When my kitchen faucet started dripping constantly and the handle became increasingly difficult to operate, I faced the choice between calling a plumber or tackling the replacement myself. After researching the process and gathering courage, I decided to attempt my first DIY faucet installation. What initially seemed like an intimidating plumbing project turned into a rewarding weekend accomplishment that saved me hundreds of dollars while giving me valuable home improvement skills and confidence for future projects.
Preparing for the Project Successfully
Tool gathering represents the most critical preparation step, determining installation success and preventing frustrating delays during the replacement process. I assembled adjustable wrenches, basin wrenches, pliers, a flashlight, and penetrating oil before starting, learning that specialized basin wrenches are essential for reaching tight spaces under sinks. Bucket placement catches dripping water and prevents cabinet damage during disconnection procedures. Having all necessary tools within reach eliminates the need for multiple trips to the garage and maintains project momentum throughout the installation.
Shutting off the water supply requires locating shut-off valves under the sink, though some homes may need the main water line closure for complete flow control. I discovered that older valves often stick and require gentle persuasion with penetrating oil applied several hours before attempting closure. Testing faucet operation after valve closure confirms complete water stoppage and prevents unexpected flooding during installation procedures. Emergency planning includes knowing the main shut-off locations in case individual valves fail during the project.
Workspace preparation involves removing items from under the sink and ensuring adequate lighting for detailed work in cramped conditions throughout the installation process. I installed a temporary LED light and positioned towels to protect the cabinet floors from tool damage and water spillage. Clear access to all plumbing connections prevents accidents and allows proper tool positioning during tight maneuvers. Comfortable positioning saves back strain during extended periods working in awkward positions under kitchen sinks.
Removing the Old Faucet Safely
Disconnecting supply lines requires careful attention to prevent damage to shut-off valves and surrounding plumbing fixtures during the removal process. I used two wrenches, one holding the valve steady while the other loosened supply line connections, preventing valve damage from excessive torque. Expect some water spillage from residual pressure in lines despite valve closure, so bucket positioning remains important. Corroded connections may require penetrating oil and patience rather than aggressive force that can damage expensive plumbing components.
Mounting hardware removal often presents the greatest challenge due to years of corrosion and mineral buildup around nuts and washers securing faucets. I found that basin wrenches work best for reaching nuts in tight spaces, though stubborn hardware may require cutting tools as a last resort. Spraying penetrating oil on mounting hardware several hours before removal softens corrosion and eases disassembly significantly. Patience prevents damage to sink surfaces that would require expensive repairs beyond faucet replacement costs.
Cleanup preparation includes removing old plumber’s putty or gasket material from sink surfaces before installing the new faucet properly and preventing leaks. I used plastic scrapers to avoid scratching sink finishes while removing stubborn adhesive residue completely. Cleaning mounting surfaces with degreasing agents ensures proper adhesion of new gaskets and prevents future leak problems. Thorough surface preparation creates professional installation results that last for years without maintenance issues.

Selecting the Right Replacement Faucet
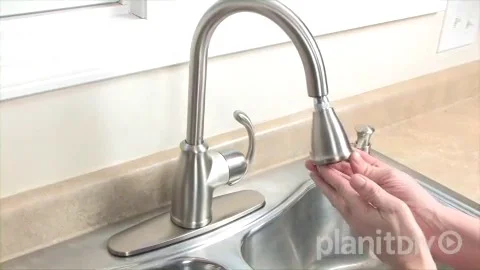
Measuring existing hole configurations determines compatible faucet styles and prevents purchasing incompatible units that won’t fit your sink layout properly. I measured hole diameter and spacing carefully, discovering that standard configurations accommodate most replacement faucets without modifications. Single-hole, three-hole, and four-hole configurations require specific faucet designs, though deck plates can adapt some models to different hole patterns. Documentation with photos helps during store visits and ensures accurate product selection.
Quality considerations balance budget constraints with longevity expectations and daily performance requirements throughout years of kitchen use and operation. I researched ceramic disc cartridges, which outlast rubber washers significantly while providing smoother operation and better leak resistance over time. Solid brass construction offers superior durability compared to plastic components that may fail prematurely under normal use. Warranty coverage indicates manufacturer confidence and protects against defects and premature failure.
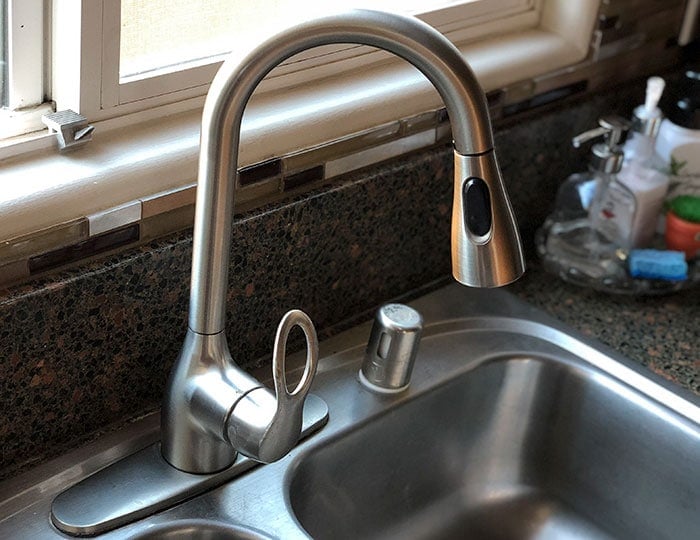
Style coordination with existing kitchen fixtures creates cohesive design aesthetics while ensuring the new faucet complements cabinet hardware and appliance finishes. I chose brushed nickel to match my cabinet pulls and appliance handles, creating a unified appearance throughout the kitchen space. Spout height and reach affect functionality for large pots and cleaning tasks, so consider your specific needs carefully. Features like pull-out sprayers add convenience but increase complexity and potential failure points over time.

Installation Steps and Techniques
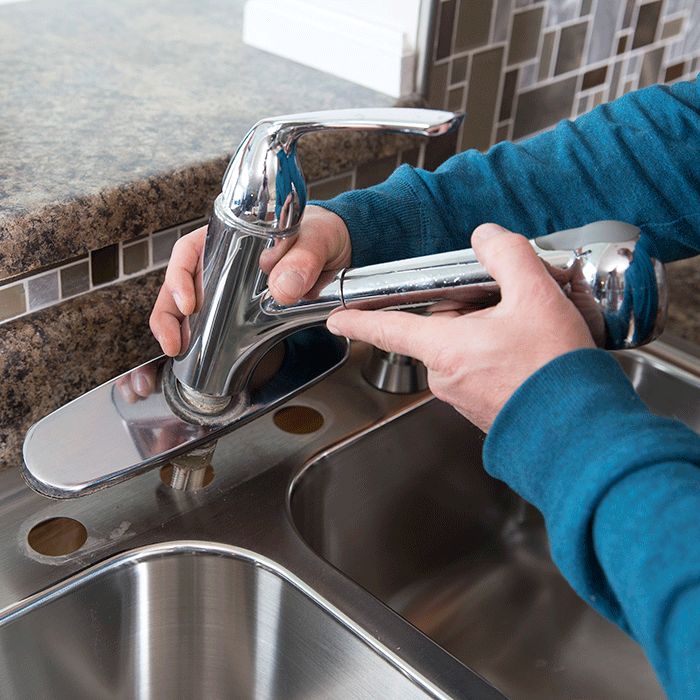
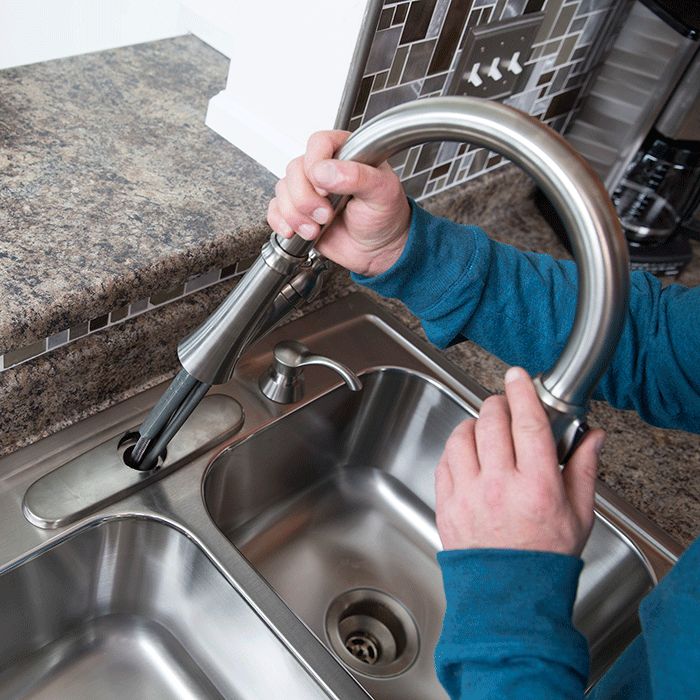
Positioning the new faucet requires careful alignment with sink holes and proper gasket placement to prevent leaks and ensure stable mounting. I followed manufacturer instructions precisely, noting that gasket orientation affects sealing performance significantly throughout the faucet’s operational life. Thread sealant application on threaded connections prevents leaks while allowing future disassembly if necessary. Hand-tightening followed by a quarter-turn with tools provides adequate tightness without over-stressing components that could crack or fail.
Supply line connections demand attention to proper threading and avoid cross-threading that damages expensive faucet components and creates leak problems immediately. I used Teflon tape on threaded connections, wrapping clockwise to prevent unwinding during tightening procedures effectively. Flexible supply lines simplify installation compared to rigid copper tubing, though quality varies significantly between manufacturers. Premium braided stainless steel lines offer superior durability and peace of mind for long-term reliability.
Testing procedures include gradual water restoration and careful leak inspection before declaring installation complete and successful throughout all connection points. I turned the water supply slowly, checking for leaks at every connection point while gradually increasing pressure to full operating levels. Operating all faucet functions, including spray features and temperature mixing, ensures proper installation and identifies problems before cleanup. Minor adjustments to tightness often resolve small leaks discovered during initial testing procedures.
Troubleshooting Common Problems
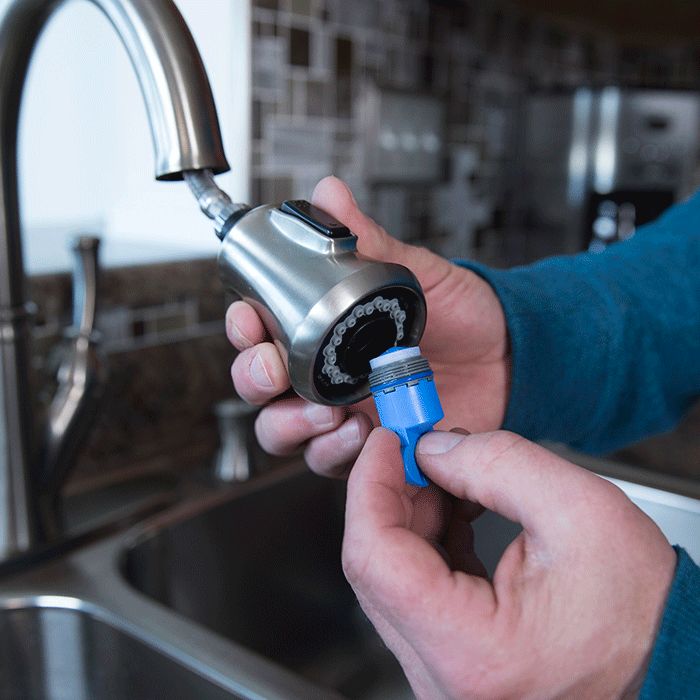
Low water pressure issues often result from debris in aerators or supply line problems that develop during installation or from existing plumbing conditions. I removed and cleaned the aerator immediately after installation, discovering construction debris that blocked water flow significantly. Kinked supply lines under tight sink installations can restrict flow, requiring repositioning for optimal performance. Checking supply valve positions ensures full water flow restoration after installation completion and testing procedures.
Leak detection requires systematic inspection of all connection points, from supply line fittings to mounting hardware and spout connections throughout the system. I found that minor leaks often resolve through slight tightening, while persistent leaks may indicate damaged gaskets or improper installation techniques. Distinguishing between minor seepage that stops after initial operation and actual leaks requiring attention prevents unnecessary disassembly. Patient observation over several hours reveals true leaks versus temporary moisture from installation.
Handle operation problems indicate internal cartridge issues or installation errors that affect temperature control and flow regulation throughout daily use. I experienced stiff handle operation that resolved after running water extensively to clear debris from internal components naturally. Some faucets require specific installation orientation for proper cartridge alignment and optimal performance. Manufacturer customer service provides valuable troubleshooting assistance when problems persist despite careful installation procedures.
Maintenance and Long-term Care
Regular cleaning prevents mineral buildup that affects faucet appearance and operation over years of daily use in typical kitchen environments. I established weekly cleaning routines using mild soap solutions and soft cloths, avoiding abrasive cleaners that damage finish coatings permanently. Aerator cleaning every few months maintains optimal water flow and prevents clogging from mineral deposits and debris. Consistent maintenance prevents major problems and extends faucet life significantly beyond typical replacement intervals.
Cartridge replacement represents the most common long-term maintenance requirement for quality faucets, typically needed every 5-10 years depending on usage and water conditions. I learned to recognize early warning signs like reduced flow, temperature control problems, or minor dripping that indicate cartridge wear. Keeping spare cartridges available prevents emergency situations and allows immediate repairs when problems develop. Quality cartridges cost significantly less than complete faucet replacement while restoring like-new performance.
Seasonal inspections catch minor problems before they develop into major failures requiring emergency repairs or complete faucet replacement unexpectedly. I check supply line connections, mounting hardware tightness, and general operation during routine kitchen cleaning activities regularly. Hard water areas may require more frequent attention to mineral buildup and component wear that affects performance. Proactive maintenance protects your DIY installation investment and ensures years of reliable service from quality faucets.

What tools do I absolutely need for DIY faucet replacement?
Essential tools include adjustable wrenches, basin wrench, pliers, flashlight, and bucket for catching water during installation procedures effectively. I found that basin wrenches are absolutely critical for reaching mounting nuts in tight spaces under sinks where regular wrenches cannot fit properly. Penetrating oil helps with stubborn connections, while Teflon tape ensures leak-free threaded joints throughout the installation. Basic plumbing tools cost less than single service call and prove useful for future projects. Quality tools make installation easier and prevent damage to expensive plumbing components.
How long should a DIY faucet installation take for a beginner?
Plan for 3-4 hours for your first installation, though experienced DIYers can complete replacements in 1-2 hours depending on complications encountered. I spent an entire Saturday on my first installation, taking time to understand each step and avoid costly mistakes that require repairs. Preparation time including tool gathering and workspace setup accounts for significant portion of total project duration effectively. Rushing leads to mistakes that create leaks and require complete reinstallation, so patience pays off significantly. Complex installations with unusual configurations may require additional time for problem-solving.
Can I install any faucet on my existing sink configuration?
Sink hole configuration determines compatible faucet types, though deck plates can adapt some models to different hole patterns successfully. I measured my three-hole sink carefully and selected a faucet designed specifically for that configuration to ensure proper fit. Single-hole sinks offer most flexibility, while four-hole configurations limit choices but accommodate faucets with side sprays and soap dispensers. Drilling additional holes requires specialized tools and risks damaging expensive sinks permanently. Matching faucet specifications to existing holes prevents costly modifications and ensures successful installation.
What should I do if I encounter a leak after installation?
Start troubleshooting by systematically checking all connection points from supply lines to mounting hardware and spout connections throughout the system. I found that most leaks resolve through slight tightening of connections, while persistent problems may indicate damaged gaskets or installation errors. Turn off water supply immediately if leaks are significant to prevent cabinet damage while investigating problems. Minor seepage often stops after initial operation as connections settle, but true leaks require attention. Document problems with photos for manufacturer support if needed.

How do I know if my old faucet is worth repairing versus replacing?
Age, repair costs, and overall condition determine whether replacement makes more economic sense than attempting repairs on existing faucets. I replaced my 15-year-old faucet when repair costs approached 60% of replacement cost while offering no guarantee of long-term reliability. Frequent repairs, outdated appearance, and poor water efficiency justify replacement investment for most homeowners effectively. Modern faucets offer superior performance, warranty coverage, and water-saving features that older models lack completely. Calculate total cost of ownership including repairs and utility savings when making decisions.
What are the most common mistakes that cause DIY faucet installation failures?
Over-tightening connections causes the most damage, cracking expensive components and creating leaks that require complete reinstallation or professional repairs. I learned to hand-tighten first, then use tools for final quarter-turn to achieve proper tightness without damage. Skipping gaskets or installing them incorrectly creates immediate leak problems that appear after water restoration. Cross-threading supply line connections damages threads permanently and requires replacement parts. Poor workspace preparation leads to dropped tools, damaged finishes, and frustrated installation experiences that could be prevented through proper planning.
Home Improvement

How To Replace a Kitchen Sink Faucet

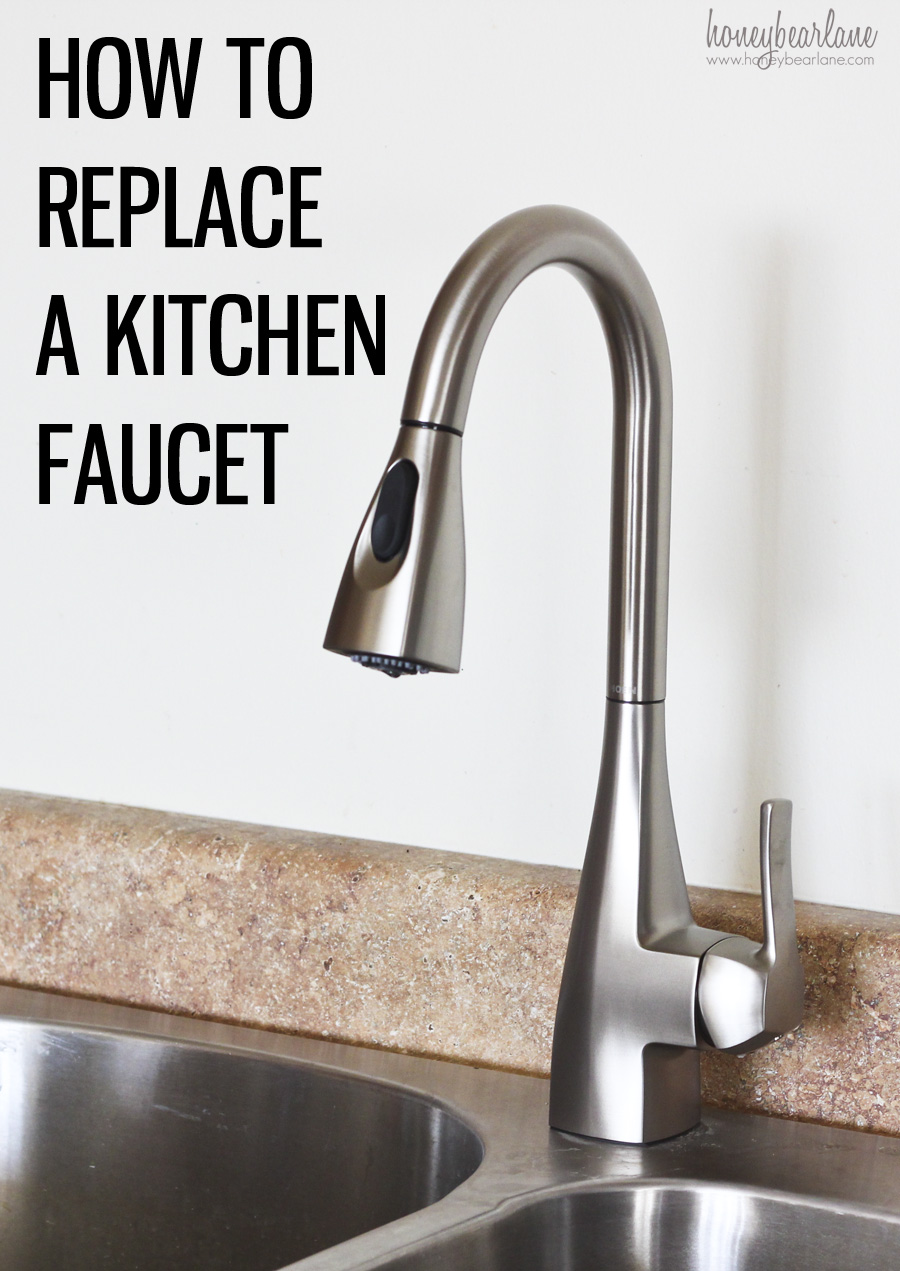
How to Replace a Kitchen Faucet

How To Replace A Kitchen Faucet – For Newbies!
How to Replace a Kitchen Faucet

How to Install a Kitchen Faucet
Related Posts: