When I decided to add an island to my small farmhouse kitchen, everyone told me I was crazy. The space felt cramped enough without adding more furniture, they said. But I’d watched myself juggling cutting boards on limited counter space and knew something had to change. After months of planning, measuring obsessively, and finally installing the perfect small island, I can’t imagine my kitchen without it. The key was understanding that small doesn’t mean sacrificing style or functionality. Let me share what I learned about making a compact island work beautifully in a cozy farmhouse kitchen.
Finding the Right Size and Proportions for Your Space
I measured my kitchen about fifty times before committing to dimensions. The standard recommendation is leaving 36 to 48 inches of clearance around all sides of an island, but I discovered that 36 inches was my absolute minimum for comfortable movement. I traced the island’s footprint on my floor using painter’s tape and lived with it for a week, walking around it during cooking and cleaning to ensure it wouldn’t drive me crazy.
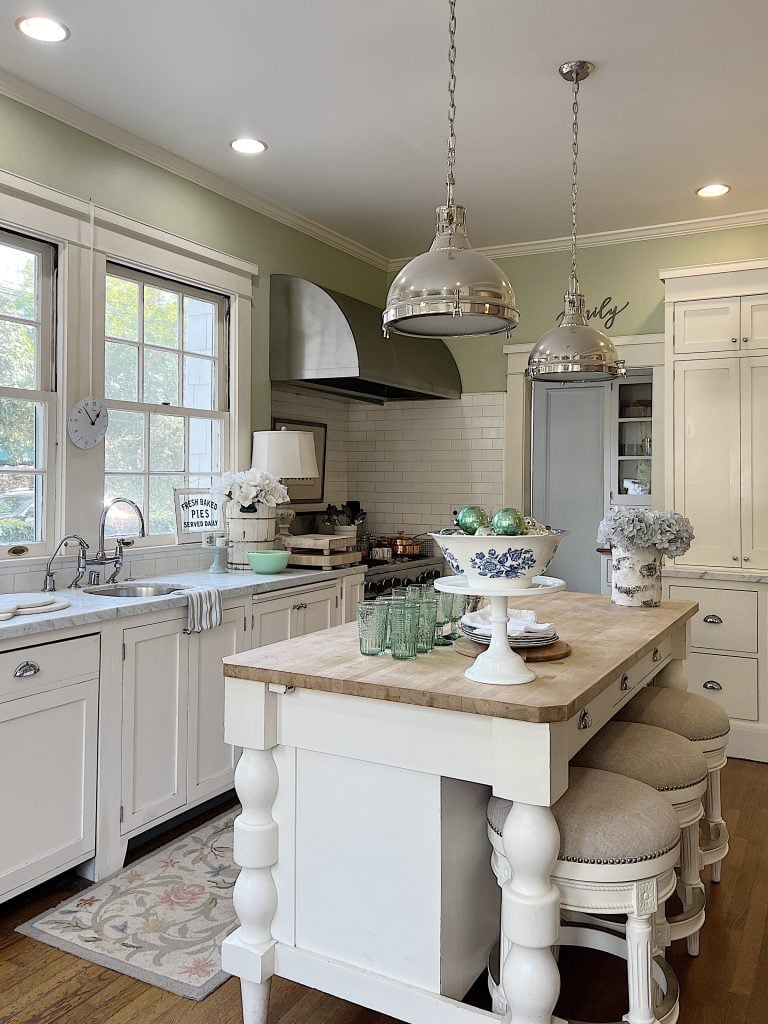
My final island measures 48 inches long by 24 inches deep, which feels substantial without overwhelming my 10×12 kitchen. I learned that narrower islands actually work better in tight spaces because they maintain traffic flow while still providing a valuable work surface. Some designers suggested going even smaller, but I needed enough room to comfortably prep meals and seat at least one person for casual breakfasts.
Height considerations surprised me with how much they mattered for both function and proportion. Standard counter height is 36 inches, which I chose because it aligns perfectly with my existing counters and makes the space feel cohesive. I considered bar height at 42 inches for a more dramatic look, but that would have created a visual disconnect and required taller stools that felt too modern for my farmhouse aesthetic. Matching heights was definitely the right decision.
Choosing Materials That Capture Farmhouse Character
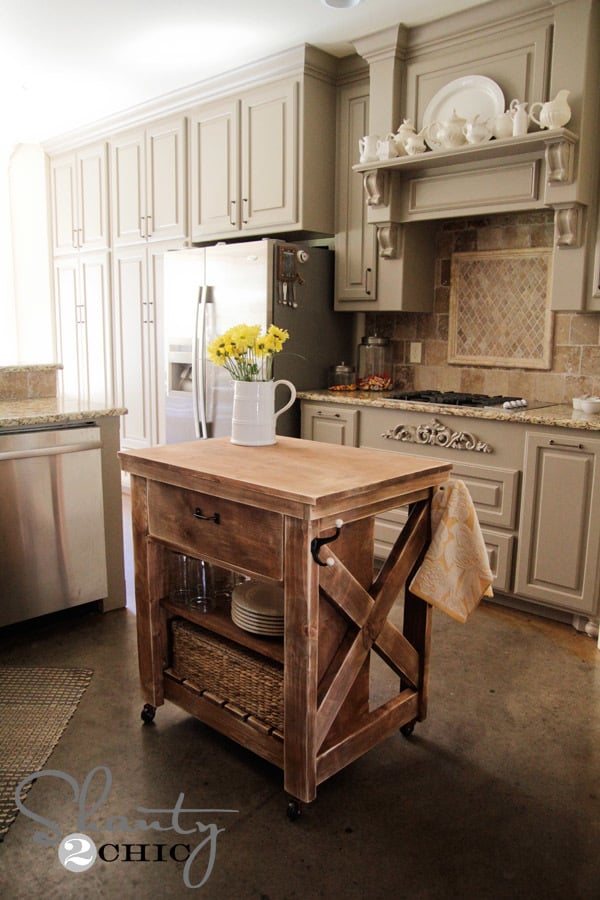
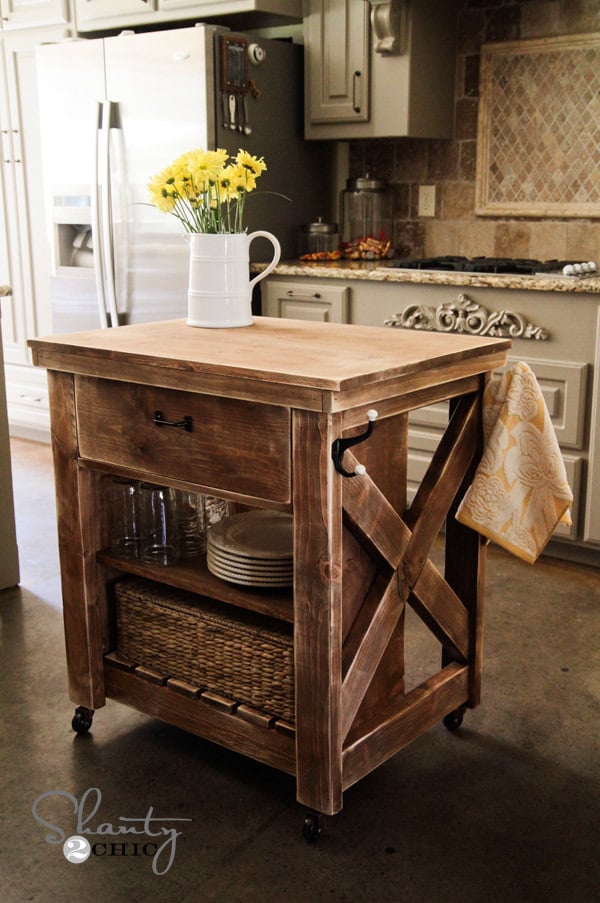
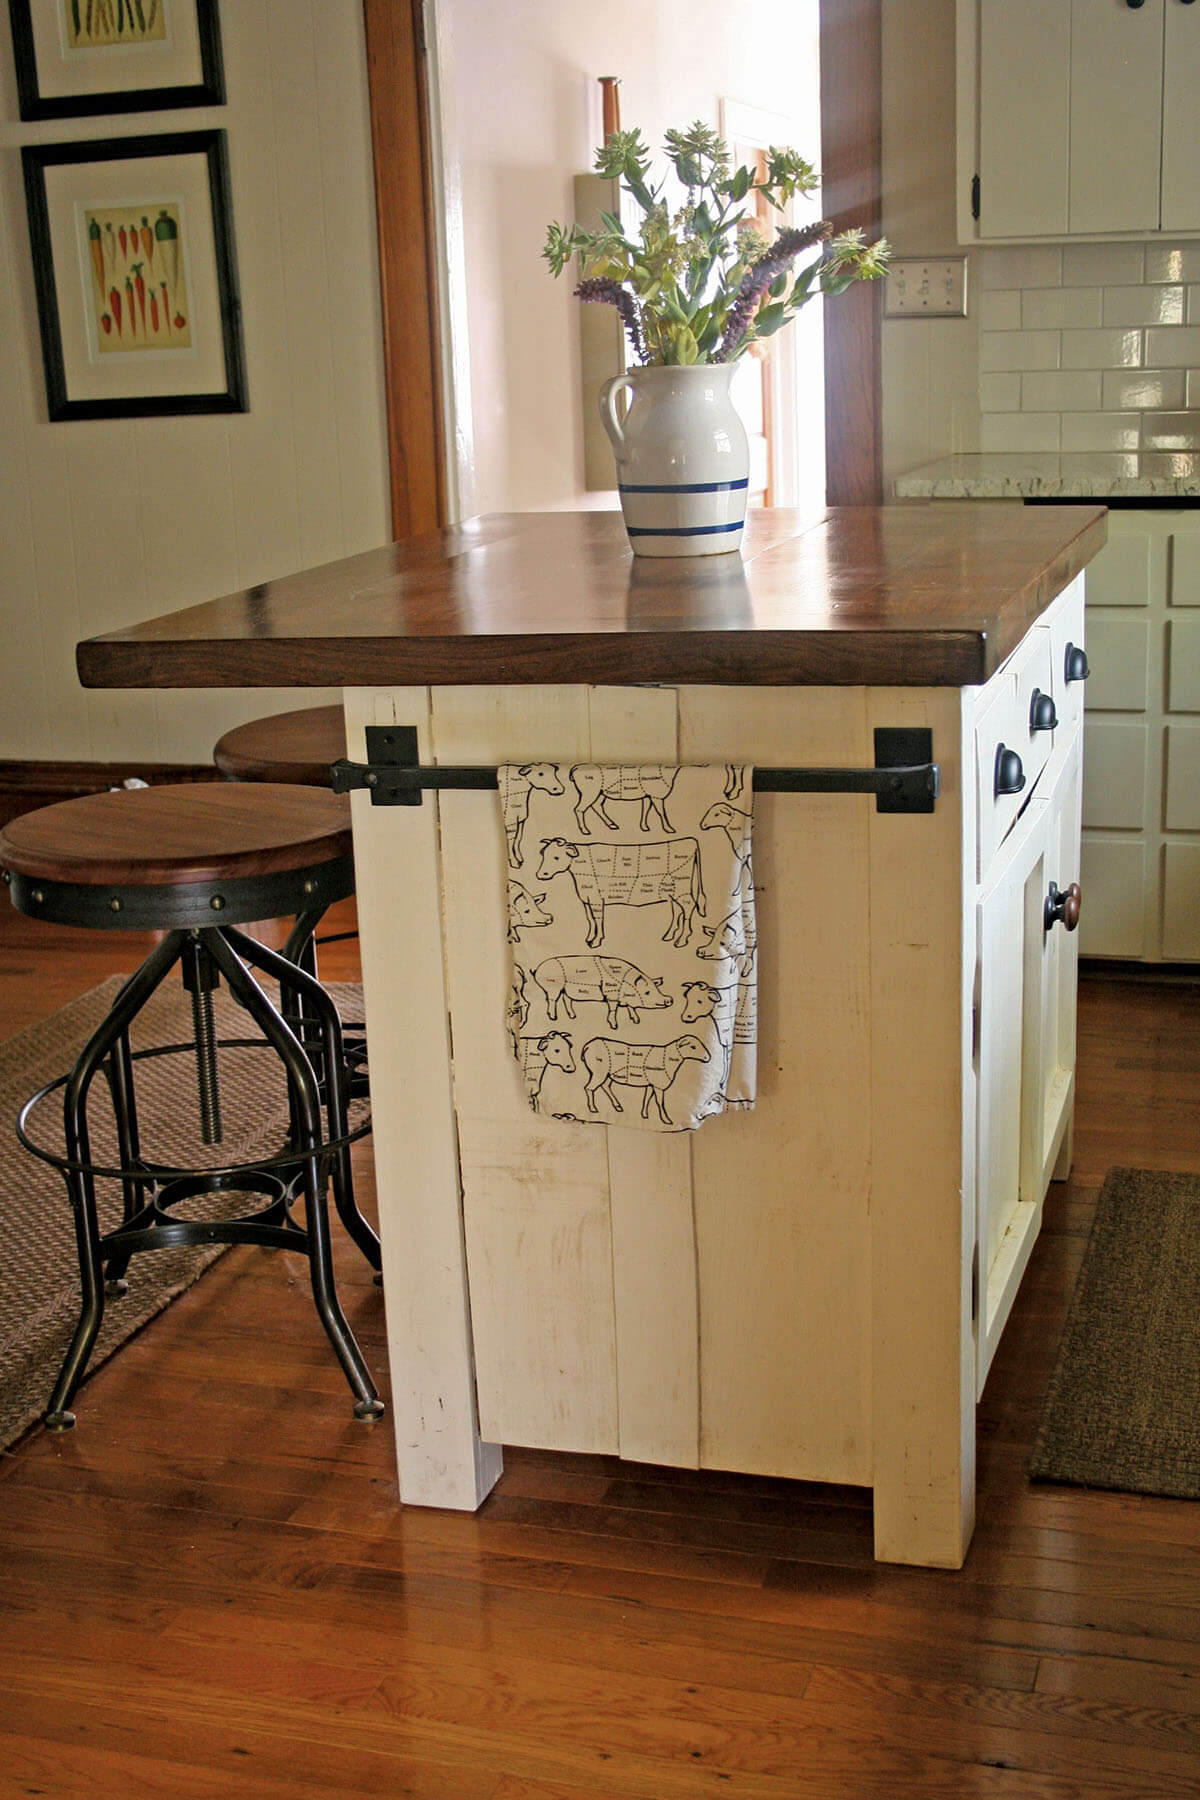
Reclaimed wood immediately captured my heart when I started material shopping. I found gorgeous barn wood with weathered gray patina and visible nail holes that told stories of its previous life. The texture and authenticity felt perfect for farmhouse styling. I used it for the island’s base and sides, and every guest who visits runs their hands along the wood’s surface, drawn to its character and history.
For the countertop, I debated between butcher block and marble for weeks. Butcher block felt warm and practical, perfect for chopping vegetables directly on the surface. I ultimately chose a thick maple butcher block because it softened the island’s overall look and provided a food-safe prep area. The honey tones complement my reclaimed wood base beautifully, creating layers of warmth that make my kitchen feel inviting and lived-in.
I added open shelving on one side using the same reclaimed wood, which increased storage while maintaining the airy feeling small kitchens desperately need. Solid cabinet doors would have made the island feel heavy and bulky. The open shelves let me display my collection of vintage crocks and wire baskets, adding farmhouse charm while keeping frequently used items accessible. This decision balanced aesthetics with practicality better than I’d hoped.
Incorporating Smart Storage Solutions
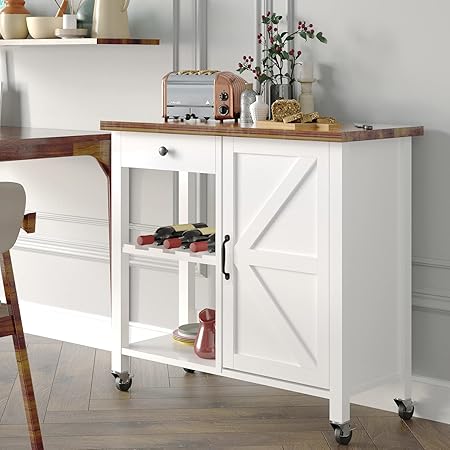
Storage became my obsession once I committed to the island project. I installed deep drawers on one side for pots, pans, and large serving dishes that were overcrowding my limited cabinet space. Soft-close hardware was worth every penny because drawers get constant use when the island becomes your primary prep station. I can now access my cookware without bending down to dig through lower cabinets, which has genuinely changed my cooking routine.
The open shelving I mentioned earlier does double duty for both storage and display. I keep everyday dishes on lower shelves within easy reach and style the upper shelves with decorative pieces that enhance my farmhouse aesthetic. Woven baskets corral smaller items like napkins and kitchen towels, preventing the open storage from looking cluttered. This visibility actually helps me stay organized because I can immediately see when supplies are running low.
I added hooks along one end of the island for hanging dish towels, oven mitts, and my collection of vintage cooking utensils. This vertical storage uses space that would otherwise go to waste while adding visual interest and convenience. My most-used tools now hang exactly where I need them while cooking. I’ve found that maximizing every surface of a small island, including the sides and ends, multiplies its usefulness beyond what the footprint suggests.

Selecting Seating Options for Compact Islands
Seating presented my biggest design challenge on a small island. I desperately wanted barstools for casual meals and homework sessions with my kids, but my 24-inch depth didn’t leave overhang for standard seating. My solution was creating a 12-inch overhang on one end rather than along the length. This accommodates two stools without interfering with the island’s primary workspace or blocking traffic flow around it.
I chose backless wooden stools with a weathered finish that tuck completely under the overhang when not in use. This feature proved crucial for maintaining the open feeling in my small kitchen. Stools with backs would have created visual clutter and made the space feel cramped. The backless design also allows people to sit from either side, adding flexibility for gatherings when I need extra perching spots.
The stool height required careful consideration to ensure comfortable seating at my counter-height island. I went with a 24-inch seat height, which provides proper leg room with my 36-inch counter. I tested various heights by sitting on display models at furniture stores, which saved me from making an expensive mistake. The 12-inch difference between the seat and counter is the sweet spot I needed for ergonomic comfort during longer sits.
Adding Farmhouse Details and Personal Touches
Hardware selection felt surprisingly impactful for such small details. I chose oversized oil-rubbed bronze bin pulls for my drawers because they complement the rustic wood while providing easy grip with messy cooking hands. The dark finish contrasts beautifully against the lighter wood tones, and the vintage-style hardware reinforces my farmhouse aesthetic. I’ve noticed that guests often comment on these little details that tie the whole look together.
I added a towel bar along one side using black iron pipe fittings that I installed myself. This DIY touch saved money while creating an industrial-farmhouse hybrid look that feels current but timeless. The bar holds decorative tea towels that I change seasonally, letting me refresh the island’s appearance without major effort. It’s become one of my favorite features for both function and the personality it adds.
Finishing touches like corbels under the seating overhang provided both structural support and decorative appeal. I found chunky wooden corbels with a distressed white finish that introduce a subtle shabby-chic element. These architectural details make my island feel custom-built rather than store-bought. Small farmhouse touches like beadboard paneling on the sides or X-brace supports also crossed my mind, but I kept things simple to avoid overwhelming the compact piece.
Making Your Island Mobile or Permanent
I seriously considered a rolling island before committing to a permanent installation. The flexibility of moving it for cleaning or repositioning during parties appealed to my practical side. Heavy-duty locking casters can support substantial weight while allowing mobility. I shopped several mobile options and appreciated how they offered farmhouse styling without the commitment of built-in cabinetry that might limit future kitchen changes.
However, I ultimately chose a permanent installation because I wanted my island anchored and stable for heavy-duty use. I secured it to the floor, which eliminated any wobbling during vigorous chopping or kneading dough. The permanent nature also allowed me to add electrical outlets on the side, something I couldn’t do with a mobile unit. Having power on the island for small appliances transformed how I use the space.
The decision between mobile and permanent really depends on your specific needs and plans. If you’re renting or like rearranging your space frequently, mobile makes complete sense. For homeowners planning to stay put, permanent installations offer more customization options and that built-in look that adds value. I don’t regret my choice, but I understand why mobile islands appeal to so many people with small farmhouse kitchens seeking flexibility.

What’s the minimum space needed to add a kitchen island?
I needed at least 36 inches of clearance on all working sides of my island for comfortable movement. My kitchen is roughly 10×12 feet, and a 48×24-inch island fits well. Measure carefully and use painter’s tape to mark the footprint before buying anything. Live with the taped outline for several days to ensure it doesn’t impede your natural traffic patterns during cooking and cleaning.
How much should I budget for a small farmhouse island?
Ready-made islands range from $300-$1,500, depending on materials and features. I spent around $800 on mine, including the butcher block top upgrade. Custom-built islands start at $1,500 and go up significantly. DIY projects using reclaimed materials can cost $200-$500 if you’re handy. Remember to budget for stools, hardware upgrades, and any electrical work you might want added.
Can I add plumbing or electrical to a small island?
Yes, though it complicates installation significantly. I added electrical outlets, which required running wiring through my floor and hiring an electrician. This cost an additional $400 but was worth it for appliance convenience. Plumbing for a sink requires more extensive work, including drain lines and venting. For small islands, I’d skip plumbing unless you’re doing a major renovation anyway.
What’s better for small spaces, open shelving or closed cabinets?
I chose open shelving because it keeps the island feeling light and airy, crucial in compact kitchens. Closed cabinets can make small islands look heavy and boxy. However, if you need to hide clutter or store items you don’t want visible, closed storage makes sense. I compromise by using attractive baskets on open shelves to conceal less photogenic items while maintaining that open feeling.

How do I prevent a small island from overwhelming my kitchen?
Keep proportions appropriate by choosing narrower depths, around 24 inches rather than standard 36-inch depths. Lighter wood tones and open elements rather than solid panels help maintain visual breathing room. I avoided bulky decorative elements and kept the design relatively simple. The island should enhance your workflow, not obstruct it, so ensure adequate clearance for opening appliances and cabinets around it.
Is butcher block or stone better for small island countertops?
I chose butcher block for its warmth and farmhouse authenticity. It’s more affordable than stone, lighter weight, and I can sand out scratches over time. Stone offers superior durability and heat resistance but adds significant weight and cost. For small islands, a butcher block feels less formal and more approachable. Consider your cooking style; if you frequently work with hot pots or knead dough, your choice might differ from mine.
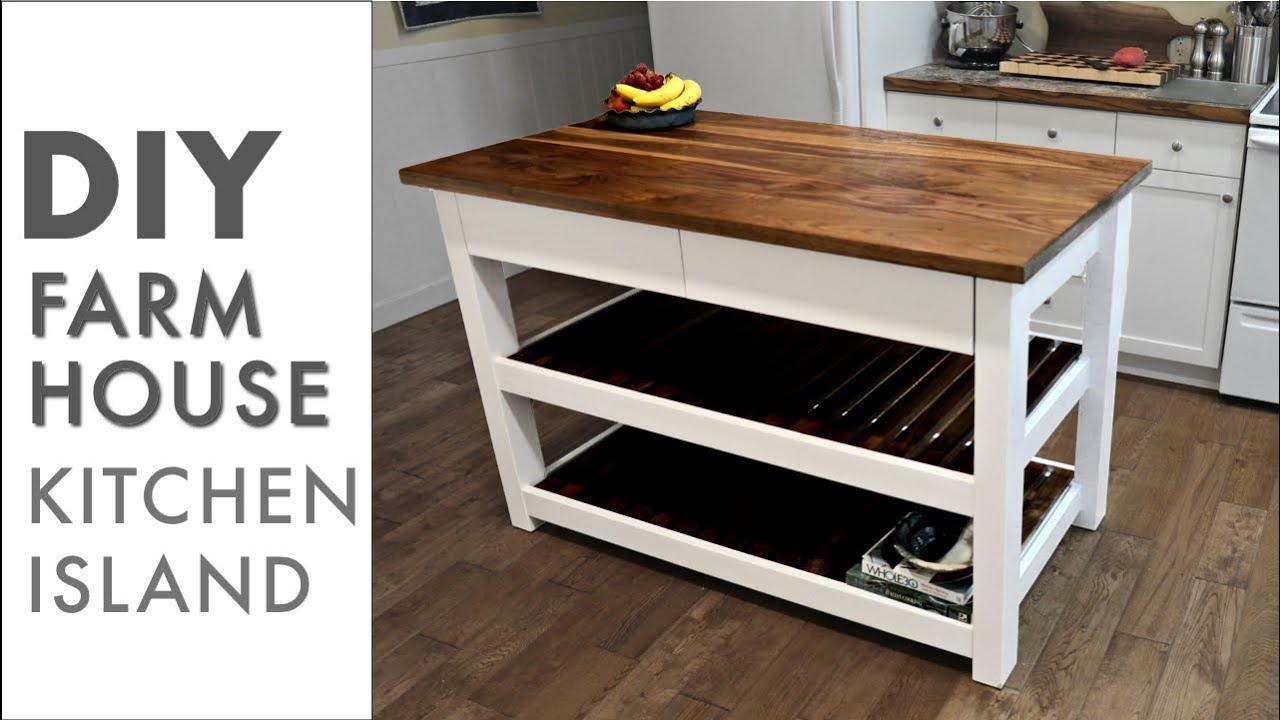
DIY Kitchen Island Ideas That Can Transform Your Home

Butcher Block Island Maintenance

Farmhouse Kitchen Ideas for Fixer Upper Style + Industrial Flare

Rustic Kitchen Island – Sarah Joy

Kitchen Island on Wheels White Kitchen Island
Best DIY Kitchen Island Ideas and Designs
Related Posts: