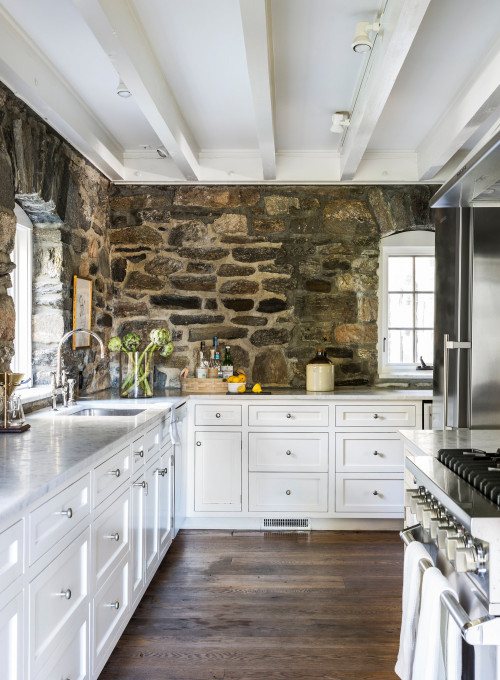
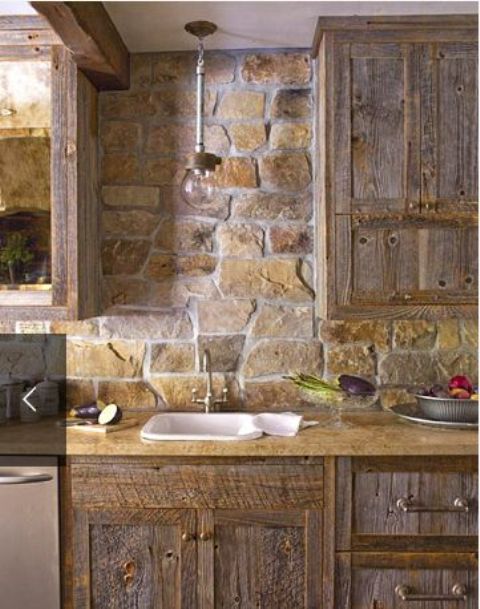
A rustic stone kitchen backsplash quickly adds character and substance to an area that may otherwise feel overly polished or antiseptic. I’ve always admired how natural stone adds a raw, honest quality to kitchens, particularly those with a farmhouse or cottage aesthetic. The combination of uneven surfaces, subtle color shifts, and hand-laid patterns imparts warmth and charm. Whether you want a whole wall of stone or just a little accent, this sort of backsplash may make your kitchen feel more welcoming and grounded.
Advantages of Using Rustic Stone in the Kitchen
One of the main reasons I choose rustic stone backsplashes is their endurance. Stone is resistant to daily wear and tear, including splashes, heat, and frequent cleaning. I’ve discovered that most natural stones are resistant to scratches and stains, especially when properly sealed. That provides me peace of mind in a busy kitchen where things may get nasty quickly.
Rustic stone also enhances natural beauty in ways that manufactured materials do not. Each piece has its color variation and texture, making the finished backsplash distinctive. I’ve worked with fieldstone, limestone, and travertine, and each has its unique feel. Something about the irregularity of a kitchen makes it feel more like a home than a showroom.
Another thing I enjoy about rustic stone is how beautifully it complements other materials. It looks excellent with wood cabinets, cast iron hardware, and old tiling. Even in modern kitchens, stone can soften clean lines and give warmth. It bridges the gap between new and old, which is vital when trying to maintain a homey atmosphere in a functional environment.
Rustic Stone Types for Backsplashes
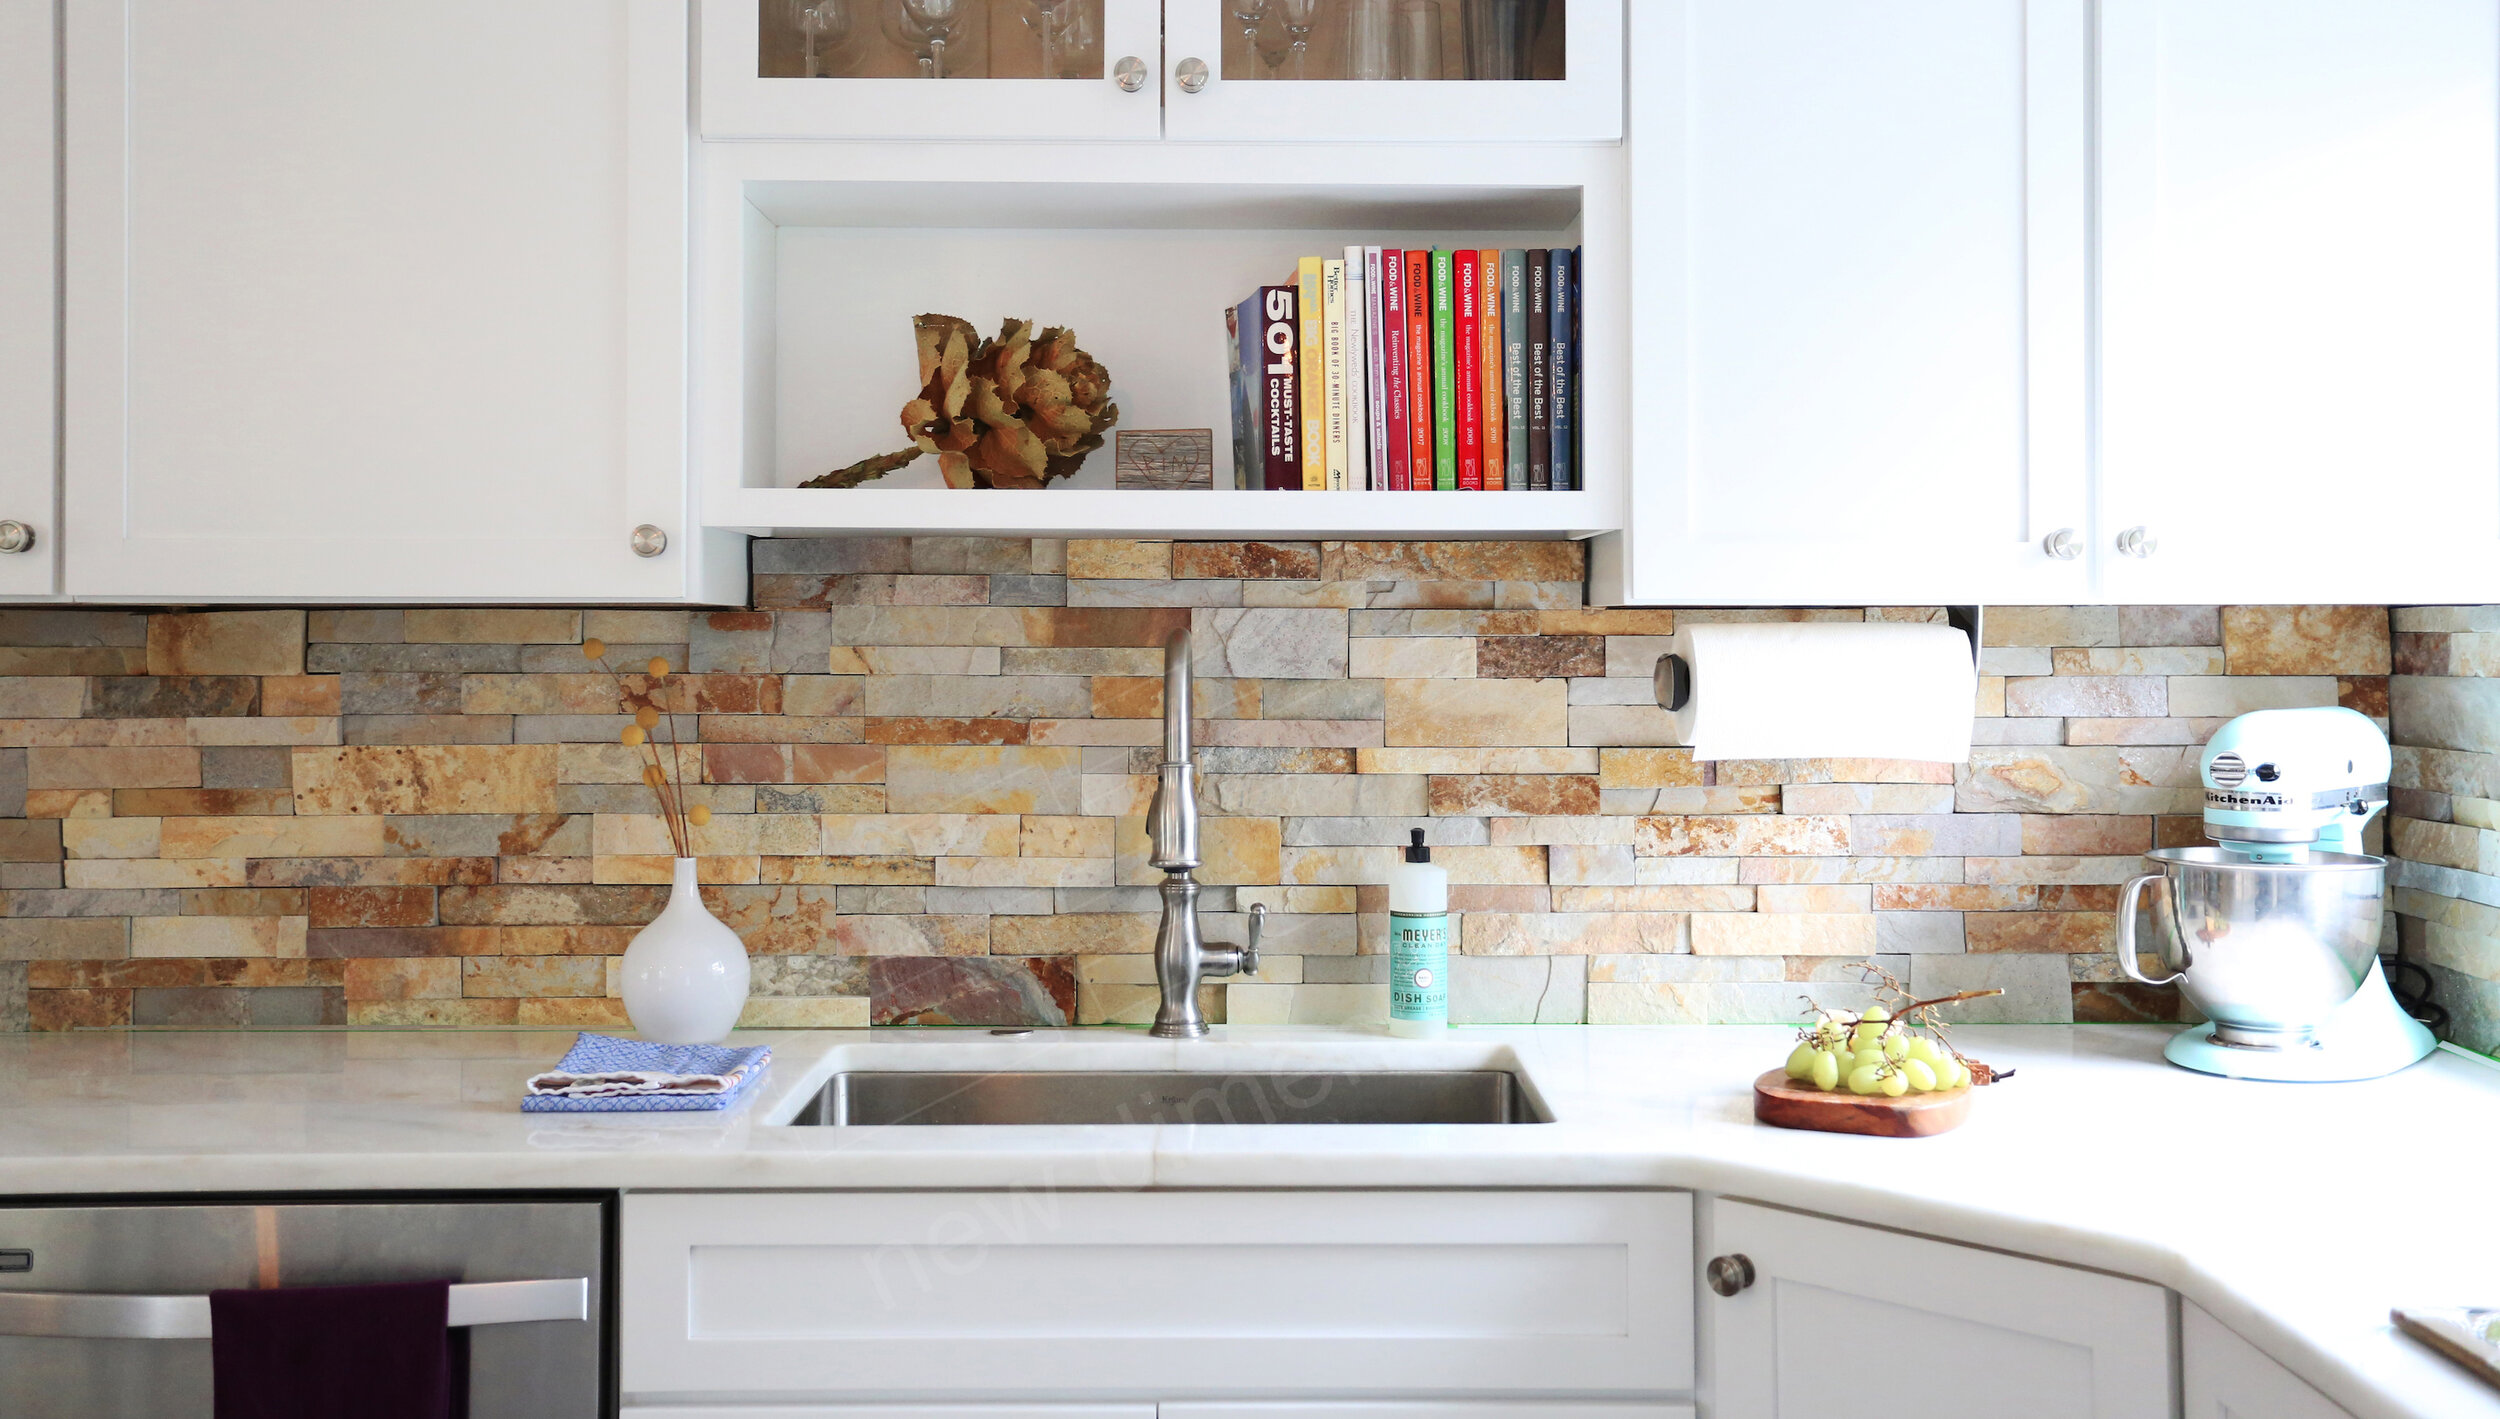
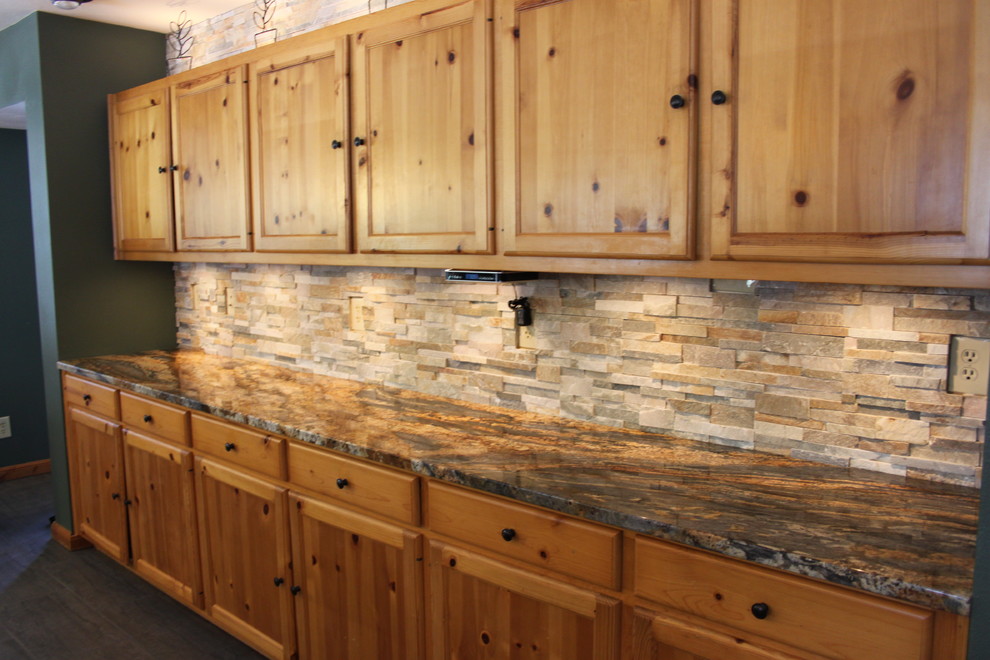
Numerous types of rustic stone work well in backsplashes, depending on the appearance you want to achieve. I used piled ledgestone for a more rough, tactile look. It produces a striking surface that reflects light and provides depth to the wall. This style is especially effective behind open shelves or as a feature behind the stove.
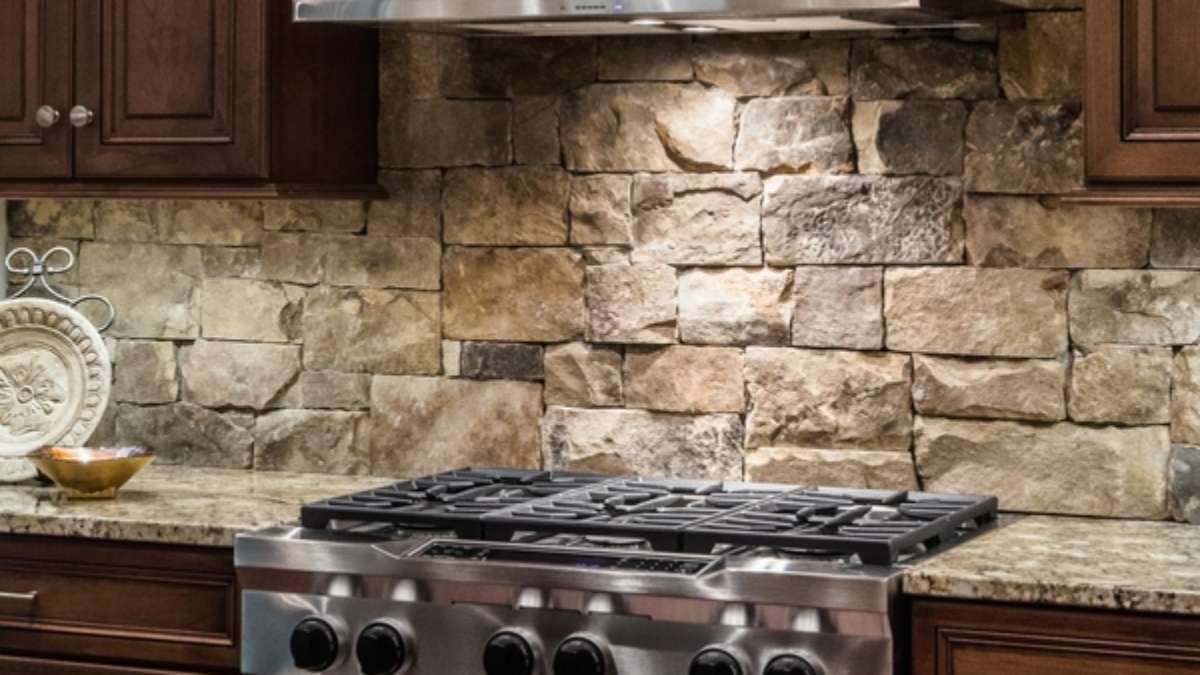
Fieldstone is another excellent option for achieving a true cabin-style kitchen design. The uneven forms and earthy tones provide a lot of character to the area. It is a little more difficult to install because it requires custom fitting, but the result is worth the extra effort. I’ve also seen people utilize it directly behind the range to create a strong focal point without taking up the full wall.
If you want something a little smoother but still rustic, tumbled travertine or split-face limestone may be a better option. These stones are easier to clean and have a more consistent thickness, which assists with installation. I once used tumbled travertine in a cottage-style kitchen, and the delicate colors and worn edges complemented the room without being overly dramatic.

How to Match Stone Backsplash to Cabinets and Countertops
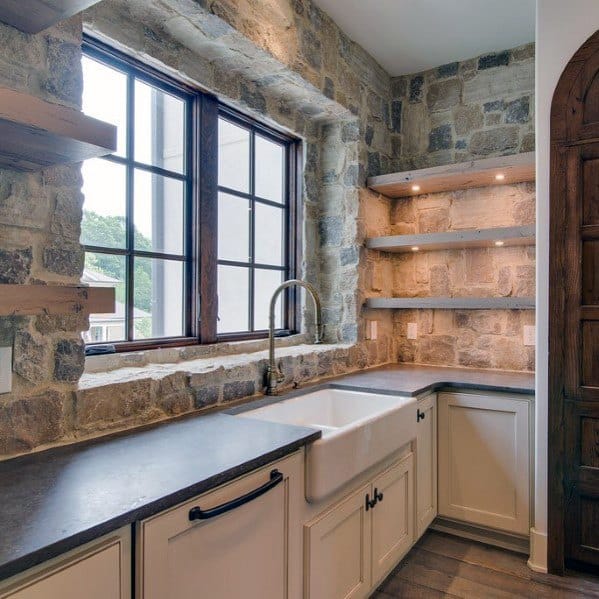
When I choose a rustic stone for a backsplash, I always consider how it will complement the cabinets and counters. With light cabinets like white or cream, I like warmer stones in beige, tan, or honey tones. This prevents the space from feeling too stark. The gentle contrast creates a pleasant atmosphere without clashing.
Dark cabinets require a different approach. I normally choose a softer stone or something with mixed tones. A backsplash of grays and browns can bring everything together. I once paired walnut cabinets with a multi-toned stone wall, and the mix highlighted the richness of both materials. It helps to keep the room balanced without becoming overly weighty.
Countertops are also an important consideration. If the countertop is busy, such as granite with prominent veining, I prefer a more modest backsplash. However, if the countertop is basic, such as butcher block or quartz, I feel free to choose a more rough or patterned stone. It’s all about keeping the eye flowing in a natural direction so that no single feature dominates the room.

Installation Tips for Rustic Stone Backsplashes
Installing rustic stone requires a little more patience than tile, but the end result is worth it. I’ve discovered that dry-laying the stones first helps a lot. It allows me to examine how the shapes fit together and make any necessary modifications before applying mortar. This is especially useful for irregular stones like fieldstone, where no two pieces are identical.
The surface behind the backsplash should be adequately prepared. I always ensure that the wall is clean, flat, and primed for adherence. Using the correct mortar is also important—stone is heavy, so I usually use a strong thinset and apply it with a notched trowel. Then I press each stone firmly and allow it to cure for a full day before sealing.
Sealing is essential when working with natural stone. It helps to avoid stains from cooking oils and makes cleanup easier later. I use a penetrating sealant after the stone has set and dried. I also recommend reapplying it once a year, particularly in high-traffic kitchens. It keeps the stone looking fresh while maintaining its rustic character.

Styling & Decor Around a Rustic Stone Backsplash
Once the backsplash is done, I like to decorate the space to reflect the rustic theme. Open shelving works well over a stone wall, especially when filled with simple earthenware, glass jars, or cast iron accessories. I usually keep the shelves natural wood or metal to complement the overall tone.
Lighting also makes a major difference. I frequently propose warm lighting, such as Edison bulbs or lantern-style sconces. They cast a mellow light that highlights the grain in the stone. I’ve also utilized under-cabinet lighting to accent the backsplash, especially if it’s deep or varied.
To keep the stone in focus, keep the decor minimal. A few hanging herbs, copper pans, or woven baskets can add charm without making the space feel cluttered. I try not to use too many patterns near the stone. The natural movement in the rock already adds visual interest to the room, so I keep with solid or mild textures for everything else.

Pros and Cons of Rustic Stone Backsplash
One of the most significant advantages of adopting rustic stone is its timeless appearance. I’ve seen kitchens with stone backsplashes that are still gorgeous after twenty years. Stone ages well and never goes out of style, particularly when combined with other timeless materials. That’s something I constantly consider while designing for the long term.
One of the most common questions I receive is about maintenance issues. Yes, rustic stone requires sealing, and its uneven surface can make cleaning more difficult. But I’ve discovered that with the correct sealant and a soft-bristle brush, it’s controllable. The result is well worth the extra effort.
Cost is also an important consideration. Stone is generally more expensive than ceramic tile, both in terms of materials and labor. But if you’re ready to DIY or utilize the stone in a smaller area, you can keep the pricing reasonable. I frequently propose placing it behind the range or as a feature wall rather than covering every inch.

Is a rustic stone backsplash difficult to clean?
Not really, as long as it’s well sealed. I use a delicate brush or towel to prevent harsh chemicals. A good sealant keeps stains and oil from soaking in, which makes cleaning much easier.
Can I do a rustic stone backsplash myself?
Yes, but previous DIY experience is beneficial. I propose starting with a small area and applying a dry-fit method first. Stone is heavier and more uneven than tile, so preparing ahead of time is essential.
What is the easiest sort of stone to deal with?
The easiest tiles for me have been tumbled travertine and flat-faced limestone. They are smoother and more consistent than coarser stones such as fieldstone or ledgestone, which require more time to install.
Will the stone make my kitchen appear too dark?
It depends on the stone and the sunlight. I always try to balance dark stone with lighter cabinetry or counters. Warm lighting can also make the stone feel more inviting than dark.
Do I need to grout a rustic stone backsplash?
Occasionally. Grout may be unnecessary in piled stone or tight-fit styles. But if the stone has gaps, I fill them with a matching grout to offer structure and strength.
How often should I reseal my backsplash?
Once a year is generally plenty. I’ve included it into my spring cleaning regimen. Resealing maintains the surface safe from stains and moisture, especially in a busy cooking zone.
Stone backsplash ideas – make a statement in your kitchen interior
Kitchen Backsplashes Tile, Stone & Glass – Rustic – Kitchen
Cool Stone And Rock Kitchen Backsplashes That Wow
Best Kitchen Stone Backsplash Ideas – Interior Designs
Related Posts:
- French Kitchen Backsplash Ideas
- Cottage Kitchen Backsplash
- Country Kitchen Backsplash
- Retro Kitchen Backsplash
- Rustic Wood Kitchen Backsplash
- Vintage Kitchen Backsplash Ideas
- Modern Farmhouse Kitchen Backsplash
- Mid Century Modern Kitchen Backsplash Tile
- Turquoise Kitchen Backsplash Tile
- Mediterranean Tile Kitchen Backsplash