When I decided to renovate my 1950s kitchen, I knew the backsplash would be my chance to celebrate the home’s original character while adding my own personality. I spent months researching authentic retro styles, hunting for the perfect tiles, and learning installation techniques. The process involved more decisions than I anticipated, from choosing between vintage and reproduction materials to selecting colors that honored the era without feeling dated.
After completing my backsplash installation and living with it for over a year, I’ve gained practical insights about what works, what I’d do differently, and how to achieve that perfect retro aesthetic while maintaining modern functionality.
Exploring Classic Retro Tile Styles and Patterns
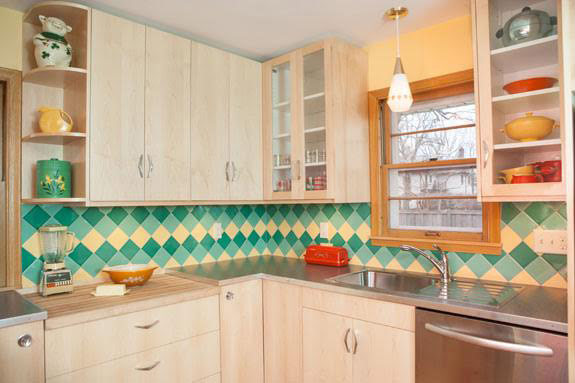
My research into retro backsplash styles opened up a fascinating window into mid-century design trends. I discovered that the 1950s and 60s featured distinct tile styles that defined kitchen aesthetics for decades. Subway tiles in pastels, small square tiles in checkerboard patterns, and colorful geometric designs dominated the era. I spent hours studying original kitchen photos from vintage magazines and architectural archives.
The tiles weren’t just functional; they were statements of optimism and modernity. Homeowners embraced bold colors like turquoise, pink, mint green, and yellow in ways that feel fearless compared to today’s neutral trends.
I particularly fell in love with 4×4 inch square tiles in what I call diner style, glossy ceramic in vibrant single colors or checkerboard patterns. These tiles reminded me of classic diners and soda fountains, capturing that nostalgic Americana aesthetic perfectly. I also considered the penny round tiles popular in the era, tiny circular tiles arranged in sheets that created texture and visual interest.
Fish scale tiles, also called fan tiles, offered another authentic retro option with their scalloped shape creating a distinctive pattern. Each style evoked different aspects of retro design, from playful to sophisticated.
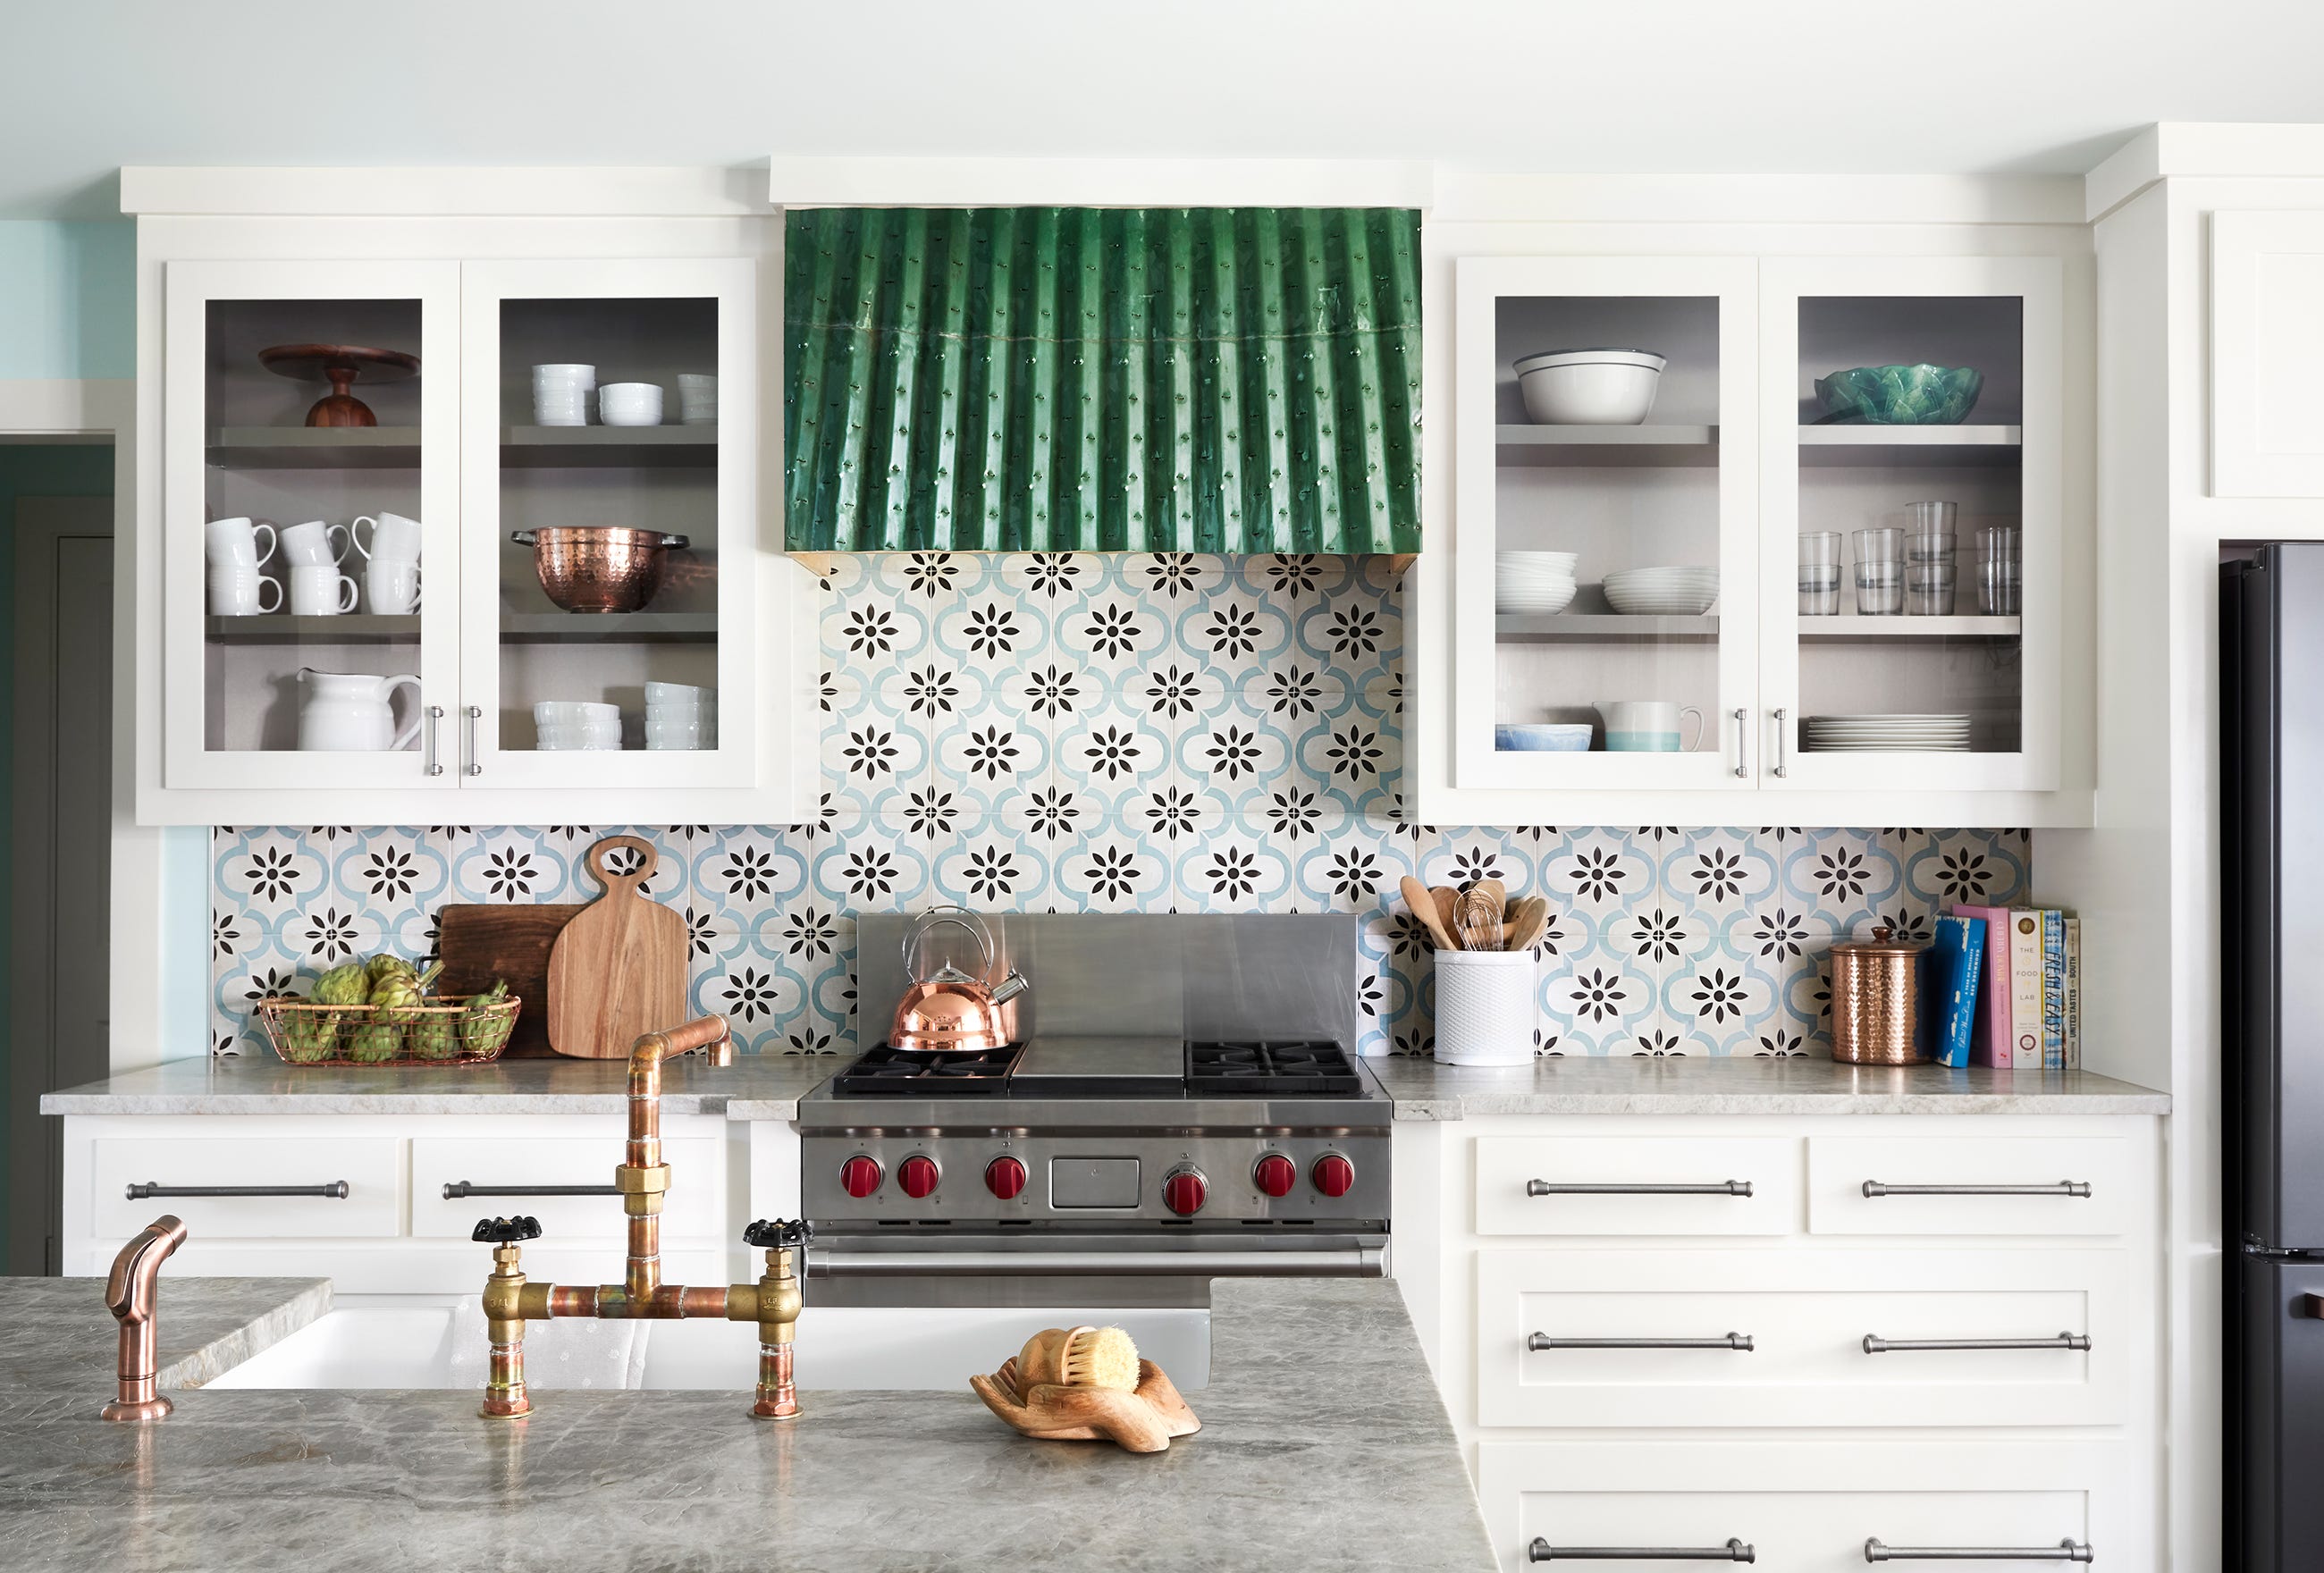
After weeks of deliberation, I chose 3×6-inch subway tiles in a soft mint green with a high-gloss finish. The subway shape felt classic and timeless, while the color and glossy surface screamed retro authenticity. I decided on a traditional running bond pattern rather than trying something more complex for my first tile installation.
The mint green complemented my white cabinets and butcher block countertops beautifully, adding the pop of color my kitchen desperately needed. The glossy finish reflected light throughout the space, making my small kitchen feel brighter and more spacious than it actually is.
Choosing Between Authentic Vintage and Modern Reproduction Tiles
The vintage versus reproduction debate consumed considerable mental energy during my planning phase. I loved the idea of using authentic tiles from the era, imagining the history embedded in each piece. I found several architectural salvage yards with original 1950s and 60s tile stock, some still in original boxes. The colors were stunning, slightly faded and mellow in ways reproduction tiles couldn’t quite match. However, authentic vintage tiles presented significant challenges. Many had slight size variations from decades of settling, making installation tricky. Some showed minor chips or crazing that might worsen over time.
The practical considerations ultimately steered me toward reproduction tiles. Modern manufacturing provides consistent sizing that makes installation much easier and ensures a professional-looking result. Contemporary tiles meet current standards for durability and water resistance, which matters in a kitchen’s wet, greasy environment. The glazes on modern tiles resist staining and hold up better to harsh cleaning products than vintage alternatives. My tile dealer explained that vintage tile glazes can be more porous and delicate, requiring gentler care that might not suit a busy kitchen.
I compromised by choosing reproduction tiles that authentically captured 1950s aesthetics while offering modern performance. Several manufacturers specialize in retro-inspired tiles that use vintage colors and finishes with contemporary durability. My mint green tiles were marketed as mid-century modern reproductions, and the color match to vintage chips I’d collected was remarkably close. I spent about $12 per square foot, which positioned between premium vintage tiles at $20-30 per square foot and basic modern tiles that lacked authentic character. This middle path gave me the look I wanted with reliability I could trust.

Selecting the Perfect Retro Color Palette
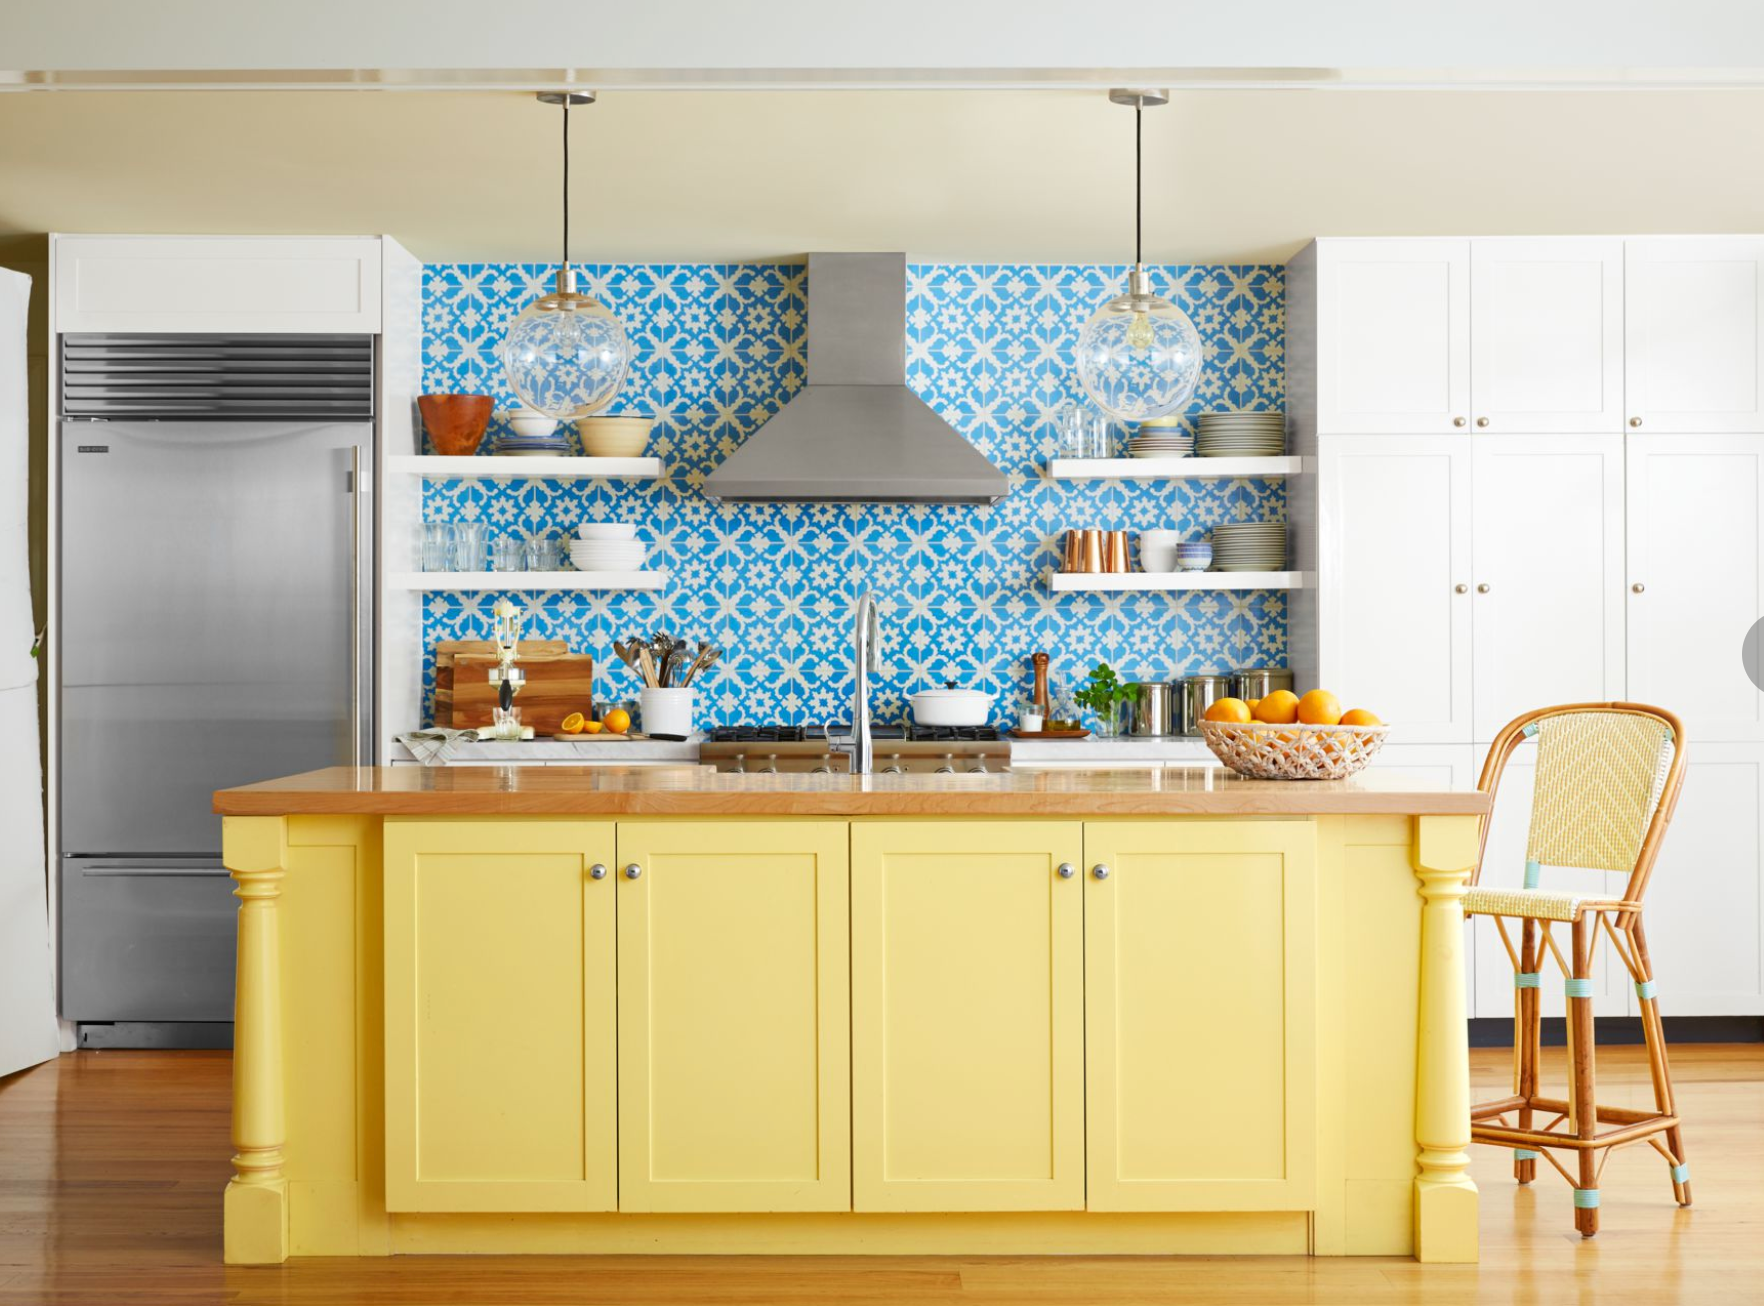
Choosing my backsplash color became one of the most enjoyable parts of the renovation process. Retro kitchens embraced color in ways that feel bold and refreshing today. I collected paint chips, fabric swatches, and vintage ads to understand authentic color palettes. Pink ranged from soft baby pink to bold flamingo. Blues spanned from pale powder blue to vibrant turquoise. Greens included mint, seafoam, and avocado. Yellow stretched from butter to bright lemon. These weren’t subtle shades; they were confident, saturated colors that made statements.
I tested several colors before committing to mint green. I initially leaned toward turquoise because it’s such an iconic 1950s color, but it felt too bold for my space’s size and natural light levels. I brought home sample tiles in turquoise, pink, and mint, living with them taped to my kitchen wall for two weeks. I observed how they looked in morning light, afternoon sun, and under evening artificial lighting. The mint green won because it felt cheerful without overwhelming, vintage without being costumey, and it complemented my existing elements beautifully.
I learned that retro color choices should consider your entire kitchen’s palette. My white cabinets provided a neutral backdrop that let the mint backsplash shine. If I’d had darker wood cabinets, I might have chosen a lighter, softer color to prevent the space from feeling heavy. My butcher block counters added warmth that balanced the cool mint tone. The chrome hardware on my cabinets echoed the era perfectly. All these elements worked together to create a cohesive retro aesthetic. Color doesn’t exist in isolation; it interacts with every other element in your space.
.jpg)
DIY Installation Tips I Learned the Hard Way
I decided to install my backsplash myself to save money and gain hands-on experience. This decision proved both rewarding and humbling. I watched countless installation videos, read tutorials, and practiced on a scrap piece of plywood before touching my actual kitchen walls. My first challenge was achieving level, straight lines when my walls weren’t perfectly plumb. I invested in a laser level that projected horizontal and vertical lines, which became indispensable for keeping my tile rows straight despite the wall’s imperfections.
Cutting tiles around outlets and edges tested my patience and skill. I rented a wet saw from a home improvement store, which made straight cuts relatively easy once I got the hang of it. However, cutting notches around outlets required a different technique. I used a tile nipper for small, irregular cuts and a carbide hole saw for drilling outlet openings. I broke several tiles learning these techniques, which is why buying 15% extra tiles was crucial. Those extra tiles saved me from project delays and ensured I could match colors perfectly since tile dye lots vary.
The thinset mortar application and spacing required more precision than I anticipated. I used a notched trowel to spread thinset on the wall, creating ridges that help tiles adhere properly. My first section looked terrible because I’d spread too much mortar at once, and it began skinning over before I could set all the tiles. I learned to work in small sections, maybe three square feet at a time. I used plastic spacers to maintain consistent grout lines, though removing them after the mortar set was tedious. The entire installation took three full weekends, but the sense of accomplishment when I stepped back and saw my completed backsplash made every frustrating moment worthwhile.
Grouting and Sealing for Long-Term Performance
Choosing grout color might seem minor, but it dramatically impacts the final appearance. I agonized over this decision, studying photos of similar backsplashes with different grout colors. White grout would create a bright, clean grid effect emphasizing each tile. Gray grout would be more forgiving of stains and create a softer, more unified look. Colored grout matching the tile would make the grout lines virtually disappear. I tested three options on my practice board, and surprisingly, I chose charcoal gray grout despite my initial inclination toward white.
The gray grout created a beautiful contrast against my mint tiles, giving them definition and making the color pop. It also proved practical, hiding minor imperfections in my grout lines better than white would have. The gray doesn’t show cooking splatters or discoloration as readily as white grout does in my friend’s kitchen. I used sanded grout because my grout lines were 1/8 inch wide, and sanded grout is recommended for lines wider than 1/8 inch. Mixing the grout to the right consistency, like thick peanut butter, took practice. Too wet and it’s messy and weak; too dry and it won’t pack properly into the joints.
Sealing the grout was a step I almost skipped, but I’m so glad I didn’t. Two weeks after grouting, once everything had fully cured, I applied two coats of penetrating grout sealer. This invisible barrier prevents stains, moisture, and bacteria from penetrating the grout. I reapply sealer annually, which takes maybe 30 minutes and keeps my grout looking new. The sealed grout resists the cooking grease and food splatters that inevitably hit the backsplash. I can wipe down the entire surface without worrying about staining. This maintenance step has preserved my backsplash’s fresh appearance despite daily cooking and the occasional tomato sauce explosion.
Accessorizing and Styling Your Retro Backsplash
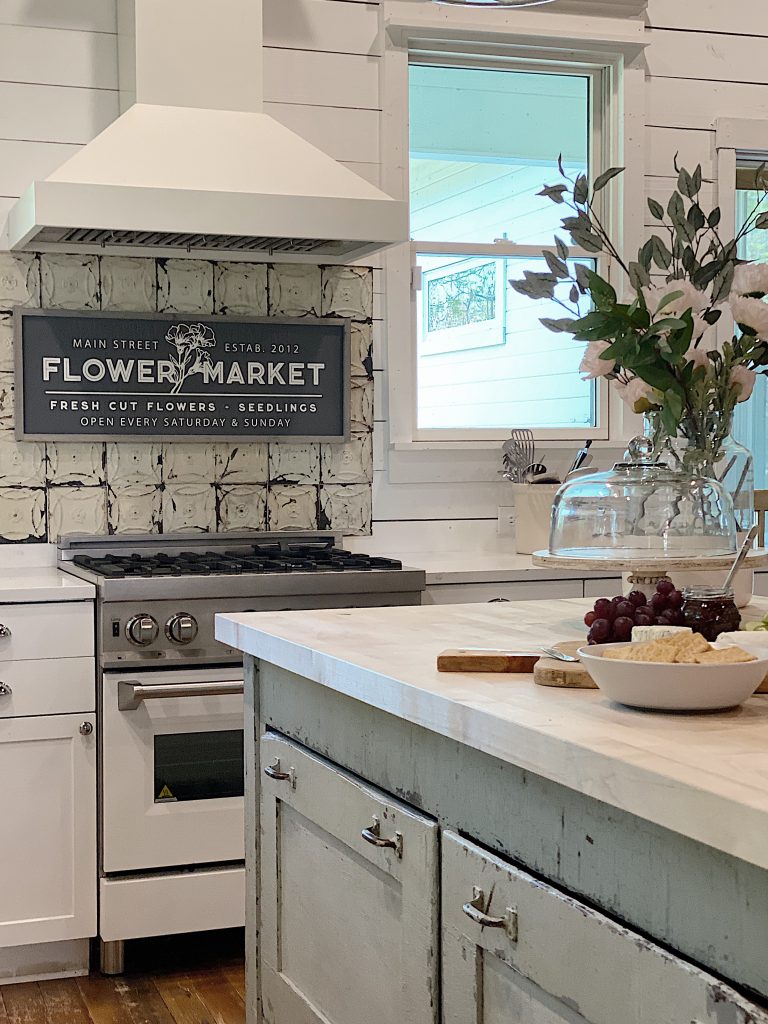
Once my backsplash was installed, I discovered that accessories and styling choices could either enhance or undermine the retro aesthetic. I replaced my modern pot rack with a vintage-inspired chrome one I found at an estate sale. The chrome finish matched the era perfectly and provided practical storage while contributing to the overall design. I added a vintage-style clock with a sunburst design, which became an instant focal point. These deliberate choices reinforced the retro theme without making the kitchen feel like a museum or theme park.
I collected period-appropriate small appliances that serve both functional and decorative purposes. A restored 1950s toaster in chrome and mint green sits on my counter, perfectly matching my backsplash. I found a vintage-style mixer in soft pink that adds another retro color touch. These appliances aren’t just for show; I use them daily and love how they make cooking feel special. I resisted the urge to overdo it, keeping some modern conveniences like my stainless steel refrigerator and contemporary gas range. The mix of eras prevents the kitchen from feeling too precious or costume-like.
My open shelving displays vintage dishware that I’ve collected over time. Fiestaware in classic colors, vintage glasses with atomic designs, and old cookbooks with colorful covers all contribute to the retro atmosphere while remaining functional. I rotate items seasonally, keeping the display fresh and interesting. Fresh flowers in a vintage vase and a small potted herb garden add life and warmth. The key is balance, enough retro elements to establish the aesthetic without cluttering the space or sacrificing functionality. My kitchen feels like a celebration of the past while working perfectly for contemporary life.
.jpg)
How much did your retro backsplash cost to install?
My total investment was approximately $850 for materials and tool rentals, though costs vary significantly based on tile choice and kitchen size. I spent $600 on tiles at $12 per square foot for 50 square feet, including waste, $80 on thinset mortar and grout, $45 on spacers and supplies, $50 on wet saw rental for three days, and $75 on tools like trowels, float, and sponges. If I’d hired professionals, labor would have added $500-800 to the project. Vintage tiles would have cost $1000-1500 for materials alone. Budget reproductions start around $6-8 per square foot, while premium options reach $20-30 per square foot.
Is glossy tile difficult to keep clean in a kitchen?
My glossy tiles are actually easier to clean than I expected. The smooth, non-porous surface doesn’t trap grease or grime like textured tiles might. I wipe down the backsplash after cooking with just a damp microfiber cloth, which removes most splashes. For weekly deep cleaning, I use a mild all-purpose cleaner, and the tiles shine beautifully. The glossy finish does show water spots if I don’t wipe it dry, but this takes seconds. Grease shows on glossy surfaces, but it also wipes away easily rather than soaking in. I actually find my glossy backsplash to be lower maintenance than my friend’s matte tiles.

Can I install a retro backsplash if my kitchen isn’t vintage?
Absolutely, and mixing eras often creates the most interesting spaces. My kitchen combines a 1950s-inspired backsplash with contemporary appliances and modern lighting. The key is finding common threads that tie everything together. I used chrome and white throughout, which works for both retro and modern elements. You could install a colorful retro backsplash in an otherwise neutral contemporary kitchen for a fun focal point. Or use retro-colored tiles in a modern large format for a fresh take on vintage style. Don’t feel constrained by rules; the best kitchens reflect personal style rather than strict period accuracy.
How do I choose the right grout color for my retro tiles?
I recommend ordering grout samples and testing them on actual tiles before committing. Most tile shops provide small grout samples, or you can mix tiny batches. Apply different colors to your sample tiles, let them dry completely, and compare. Consider how grout color affects the overall look: white creates contrast and grid patterns, matching color makes grout lines disappear and tiles flow together, and gray or contrasting colors add definition. Also consider maintenance; darker grouts hide stains better than white. I chose charcoal gray for my mint tiles, and it provides beautiful definition while being practical.

Should I extend my backsplash to the ceiling or stop at the cabinets?
This depends on your layout and budget. Traditional retro backsplashes typically ran from the counter to the bottom of wall cabinets, about 18 inches high. I followed this approach, which felt authentic and kept costs manageable. However, extending to the ceiling can create a dramatic impact, especially with bold colors. If you have open walls without upper cabinets, going higher makes sense. I’ve seen full-height backsplashes look stunning in retro kitchens, though they require significantly more tile. Consider your budget, the impact you want, and how much of that vibrant color you can handle before deciding.
Where did you find your retro tiles?
I shopped extensively before finding the right tiles. I discovered my mint green subway tiles at a specialty tile shop that carried reproduction lines specifically targeting mid-century aesthetics. Online retailers like Fireclay Tile, Mercury Mosaics, and Modwalls offer excellent retro-inspired options. For authentic vintage tiles, I checked architectural salvage yards, though selection is hit-or-miss. Big box stores carry some retro-inspired options in their specialty sections, usually at lower price points. I recommend visiting showrooms when possible to see and touch tiles, as colors and finishes photograph differently than they appear in person. Bring paint chips and cabinet samples for comparison.

Cool Retro Kitchens – How to Decorate a Kitchen in Throwback Style

Chic Kitchen Backsplash Ideas – Tile Designs for Kitchen
Vintage Vibe Backsplash Tile Looks for Modern Classic Design
.jpg)
Mid Century Tile – vintage ceramic tile for bathrooms

Varieties of Tile to Add Texture to Your Kitchen

Retro Kitchen Cabinets: Pictures, Options, Tips & Ideas

Vintage 1960s kitchen tile design ideas

Related Posts:
- French Kitchen Backsplash Ideas
- Cottage Kitchen Backsplash
- Country Kitchen Backsplash
- Retro Kitchen Backsplash
- Rustic Wood Kitchen Backsplash
- Vintage Kitchen Backsplash Ideas
- Modern Farmhouse Kitchen Backsplash
- Mid Century Modern Kitchen Backsplash Tile
- Turquoise Kitchen Backsplash Tile
- Mediterranean Tile Kitchen Backsplash