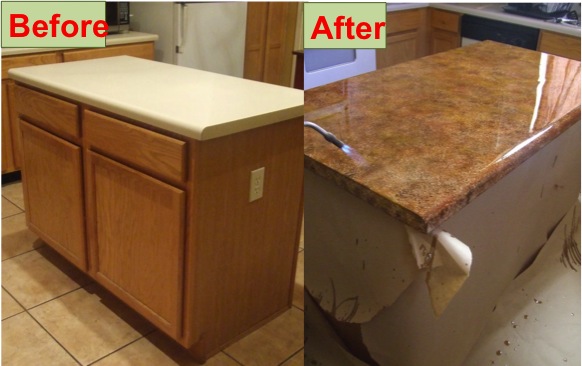
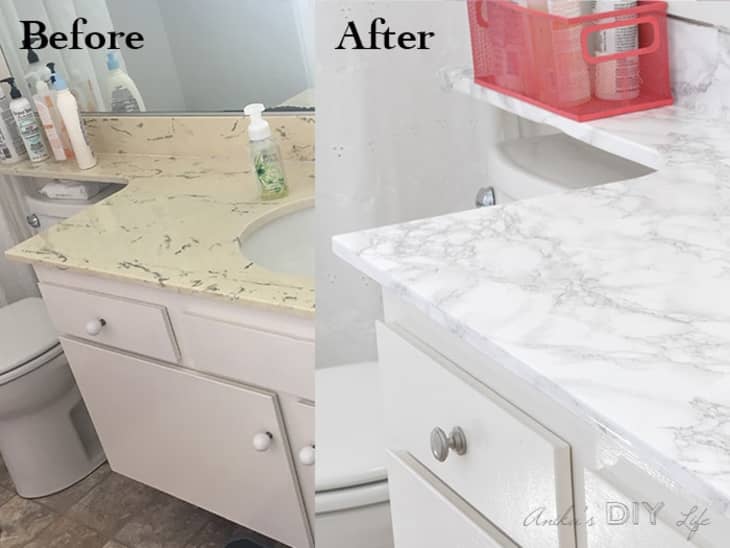
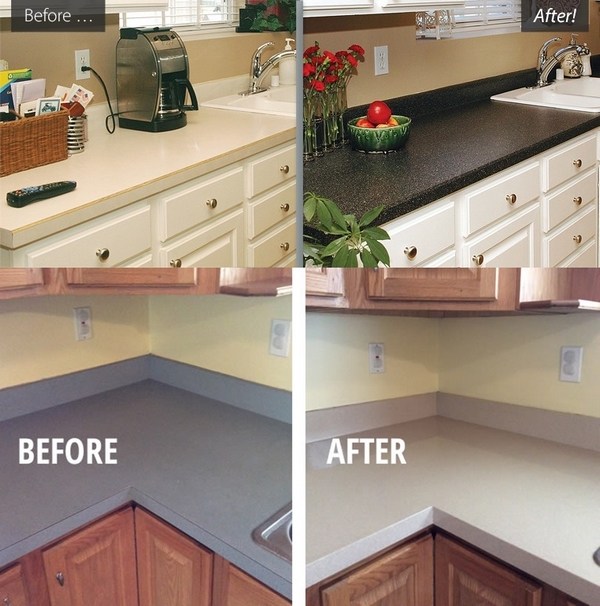
Refinishing kitchen countertops is an inexpensive method to update your kitchen without a complete makeover. Whether your countertops are damaged, outdated, or simply in need of a new look, a DIY refinishing job may make a significant difference. With the correct supplies, tools, and procedures, you can create a professional-looking finish that will last the life of your countertops. Below are the steps for successfully refinishing your kitchen countertops, from preparation to sealing.
Choosing the Right Refinishing Kit
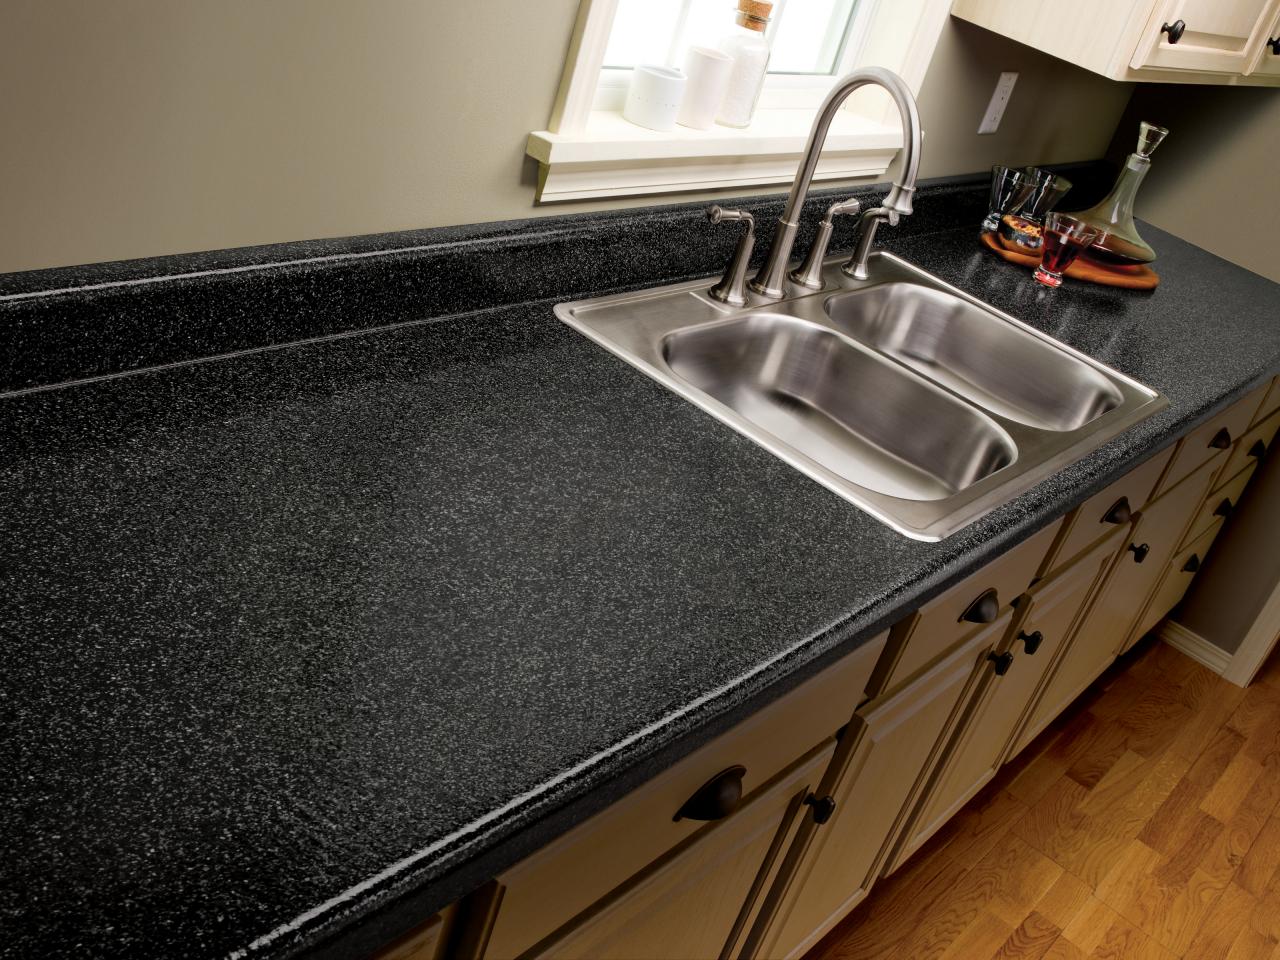
Choosing the proper refinishing kit is essential for achieving a long-lasting and appealing finish. Kits are available for a variety of countertop materials, such as laminate, tile, and wood. Look for a kit that contains primer, paint/epoxy, and a protective finish. Some kits include decorative flakes or textures that simulate actual stone.
Before making a purchase, evaluate the condition of your countertop. If there are extensive scratches or chips, you may require the repair filler included in the kit. Read product reviews to make sure the kit matches your skill level and intended goal. Higher-quality kits typically have higher adhesion and lifespan.
Budget is another consideration. Premium kits may cost more, but they usually provide superior coverage and durability. Cheaper choices may require more coats or wear out sooner. Investing in a trustworthy kit will save you time and work in the long run.
Preparing the Countertop Surface
Proper preparation ensures that refinishing materials adhere properly and remain longer. Begin by thoroughly washing the countertop to eliminate grease, grime, and residues. Use a degreaser, or a solution of warm water and mild detergent. Prior to beginning, thoroughly rinse and dry the surface.
Next, sand the countertop to produce a rough surface for improved adhesion. Sandpaper with grits ranging from 120 to 220 is recommended, depending on the material. Light sanding is acceptable for laminate, while more vigorous sanding may be required for wood. Wipe away the dust with a moist cloth and let it to dry.
Fill any cracks, chips, or holes with the appropriate repair compound. Smooth the filler with a putty knife and let it to dry per the manufacturer’s recommendations. Sand lightly to integrate the repaired portions into the surrounding surface. Proper preparation prevents peeling and bubbling later.
Applying Primer and Basecoat
Primer is vital for ensuring that the paint or epoxy adheres properly. Use a high-quality primer specifically suited for your countertop material. Apply it evenly using a brush or roller, allowing the manufacturer’s specified drying time. Avoid heavy coatings, as they can cause uneven drying and cracking.
Once the primer has dried, apply the base coat. Refinish your paint with a high-adhesion acrylic or epoxy paint. Apply in thin, even layers to avoid drips and streaks. Allow each coat to thoroughly dry before applying another. Most jobs require two to three coats for complete coverage.
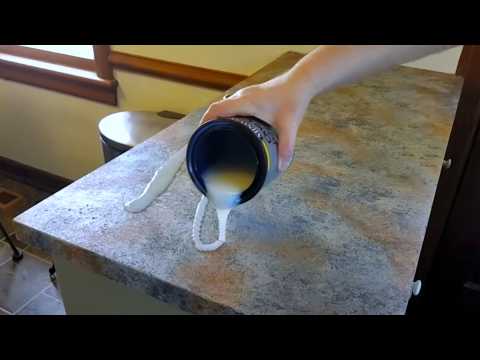
If you’re using an epoxy refinishing kit, mix the components exactly as advised. Apply the epoxy carefully and evenly with a roller or squeegee. Work swiftly, as epoxy hardens quickly. To get a flawless finish, eliminate any air bubbles with a heat gun or torch. Proper application promotes longevity and a professional appearance.
Add Decorative Effects (Optional)
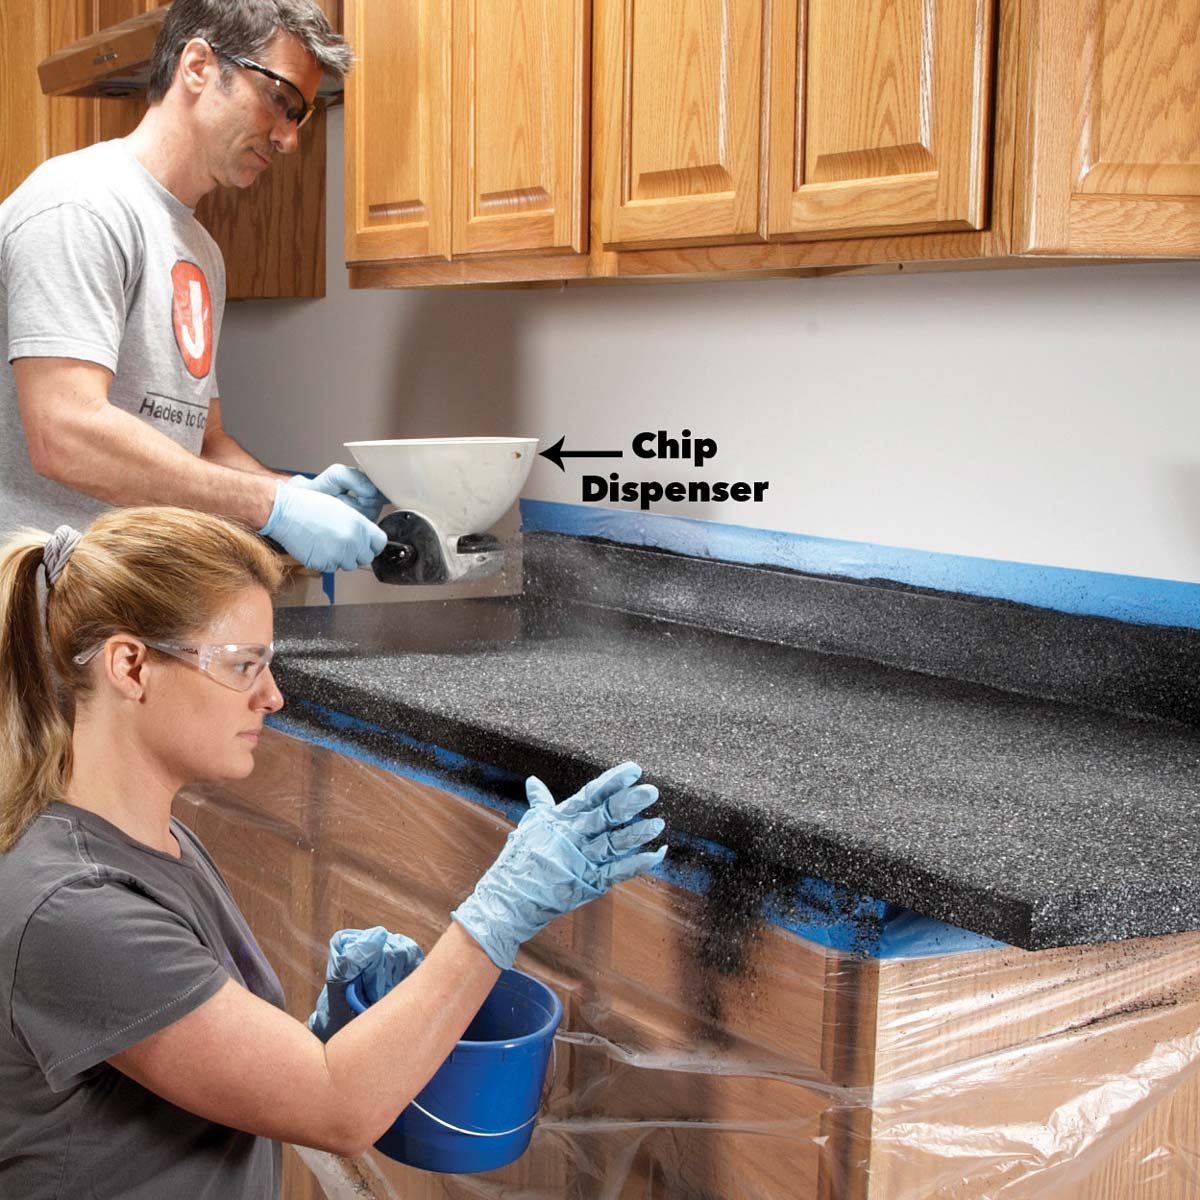
Consider adding ornamental effects to provide a more personalized look. Some refinishing kits include color flakes, metallic pigments, or stencils for creating designs. To achieve a speckled granite effect, sprinkle flakes across wet epoxy or paint. Use a stencil to create detailed designs before sealing.
Metallic epoxy coatings can resemble high-end materials such as marble or quartz. Apply a foundation layer, then swirl metallic pigments with a brush or comb to create a veined appearance. Before committing to the entire countertop, experiment with a tiny test area to refine your technique.
Textured coatings can conceal flaws and offer visual flair. To add texture, use a sponge, cloth, or a specialist roller. These effects work nicely on both paint and epoxy finishes. Personalizing your countertop adds to its uniqueness and matches the overall style of your kitchen.

Sealing and protecting the finish
A protective coating is required to prevent scratches, stains, and moisture damage. For painted countertops, use a transparent polyurethane or water-based sealer. Apply two to three thin applications, letting each dry completely. Sand lightly in between coats to achieve a smoother finish.
Epoxy finishes usually include a built-in topcoat, but an extra sealer can improve longevity. If your kit does not include one, use a food-safe epoxy sealer. Ensure that the sealer is compatible with your base material to minimize peeling or fading over time.
Proper curing is crucial. For at least 48 hours, avoid placing heavy objects or excessive use of the countertop. Follow the manufacturer’s instructions for a full curing period, which can last from a few days to a week. A properly sealed countertop will last longer and withstand regular wear.
Maintaining Your Refinished Countertops
Regular upkeep ensures that your repaired counters seem new. Spills should be cleaned up right once to avoid stains, especially if they are on porous materials like wood or laminate. To protect the finish, use gentle, non-abrasive cleaning. Harsh chemicals might degrade the sealant over time.
Avoid placing hot pots directly on the surface, since this might result in cracks or discolouration. For added protection, use trivets or heat-resistant pads. Similarly, chop meals on cutting boards rather than the countertop to avoid scratches.
Periodically inspect the finish for signs of wear. If the sealant begins to degrade, apply a new layer to continue protection. With careful maintenance, a DIY-refinished countertop can survive for several years before requiring an upgrade.
How long will a DIY countertop refinishing job take?
A normal refinishing project lasts two to three days, including prep, application, and drying time. Cleaning and sanding can take several hours. Primer and base coats need to dry for several hours between applications. Before using the topcoat, allow at least 24 to 48 hours for it to completely cure. Epoxy coatings may take longer due to lengthier curing times. To avoid harming the fresh finish, plan on using the kitchen little during the project.
Can I refinish any countertop material?
Most countertop materials, such as laminate, wood, tile, and solid surface, can be resurfaced. Natural stones, such as granite or quartz, require specialized refinishing kits or professional assistance. Laminate and wood are the easiest to restore using DIY kits. Always refer to the product specs to guarantee compatibility with your countertop material. Some extremely damaged or porous surfaces may require further preparation or do not hold the finish adequately.
Is it cheaper to refinish countertops than to replace them?
Yes, refinishing is far cheaper than replacing. A DIY refinishing kit typically costs between $100 and $300, depending on size and quality. Full countertop replacement might cost $1,500 to $5,000 or more, including labor. Refinishing also saves you the trouble of demolishing and installing. While refinishing might not last as long as a complete replacement, it is a great low-cost choice for a quick refresh.
How durable is a refinished countertop?
A properly resurfaced countertop can last three to five years with proper care. The durability is determined by the quality of the materials used, surface preparation, and regular upkeep. Epoxy coatings are typically more durable than paint, with higher scratch and moisture resistance. High-traffic areas may show wear faster. Reapplying a topcoat every several years can extend its longevity. To keep the finish intact, avoid using abrasive cleansers and strong impacts.
Can I change the color of my countertop when refinishing?
Yes, refinishing allows for entire color changes. Kits are available in a variety of hues, ranging from subtle to bold. Paint-based restoration provides the most freedom, whereas epoxy kits may have a limited color selection. For a natural stone appearance, use kits with ornamental flakes or veining effects. Test a tiny area first to confirm that the color fits your expectations. A well-executed color change will instantly update your kitchen.
What are some frequent mistakes to avoid while resurfacing countertops?
Skipping sufficient surface preparation is a fundamental mistake that results with poor adhesion and flaking. Rushing the drying process between applications might result in bubbles and fractures. Applying thick layers of paint or epoxy leads to uneven drying and a less durable surface. Failure to seal the countertop exposes it to stains and damage. Using unsuitable materials, such as oil-based sealants over water-based paint, might damage the finish. For the greatest results, pay close attention to the directions and proceed slowly.
DIY Countertops: Countertop Makeover Ideas on a Budget

DIY Countertop refinishing – tips and tricks to renew the counter
How to Repair and Refinish Laminate Countertops
How to Paint Countertops – Looks Like Slate – $65 DIY Budget Friendly Kitchen Update
Easy DIY Countertop Refinishing with Countertop Paint Kit

Countertop Reglazing

Related Posts: