Two years ago, I finally reached my breaking point with my old laminate countertops. The burn marks from hot pans, permanent stains from red wine spills, and that annoying seam that had started lifting made my kitchen look dated and cheap. What started as a simple “let’s just replace the countertops” project turned into a months-long learning experience that taught me way more than I expected about materials, installation, and budgeting.
I made plenty of mistakes along the way, from underestimating costs to choosing the wrong contractor initially, but I also discovered some money-saving tricks and shortcuts that worked. Now that I’m cooking on my beautiful new quartz countertops, I want to share everything I learned so you can avoid my pitfalls and get the kitchen of your dreams.
Planning and Budgeting for Your Countertop Project
When I first started researching countertop replacement, I naively thought I could just pick a material and have it installed within a few weeks. Boy, was I wrong. The planning phase took nearly two months as I discovered all the decisions I needed to make beyond just the surface material. Edge profiles, backsplash integration, sink cutouts, and appliance clearances all required careful consideration that I hadn’t anticipated.
Creating a realistic budget proved more challenging than expected. Initial online estimates suggested I could redo my 40 square feet of countertops for around $2,000, but once I factored in demolition, disposal, plumbing adjustments, and unexpected repairs to my cabinets, the real cost nearly doubled. I learned to add at least 25% contingency to any contractor estimate, and even that wasn’t always enough when we discovered issues hidden under my old countertops.
The timeline planning was equally eye-opening. What I thought would be a weekend project took three weeks from start to finish. Template creation, fabrication delays, and coordination with plumbers and electricians all added time I hadn’t considered. I had to plan for several days without a functioning kitchen, which meant lots of takeout and paper plates. Learning about lead times for different materials also influenced my final choice, as some options required 4-6 weeks of waiting.
Comparing Materials: What Matters in Daily Use
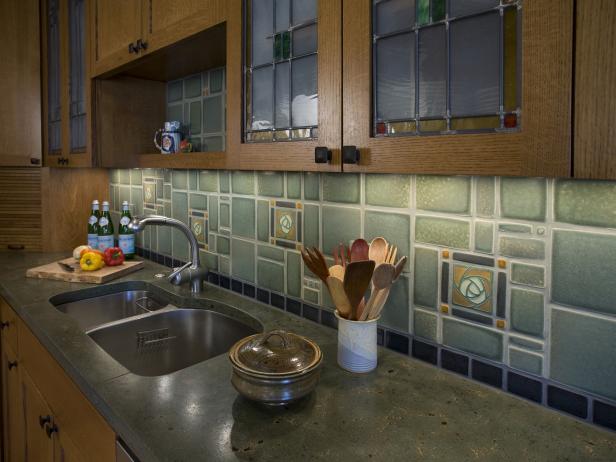
I spent weeks researching different countertop materials, reading reviews, and visiting showrooms to understand the real differences between options. Granite seemed appealing initially, but I learned about the maintenance requirements and potential for staining that made me hesitant. Marble looked gorgeous but was completely impractical for my cooking habits, especially considering my love for citrus and red wine.
Quartz emerged as my top choice after seeing it in several friends’ kitchens and learning about its performance characteristics. The engineered stone offers granite’s durability without the maintenance hassles, and the color consistency appealed to my design sensibilities. However, the higher upfront cost required some serious budget adjustments. I also considered concrete countertops, which offered a custom look at a lower price point, but the potential for cracking and the DIY installation complexity ultimately scared me off.
Butcher block countertops provided an interesting middle-ground option that I seriously considered for my island. The warm wood appearance and lower cost were appealing, but after talking to owners about the maintenance routine and potential for water damage, I decided consistency throughout the kitchen was more important. Solid surface materials like Corian offered good performance at a moderate price, but lacked the natural beauty and prestige factor that would help my home’s resale value.
Finding the Right Contractor and Avoiding Red Flags
My first contractor experience was a disaster that taught me valuable lessons about vetting professionals properly. I chose the lowest bid without thoroughly checking references or verifying licensing and insurance. The contractor showed up unprepared, damaged my cabinets during demolition, and disappeared halfway through the project, leaving me with a non-functional kitchen for two weeks while I scrambled to find someone else to finish the job.
The second contractor I hired came highly recommended by my neighbors and charged about 30% more, but the difference in professionalism was night and day. He provided detailed written estimates, showed up on time, protected my home during work, and communicated proactively about any issues that arose. This experience taught me that the cheapest option often costs more in the long run when you factor in delays, damages, and stress.
I learned to ask specific questions during contractor interviews that revealed their experience and professionalism. Questions about their process for template creation, how they handle unexpected issues, and their warranty policies helped separate the serious professionals from the fly-by-night operators. I also started requiring proof of insurance and checking online reviews on multiple platforms, not just their website testimonials. These extra steps took time but prevented costly mistakes.

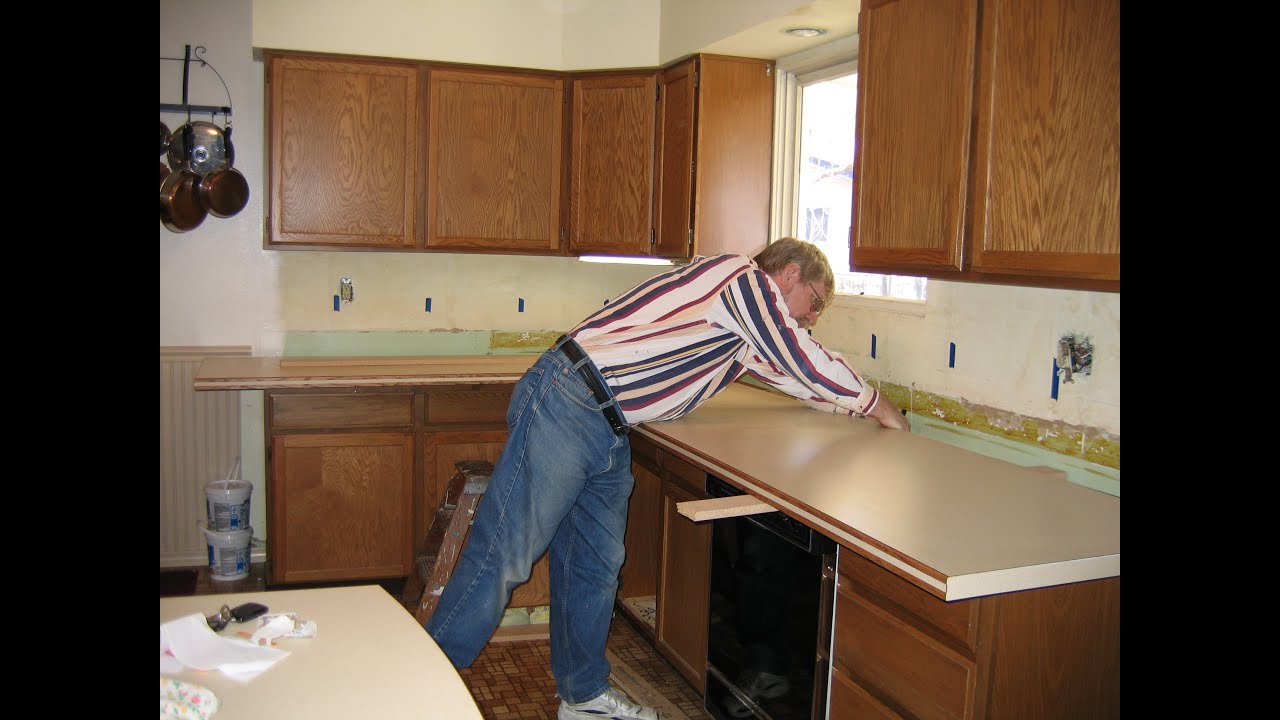
The Removal and Installation Process Reality Check
Watching the removal of my old countertops was both exciting and terrifying. I hadn’t realized how much destruction would be involved, or how the process would reveal hidden problems with my cabinets and plumbing. The contractor discovered that my cabinet tops weren’t perfectly level, requiring shims and adjustments before the new countertops could be installed properly. Water damage around the sink area meant replacing part of the cabinet structure.
The template creation process fascinated me as the installer used cardboard and specialized tools to create precise patterns for the fabrication shop. Every appliance, fixture, and corner had to be measured exactly, because there’s no room for error when cutting expensive stone slabs. I learned that any changes to appliances or plumbing after template creation could result in costly remakes, so finalizing all decisions beforehand was crucial.
Installation day arrived three weeks after templating, and watching the installers work was like observing skilled artisans. The precision required to fit heavy stone slabs into place while ensuring perfect alignment and level amazed me. They used specialized lifting equipment and worked methodically to avoid any damage to my cabinets or new countertops. The final result looked flawless, but I gained tremendous appreciation for the skill and experience required to achieve that outcome.

Hidden Costs and Unexpected Expenses That Add Up
The sticker shock of my countertop project came not from the material costs, which I had researched extensively, but from all the hidden expenses that nobody mentioned upfront. Demolition and disposal of my old countertops cost $400, which wasn’t included in the basic installation quote. Plumbing adjustments to reconnect my sink and dishwasher added another $300, and electrical work for my undermount sink lighting cost $150.
Cabinet modifications became necessary when we discovered that my existing cabinets couldn’t properly support the weight and overhang of my new quartz countertops. Reinforcement brackets and additional support structures added $250 to the project cost. The installer also had to adjust some cabinet doors and drawers that no longer cleared the thicker countertop edges, which required additional time and materials I hadn’t budgeted for.
Edge treatments and special features drove costs up significantly. I had planned on a simple straight edge, but fell in love with a more complex ogee profile that added $8 per linear foot to my bill. The undermount sink required special cutting and polishing techniques that cost an extra $200. By the time I added up all these extras, my project cost was nearly 40% higher than the basic material and installation quote I had originally received.

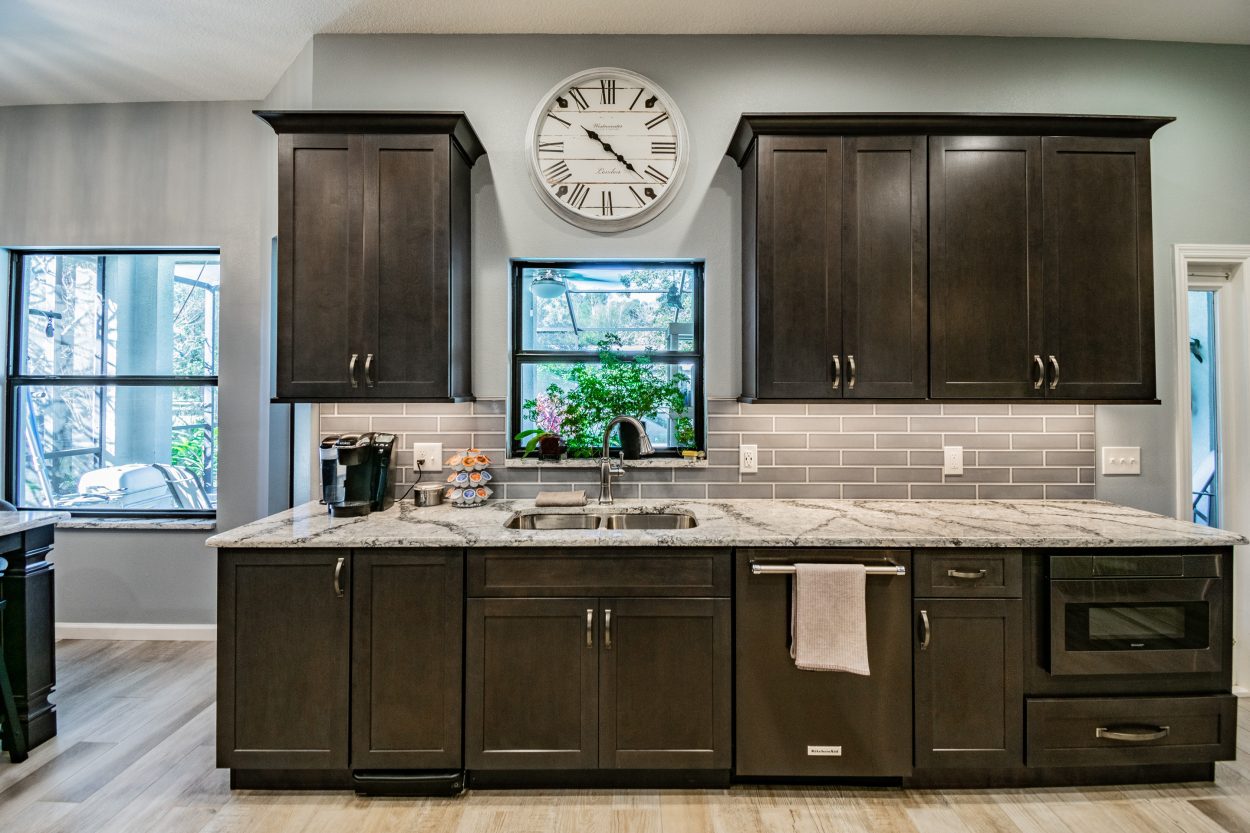
Living with My New Countertops: Two Years Later
The daily experience of cooking and entertaining on my new quartz countertops has been everything I hoped for and more. The non-porous surface means spills wipe up easily without staining, and I no longer worry about placing hot pans directly on the surface (though I still use trivets out of habit). The consistent pattern and color have maintained their beauty without any maintenance beyond regular cleaning with mild soap and water.
The investment has paid off in ways beyond just aesthetics and functionality. Friends and family constantly compliment the kitchen’s appearance, and the improvement has made me enjoy cooking and entertaining at home much more than before. The kitchen feels like a completely different space, more sophisticated and welcoming. I find myself keeping the kitchen cleaner because the beautiful countertops deserve to be showcased properly.
From a financial perspective, the countertop replacement has already begun paying dividends in home value. A recent appraisal for refinancing specifically mentioned the kitchen upgrades as a significant positive feature. While I may not recoup 100% of the investment immediately, the daily enjoyment and long-term value enhancement make the project feel worthwhile. I only wish I had done it sooner instead of living with those awful laminate countertops for so many years.

Lessons Learned and Advice for Future Projects
If I could redo my countertop project knowing what I know now, I would plan more thoroughly from the beginning and budget more realistically for all the potential extras. Starting the planning process at least three months before my desired completion date would have reduced stress and allowed for better decision-making. I also would have invested more time in finding the right contractor initially instead of learning through painful experience.
The most valuable lesson was understanding that countertop replacement affects many other aspects of the kitchen, from plumbing and electrical to cabinet function and backsplash integration. Treating it as a complete kitchen refresh rather than just a surface change would have led to better coordination and potentially better overall results. I ended up redoing my backsplash six months later because it looked outdated next to the beautiful new countertops.
My biggest piece of advice is to live in your kitchen for a while after installation before making any other changes. The new countertops will change how you see and use the space, potentially influencing other decisions about lighting, hardware, or appliances. I’m glad I waited to replace my faucet because the new countertops made me realize I wanted a different style than I had originally planned. Patience in the decision-making process leads to better long-term satisfaction.

How long should I expect my kitchen to be out of commission during countertop replacement?
Plan for 3-5 days minimum without a full kitchen function. My project took longer due to complications, but typically you’ll have 1 day for removal, 2-3 weeks for fabrication, then 1-2 days for installation. I recommend setting up a temporary kitchen in another room with essentials like a coffee maker, a microwave, and paper goods. Having a backup plan for meals and cleanup made the process much more manageable.
Can I replace countertops without replacing cabinets, and what issues might arise?
A: Yes, most countertops can be replaced without changing cabinets, which is exactly what I did. However, expect potential issues like cabinet damage during removal, the need for reinforcement with heavier materials, and adjustment of doors/drawers. My cabinets needed minor repairs and modifications, but the overall structure remained intact. Just budget extra for these likely adjustments and use an experienced contractor.

What’s the most cost-effective way to get high-end looking countertops on a budget?
Quartz remnants saved me significant money while still getting premium material. Many fabricators have leftover pieces from larger jobs that work perfectly for smaller kitchens. I also saved by choosing simpler edge treatments and avoiding complex cutouts. Shopping during slower seasons (winter) and getting multiple quotes helped negotiate better pricing. Consider solid surface alternatives that mimic stone appearance at a lower cost.
How much does countertop material choice affect daily kitchen maintenance?
A: The difference is dramatic! My old laminate required constant worry about stains and heat damage, while my new quartz needs only basic cleaning. Natural stones like granite require periodic sealing and careful cleaning product selection. Butcher block needs regular oiling and immediate spill cleanup. Consider your lifestyle honestly; busy families might prefer low-maintenance engineered materials over beautiful but demanding natural options.

Should I coordinate countertop replacement with other kitchen renovations for better results?
If your budget allows. I wish I’d replaced my backsplash simultaneously instead of six months later. Coordinating with cabinet refacing, appliance upgrades, or plumbing improvements can save money and create better overall design cohesion. However, if the budget is tight, countertops alone can dramatically transform your kitchen’s appearance and make other elements look better by comparison.
What warranty should I expect, and what does it typically cover?
My quartz came with a 15-year manufacturer’s warranty against defects, while installation carried a 1-year warranty for workmanship. This covers structural issues, fabrication errors, and installation problems, but not damage from misuse or accidents. Read warranty terms carefully and keep all documentation. Some materials, like granite, have shorter warranties, while solid surfaces may offer longer coverage. Professional installation is usually required to maintain warranty validity.

How To: $500 DIY Kitchen Remodel Update Counter u0026 Cabinets on a Budget

Tips For Partial Kitchen Makeovers

Kitchen Remodeling Tampa Why Do Non-Porous Kitchen Countertops
How to Paint Countertops – Looks Like Slate – $65 DIY Budget Friendly Kitchen Update

Related Posts: