My 150-square-foot kitchen had awful lighting for years, relying on a single fluorescent fixture that created harsh shadows and made food preparation difficult. I loathed cooking in the evenings when natural light was scarce, leaving me straining over cutting boards and struggling to see within cabinets. After examining several lighting options, I determined that recessed lighting may transform my tight kitchen into a bright, useful room. My experience installing recessed lights taught me important lessons about proper placement, bulb selection, and the tremendous impact that good lighting can have in small places.
Understanding My Small Kitchen’s Lighting Requirements
Analyzing my kitchen’s current lighting highlighted several issues that recessed fixtures may successfully address. The original fluorescent ceiling light cast a single bright spot in the center, leaving corners and work surfaces in shadows. I required uniform lighting across the space to eliminate these dark areas and dramatically increase functionality.
Measuring my kitchen’s measurements allowed me to determine the best number and location of recessed lights for uniform coverage. My 10-by-15-foot room needs six strategically placed fixtures to ensure optimum light distribution. I discovered that putting recessed lights too far apart results in pooling effects, whilst positioning them too close together wastes energy and causes glare.
Task lighting became my primary worry because most of my culinary activities entailed intricate work, such as cutting vegetables and reading recipes. I identified essential work locations that need focused illumination, such as the stoves, sink, and major preparation counter. Understanding these unique lighting requirements influenced my fixture placement selections, allowing me to create a more functional cooking environment.
Planning the Ideal Recessed Light Layout
Making a lighting plan on paper avoided costly mistakes and ensured perfect light distribution around my little kitchen. I drew my kitchen to scale and identified the existing electrical connections, cabinetry, and key appliances. This visual technique assisted me in determining the optimal places for new fittings while avoiding structural constraints.
The typical spacing calculation, which divides ceiling height by two, offered me a starting point for fixture placement in my 8-foot-high kitchen. This means spacing the lights about 4 feet apart for even coverage. However, I significantly altered this spacing to focus more light on work surfaces and less on open floor areas that did not require intense illumination.
To address the different needs of my kitchen, I chose a combination of broad ambient and concentrated task lighting. Four lights illuminate the entire space, while two extra lamps positioned over my primary work counter give concentrated task lighting. This layered technique maximizes both functionality and aesthetic appeal in my little kitchen.
Choosing the Right Recessed Lighting Fixtures
Choosing between 4-inch and 6-inch recessed lights necessitated careful consideration of my kitchen’s dimensions and ceiling height. The 4-inch fixtures I chose produce ample light while preserving a discreet design that does not overpower my small room. Larger 6-inch fixtures would have taken up too much visual area on the ceiling.
LED compatibility became critical since I wanted energy-efficient lighting that would endure for years without being replaced. I chose fixtures with built-in LED modules over separate bulbs to ensure optimal performance and avoid future bulb purchasing. These integrated devices have superior heat control and longer lifespans than typical bulb-based systems.
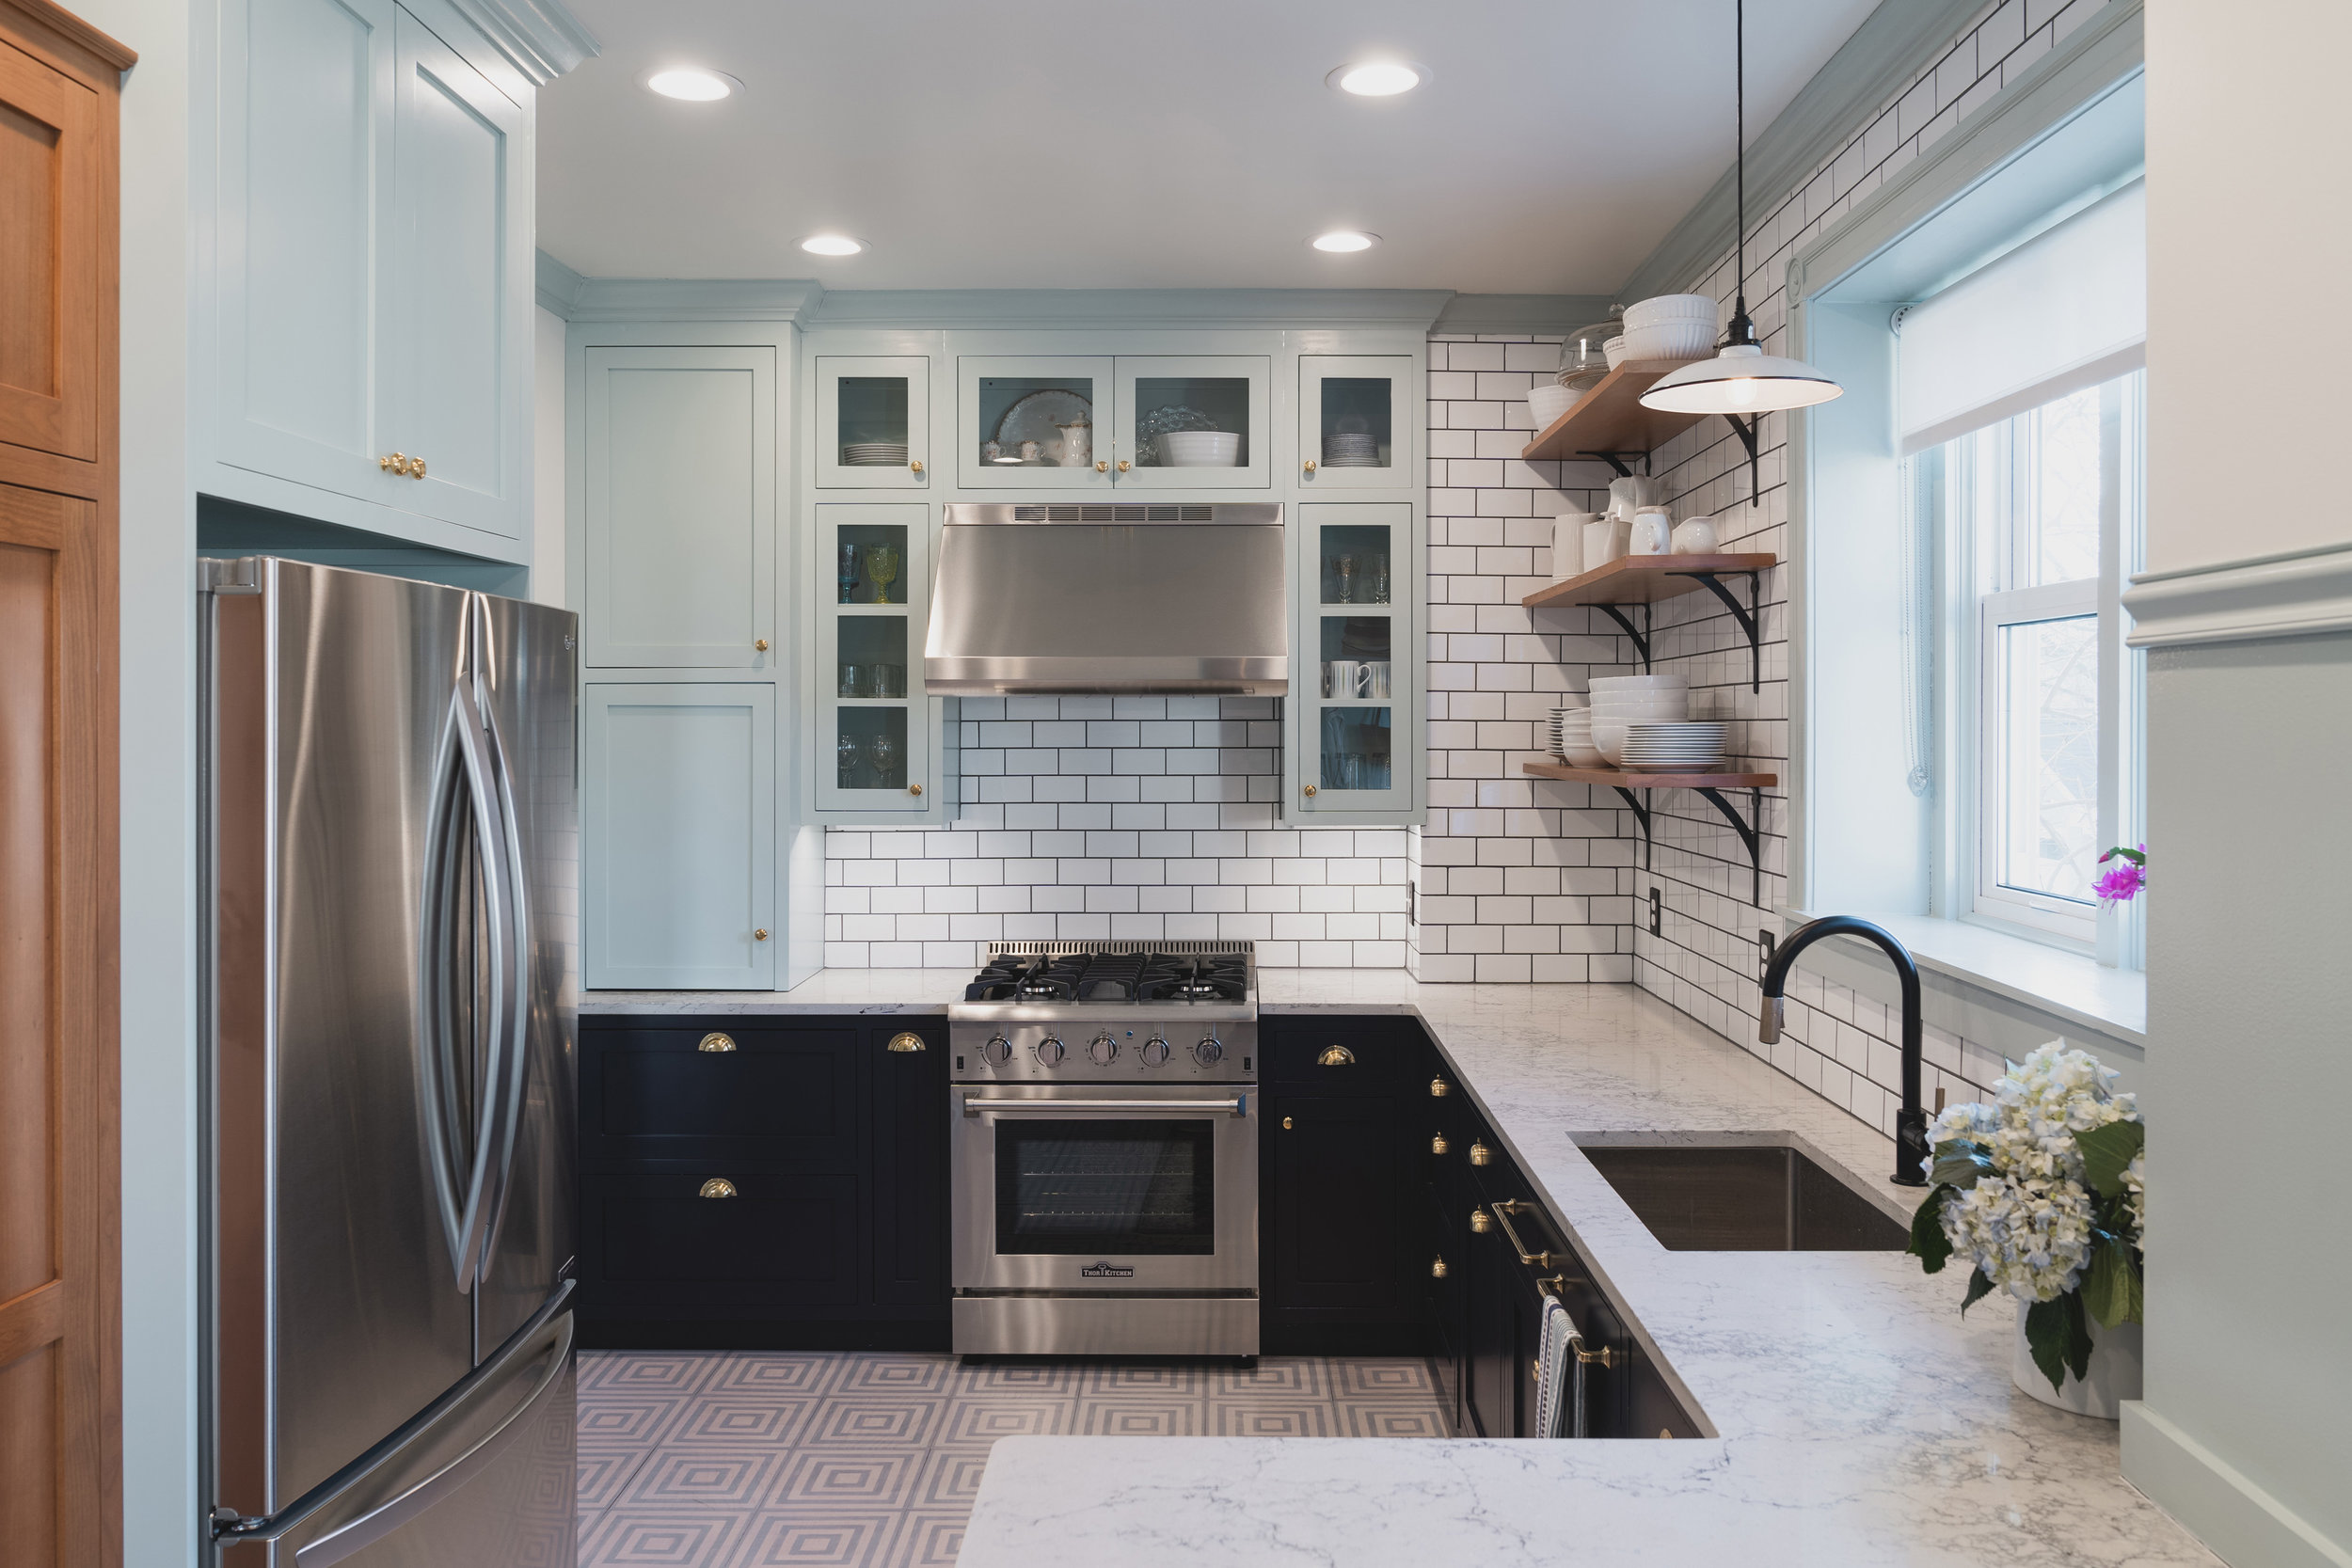
Trim designs have a huge impact on the overall appearance of recessed lighting in tiny kitchens, therefore, I picked plain white trims that blend in with the ceiling. Decorative trims and deeper hues would have drawn too much attention, making my ceiling appear lower. The sleek, minimalist appearance draws attention to my kitchen’s other design features rather than the lighting fixtures themselves.

Installation Challenges I Faced
Working with my home’s existing electrical system necessitated meticulous planning and professional consulting to ensure a safe installation. My kitchen only had one electrical connection in the ceiling, so I had to add new wiring to each recessed light spot. This method involves fishing wires through ceiling joists and cutting access holes that need to be patched later.
Because of the limited ceiling height in my little kitchen, I had to go for low-profile fixtures that did not protrude beyond the surface. Standard recessed lights require 6 inches of clearance above the ceiling, but I found shallow fixtures made for small spaces. These specialized modules allowed me to install them in my restricted attic space without requiring any structural adjustments.
The coordination with other ceiling features, such as heating ducts and plumbing lines, made the installation process substantially more challenging. I had to change several intended fixture locations to avoid issues with existing systems. This flexibility in planning proved critical because strict adherence to my initial idea would have resulted in costly and unnecessary issues during installation.

Selecting the Ideal Light Temperature and Brightness
Choosing the right color temperature changed my kitchen’s mood from chilly and clinical to warm and inviting. I experimented with numerous temperatures before landing on 3000K warm white, which provides excellent visibility for kitchen operations while producing a nice atmosphere. Cooler temperatures made my little area feel sterile, whereas warmer alternatives appeared excessively yellow for food preparation.
In my little kitchen, I needed to strike a balance between enough illumination and energy efficiency, as well as avoid glare. I utilized 650-lumen bulbs for general lighting and 850-lumen bulbs for task-oriented placements above work surfaces. This combination provides adequate lighting for all tasks without overwhelming the environment or causing uncomfortable brightness levels.
Dimming capabilities were critical for generating adaptability in my kitchen lighting system, allowing me to modify brightness dependent on the time of day and activities. I installed appropriate dimmer switches that operate perfectly with my LED fixtures. This feature converts my kitchen from a bright workspace when I’m cooking to a more subtle ambient lighting when I’m hosting or eating late at night.
Transformative Results and Daily Benefits
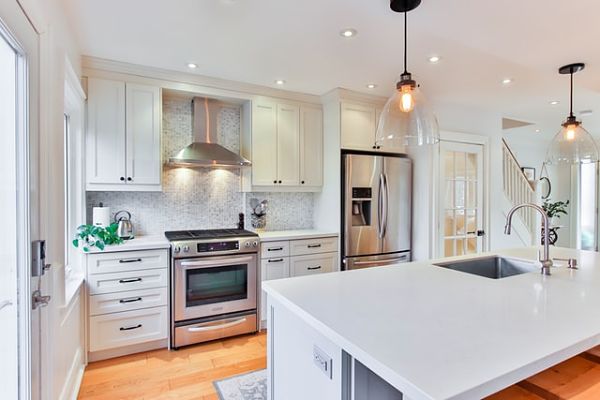
My kitchen’s functioning has improved beyond my expectations, making cooking and food preparation much more joyful and efficient. Every corner now has appropriate lighting, removing the irritating shadows that previously made work difficult. During evening cooking sessions, I can readily see within cabinets, read recipe instructions, and safely use sharp knives.
Energy efficiency became an unexpected bonus because my six LED recessed lights use less electricity than my old single fluorescent fixture while giving better illumination. My monthly electricity bill fell significantly following the installation. The LED lamps emit very little heat, making my little kitchen more comfortable during summer cooking sessions where every degree counts.
The visual impact turned my kitchen from a small, dimly lighted space to one that feels larger and more sophisticated. Even illumination removes harsh shadows, which previously made my kitchen appear smaller and more cluttered. Friends and family have repeatedly commented on how much brighter and more spacious my kitchen appears after I installed the recessed lighting system.
How many recessed lights do I need in a small kitchen?
Based on my experience with a 150-square-foot kitchen, I put six recessed lights to ensure adequate coverage. The typical approach is to divide your ceiling height by two to determine spacing, and then calculate the fixtures required according to room size. For kitchens under 100 square feet, four lights are usually sufficient, however, larger compact kitchens may require six to eight lamps for even illumination and suitable task lighting coverage.
What is the optimal spacing for recessed lighting in tiny kitchens?
I spaced my recessed lights about 4 feet apart, using the typical calculation of half the ceiling height for spacing. However, I changed the location to focus more light on work areas and less onthe wide floor space. For maximum operation, keep lights at least 18 inches away from wall edges and guarantee even coverage across the space.
Should I get 4-inch or 6-inch recessed lights for my little kitchen?
I chose 4-inch recessed lighting for my small kitchen because they give ample illumination while without visually dominating the small space. Smaller fixtures fit better with lower ceilings and have a cleaner appearance. Six-inch fixtures are better suited for bigger kitchens with higher ceilings, but they can make tiny areas feel crowded and bring unwanted attention to the ceiling fixtures.
What color temperature is most suited for small kitchen recessed lighting?
After trying several possibilities, I decided on 3000K warm white for my little kitchen recessed lighting. This temperature allows for optimum sight during meal preparation while also producing a comfortable and inviting environment. Cooler temperatures, such as 4000K or 5000K, make tiny places feel sterile and unwelcoming, and warmer temperatures below 2700K appear too yellow for precise cooking activities and proper food color perception.

Can I put recessed lighting in a kitchen with low ceilings?
Yes, I successfully installed recessed lighting in my kitchen with 8-foot ceilings, utilizing shallow or ultra-thin fixtures made for small spaces. These specialty units require only 2-4 inches of clearance above the ceiling, as opposed to the conventional 6-inch minimum. New construction applications provide greater flexibility, however, retrofit alternatives are available for older homes with restricted ceiling space above.
How much is it to install recessed lighting in a small kitchen?
My little kitchen recessed lighting makeover cost around $800, including six LED lamps, dimmer switches, and professional electrical work. DIY installs can save $300-500 on materials alone, but electrical work frequently requires expert installation to ensure safety and code compliance. Prices vary depending on fixture quality, electrical complexity, and local labor rates, but the investment improves both functionality and property value.
Can Lights in a Kitchen – Room For Tuesday

😮 Kitchen Recessed Light Surprise and Tutorial! 💡

Kitchen Recessed Lighting: Planning the Perfect Illumination
Small Kitchen Lighting Ideas that Blend Form with functionality
Related Posts:
- Tuscan Kitchen Light Fixtures
- Cottage Kitchen Lighting Ideas
- Country Kitchen Lighting Ideas
- Retro Kitchen Pendant Lights
- Rustic Industrial Kitchen Lighting
- Vintage Kitchen Light Fixtures
- Farmhouse Style Lighting For Kitchen
- Contemporary Kitchen Lighting Design
- Kitchen Bench Pendant Lights
- Kitchen Vanity Lights