When I started planning my kitchen renovation last year, I knew I wanted that coveted modern farmhouse look. The backsplash became my focal point, and after months of research and careful selection, I discovered that the right choice could completely transform the space. My kitchen went from bland and outdated to warm, inviting, and perfectly balanced between rustic charm and contemporary functionality. The backsplash I chose not only complemented my white shaker cabinets and butcher block countertops but also became the conversation starter that every guest mentions when they walk into my kitchen.
Subway Tiles: The Foundation of My Farmhouse Dream
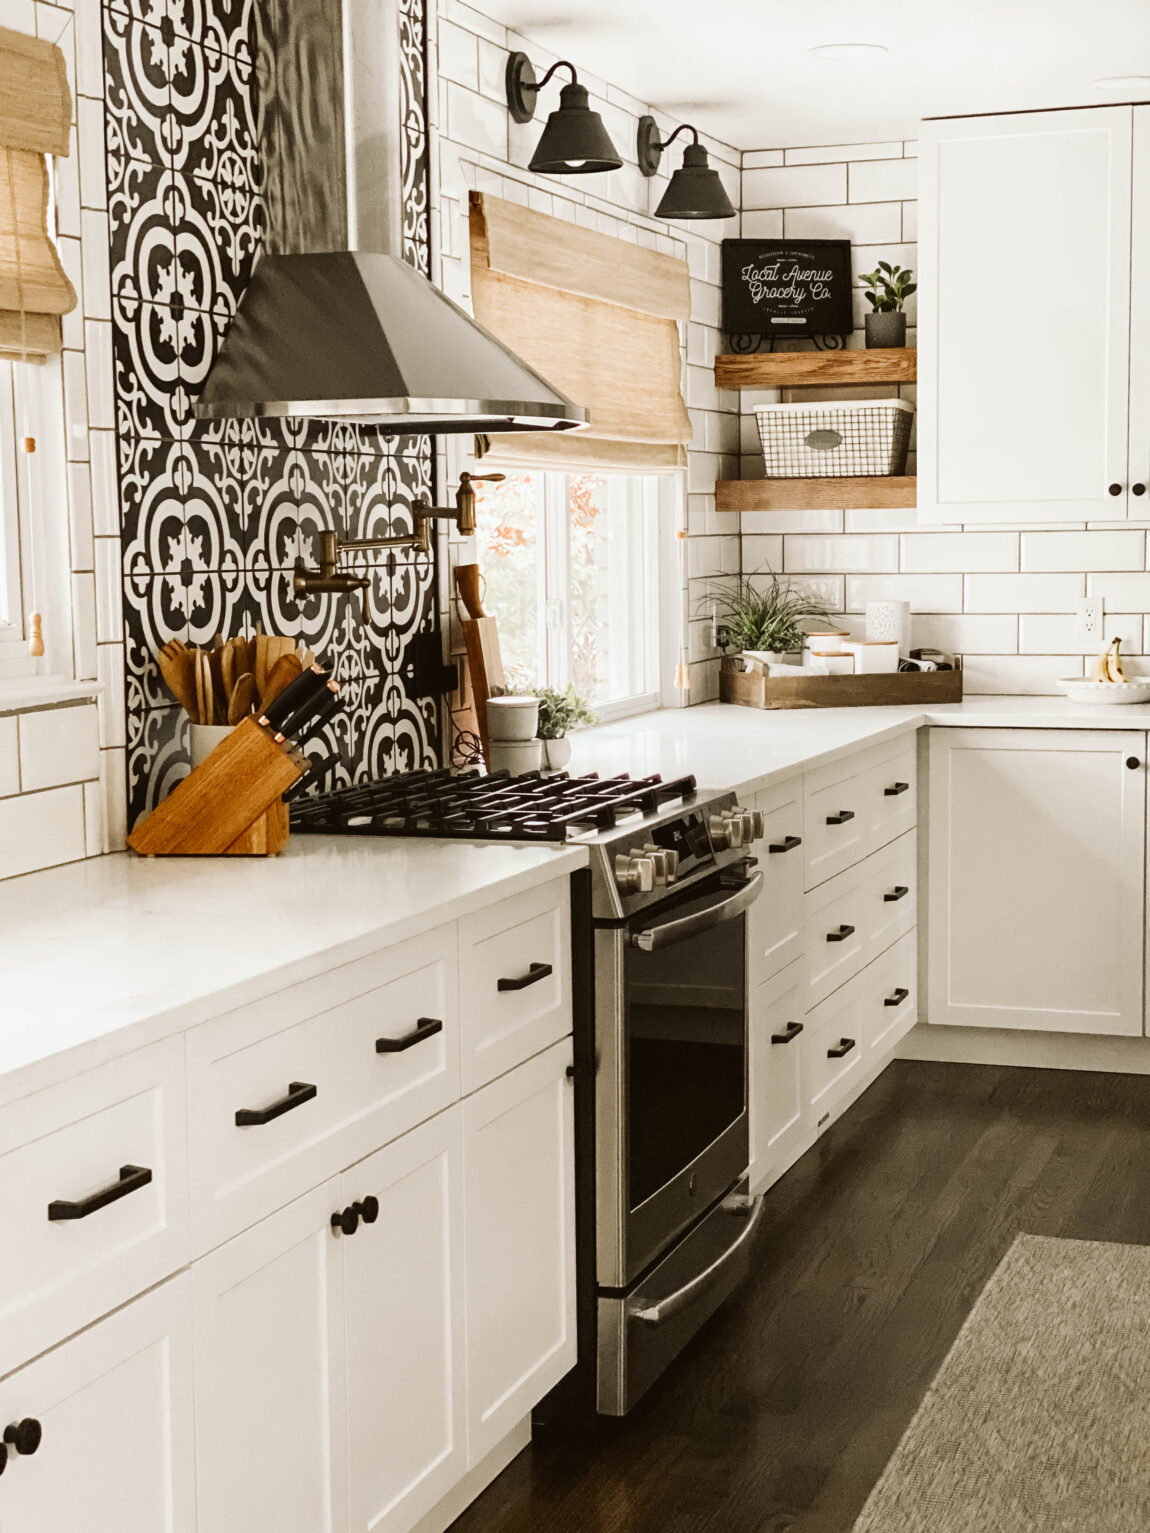
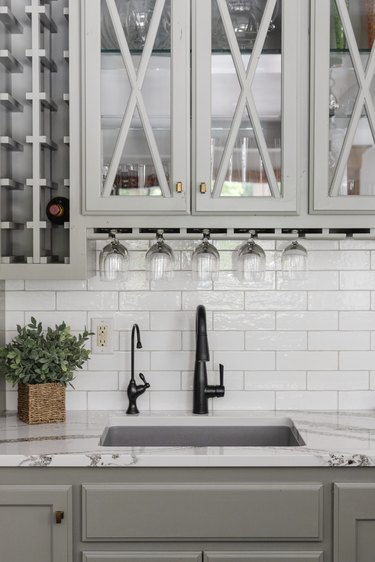
I started with classic white subway tiles because they’re truly the backbone of any modern farmhouse kitchen. When I first installed them in a traditional brick pattern, the look felt clean but somewhat predictable. The 3×6-inch tiles gave me that timeless appeal I wanted, but I knew I needed something more to make the space feel uniquely mine. The crisp white finish reflected light beautifully and made my kitchen feel larger and brighter than it had in years.
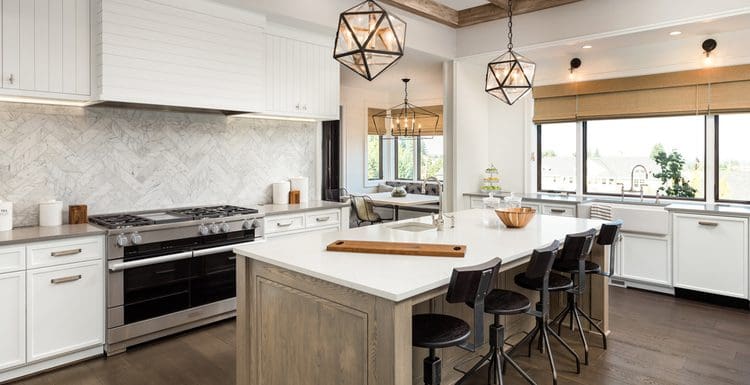
After living with the basic subway tile layout for a few weeks, I realized I wanted more visual interest. That’s when I decided to experiment with different patterns using the same tiles. I rearranged them in a herringbone pattern behind my stove, and suddenly the entire wall came alive. The diagonal lines created movement and sophistication while maintaining that classic farmhouse feel I was after.
The grout color became my next big decision, and I’m so glad I took time to consider this detail carefully. Instead of bright white grout, I chose a soft gray that added subtle definition between each tile. This choice prevented the wall from looking too stark while still keeping the overall palette light and airy. The slight contrast made each tile distinct without overwhelming the space.
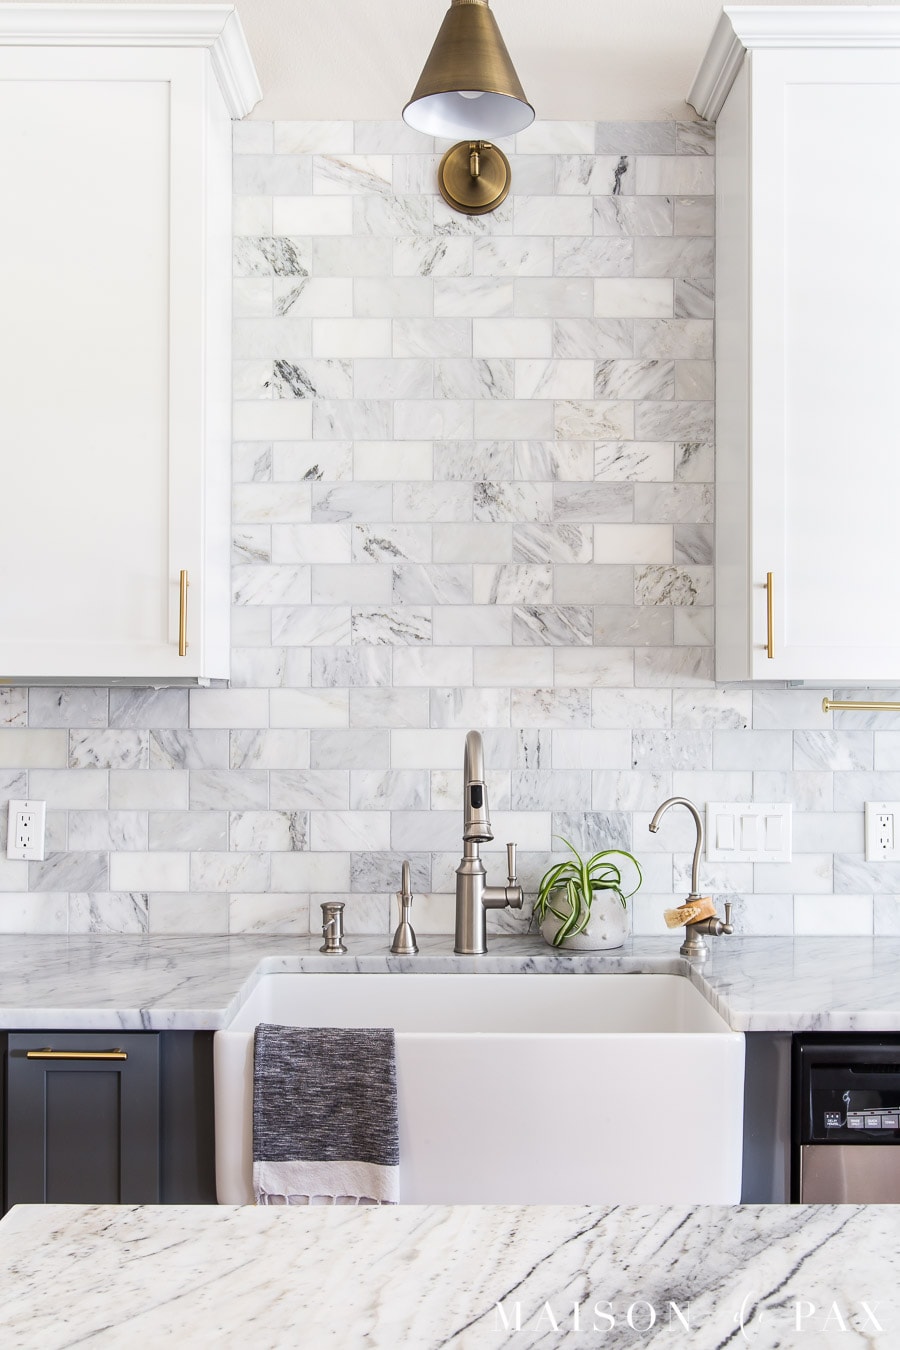
Natural Stone: Adding Authentic Texture and Warmth
My second backsplash area, behind the prep sink, called for something with more texture and organic appeal. I chose tumbled marble tiles that brought in beautiful natural variation and a slightly rustic edge. Each tile was unique, with subtle veining and color differences that made the wall feel like it had history and character. The tumbled finish gave the marble a soft, weathered look that perfectly complemented my reclaimed wood floating shelves.
Installing natural stone required more careful planning than I initially expected. I learned that sealing was absolutely crucial to prevent staining, especially in areas prone to splashing. I applied two coats of a high-quality sealer before grouting and plan to reseal annually to maintain protection. The investment in proper sealing has been worth it, as my marble still looks pristine after heavy daily use in my busy kitchen.
The color palette of my natural stone tiles ranges from creamy whites to soft grays with occasional hints of beige. This variation adds depth and prevents the backsplash from looking flat or monotonous. I love how the natural stone catches and reflects light differently throughout the day, creating an ever-changing backdrop that keeps my kitchen feeling dynamic and alive.
Shiplap Backsplash: Bringing Farmhouse Character Home
Behind my range, I installed white-painted shiplap that extends from counter to ceiling, creating a stunning focal point. The horizontal wood planks immediately transported my kitchen into true farmhouse territory. I used reclaimed pine boards that I lightly distressed and painted with semi-gloss white paint for easy cleaning. The texture and grain showing through the paint added the authentic character I was craving.
Installing shiplap as a backsplash presented some unique challenges, particularly around electrical outlets and switches. I had to carefully measure and cut each board to fit perfectly around these obstacles. The key was taking my time with measurements and using a fine-tooth saw for clean cuts. I also installed a clear protective coating over the paint in areas most likely to get splashed during cooking.
The visual impact of the shiplap backsplash exceeded all my expectations. It serves as a beautiful backdrop for my vintage-style range and draws the eye upward, making my kitchen feel taller and more spacious. The horizontal lines balance perfectly with the vertical lines of my upper cabinets, creating a harmonious flow that feels intentional and well-designed throughout the entire space.

Mixed Materials: Creating Visual Interest Through Contrast
One of my favorite design decisions was mixing different backsplash materials within the same kitchen. I used subway tiles in most areas but incorporated natural stone behind the prep sink and shiplap behind the range. This approach prevented monotony while maintaining cohesion through a consistent white and neutral color palette. Each material serves a different functional purpose while contributing to the overall aesthetic story.
The transition between materials required careful planning to ensure smooth visual flow. I used coordinating trim pieces and thoughtful placement to make each material change feel intentional rather than disjointed. At corners and edges, I paid special attention to creating clean lines that enhanced rather than interrupted the overall design. The key was ensuring each material complemented rather than competed with its neighbors.
Maintenance considerations played a significant role in my material placement decisions. I positioned the most durable and stain-resistant materials in the highest-use areas, while saving more delicate finishes for spots with lighter daily wear. This strategic approach has allowed me to enjoy the beauty of mixed materials without constantly worrying about damage or excessive upkeep in my busy family kitchen.

Color Palette: Keeping It Fresh While Staying True to Style
My modern farmhouse backsplash palette centers around whites and soft neutrals, but I’ve learned that subtle variations make all the difference. I chose warm whites rather than stark cool whites to maintain that cozy farmhouse feeling. The creamy undertones in my tiles complement my warm wood elements and brass hardware perfectly, creating a cohesive look that feels collected over time rather than purchased all at once.
Adding just touches of soft gray through grout lines and natural stone veining prevented my all-white backsplash from feeling sterile or cold. These gentle contrasts provide definition and visual interest without disrupting the serene, calming atmosphere I wanted to create. The subtle color variations also help hide minor imperfections and daily wear, making maintenance much more manageable for a busy family kitchen.
I resisted the urge to add bold accent colors to my backsplash, instead allowing colorful accessories, artwork, and fresh flowers to provide pops of personality. This neutral foundation gives me the flexibility to change seasonal decorations and small accessories without worrying about clashing with permanent backsplash elements. The timeless palette ensures my kitchen will look fresh and current for years to come.

Installation Tips: Lessons Learned from My DIY Journey
Taking on backsplash installation myself was both challenging and rewarding. I started with the subway tile areas since they were most forgiving for a beginner. My biggest lesson was the importance of proper surface preparation, spending extra time cleaning, priming, and ensuring walls were completely level before beginning tile work. This foundation work made the actual installation much smoother and helped prevent future problems.
Measuring and cutting tiles required patience and the right tools. I invested in a quality tile saw and took time to measure twice before cutting once. For outlet and switch cutouts, I used a tile nipper and files to achieve clean edges. The most challenging aspect was maintaining consistent spacing, but using tile spacers and frequently checking alignment with a level kept my rows straight and professional-looking.
Grouting proved trickier than anticipated, and I wish I had practiced the technique beforehand. Working in small sections and cleaning excess grout immediately was crucial for achieving clean lines. I learned to use a diagonal motion when applying grout and to clean tiles thoroughly before the grout fully sets. Taking breaks between sections allowed me to maintain quality and attention to detail throughout the entire project.
How do I choose between subway tiles and natural stone for my modern farmhouse backsplash?
Consider your budget, maintenance preferences, and desired texture level. Subway tiles offer affordability, easy cleaning, and timeless appeal, while natural stone provides unique character and texture but requires more maintenance and sealing. I chose subway tiles for most areas and natural stone as an accent for the perfect balance of practicality and visual interest.
What’s the best grout color for a white farmhouse backsplash?
I recommend soft gray grout over bright white for most farmhouse kitchens. Gray grout provides subtle definition between tiles while hiding dirt and wear better than white. It prevents the stark, clinical look that bright white grout can create while maintaining the clean, fresh aesthetic that’s essential to the modern farmhouse style.

Can I install a farmhouse backsplash myself, or should I hire professionals?
Basic subway tile installation is definitely DIY-friendly if you have patience and basic tools. I successfully installed mine over several weekends. However, complex patterns, natural stone, or areas requiring extensive cutting around fixtures might benefit from professional installation. Start with a small, less visible area to test your skills before tackling prominent walls.
How do I maintain different backsplash materials in my farmhouse kitchen?
Daily maintenance involves wiping down surfaces with mild soap and water. Natural stone requires annual sealing and gentle, pH-neutral cleaners. Painted surfaces like shiplap need occasional touch-ups but clean easily with standard kitchen cleaners. Avoid abrasive scrubbers on all materials, and address stains immediately to prevent permanent damage.

What’s the most cost-effective way to achieve the modern farmhouse backsplash look?
Subway tiles offer the best value while delivering authentic farmhouse style. I saved money by doing the installation myself and using standard 3×6 tiles in creative patterns rather than expensive specialty tiles. Adding texture through grout color choice and mixing in small amounts of premium materials as accents maximizes impact while controlling costs effectively.
How high should my farmhouse backsplash extend up the wall?
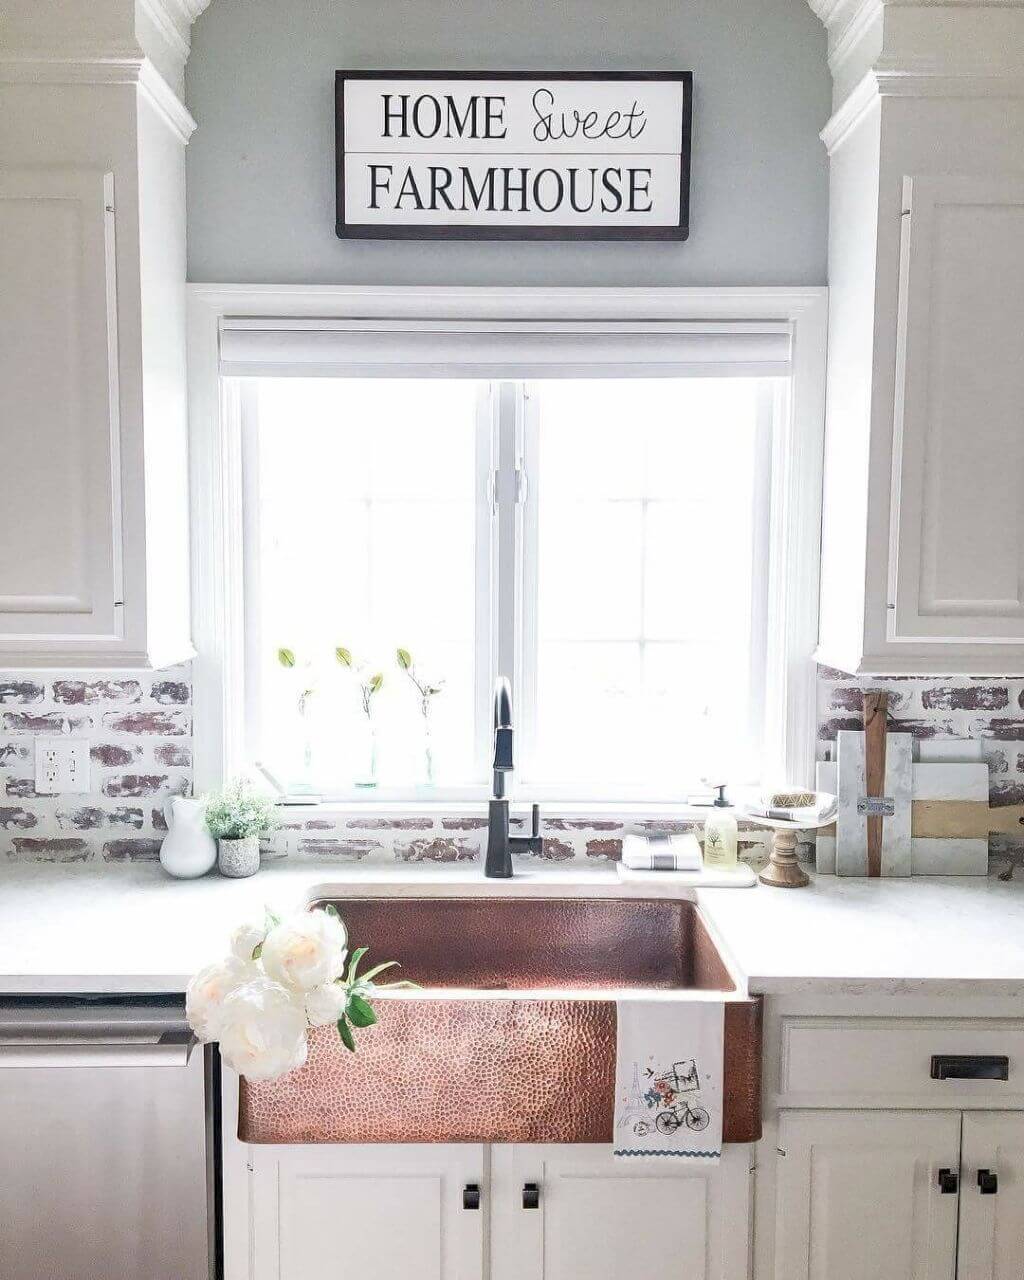
Standard height is 18-20 inches above countertops, but I extended mine to the bottom of upper cabinets for better protection and visual impact. Behind my range, the shiplap goes full height to the ceiling, creating a dramatic focal point. Consider your ceiling height, cabinet placement, and personal preference when determining the best proportions for your specific kitchen layout.

Best Farmhouse Kitchen Backsplash Ideas

Gorgeous Modern Farmhouse and Cottage Kitchen Tile Ideas
Modern European Meets Farmhouse Dream Kitchen

Best Farmhouse Kitchen Backsplash Ideas and Designs
Farmhouse Kitchen Backsplash Ideas to Try
Related Posts:
- French Kitchen Backsplash Ideas
- Cottage Kitchen Backsplash
- Country Kitchen Backsplash
- Retro Kitchen Backsplash
- Rustic Wood Kitchen Backsplash
- Vintage Kitchen Backsplash Ideas
- Modern Farmhouse Kitchen Backsplash
- Mid Century Modern Kitchen Backsplash Tile
- Turquoise Kitchen Backsplash Tile
- Mediterranean Tile Kitchen Backsplash