A limestone kitchen backsplash adds organic texture and timeless beauty to your culinary space. I’ve installed a lot of limestone backsplashes, and their gentle, earthy appeal always makes kitchens seem better. Unlike homogeneous tiles, each limestone piece has distinct veining and small color variations, adding depth and character. This natural stone works nicely in rustic farmhouse kitchens and contemporary minimalist designs. While limestone requires extra attention, its warmth and sophistication make it a worthwhile choice. Let’s look at how to use this stunning material in your kitchen.
How to Choose the Right Limestone Style
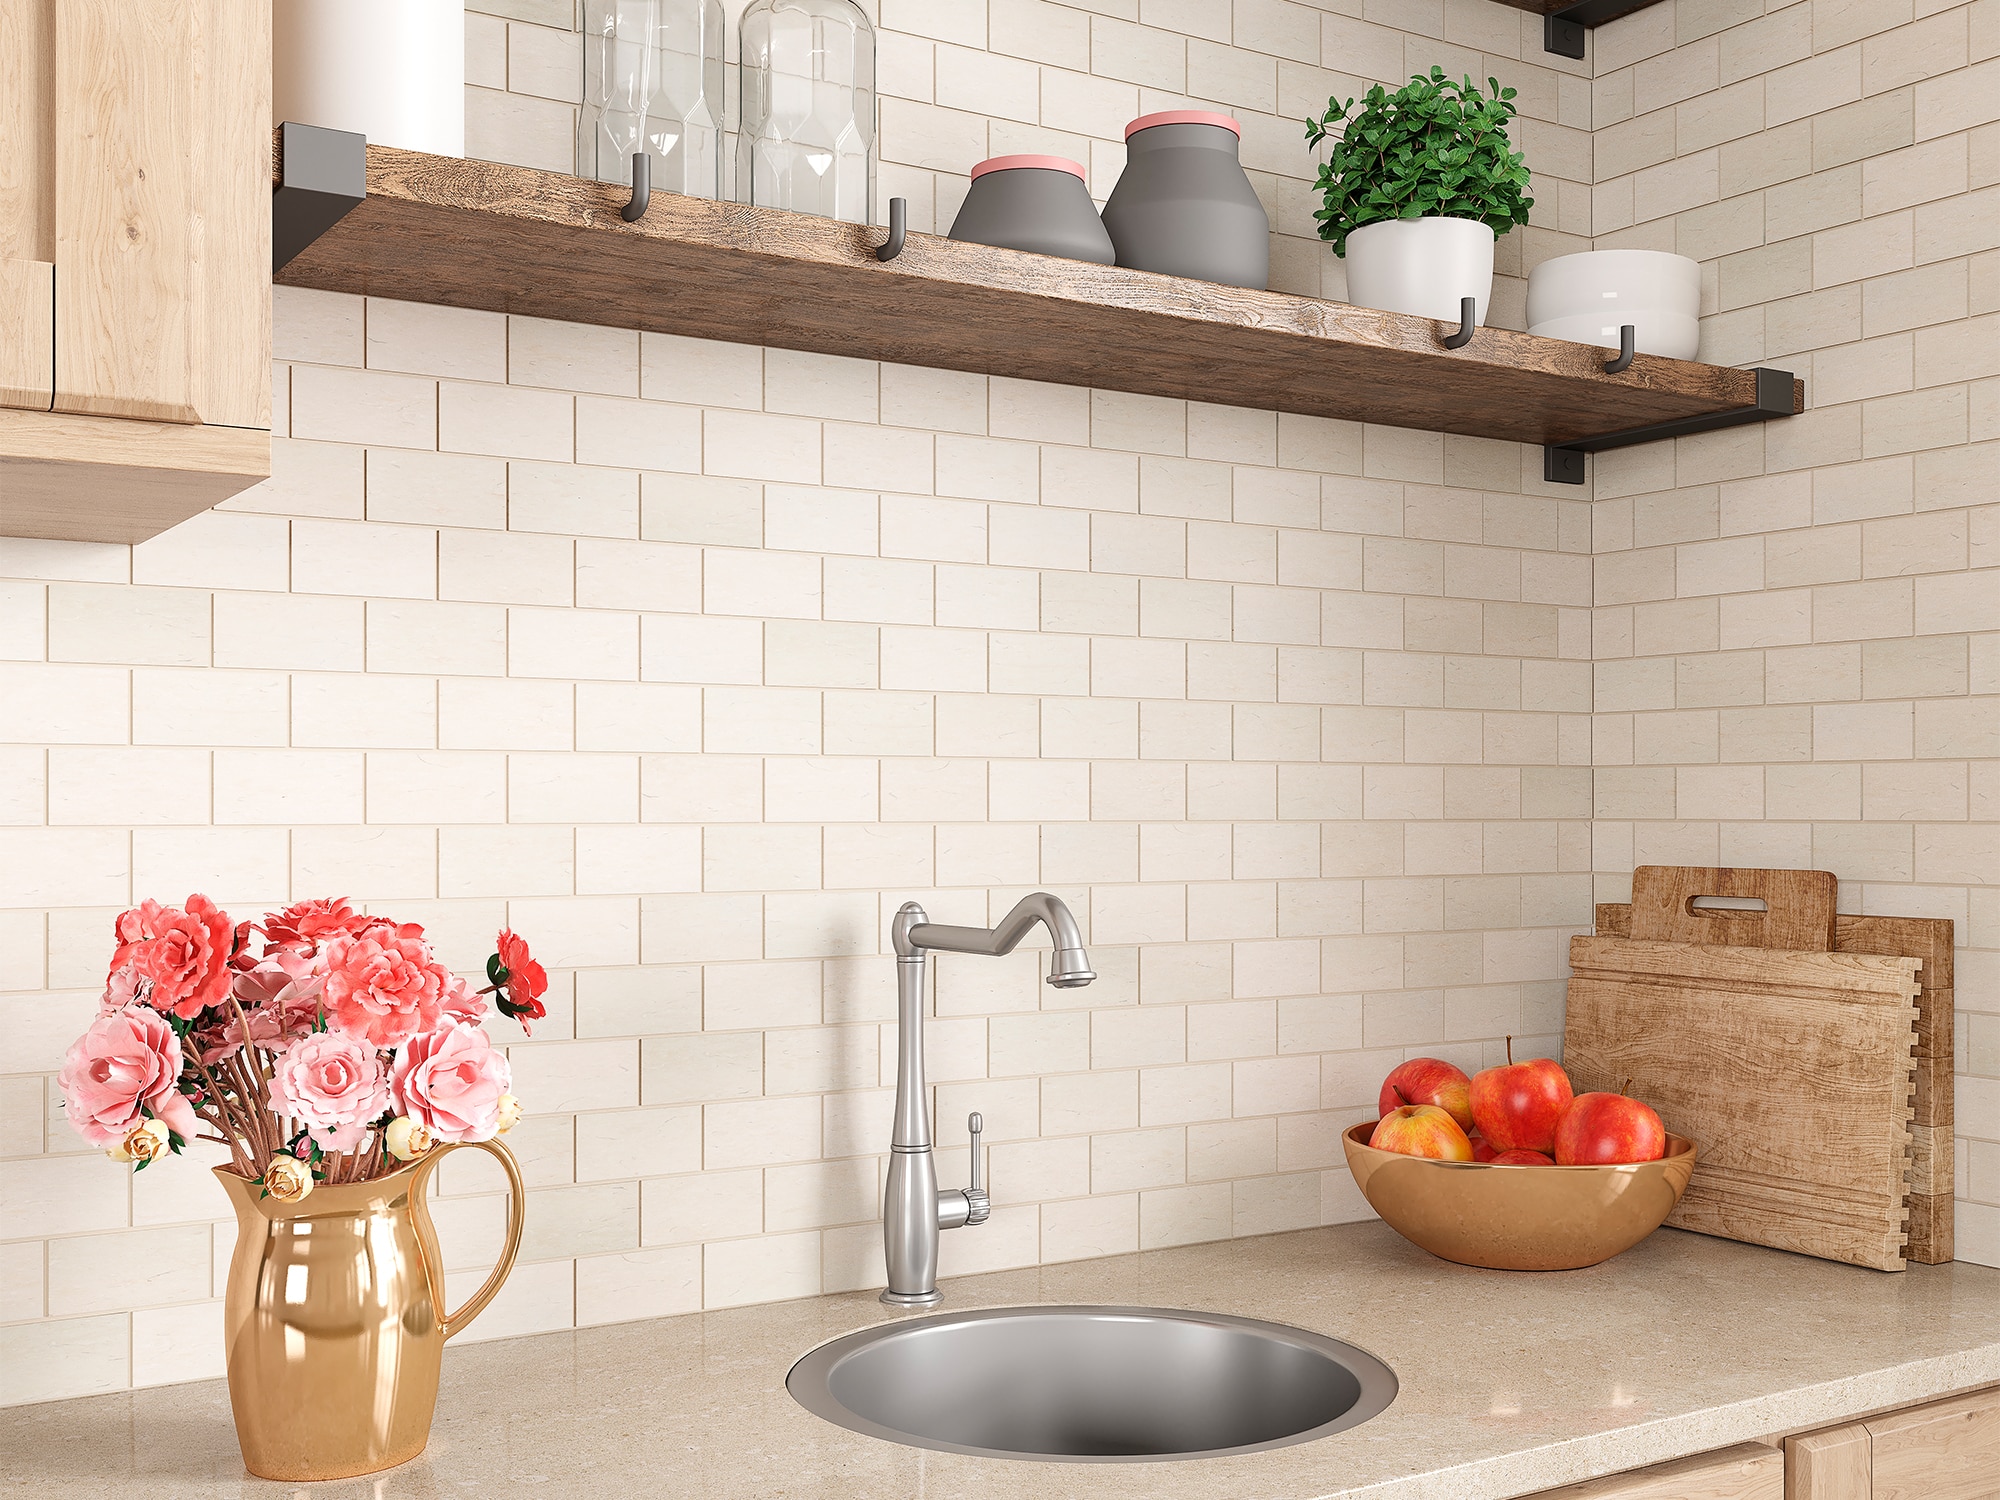
The range of limestone finishes enables customisation to any design concept. Honed limestone has a smooth, matte surface that is gentle to the touch, making it excellent for classic kitchens. Tumbled limestone has gently rounded edges and a worn appearance that complements rustic or Mediterranean themes. For modern interiors, I recommend polished limestone, which has a delicate gloss and reflects light brilliantly. The stone’s natural colors range from creamy whites to warm beiges and gentle grays, making it compatible with a variety of countertops and cabinets.
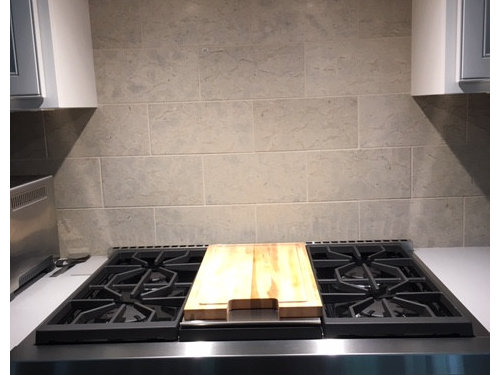
Consider the size and design of your limestone tiles. Large-format tiles (12×24 inches or more) reduce grout lines for a cleaner appearance. Mosaic sheets with small limestone squares add texture and movement. Some of my favorite works combine multiple sizes in a random sequence for an organic look. Full tile samples should always be viewed in your actual kitchen lighting, as the appearance of limestone varies drastically under different settings. The veining and fossils seen in the stone should enhance your overall design plan.
Sealing is essential for limestone backsplashes. Unlike certain natural stones, limestone is relatively porous and easily stained. I specify an impregnating sealer prior to installation and reapply it once a year. For heavy-duty kitchens, select a limestone with lesser porosity, such as Jerusalem Gold or French Limestone. These kinds can endure cooking conditions better than softer choices. The correct limestone selection strikes a balance between aesthetics and functional durability.
Installation Considerations for Limestone
Proper substrate preparation leads to long-lasting benefits. Before tiling, I cover the wall surface with cement backer board to create a strong, moisture-resistant base. The substrate must be precisely flat, as limestone tiles show even minor flaws. I use a leveling method on large-format tiles to eliminate lippage and assure equal surfaces. To handle the weight of limestone, thin-set mortar should be made to the appropriate consistency, which is slightly thicker than for ceramic tiles.
Grout selection has a significant impact on the finished appearance. I prefer unsanded grout for honed limestone with small joints (1/8 inch or less). Sanded grout is better suited for tumbling stone with broader joints. The grout color should complement the limestone; I usually select a shade that is somewhat darker than the stone’s base color. Epoxy grout is highly stain resistant, although it must be applied with care on porous limestone surfaces. Always seal the grout after it has cured to prevent moisture infiltration.
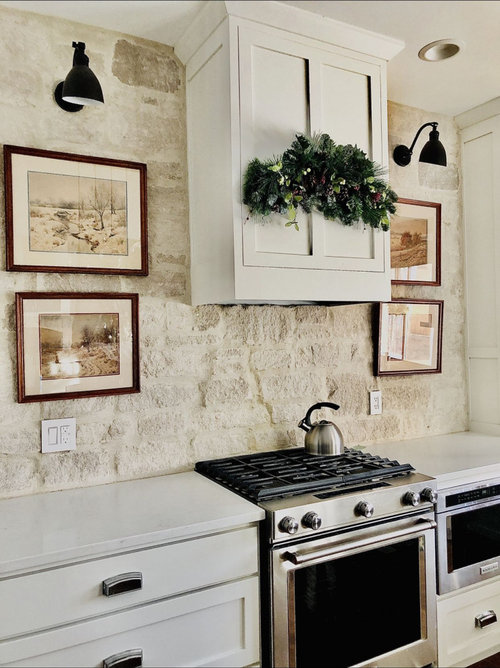
Edge details finish the installation. I use matching limestone pencil tiles or metal trim pieces to achieve neat edges. Outside corners require mitered cuts or specific edge tiles. To get a cohesive look behind the range, I stretch the backsplash to the ceiling with the same limestone. After the installation is complete, apply a quality sealant to protect both the stone and the grout.

How to Pair Limestone with Other Kitchen Elements
Countertop coordination promotes harmony. I frequently use pale marble backsplashes with black countertops to create a stunning contrast. Butcher block counters suit limestone’s warmth perfectly. When using limestone that extends up from a limestone countertop, I bookmatch the veining to ensure a consistent flow. The idea is to ensure that the backsplash does not compete with the busy countertop patterns.
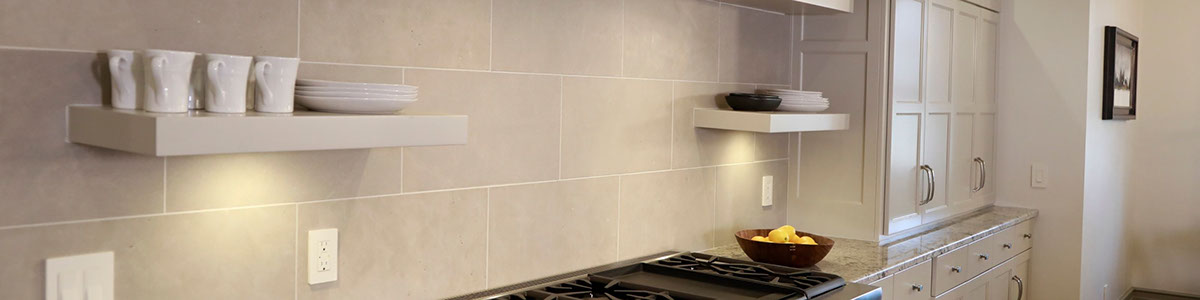
Cabinet colors should highlight the limestone’s natural tones. White cabinets highlight the stone’s grain, whilst grey cabinets complement cooler limestone variants. I sometimes use a subtle hue from the limestone veining for cabinet finishes. Open shelf in natural wood breaks up limestone expanses and displays elegant dishware. The materials used should be intentional and balanced.
Hardware and fixtures should enhance the stone’s character. Brushed brass hardware warms up beige limestone, while iron finishes improve gray variants. When picking metal treatments, I consider the limestone’s undertones; certain stones have veining that looks great with polished nickel. Consistent metal finishes across the area help to establish coherence.

How to Maintain Your Limestone Backsplash
Daily maintenance maintains the limestone’s beauty. I propose wiping away cooking splatters with a gentle, wet towel. For grease buildup, a pH-neutral stone cleanser is ideal. To avoid etching, immediately clean up any acidic spills like as citrus or vinegar. Avoid using abrasive pads or harsh chemicals that may damage the stone’s surface.
Annual sealing is required for limestone backsplashes. I use a high-quality impregnating sealer that does not alter the stone’s appearance. Before resealing, I carefully clean and allow the surface to dry completely. Some sealers require many coatings to provide adequate protection. When correctly applied, the sealer should cause water to bead on the surface.
Stains and etching should be addressed right away. Poultices help remove oil-based stains from permeable stone. For acidic etching, I use specific polishing agents made for limestone. Serious damage may necessitate professional refinishing. With proper care, limestone produces a nice patina rather than displaying wear.
Cost-effective Limestone Alternatives
Limestone-look porcelain tiles provide a comparable beauty while being easier to maintain. Modern digital printing produces stunningly lifelike patterns. I recommend rectified porcelain tiles with tight grout joints that resemble natural stone. These tiles are stain and etch-resistant, making them excellent for busy kitchens. The best versions contain subtle texture variances that provide realism.
Limestone veneers offer economic savings over full-thickness stone. These tiny chunks of actual limestone adhere to conventional backer boards. While not as durable as full stone, they have the same visual appeal at a reduced cost and weight. I frequently use veneers for DIY projects in which handling entire stone tiles would be difficult.
The strategic use of limestone decreases expenses. I occasionally place limestone only behind essential sections, such as the range or sink, supplemented by less expensive materials elsewhere. A limestone “rug” design framed by simpler tiles draws attention without breaking the bank. Unique backsplash designs can be created using salvaged limestone fragments.

How do I protect the limestone backsplash behind my stove?
I recommend installing a larger limestone slab or tile behind the cooking area to make cleaning easier. To add added protection, apply a heat-resistant sealant. Install a correctly sized range hood that will catch grease before it hits the stone. For everyday maintenance, clean splatters with a moist towel right away. Avoid using abrasive cleansers, which might damage the limestone surface. Consider utilizing a matching limestone slab instead of tiles in this location to reduce grout lines where grease might gather.
Can limestone backsplashes be placed over existing tile?
Yes, but with good planning. The current tile must be well attached, clean, and roughened before bonding. I use a layer of cement backer board or a high-quality thin-set mortar manufactured specifically for overlay applications. Limestone veneer panels work especially nicely in this application. However, additional thickness may pose complications with outlet boxes and cabinet clearances, so consider these first. In most circumstances, removing the old tile produces superior long-term outcomes.

Are limestone backsplashes appropriate for tiny kitchens?
Yes, when designed thoughtfully. To reduce visual clutter in compact spaces, I utilize larger-format limestone tiles. Light-colored limestone reflects light, making kitchens appear larger. In galley kitchens, I frequently run the same limestone from counter to ceiling to create a sense of height. Simply avoid busy designs that can overwhelm the space. Mirroring stones on opposite walls can increase the sense of spaciousness.
How do I select a grout color for my limestone backsplash?
For definition, I often use grout that is one shade deeper than the prevailing color of the limestone. To achieve a smooth appearance, match the grout to the stone’s lightest tone. I combine small grout samples from a wide range of limestone to create the ideal neutral bridge. Epoxy grout provides color consistency and stain resistance. Always test grout colors on real limestone pieces, as dried grout appears lighter than in the package. For tumbled limestone, I recommend sanded grout, which thoroughly fills uneven areas.
Can I install the limestone backsplash myself?
With the right tools and preparation, tile-form limestone backsplashes are easy to install yourself. I propose starting with smaller tiles or mosaics instead than massive slabs. To avoid stains, always seal the limestone before grouting. Use a high-quality thin-set mortar and carefully follow the manufacturer’s directions. Hiring a professional assures proper installation and reduces costly blunders when dealing with intricate designs or valuable stone. The weight of limestone necessitates tight mounting, particularly for larger tiles.
How does natural limestone relate to porcelain-like materials?
Natural limestone has unique variances and depth that artificial products cannot entirely imitate. Porcelain tiles, on the other hand, are more consistent, durable, and require less upkeep. I recommend porcelain for high-traffic kitchens or low-budget designs. Natural limestone develops a patina over time, adding character, whereas porcelain retains its new appearance. Weight is another concern; huge limestone tiles may necessitate additional wall reinforcing, which porcelain avoids. When chosen correctly, both approaches can provide stunning backsplashes.
Stone Backsplash Ideas That Will Work for Every Kind of Kitchen

Limestone Backsplash Definition, Usage, Design Ideas and Tips

Limestone « Interceramic
Related Posts:
- French Kitchen Backsplash Ideas
- Cottage Kitchen Backsplash
- Country Kitchen Backsplash
- Retro Kitchen Backsplash
- Rustic Wood Kitchen Backsplash
- Vintage Kitchen Backsplash Ideas
- Modern Farmhouse Kitchen Backsplash
- Mid Century Modern Kitchen Backsplash Tile
- Turquoise Kitchen Backsplash Tile
- Mediterranean Tile Kitchen Backsplash