Installing kitchen floor tiles requires careful planning and proper technique to achieve professional-looking, long-lasting results. Whether you’re working with ceramic, porcelain, or natural stone, the right preparation and installation methods make all the difference. From subfloor preparation to grouting, each step impacts the final outcome of your kitchen flooring project. Below we outline six essential aspects of laying kitchen floor tiles to help you create a beautiful, durable surface.
Preparing the Subfloor
A stable, level subfloor is crucial for successful tile installation. Start by removing existing flooring and checking for structural issues like squeaks or uneven areas. Concrete subfloors must be clean and free of cracks, while wood subfloors require cement backer board or an uncoupling membrane to prevent movement from affecting tiles.
Use a long level to identify high and low spots across the floor. Self-leveling compound can correct minor imperfections, while more severe unevenness may require plywood underlayment. The subfloor must be completely flat—industry standards allow no more than 1/8″ variation over 10 feet. Proper preparation prevents cracked tiles and lippage (uneven edges) after installation.
Ensure the subfloor is clean, dry, and free of debris before beginning. For wood subfloors, screw down any loose areas and apply a suitable primer if using self-leveling products. Taking time with preparation creates the ideal foundation for your new tile floor.
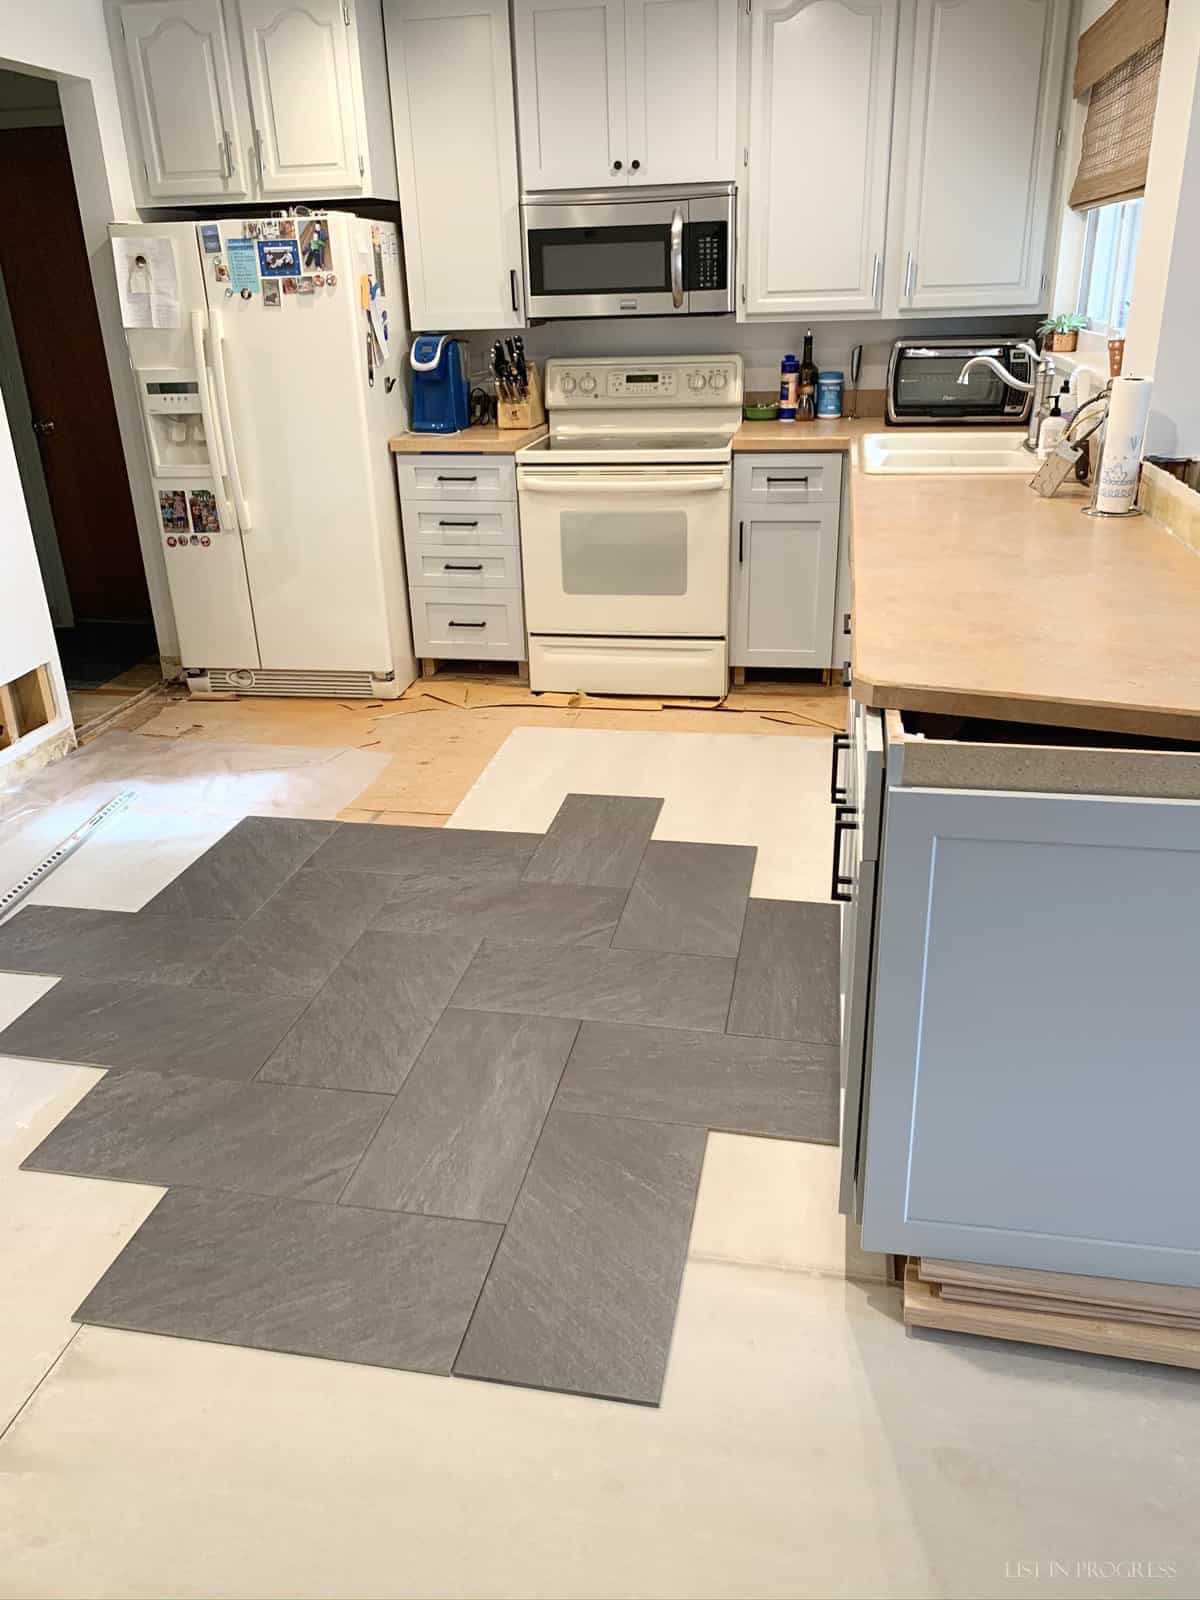
Choosing the Right Tile Layout
Plan your tile pattern before mixing any thinset mortar. Dry-lay tiles without adhesive to visualize the layout and make necessary adjustments. Start from the center of the room and work outward for the most balanced appearance, using chalk lines to mark reference points. Consider how the pattern will interact with cabinets, appliances, and doorways.
For rectangular tiles, decide between straight (grid) or diagonal layouts—the latter creates visual interest but requires more cuts. Mix tiles from multiple boxes to distribute any color variations evenly. Leave appropriate expansion gaps (usually 1/8″ to 1/4″) along walls and fixed objects to allow for natural movement.
Account for cut tiles at the edges by adjusting your starting point if needed. It’s better to have equally sized cut tiles on opposite sides rather than one very small piece. Planning the layout carefully minimizes awkward cuts and creates a professional-looking installation.
Mixing and Applying Thinset Mortar
Select the appropriate thinset mortar for your tile type and subfloor. Modified thinset works for most ceramic and porcelain tiles, while natural stone often requires specific mortars. Mix to a peanut butter-like consistency—too thin and it won’t support tiles; too thick and it won’t adhere properly.
Use the correct notched trowel size for your tiles (typically 1/4″ x 3/8″ for standard floor tiles). Hold the trowel at a 45-degree angle to create uniform ridges in the mortar. Only spread enough mortar for a few tiles at a time to prevent skinning over before placement.
Apply mortar to both the subfloor and tile back (back-buttering) for large format tiles or problematic installations. This technique ensures complete coverage and prevents hollow spots that could lead to cracked tiles later. Proper mortar application creates a strong, lasting bond between tile and subfloor.
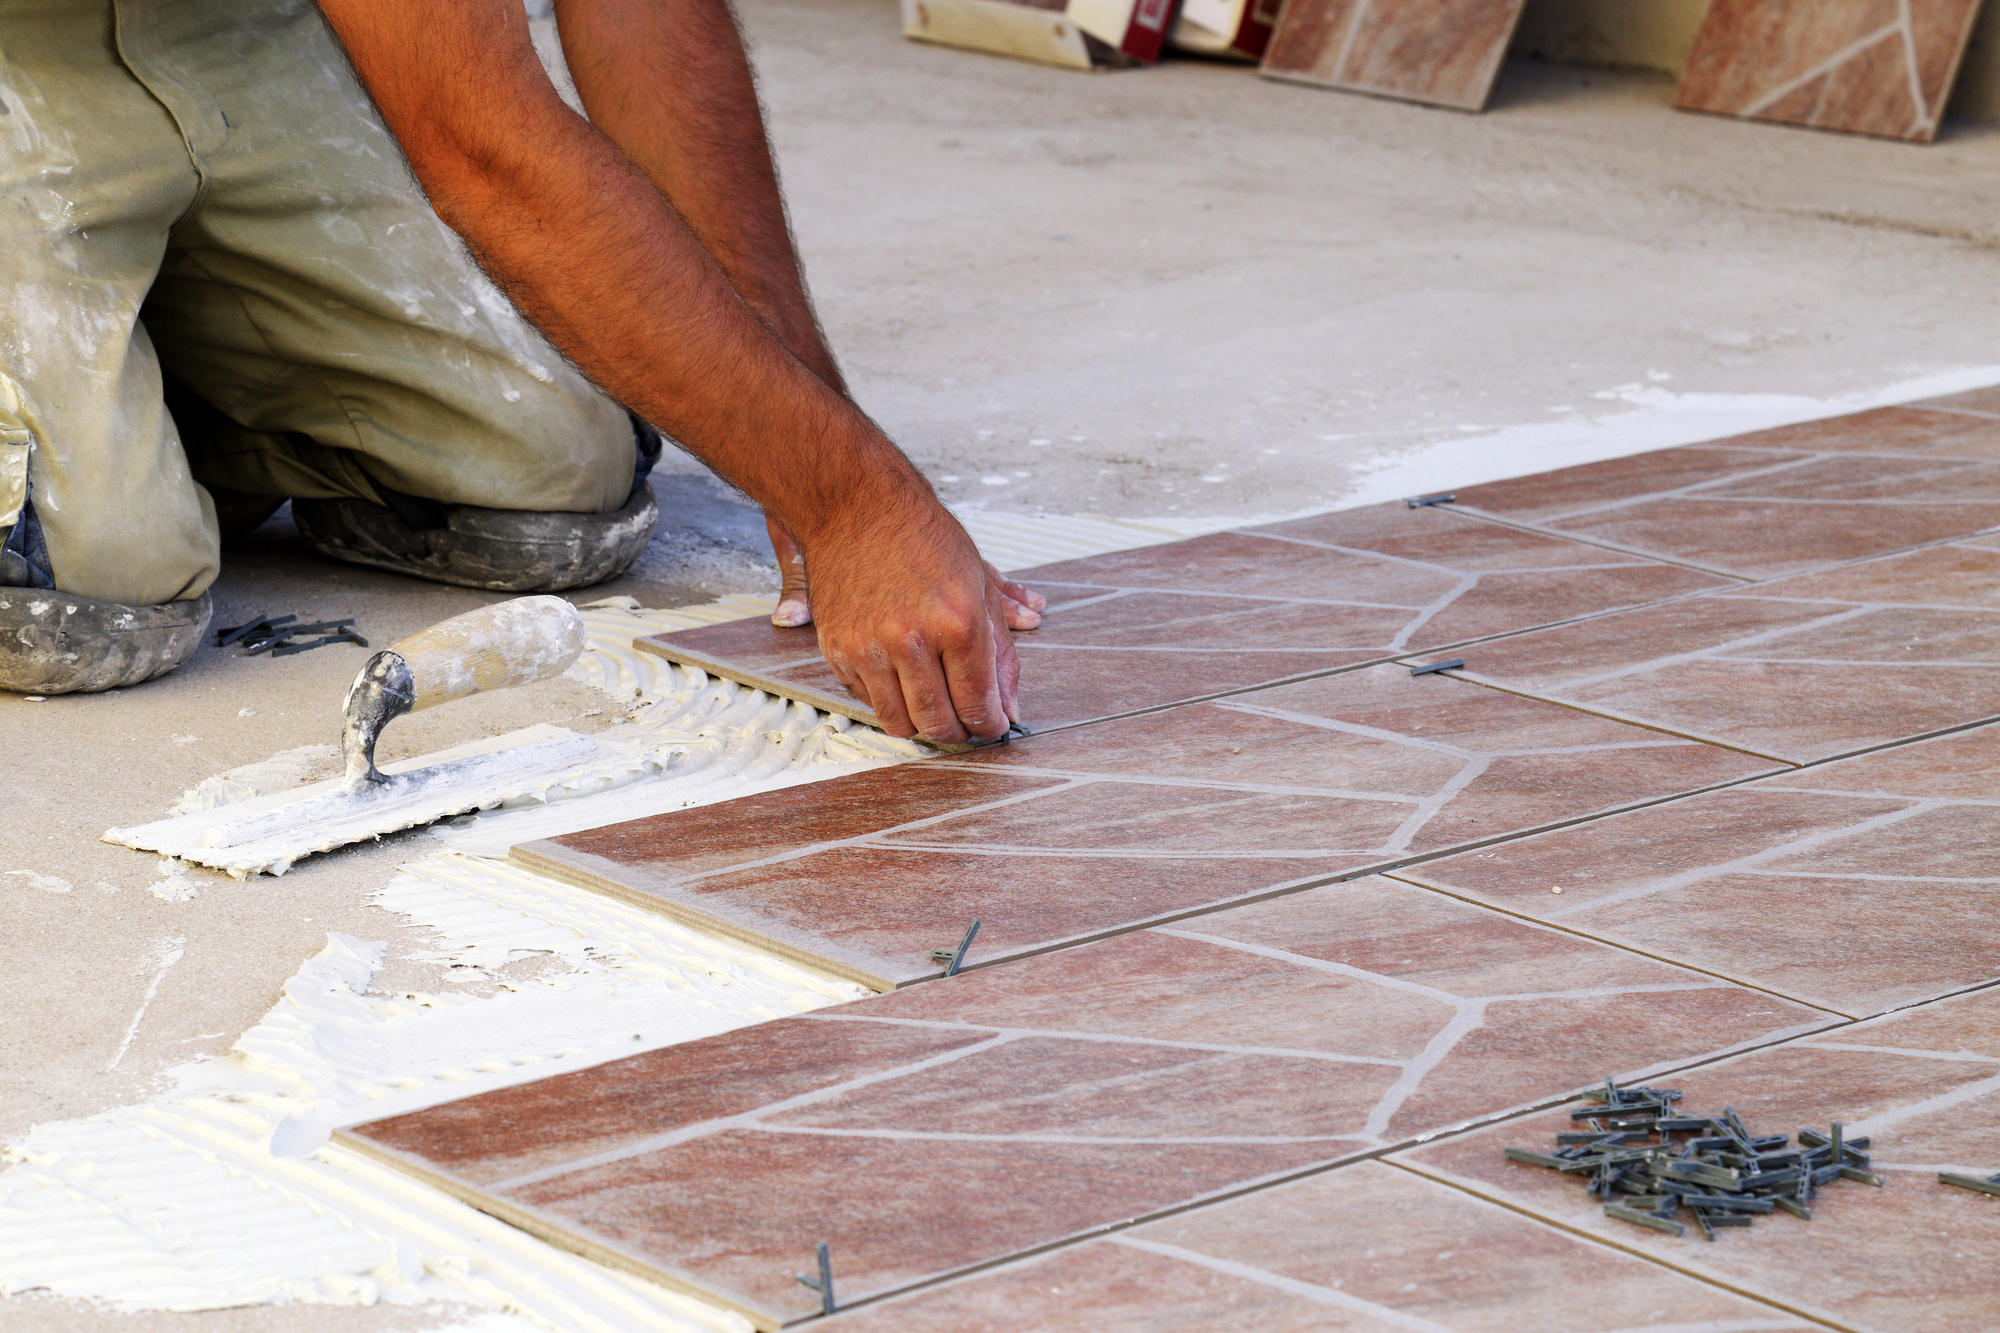
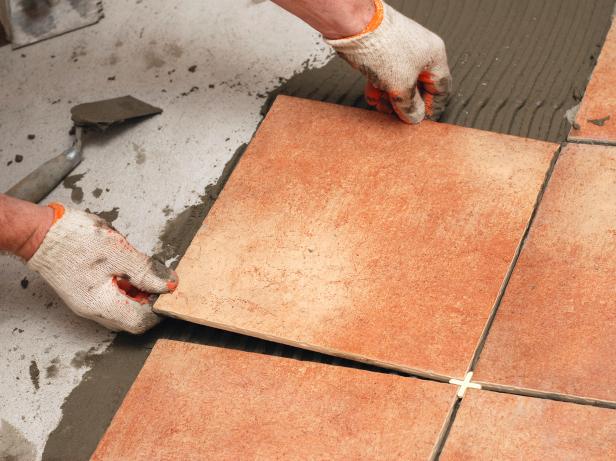
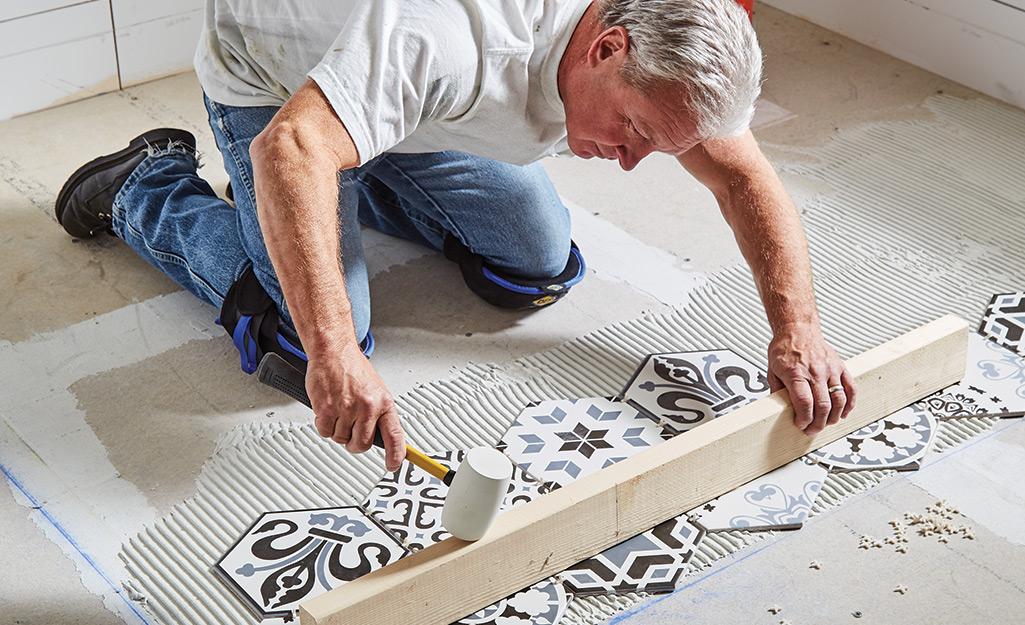
Setting and Leveling Tiles
Press tiles firmly into the mortar with a slight twisting motion to ensure good contact. Use tile spacers to maintain consistent grout lines—plastic spacers come in various sizes depending on your desired look. Check frequently with a level, adjusting tiles as needed to maintain a flat surface.
For large-format tiles, use a leveling system with clips and wedges to prevent lippage. These systems help align edges perfectly across multiple tiles. Work in small sections, being careful not to walk on freshly laid tiles until the mortar has set (usually 24 hours).
Cut tiles as needed using a wet saw for straight cuts or nippers for small curved adjustments. Always measure twice and cut once—account for grout lines when marking cutting lines. Keep cut edges placed toward walls where they’ll be less visible under baseboards.
Grouting and Sealing
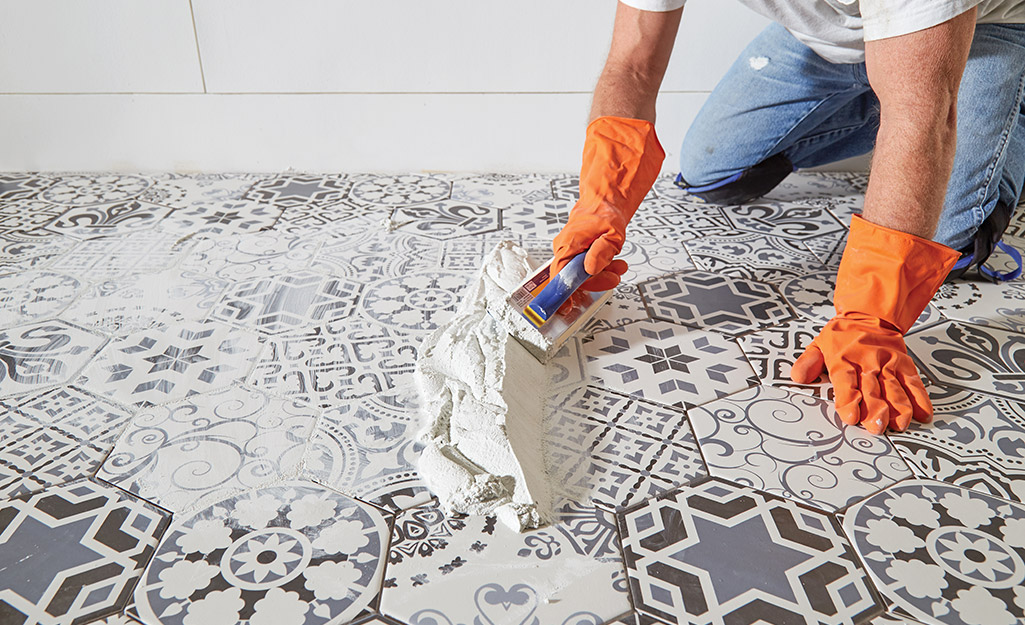
Wait at least 24 hours after setting tiles before grouting. Remove all spacers and clean out any mortar from joints first. Choose sanded grout for joints wider than 1/8″, unsanded for narrower spaces. Mix grout to a thick paste consistency that holds its shape when squeezed.
Push grout into joints at a 45-degree angle using a rubber float, working diagonally across tiles to avoid pulling grout from joints. Remove excess grout with a damp sponge before it fully hardens, rinsing frequently. After initial haze forms, polish tiles with a dry cloth.
Once grout has fully cured (typically 72 hours), apply a quality sealer to protect against stains, especially with natural stone or porous tiles. Reapply sealer annually in high-traffic kitchens to maintain protection. Proper sealing extends the life and beauty of your tiled floor.
Finishing Touches and Maintenance
Install matching silicone caulk where tile meets countertops or other fixed objects, as these areas need flexibility that grout can’t provide. Choose a color that matches your grout for a seamless look. Allow everything to cure completely before moving appliances back into place.
For the first week after installation, avoid heavy impacts or dragging appliances across the new floor. Use felt pads under furniture legs to prevent scratching. Regular sweeping and damp mopping with pH-neutral cleaners will keep tiles looking their best.
Address any cracked tiles or grout issues promptly to prevent water damage to the subfloor. With proper installation and care, your kitchen tile floor should provide decades of service while maintaining its attractive appearance. The effort put into proper techniques pays off in long-term durability and satisfaction.
Laying kitchen floor tiles requires patience and attention to detail, but the results are worth the effort. By following these steps carefully, even first-time tilers can achieve professional-quality results. A well-installed tile floor adds beauty, value, and easy maintenance to your kitchen for years to come.
How to Install a Tile Floor
Step by Step How to Install Tile for the First Time

How to lay vinyl floor tiles u0026 revamp a tired kitchen Dove Cottage
![]()
Best Kitchen Floor Tile Ideas – Flooring Designs

Related Posts: