I’ve designed dozens of kitchen layouts over the years, and the island peninsula remains one of my favorite solutions for both functionality and style. Unlike a traditional island, a peninsula connects to a wall or cabinetry on one end, offering unique traffic flow and workspace advantages. Whether renovating or building new, a well-planned peninsula can provide extra seating, storage, and prep space while defining your kitchen area. Through trial and error, I’ve discovered what makes these hybrid features work beautifully in different kitchen configurations. Here are my best ideas for incorporating a peninsula that elevates your kitchen’s form and function.
Space-Saving Peninsula Designs
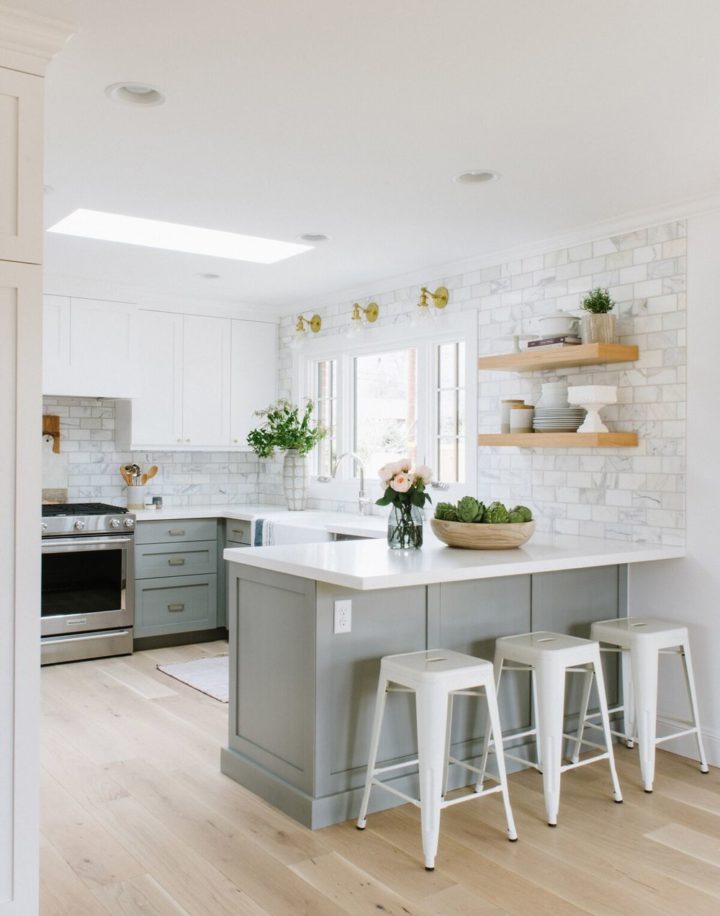
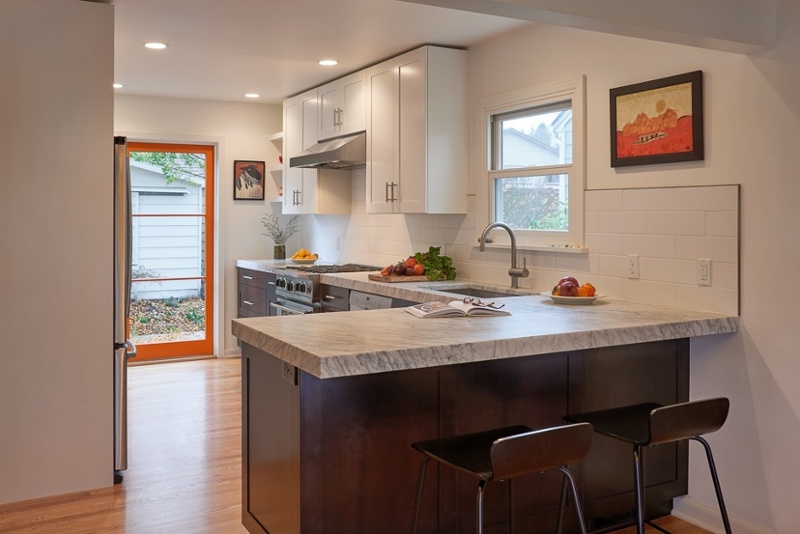
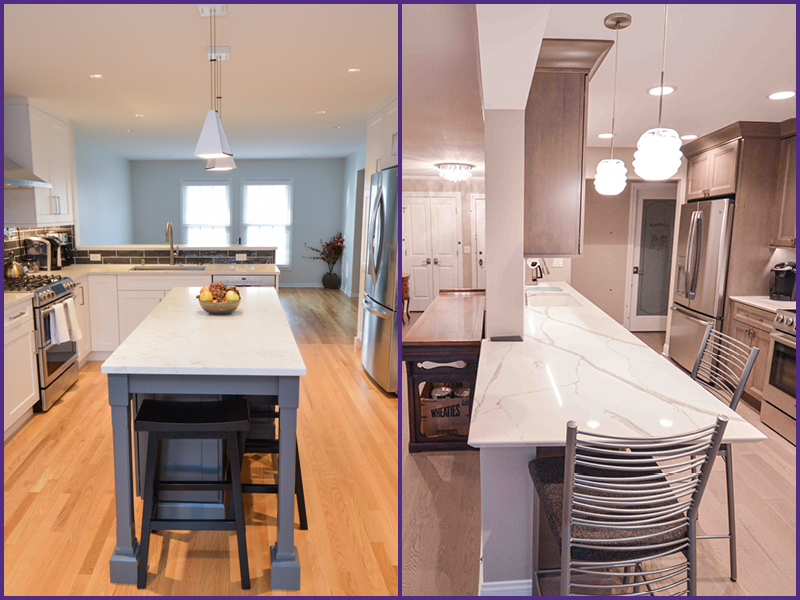
Small kitchens benefit tremendously from peninsula layouts. I recently transformed a cramped galley kitchen by replacing a wall with a 30-inch deep peninsula that added both workspace and casual dining. The key is maintaining at least 42 inches of clearance around all sides—I use painter’s tape to map out different sizes on the floor before committing. For narrow spaces, I sometimes design peninsulas as shallow as 24 inches deep, perfect for breakfast bars with stool seating underneath. The connected end makes these feel more substantial than a freestanding island would in tight quarters.
Clever storage solutions maximize every inch of a small peninsula. I often incorporate shallow cabinets (12-15 inches deep) on the kitchen side and open shelving on the opposite side for display. Narrow pull-out cabinets work great for spice storage near the cooking area. One of my favorite space-savers is a peninsula with built-in appliances—I’ve installed slim dishwashers, microwave drawers, and even small wine refrigerators to free up other kitchen real estate. Just be sure to allow proper ventilation space for any appliances you build in.
Visual tricks can make a modest peninsula feel more substantial. I sometimes extend the countertop 6-8 inches beyond the base cabinets at the open end to create the illusion of more surface area. Matching the peninsula counter to the perimeter counters creates continuity that expands the space visually. For the ultimate space-saving trick, I’ve designed peninsulas with flip-up extensions that provide extra workspace when needed but tuck away neatly against the cabinetry when not in use.
Peninsula Shapes That Enhance Workflow
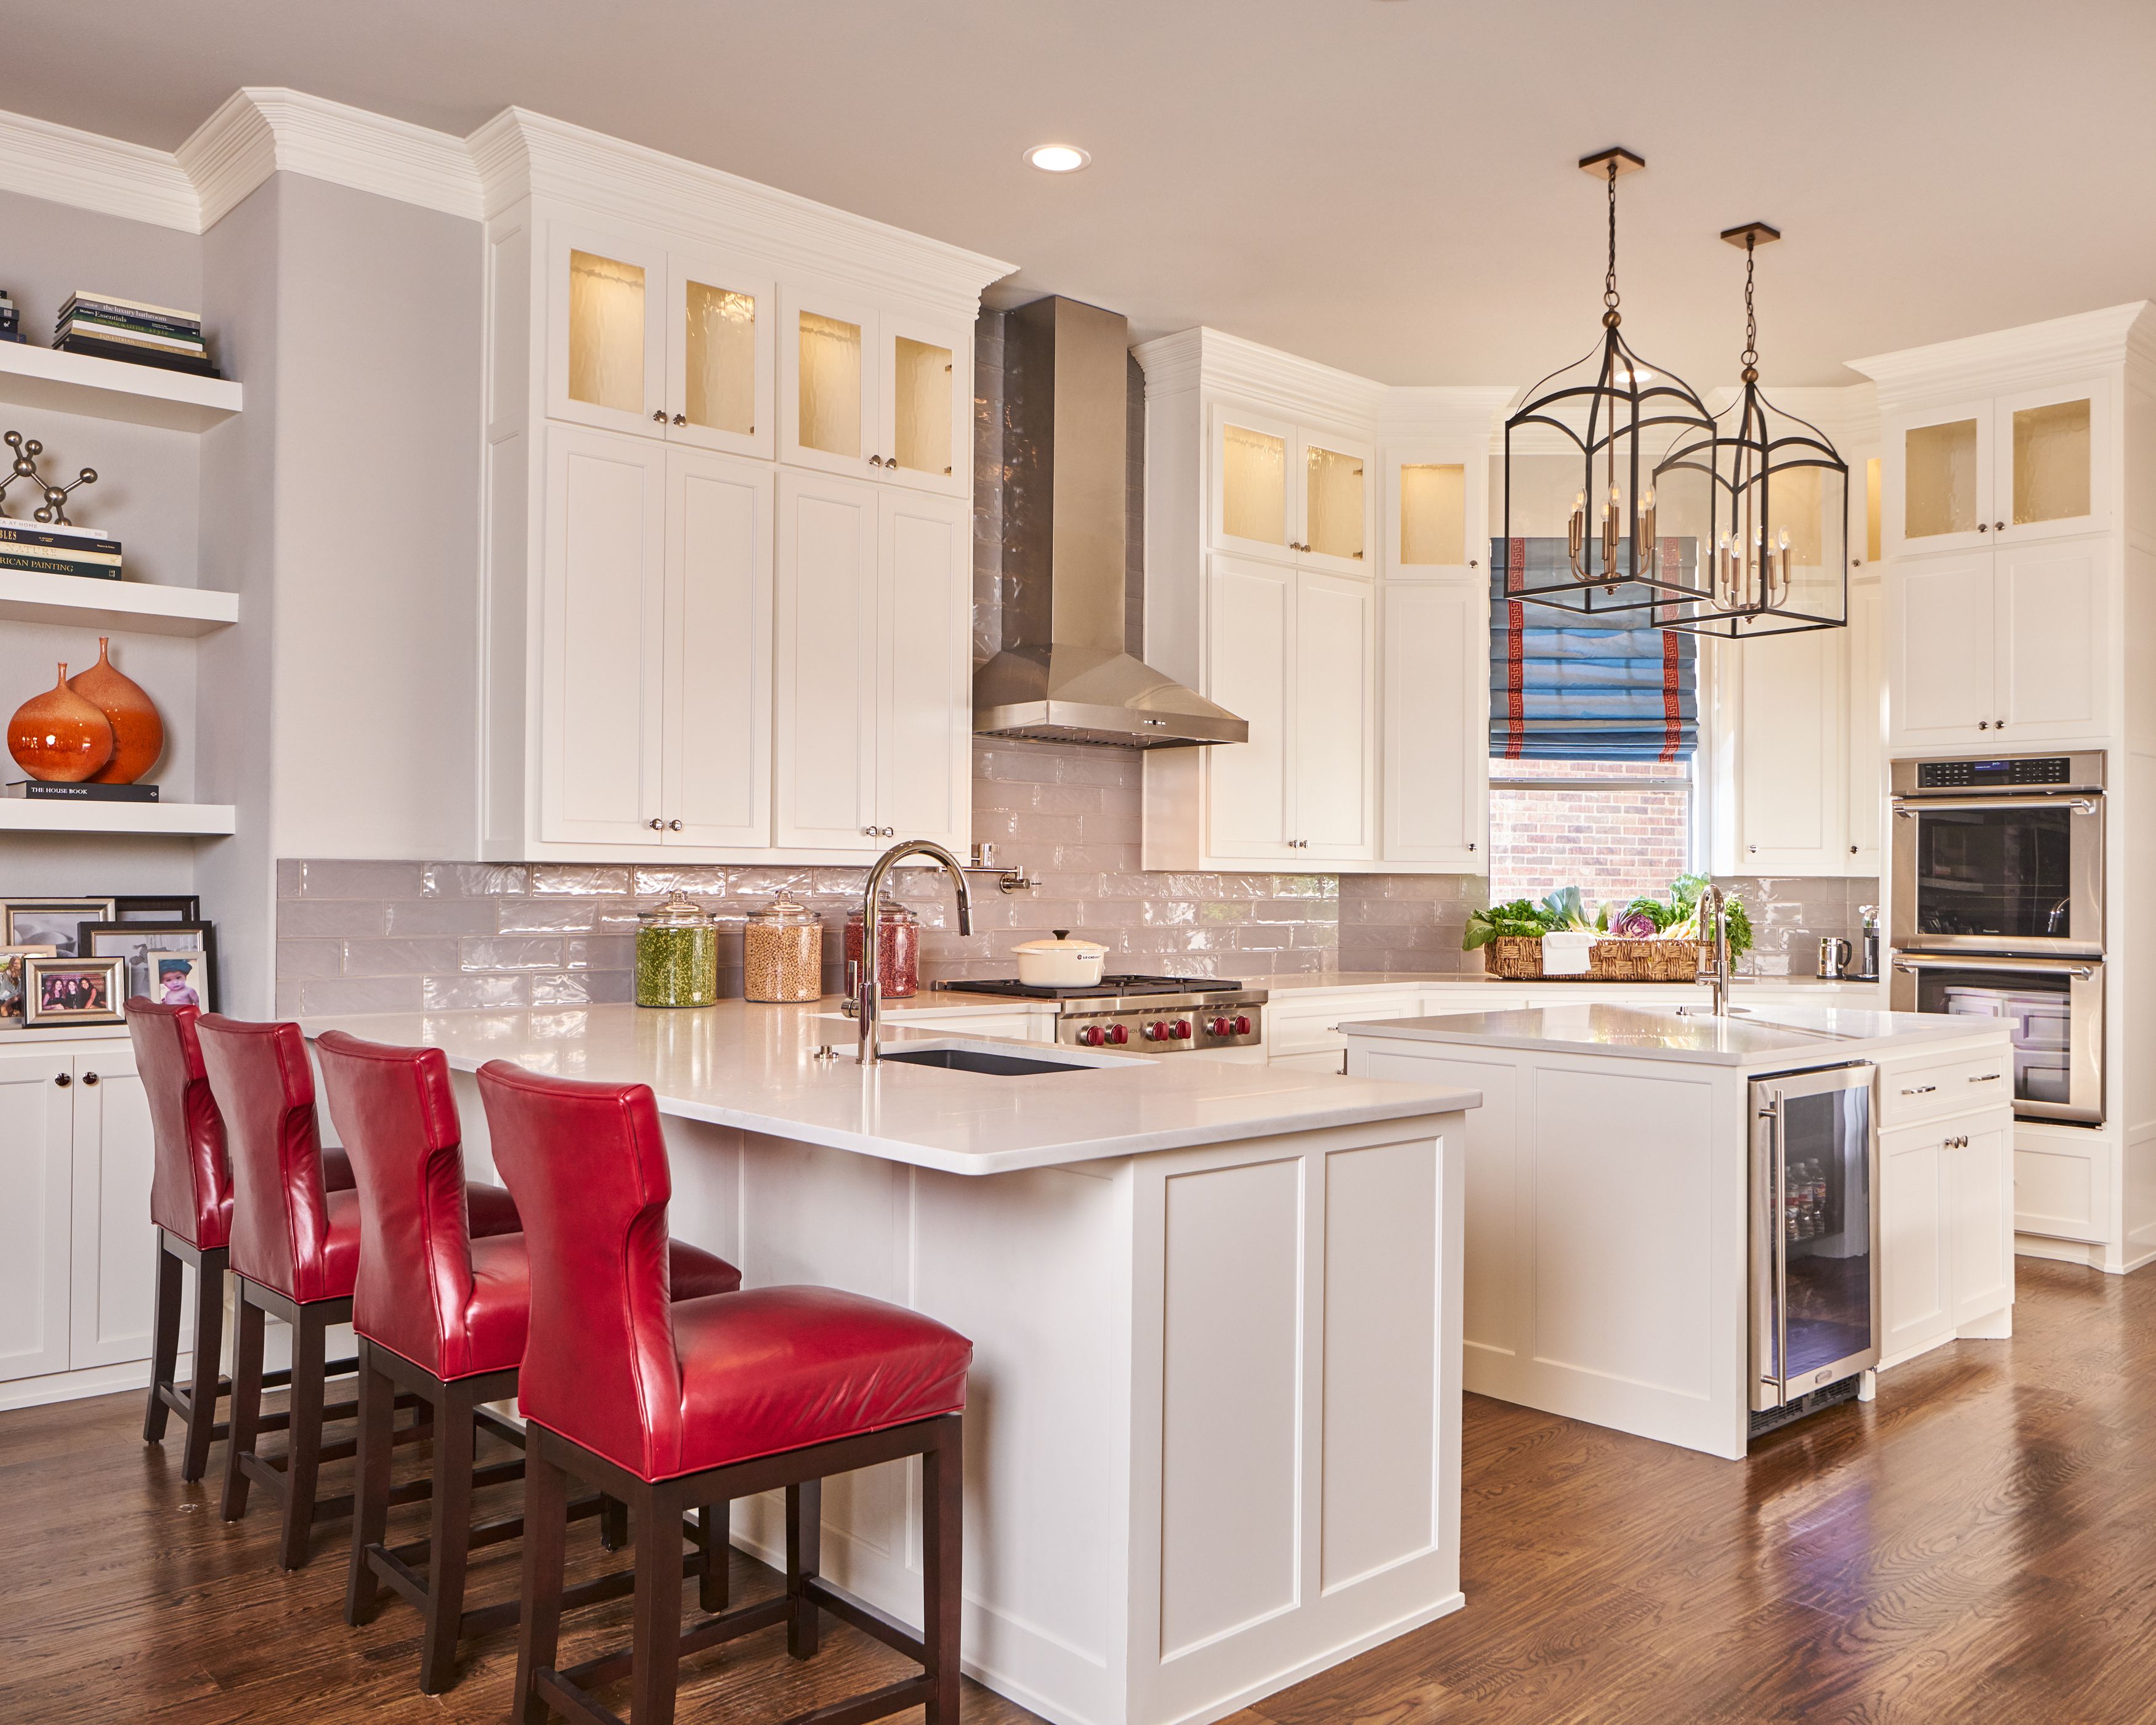
The classic rectangular peninsula works well in most kitchens, but I love experimenting with creative shapes. L-shaped peninsulas are perfect for corner connections, effectively creating a work triangle within the kitchen zone. I recently designed a curved peninsula that softened the transition between a contemporary kitchen and traditional dining room—the organic shape made the connection feel intentional rather than awkward. For larger spaces, a T-shaped peninsula with extensions on both sides creates multiple work zones and seating areas.
Angled peninsulas solve tricky layout problems beautifully. In one project, a 45-degree angled peninsula improved traffic flow between the kitchen and family room while adding valuable counter space. The diagonal orientation made the kitchen feel larger by breaking up the boxy layout. I often use angled peninsulas to create natural pathways in open-concept homes—they guide movement without the need for walls or abrupt transitions. Just be mindful of standard appliance depths when planning angles to maintain a functional workspace.
Multi-level peninsulas add functional variety to a single footprint. My go-to design includes a standard 36-inch counter height on the kitchen side with a 42-inch bar height extension on the opposite side. This provides both food prep space and casual dining without crowding. I sometimes incorporate a third level—perhaps a lowered baking station or raised display ledge—for specialized tasks. The key is maintaining at least 12 inches of overhang for comfortable knee space at seating areas and ensuring the transitions between levels feel intentional rather than haphazard.
Peninsula Seating Solutions
Comfortable seating requires careful peninsula planning. I allow 24 inches of width per stool for adequate elbow room—so a 6-foot peninsula comfortably seats three. The ideal overhang is 12-15 inches for leg comfort, with 15 inches being my preference for taller guests. I always specify rounded or eased counter edges at seating areas—sharp square edges become uncomfortable quickly. For backless stools, I recommend at least 30 inches of clearance between the floor and counter underside; with backs, 36 inches is better.
Creative seating arrangements can maximize functionality. I often design peninsulas with seating on the end rather than the long side—this preserves valuable workspace while still accommodating guests. In one project, I created a wraparound seating nook at the peninsula’s corner that became the family’s favorite spot. For homes with children, I sometimes incorporate a lowered section (about 30 inches high) with small chairs—kids love having their own special space. Just remember to allow enough knee space (at least 18 inches deep) under any seated areas.
The right stool selection completes the picture. I prefer adjustable-height stools (24-30 inch range) to accommodate different users and counter heights. Backless stools tuck neatly underneath when not in use, while backed models provide more comfort for extended sitting. For a cohesive look, I match stool finishes to other metal elements in the kitchen—cabinet hardware, light fixtures, or faucets. One of my favorite tricks is using upholstered stools with fabric that picks up colors from the backsplash or countertop for a pulled-together appearance.
Peninsula Storage Innovations
Smart storage solutions transform a basic peninsula into an organizational powerhouse. I frequently incorporate deep drawers for pots and pans near the cooking surface—these accessed much more efficiently than standard cabinets. Pull-out trash and recycling centers keep waste out of sight but within easy reach. For baking enthusiasts, I design flour and sugar pull-outs with built-in measuring cup holders. One of my most requested features is a peninsula appliance garage that hides mixers and toasters but rolls out when needed.
Open shelving on the non-kitchen side of peninsulas adds display space without sacrificing storage. I use this area for frequently used cookbooks, decorative bowls, or herb gardens in small pots. The depth is important—shelves deeper than 12 inches tend to collect clutter. For a cleaner look, I sometimes install cabinet doors on the kitchen side and open shelving on the opposite side. Glass-front upper cabinets on the peninsula end create display space while maintaining a light, open feel in the room.
Specialty inserts maximize peninsula storage efficiency. I’ve installed everything from vertical tray dividers to peg systems for cutting boards to spice rack pull-outs in peninsula bases. Charging stations with built-in outlets and USB ports are increasingly popular in peninsulas near seating areas. For wine lovers, I often incorporate temperature-controlled wine storage at the end of the peninsula—it becomes a natural gathering spot. The key is tailoring storage to how you use your kitchen rather than defaulting to generic solutions.
Peninsula Lighting Strategies
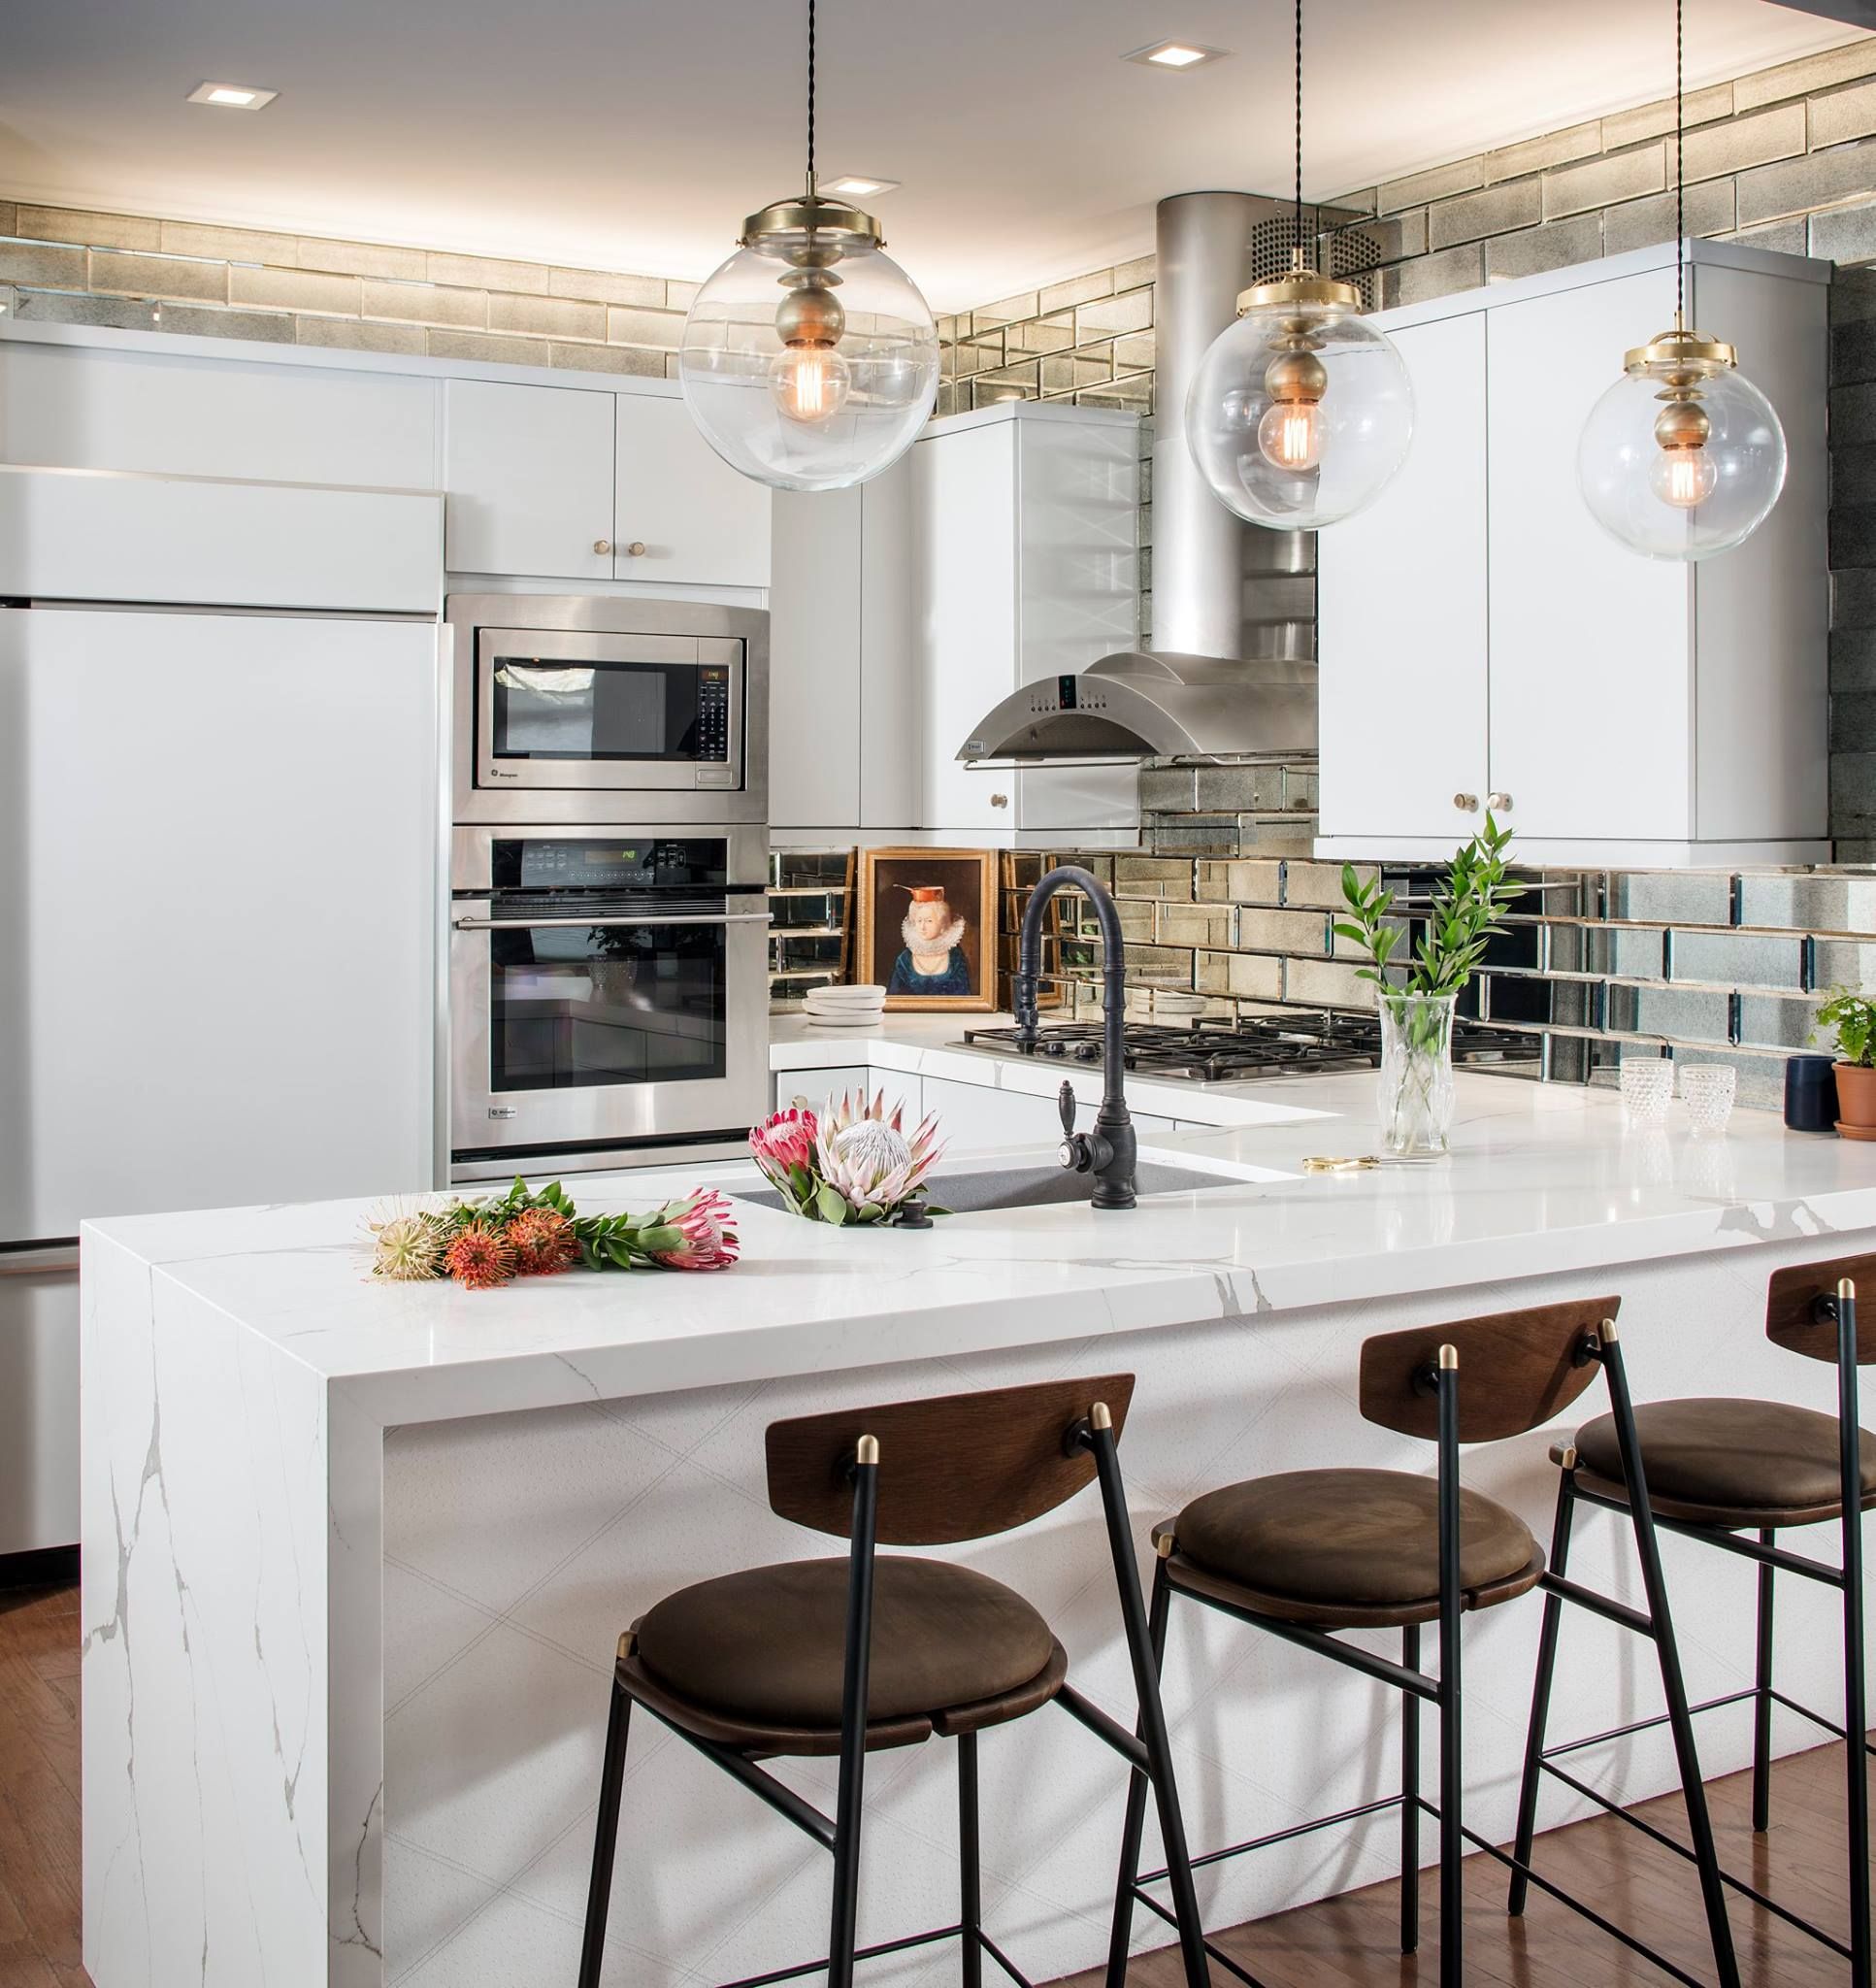
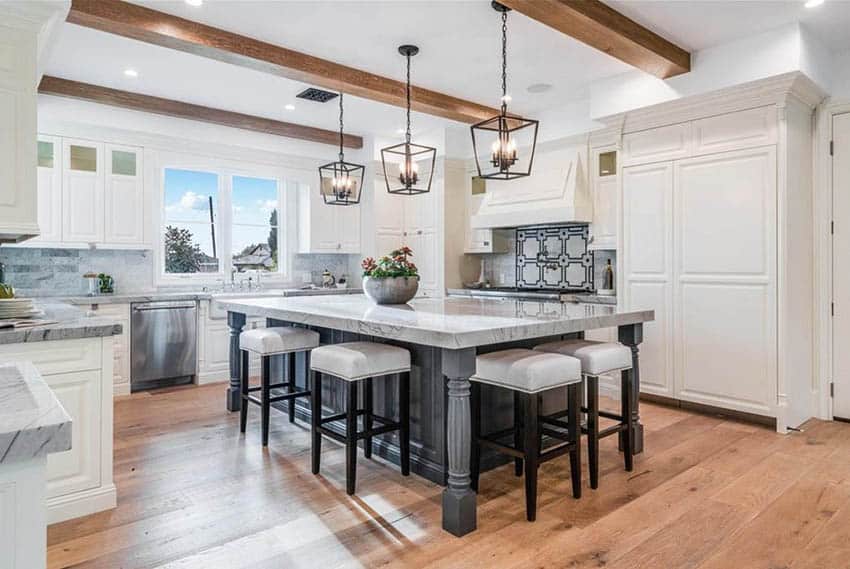
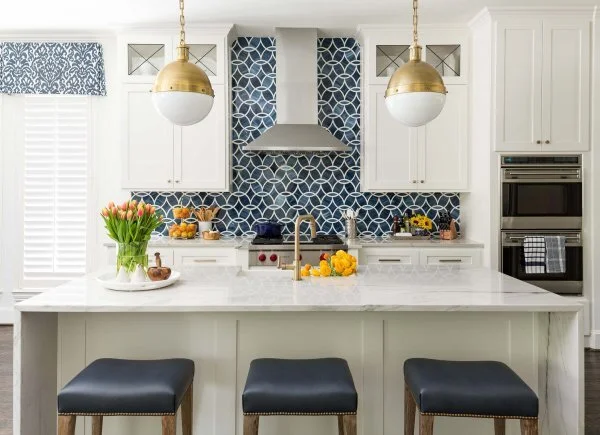
Proper lighting transforms a peninsula from purely functional to truly special. I always include both task and ambient lighting in my peninsula designs. For task lighting, pendant lights hung 30-36 inches above the countertop provide ideal illumination for food prep and dining. I typically space pendants 24-30 inches apart, depending on the peninsula length—three lights over a 6-foot peninsula creates perfect balance. The fixtures should align with the edge of the counter rather than the center to properly light work surfaces.
Layered lighting creates the most flexible peninsula environment. In addition to pendants, I often install under-cabinet lighting on the kitchen side for food preparation. Low-voltage LED strip lights underneath the counter overhang provide subtle ambient glow for evening ambiance. For peninsulas with open shelving, I sometimes add small spotlights to highlight displayed items. All peninsula lighting should be on dimmers—I’ve found that lighting at 50-70% brightness creates the most inviting atmosphere for casual meals and entertaining.
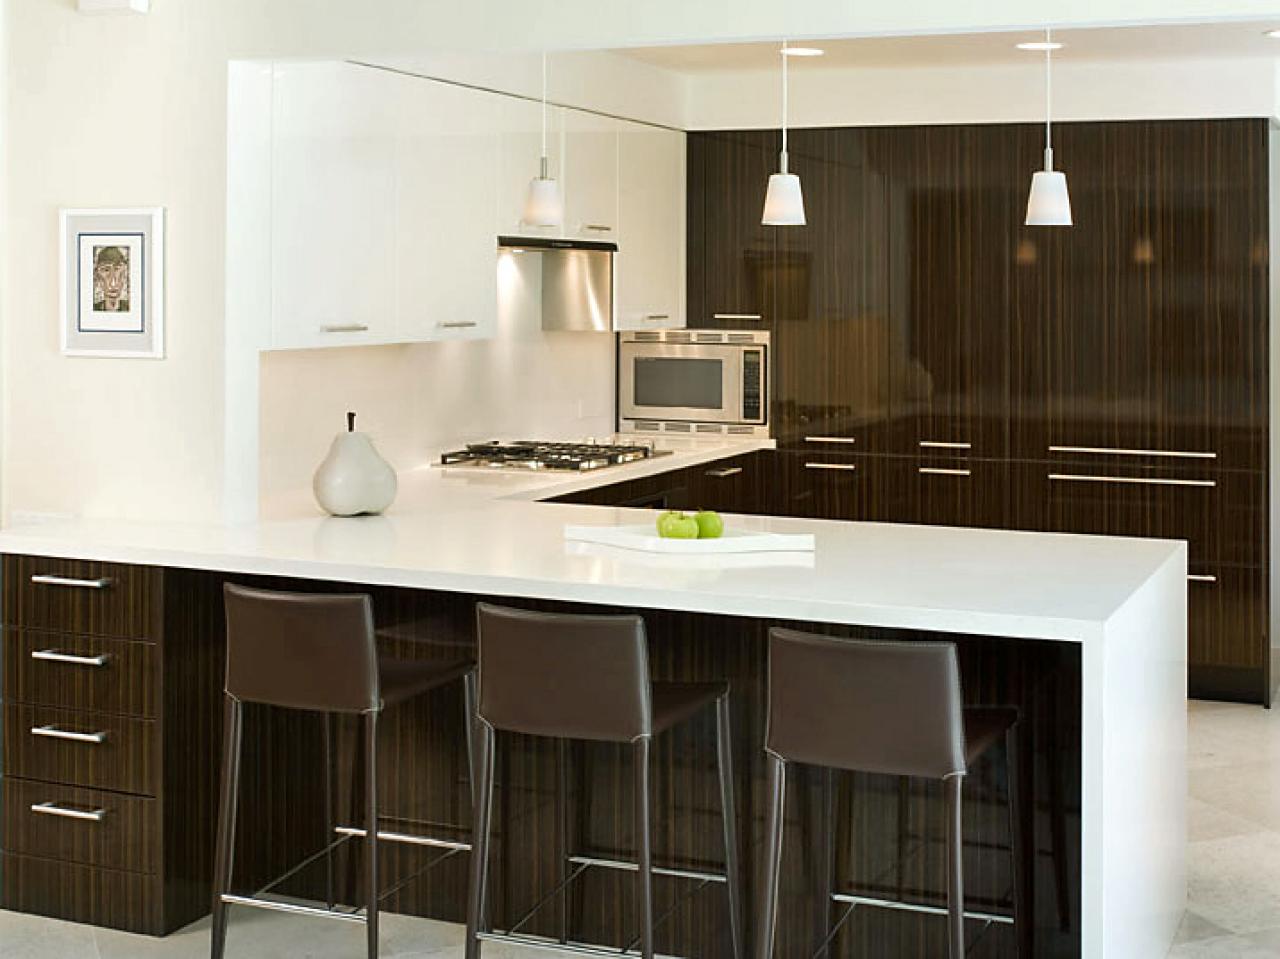
Fixture styles should complement the peninsula’s design. I prefer smaller-scale pendants over peninsulas rather than one large fixture—it creates better light distribution. Metal finishes should coordinate with other kitchen hardware for a cohesive look. In one transitional kitchen, I used industrial-style cage pendants over a rustic wood-topped peninsula that blended both styles beautifully. For contemporary spaces, I often choose sleek cylindrical pendants that don’t visually overwhelm the peninsula. Always consider the view from all angles—fixtures should look attractive from both the kitchen andthe adjacent room perspectives.

Peninsula Materials and Finishes
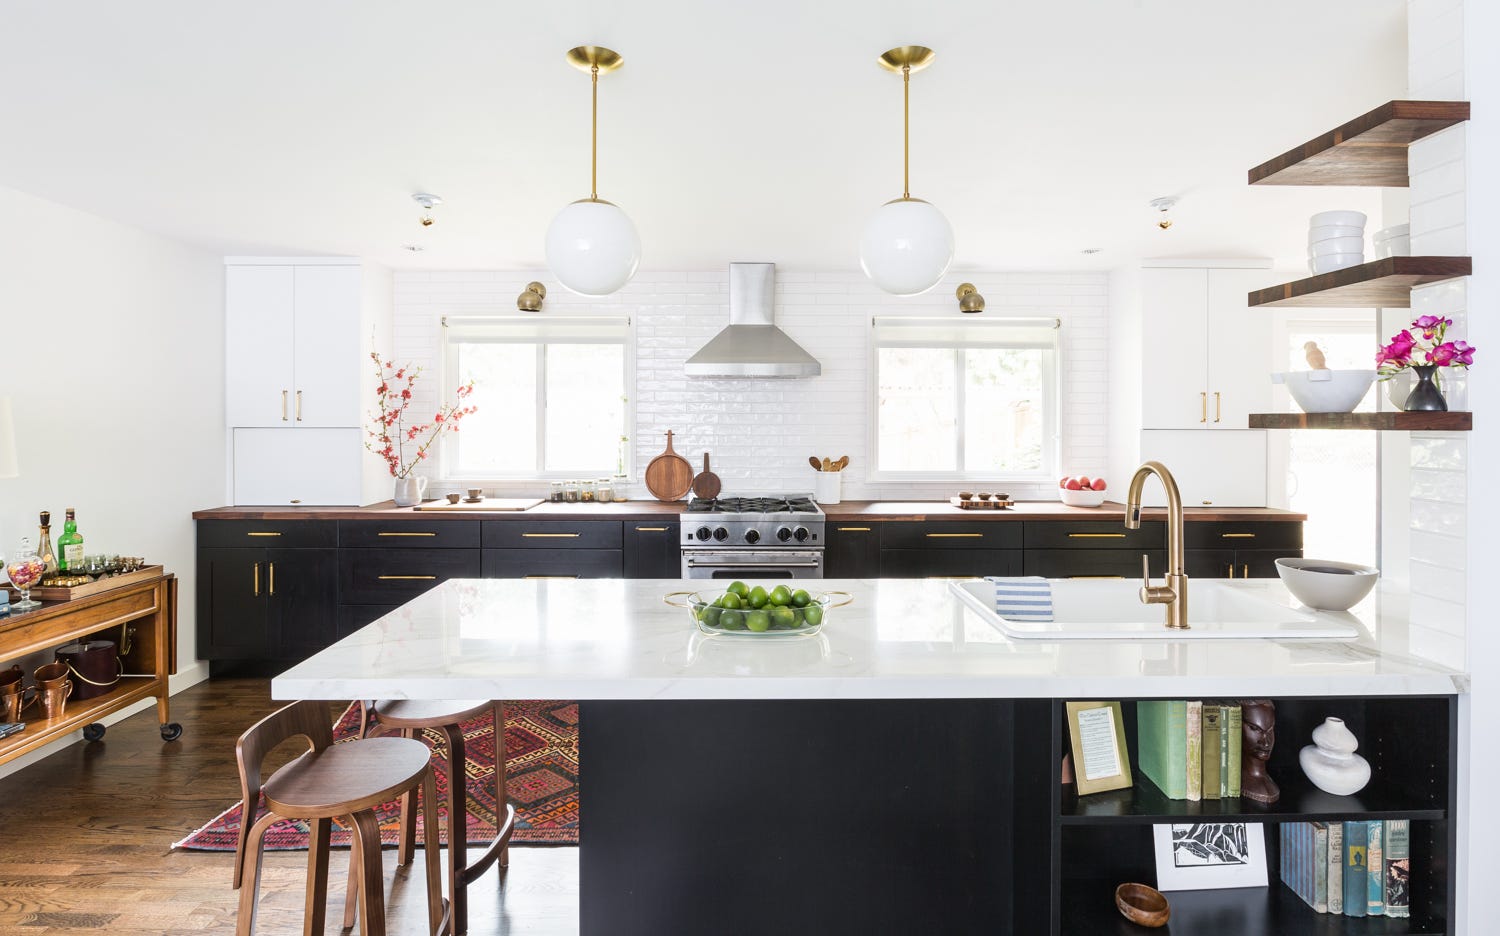
Countertop material choices dramatically impact a peninsula’s functionality and style. I frequently use the same material as the perimeter counters for visual continuity, but sometimes introduce a complementary material on the seating side for interest. Butcher block makes a warm, practical peninsula surface that’s perfect for food prep areas. In one modern farmhouse kitchen, I paired white quartz perimeter counters with a thick walnut slab on the peninsula—the contrast became the kitchen’s focal point.
Mixed materials add depth and character to peninsulas. I often combine different finishes on the cabinet bases—perhaps painted shaker style on the kitchen side and reclaimed wood panels on the opposite side. Metal accents like brass inlays or iron strapping can highlight the peninsula’s architectural details. For contemporary spaces, I sometimes use lacquered cabinets on the kitchen side and textured wood veneers on the display side. The key is ensuring the materials relate through color, texture, or pattern rather than looking randomly assembled.
Finish durability matters especially for high-use peninsulas. I specify tough, stain-resistant finishes for cabinet surfaces that will face heavy traffic. Counter edges at seating areas benefit from eased or rounded profiles that resist chipping. For families with young children, I often recommend quartz or solid surface materials that can handle inevitable bumps and spills. In one beach house project, I used a porcelain slab for the peninsula counter—its resistance to sun, sand, and saltwater made it ideal for the location. Always consider how the peninsula will be used when selecting materials.
What’s the ideal width for a kitchen peninsula?
The perfect width depends on your kitchen’s size and how you’ll use the peninsula. For primarily food prep, I recommend 36-42 inches deep—this allows a comfortable workspace with standard appliance depths. In smaller kitchens, I’ve successfully designed peninsulas as narrow as 24 inches deep when space is limited. If incorporating seating, allow at least 15 inches of overhang for legroom. The length varies more, but I typically suggest at least 4 feet to be functional—this provides decent workspace or seating for two. Always tape out different sizes on your floor before finalizing dimensions to ensure comfortable traffic flow around all sides.
Can I add a peninsula to my existing kitchen without remodeling?
Yes, in many cases you can. I’ve created peninsulas by reconfiguring existing base cabinets or adding new ones to extend a countertop. The simplest approach is connecting to an existing cabinet run with a perpendicular extension—just ensure your flooring continues underneath. For a more dramatic change, I sometimes remove a section of the wall to create a peninsula opening. Electrical and plumbing considerations are important—if adding appliances or sinks, consult a professional. Even a simple 18-inch deep peninsula with stools can add functionality without major construction. Always check load-bearing requirements before removing any walls.
How do I choose between an island and a peninsula?
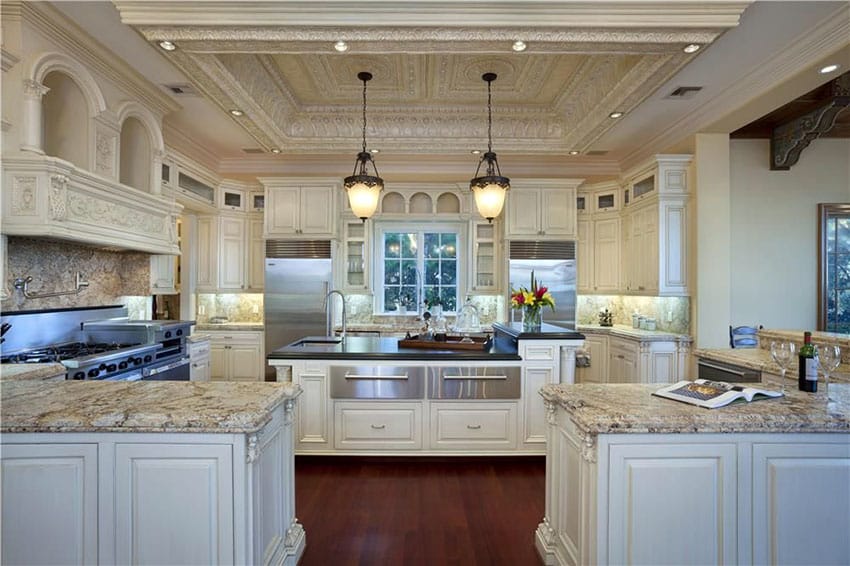
The decision comes down to your kitchen’s layout and traffic patterns. I recommend peninsulas when you need to define the kitchen space in an open floor plan or when working with smaller square footage—they require less clearance than islands. Islands work better in large, square kitchens where you can walk completely around them. Peninsulas excel at creating natural room divisions—I often use them to separate kitchens from dining areas without closing off sightlines. If you frequently entertain with guests gathering in the kitchen, an island’s 360-degree access might be preferable. Consider trying both layouts with painter’s tape on the floor to visualize the differences.
What’s the best overhang for peninsula seating?
For comfortable seating, I recommend 12-15 inches of overhang—15 inches being ideal for taller individuals. This provides adequate knee space while maintaining structural support. The countertop thickness affects this measurement too—thicker materials like stone can safely overhang more than thinner surfaces. I always include corbels or brackets for support on overhangs beyond 12 inches. For wheelchair accessibility, allow at least 27 inches of knee clearance height and 19 inches of depth under the overhang. If space allows, I prefer the generous 15-inch overhang—it simply feels more comfortable for extended sitting compared to the minimal 12-inch versions.

How do I incorporate appliances into a peninsula?
Strategic appliance placement maximizes a peninsula’s functionality. I often install microwaves at the end of peninsulas—either as drawer models or with trim kits for a built-in appearance. Dishwashers work well in peninsulas near the sink area. For serious cooks, I’ve designed peninsulas with cooktop installations, always including proper ventilation. Small refrigerators or wine coolers can occupy base cabinet spaces in entertainment-focused peninsulas. The key is maintaining proper clearances—allow at least 15 inches of landing space beside cooktops and 18 inches beside ovens. Always consult appliance specifications and local codes before installing anything requiring plumbing, gas, or special electrical.
What’s the best lighting layout for a peninsula?
I follow a simple formula for peninsula lighting: space pendants 24-30 inches apart, hung 30-36 inches above the countertop. For a standard 6-foot peninsula, three appropriately scaled pendants work perfectly. Align the fixtures with the front edge of the counter rather than centering them—this better illuminates work surfaces. Add under-cabinet lighting on the kitchen side for task illumination. I often install dimmable LED strip lighting underneath the overhang for ambient glow. All lighting should be on dimmers to adjust for different activities. Avoid single large fixtures over peninsulas—they create uneven lighting and can visually overwhelm the space. Consider the view from all angles when selecting fixture styles.
Kitchen Island vs Peninsula (Design Guide) – Designing Idea
Peninsula Kitchen Design: Pictures, Ideas & Tips
Practical Kitchen Peninsula Ideas for Your Remodel

How to Choose Between an Island or Peninsula
Kitchen Island vs Peninsula: Which Layout is Best for Your Home
Related Posts: