I’ve seen countless kitchen transformations over the years, and cabinet refinishing remains one of the most cost-effective ways to completely change your space. There’s something incredibly satisfying about taking tired, outdated cabinets and making them look brand new again. Whether you’re working with solid wood or laminate surfaces, the right refinishing approach can save you thousands compared to full replacement while delivering stunning results. After refinishing dozens of kitchen cabinets myself, I’ve learned what works, what doesn’t, and how to avoid common pitfalls. Here’s my complete guide to achieving professional-looking results.
Assessing Your Cabinets’ Refinishing Potential
Not all cabinets are good candidates for refinishing, so careful evaluation comes first. I always start by examining the cabinet boxes—if they’re structurally sound with no water damage or warping, they’re worth saving. Solid wood cabinets refinish beautifully, but I’ve also had great success with laminate surfaces using the right products. The biggest red flags are severe delamination, deep scratches that go through the veneer, or particle board that’s swollen from moisture. I once tried refinishing water-damaged MDF cabinets and regretted it when they continued deteriorating.
Door style plays a big role in the refinishing process. Simple shaker-style doors are easiest to work with, while intricate raised panel designs require more patience. I’ve found that removing all doors and drawers before starting makes the job much more manageable. Labeling each piece with masking tape and numbering the corresponding cabinet opening saves hours of frustration during reassembly. One trick I use: take photos of the cabinet interiors before emptying them to remember where everything belongs.
Consider the existing finish before choosing your approach. Painted cabinets need different preparation than stained ones. I can often tell just by feel whether cabinets have oil-based or latex paint—the former feels slightly tacky even when dry. Laminate surfaces require special bonding primers. If you’re unsure, test a small inconspicuous area with paint stripper to see how the existing finish reacts. This preliminary work might seem tedious, but it prevents nasty surprises later.
Choosing Between Painting and Staining
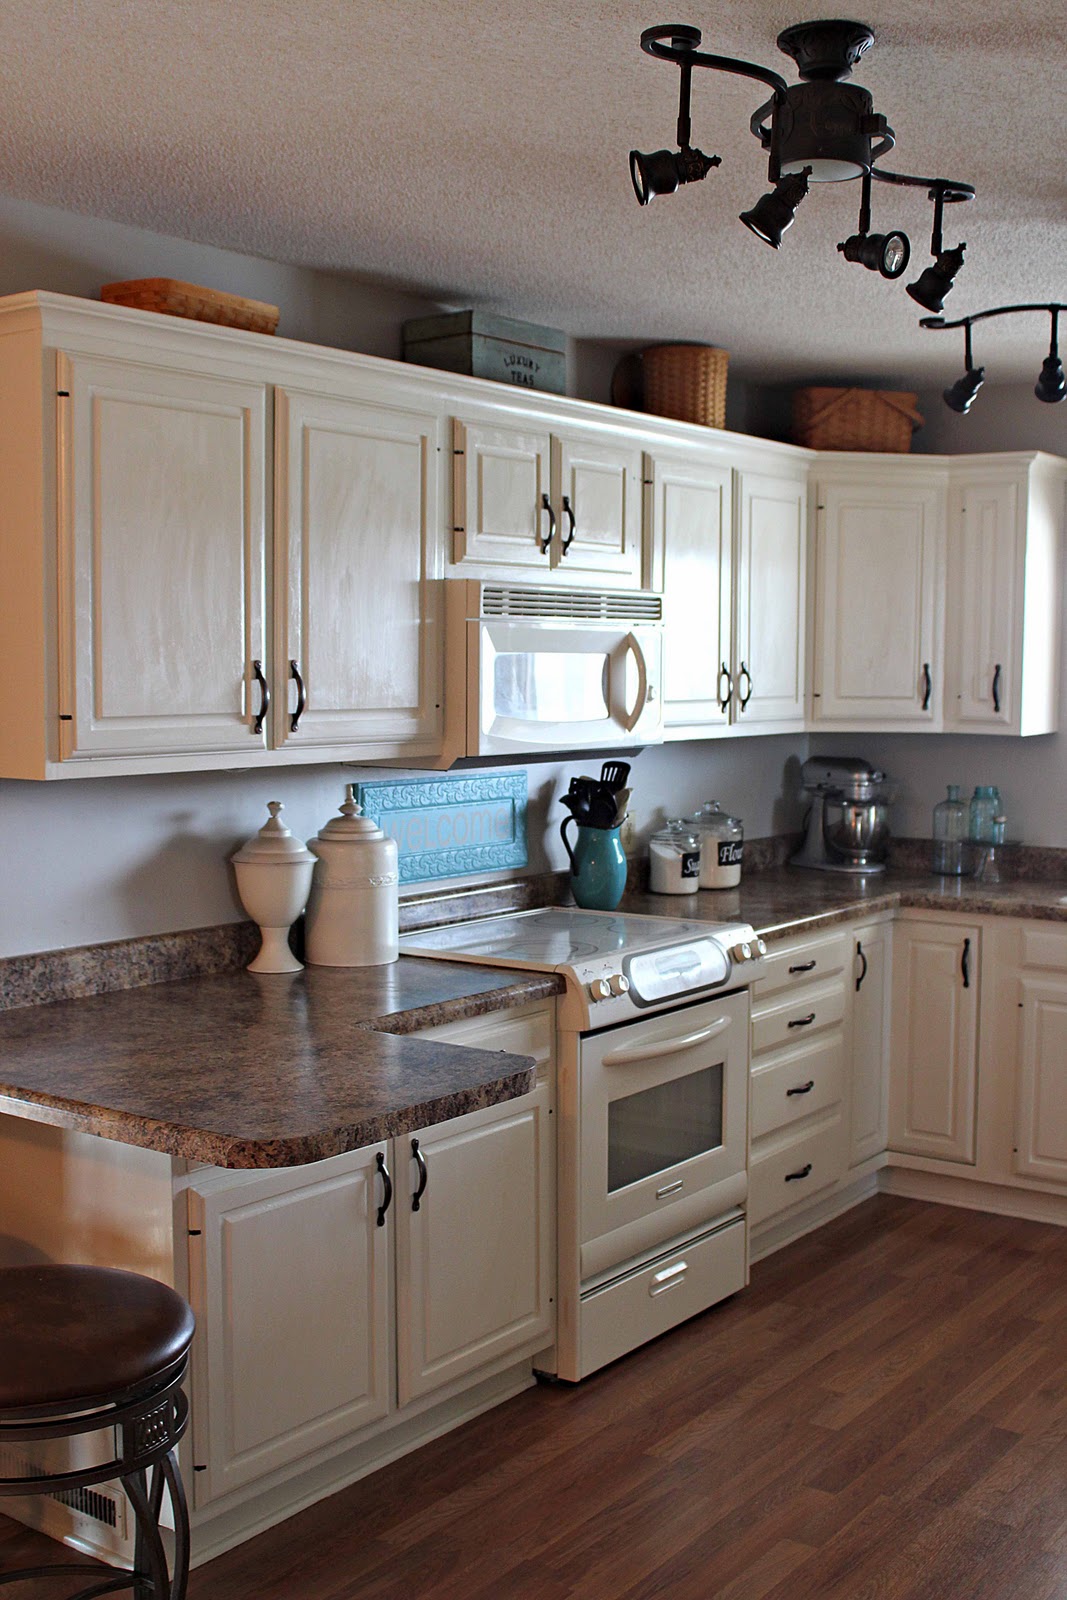
This decision comes down to both personal preference and your cabinets’ current state. I typically recommend painting when dealing with mixed wood types, damaged surfaces, or dated oak grain patterns that are hard to modernize. The opaque coverage creates a unified look, and today’s cabinet paints are remarkably durable. My go-to is a satin or semi-gloss acrylic-urethane hybrid that levels beautifully and resists yellowing. For a truly professional finish, I apply with an HVLP sprayer after thorough prep work.
Staining works best when you want to preserve or enhance the wood’s natural character. I’ve brought gorgeous grain patterns back to life on old maple and cherry cabinets that had been buried under layers of paint. The process requires more sanding—I typically start with 80-grit to remove old finish, then progress through 120 and 220 for a silky smooth surface. Gel stains are more forgiving than traditional liquid stains, especially on vertical surfaces. Whichever you choose, always test on scrap wood or cabinet interiors first—I learned this after a mahogany stain turned pink on pine cabinets.
The sheen level makes a big difference in the final appearance. For painted cabinets, I avoid high-gloss finishes in most kitchens—they show every fingerprint and imperfection. Satin offers just enough reflectivity while being practical for daily use. With stained cabinets, I prefer matte or satin polyurethane over glossy, which can look plasticky. One recent client insisted on ultra-matte, which created a beautiful, contemporary look but required special water-based topcoats. Consider your kitchen’s lighting when choosing sheen—glossier finishes reflect more light in darker spaces.

The Critical Prep Work
Proper preparation separates professional-looking results from disappointing ones. I dedicate at least 60% of the total project time to prep—it’s that important. Everything starts with thorough cleaning; years of cooking grease and dust prevent proper paint adhesion. My secret weapon is trisodium phosphate (TSP) solution, which cuts through grime better than any household cleaner. I scrub every surface, including the often-neglected tops of upper cabinets, then rinse with clean water and let dry completely.
Sanding comes next, and it’s the step most people rush through. For paint, I scuff-sand all surfaces with 120-grit paper to create “tooth” for the new finish. Staining requires more aggressive sanding to bare wood—I start with 80-grit and work up to 220. Contours and details need hand-sanding with foam blocks or folded paper. Never skip the edges and corners—these areas show wear first. I keep a vacuum handy to remove dust constantly, followed by tack cloth for final cleanup. One lesson I learned the hard way: sanding after primer is just as important as initial sanding for a smooth finish.
Repairing imperfections prevents them from glaring at you later. I fill dents and scratches with two-part wood filler, applying it sparingly and sanding flush once dry. For laminate cabinets, I use a special laminate repair paste that bonds securely. Loose joints get reglued and clamped overnight. Any hardware holes that won’t be reused get filled with dowels glued in place. I also check all cabinet boxes for square and make adjustments as needed—doors won’t hang properly otherwise. This meticulous prep work pays off when the finish goes on perfectly.

Application Techniques That Work
Having tried every application method over the years, I’ve settled on a few reliable approaches. For painted cabinets, nothing beats an HVLP sprayer for smooth, brushmark-free results. I use a professional-grade unit with proper thinning of the paint—usually about 10% with water for latex paints. The key is multiple light coats rather than one heavy application. Between coats, I lightly sand with 220-grit paper and wipe clean. Spraying requires careful masking of surrounding areas—I use plastic sheeting taped to create a temporary spray booth.
When spraying isn’t practical, high-quality brushes and rollers can still achieve great results. I invest in premium angled sash brushes for edges and a mini foam roller for flat surfaces. The technique matters: I load the brush lightly, apply with long smooth strokes, and always “tip off” by lightly dragging the brush over wet paint to eliminate marks. For cabinet frames, I’ve had success with small foam rollers designed for smooth surfaces. The secret is working quickly and maintaining a wet edge to prevent lap marks. Regardless of method, I always follow the manufacturer’s recoat times precisely.
Staining requires a different approach. After sanding, I wipe the wood with mineral spirits to reveal any remaining imperfections. Applying stain with a clean rag gives me more control than a brush—I can manipulate how deep the color penetrates. For tricky areas like raised panel details, I use a soft brush to work stain into crevices, then wipe off excess. After the stain dries completely (usually overnight), I apply protective topcoats. My current favorite is water-based polyurethane, which dries clear and resists yellowing. Three thin coats with light sanding between yield a durable finish that’s easy to touch up later.

Hardware and Finishing Touches
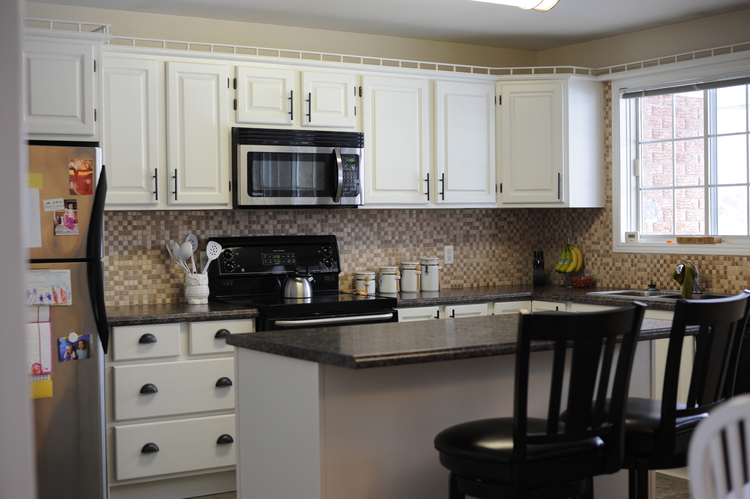
New hardware can completely transform refinished cabinets. I always recommend replacing old knobs and pulls—they’re like jewelry for your cabinets. The current trend leans toward simple, clean designs in matte black, brass, or nickel finishes. I keep a cardboard template with standard hole spacing to test different hardware sizes before purchasing. For a cohesive look, I match the finish to other metal elements in the kitchen like faucets and light fixtures. One trick: paint or stain your cabinets first, then choose hardware that complements the new color.
Soft-close hinges are worth the investment during refinishing. I replace old hinges as part of the process—they’re relatively inexpensive and make cabinets feel luxurious. European-style concealed hinges offer the cleanest look and allow for precise door adjustments. I always check door alignment before finalizing the finish work. Minor adjustments with the hinge screws can make a big difference in how professional the final result appears. For drawers, I upgrade old metal slides to full-extension ball-bearing models that operate smoothly.
Final details elevate the project from good to great. I install bumpers on all doors and drawers to prevent slamming. Inside the cabinets, I often add peel-and-stick wallpaper or fresh contact paper for a clean backdrop. Lighting upgrades like battery-operated LED strips inside glass-front cabinets showcase the refinishing work. One of my favorite finishing touches is adding crown molding to upper cabinets if they don’t already have it—this small addition makes them look custom-built. The last step is always a thorough cleanup with a mild cleaner to remove any dust or fingerprints before admiring the transformation.

Maintenance and Long-Term Care
Proper care ensures your refinished cabinets stay beautiful for years. I advise clients to wait at least two weeks before doing heavy cleaning—this allows finishes to fully cure. For daily cleaning, a soft cloth with mild soap and water works best. I avoid abrasive cleaners or scrub pads that can damage the finish. Painted cabinets benefit from occasional dusting with a microfiber cloth to prevent buildup in detailed areas. Stained cabinets may need furniture polish every few months to maintain luster.
Touch-up strategies prevent small issues from becoming big problems. I always save leftover paint or stain for future repairs. For painted cabinets, I keep a small artist’s brush handy for quick chip repairs—the key is feathering the edges into the existing finish. Stained cabinets require more careful touch-ups; I often use colored wax sticks for minor scratches. In high-traffic areas like near the sink, I sometimes apply an extra coat of polyurethane for added protection.
Long-term, refinished cabinets typically last 7-10 years before needing attention. The first signs are usually wear around handles or on drawer fronts. When this happens, I often just refresh the finish on these high-contact areas rather than redoing everything. With proper care, I’ve seen refinished cabinets look great for 15 years or more. One client’s maple cabinets still look fresh after 12 years because she follows my maintenance routine religiously. The upfront work pays dividends in long-term satisfaction.
How long does cabinet refinishing typically take?
A full kitchen cabinet refinishing project usually takes me 5-7 days working methodically. Day 1 is cleaning and prep, Days 2-3 involve sanding and repairs, Day 4 is priming, and Days 5-7 are for finish coats with drying time between. Rushing leads to subpar results—paint needs proper curing time between coats. For DIYers working evenings and weekends, plan for 2-3 weeks. Temperature and humidity affect drying times; I avoid refinishing in very humid conditions. The actual hands-on time is about 20-30 hours for an average kitchen, but proper scheduling prevents frustration.
Can I refinish thermofoil or laminate cabinets?
Yes, but it requires specific products and techniques. I’ve had excellent results using bonding primers designed for slick surfaces—they create a base that paint can adhere to. The prep work is crucial: I lightly sand with 220-grit paper, clean with deglosser, and apply primer within the recommended time window. For thermofoil, I check for peeling edges first—these need to be reglued or removed. The finish won’t be as durable as on wood, but with proper care, refinished laminate cabinets can last 5+ years. I recommend semi-gloss or satin paints that flex slightly with the material.
Do I need to remove cabinet doors to refinish them properly?
Absolutely—it’s one of the most important steps many DIYers skip. Trying to refinish doors while hung leads to drips, uneven coverage, and missed spots. I remove all doors, drawers, and hardware, labeling each piece clearly. Working on a flat surface like sawhorses allows you to properly sand and finish both sides. Doors need to dry flat to prevent warping. The only exception might be cabinet frames, which I sometimes refinish in place after thorough masking. But even then, removing them yields better results if possible. The extra time spent removing pays off in professional-quality results.
How do I choose between oil-based and water-based products?
This depends on your priorities. Oil-based paints and stains penetrate better and dry harder, but they yellow over time and have strong fumes. Water-based options have improved dramatically—many now rival oil for durability with easier cleanup and low odor. My current preference is water-based hybrid paints that offer the best of both worlds. For stains, I still prefer oil-based on dense woods like maple, but water-based works well on porous woods like oak. Always check manufacturer recommendations—some products shouldn’t be used over certain existing finishes. Proper ventilation is crucial regardless of product type.
Can I change my cabinet color from dark to light (or vice versa)?
Yes, but the process differs. Going from dark to light requires more thorough prep—I often use a tinted primer to block bleed-through. Multiple coats may be needed for full coverage. Transitioning from light to dark is generally easier, though some woods may need wood conditioner first to prevent blotchiness. The biggest challenge is usually the cabinet interiors—I either paint them too or use tinted glaze to minimize contrast. Dramatic color changes work best when you also update other elements like backsplash and countertops to create a cohesive new palette. Test your new color in an inconspicuous area first to ensure you’re happy with the transformation.

Cabinet Painting in Ottawa

Kitchen Cabinet Refacing

Where to Get Cabinet Refacing Done in Ottawa

Cabinet Painting and Refinishing in Ottawa CertaPro Painters® of
Related Posts: