I’ve always believed lighting can make or break a kitchen and dining area. Over the years, I’ve experimented with countless lighting setups in my own home and helped friends transform their spaces with strategic illumination. The right lighting does more than just help you see—it creates atmosphere, defines zones, and even affects how food appears. Whether you’re renovating or just looking to update your current setup, these practical lighting ideas will help you achieve both functionality and style in your kitchen and dining areas.
Layered Lighting for Kitchens
Every good kitchen lighting plan starts with three layers: ambient, task, and accent. I always begin with ambient lighting to provide overall illumination—typically recessed ceiling lights or a central fixture. For my kitchen, I installed dimmable LED can lights spaced about 4 feet apart, which gives even coverage without shadows. The next layer is task lighting, crucial over work areas. Under-cabinet LED strips completely transformed my food prep experience, eliminating dark spots on countertops. I prefer 3000K temperature bulbs that provide warm yet crisp light for cooking.
Accent lighting adds the finishing touch. I use it to highlight architectural features or display areas. In one project, I installed small directional lights above open shelving to showcase beautiful dishware. For kitchens with glass-front cabinets, interior LED pucks create a lovely glow. The magic happens when you control these layers separately. I put my ambient lights on one switch, task lighting on another, and accent lights on a dimmer. This flexibility lets me create everything from a bright workspace to a soft evening ambiance with just a few adjustments.
The placement of these lights matters tremendously. I always position task lighting in front of where people stand to work, not behind them, to prevent casting shadows. For islands, pendants should hang about 30-36 inches above the surface, spaced evenly. One mistake I see often is over-lighting—your kitchen doesn’t need to be as bright as an operating room. I aim for about 100 lumens per square foot total, distributed across the different layers. Properly layered lighting makes kitchens both highly functional and inviting.
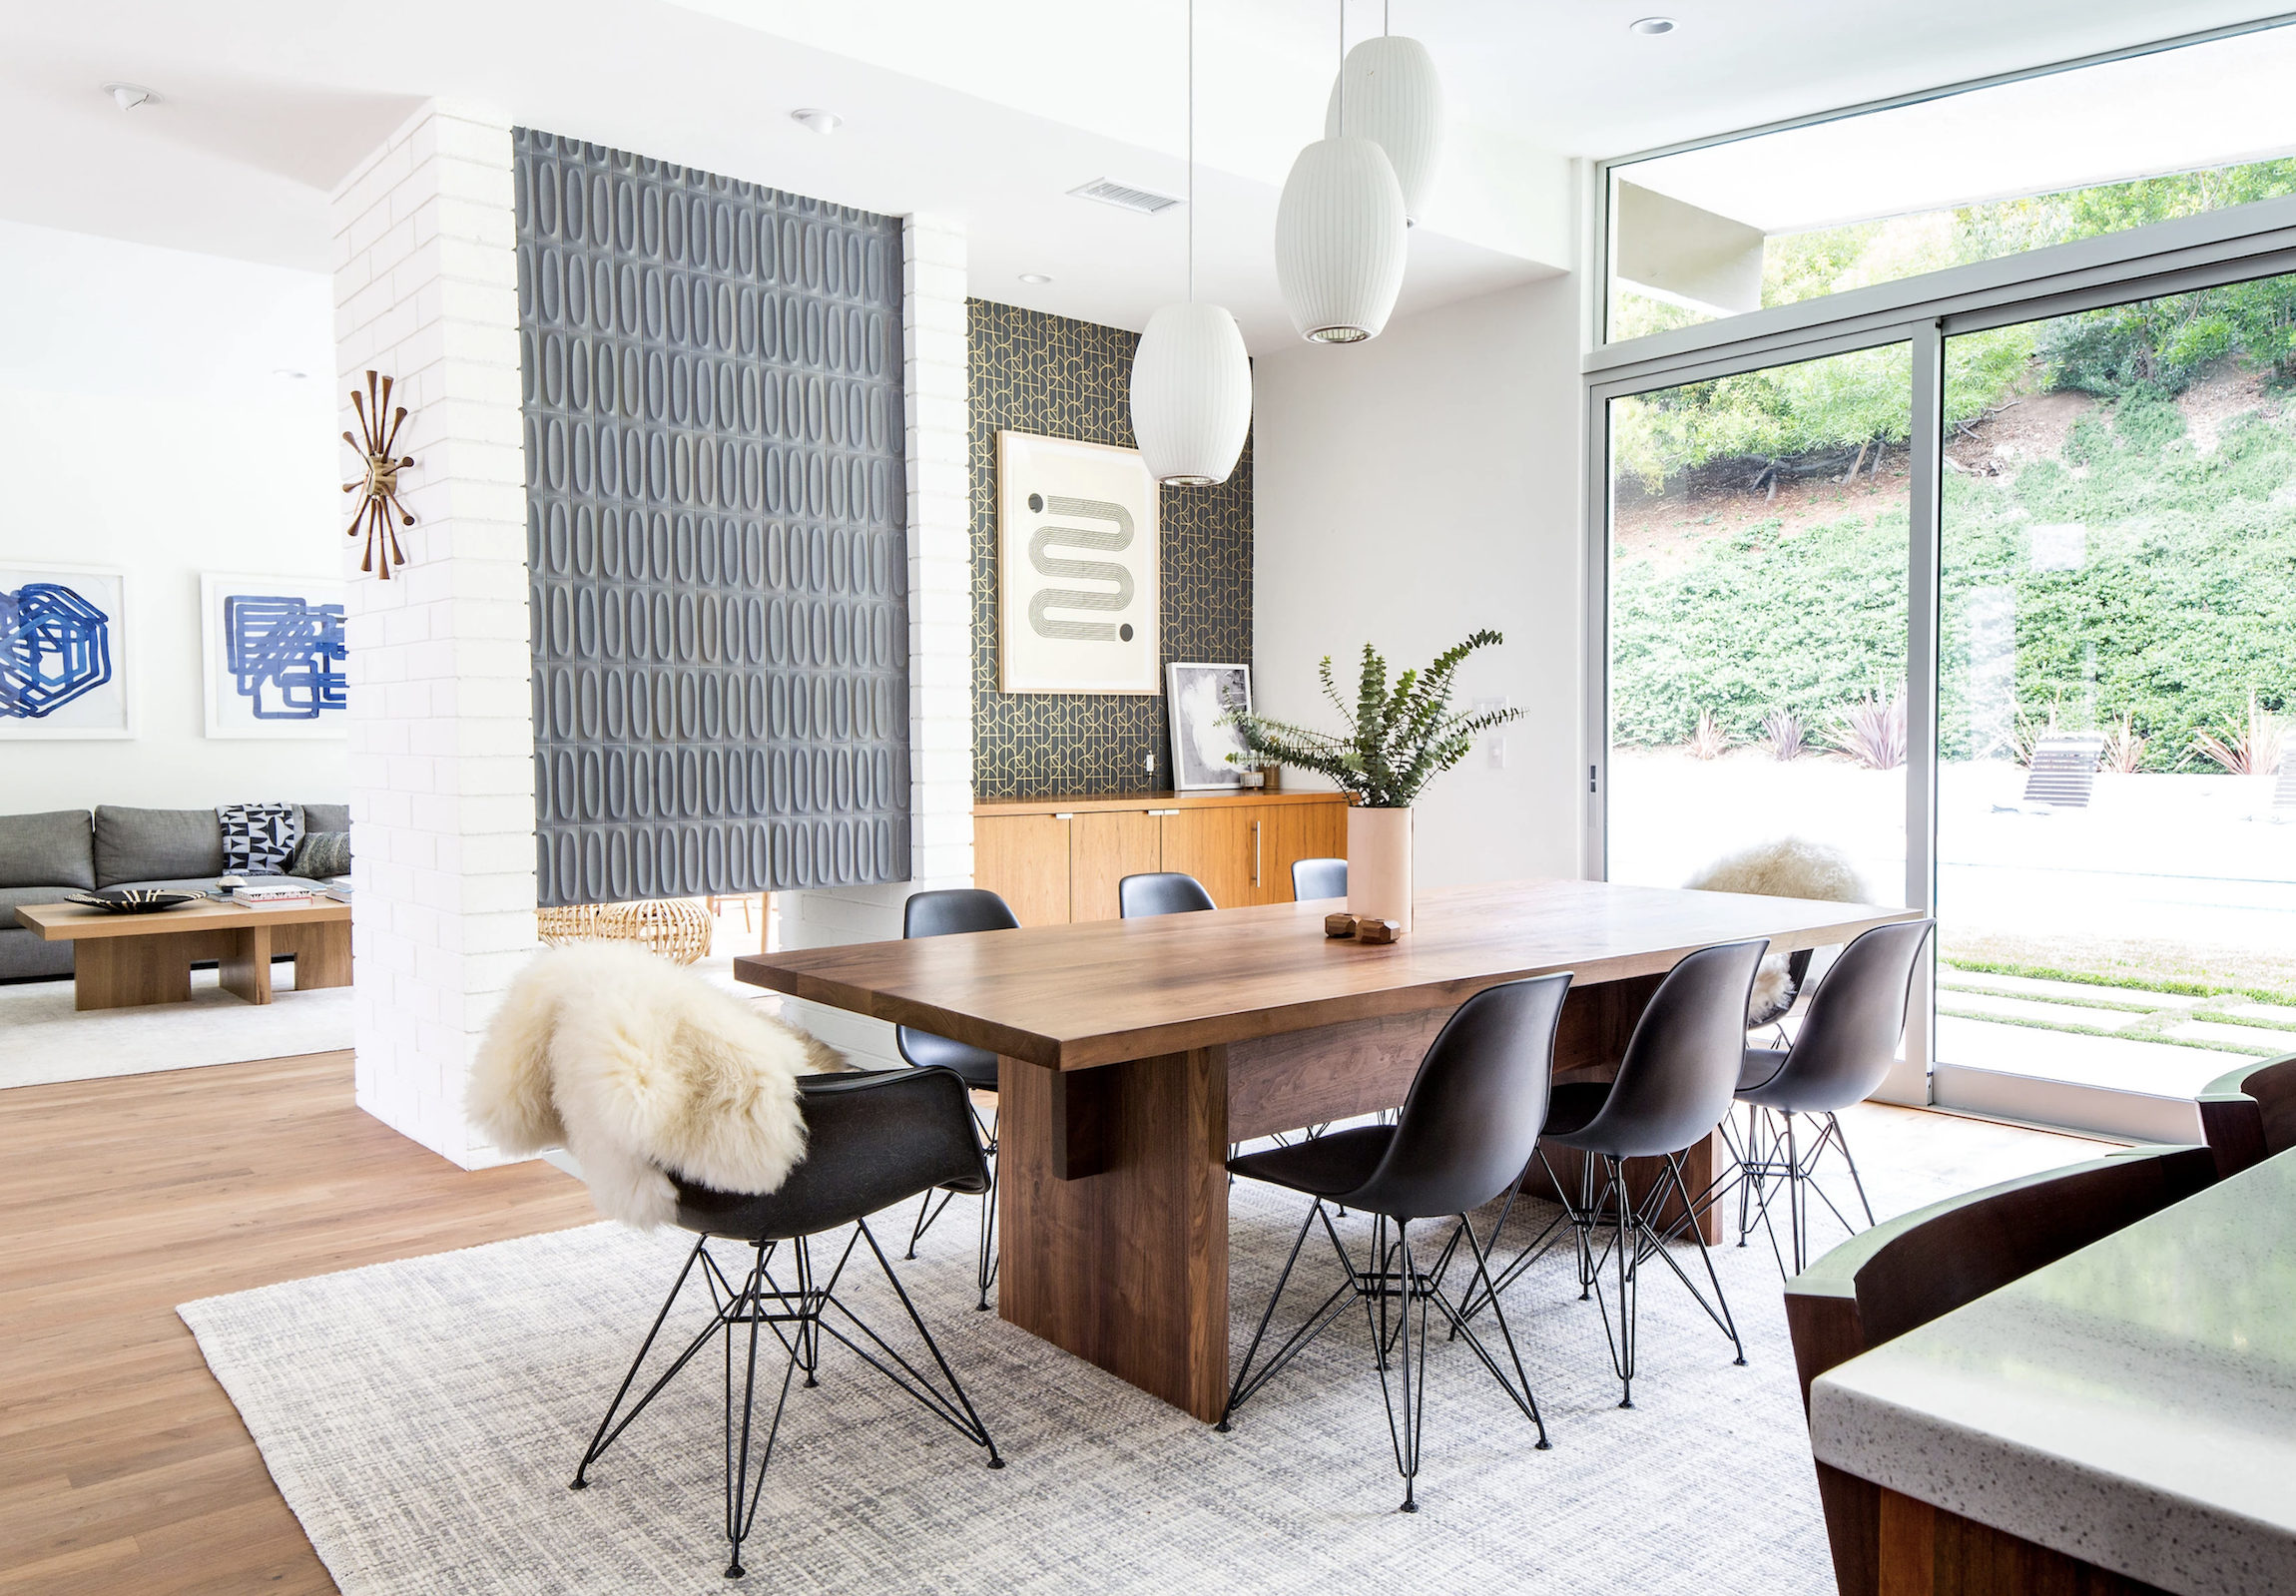
Pendant Lighting Over Islands
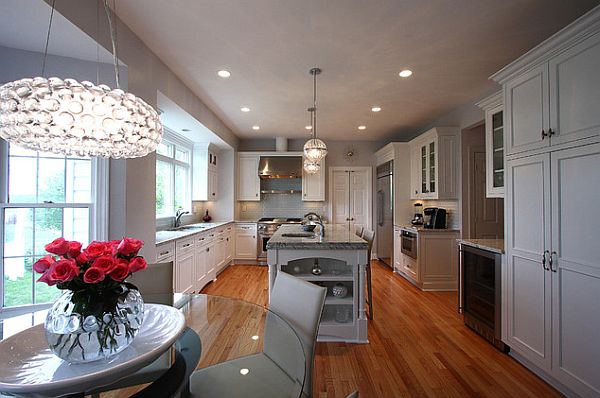
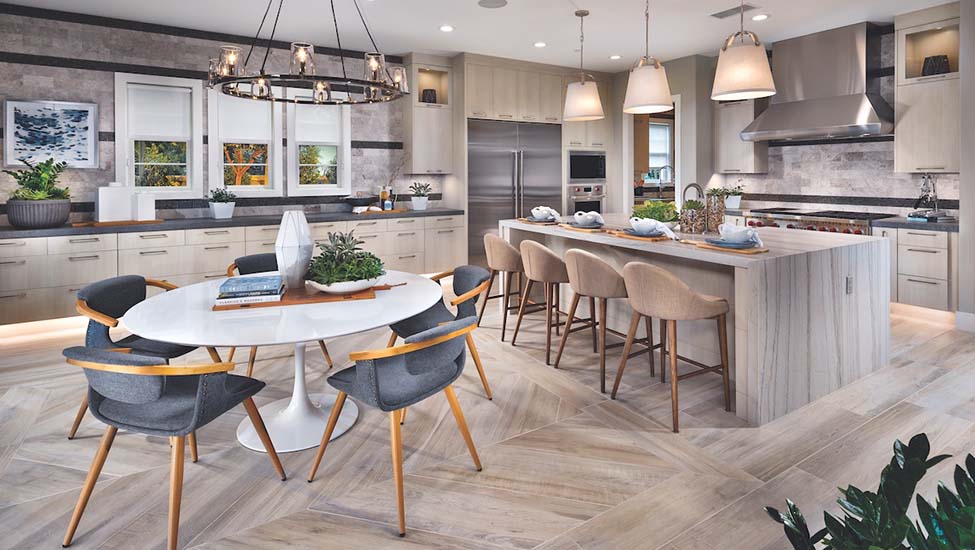
Island pendants serve as both workhorses and jewelry for your kitchen. I’ve found three pendants work perfectly over most standard-sized islands (about 6 feet long). The scale should match your space—larger kitchens can handle bigger fixtures, while smaller ones need more modest sizes. My rule of thumb: add the length and width of your island in feet, then convert that number to inches for the total width of all pendants combined. This ensures they look proportional without overwhelming the space.
The style of pendants should complement your kitchen’s overall design. In my modern farmhouse kitchen, I chose black metal cage pendants with Edison bulbs that bridge rustic and industrial styles. For contemporary spaces, I love sleek drum or cylinder pendants in metallic finishes. One client’s traditional kitchen came alive with crystal chandelier-style pendants over their island. Whatever style you choose, I recommend LED bulbs labeled “bright white” or “soft white” (2700K-3000K temperature) for the most flattering light.
Height adjustment makes a big difference in functionality. I install pendants on adjustable cables or rods so homeowners can fine-tune the positioning. The bottom of the fixtures should clear the sightlines of people sitting at the island, usually 30-36 inches above the surface. One clever trick I’ve used: installing pendants at slightly different heights for visual interest in more casual spaces. Always view the pendants from all angles during installation to ensure they look balanced from every viewpoint in your open-concept area.
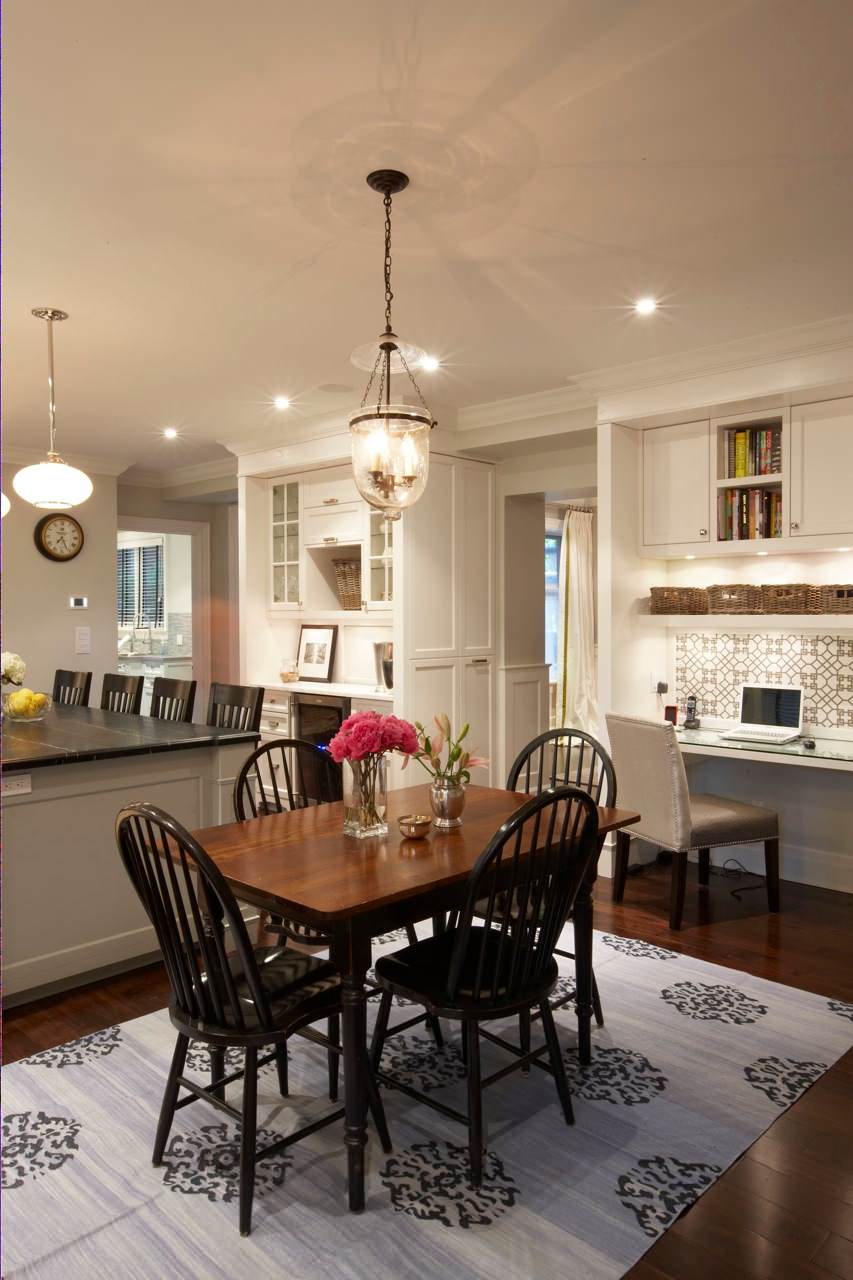
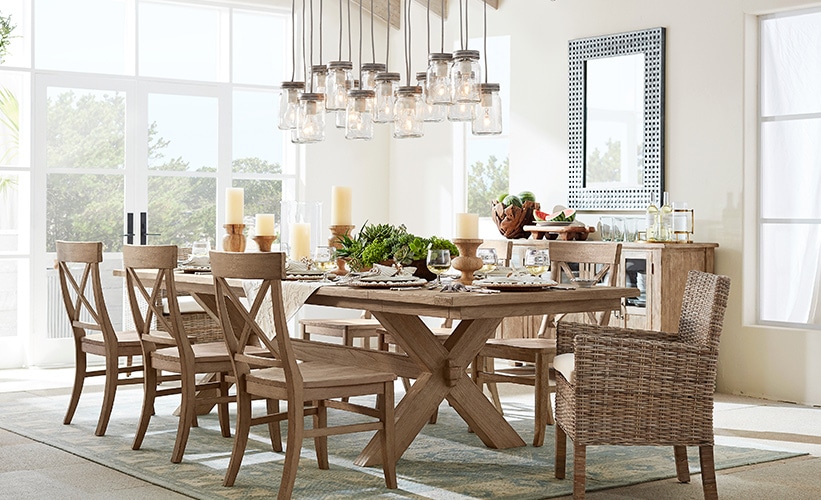
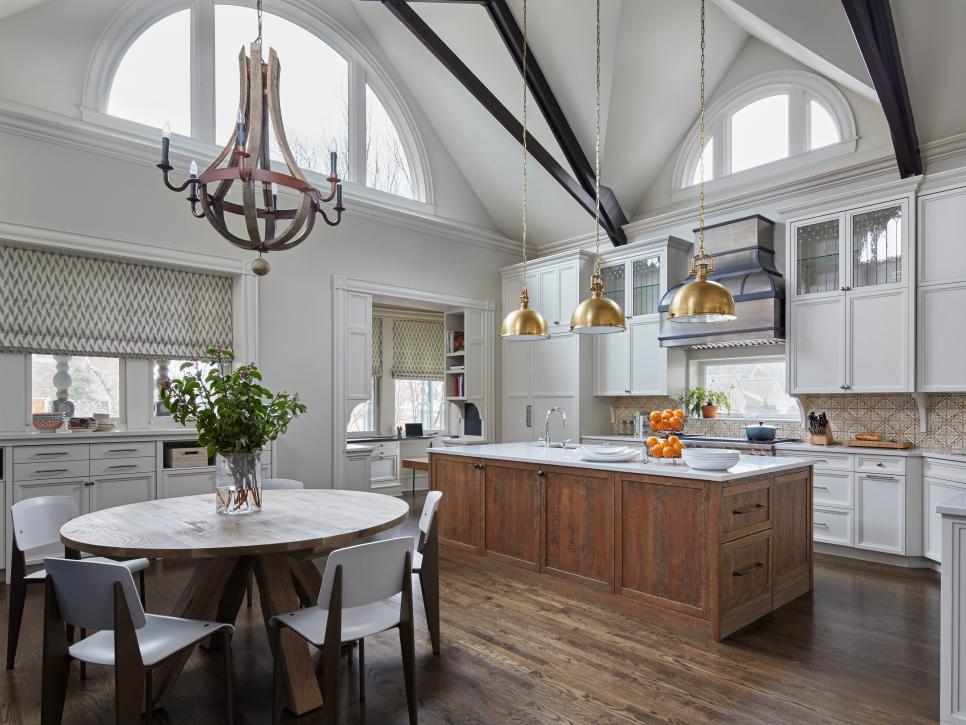
Dining Room Chandelier Selection
The dining room chandelier serves as the crown jewel of your eating space. I always choose a fixture about 12 inches narrower than the table’s narrowest dimension—so a 36-inch wide table gets a 24-inch wide chandelier. For height, I hang it so the bottom sits 30-34 inches above the tabletop in rooms with 8-foot ceilings. In my dining room, I installed a dimmable chandelier with candleshades that casts the perfect glow for both everyday meals and dinner parties.
The chandelier’s style should reflect how you use the space. Formal dining rooms can handle more elaborate crystal or multi-light fixtures, while casual eat-in kitchens need simpler designs. I recently helped a client select a woven rattan chandelier for their coastal-style dining nook—it adds texture without overwhelming the small space. For rectangular tables, linear chandeliers or multiple smaller fixtures work better than single round ones. Always consider the view from adjacent rooms—your chandelier should look attractive from all angles, not just when seated at the table.
Light quality is just as important as appearance. I avoid bare bulbs that create glare and instead look for fixtures with diffusers or shades that soften the light. The ideal brightness depends on your activities—I recommend a dimmer switch for flexibility. For most dining rooms, I calculate about 30-40 watts (or equivalent lumens) per square foot. One of my favorite tricks is installing a chandelier with upward-facing lights that bounce off the ceiling, creating flattering indirect illumination that’s perfect for entertaining.
Under-Cabinet Kitchen Lighting
Under-cabinet lighting revolutionized how I work in my kitchen. After trying various options, I’ve settled on LED tape lights as the most practical solution. They provide even, shadow-free illumination across the entire countertop. I install them toward the front of the cabinets, hidden by the lip, which prevents direct visibility of the light source while maximizing task lighting. The 3000K temperature offers ideal color rendering for food prep—it makes ingredients look natural without the sterile effect of cooler temperatures.
Installation details make all the difference. I always hardwire under-cabinet lights to a switch for convenience, with the transformer hidden in a cabinet. For DIYers, plug-in versions with discreet cords work well too. The lights should run continuously along all work surfaces, with special attention to corners where shadows often form. In my kitchen, I added extra lighting inside glass-front cabinets to create depth and showcase pretty dishware. The key is hiding all wiring completely—I use paintable wire channels when necessary to maintain a clean look.
Control options enhance functionality. I put my under-cabinet lights on a separate switch from the overhead lights, and I highly recommend adding a dimmer. This allows me to use bright light for cooking tasks and lower light for nighttime ambiance. Some newer systems even offer color temperature adjustment or smart home integration. One client loves being able to turn on their under-cabinet lighting with a voice command when entering the kitchen with armfuls of groceries. Proper under-cabinet lighting makes kitchen tasks easier while adding a high-end look.
Dimmers and Smart Controls
Dimmers completely transform how lighting functions in kitchens and dining areas. I install them on nearly every lighting circuit—they’re inexpensive upgrades with huge impact. In my dining room, I can adjust from bright light for homework to soft glow for intimate dinners. Kitchens benefit from dimmers too—sometimes you want full brightness for cleaning, lower levels for evening snacks. I prefer rotary dimmers for their precise control, though slide dimmers work well too. Just ensure your dimmers are compatible with your bulbs, especially LEDs.
Smart lighting systems take control to the next level. I’ve set up several kitchens with voice-controlled or app-controlled lighting that remembers preferred settings. One favorite feature: “scene” programming that adjusts multiple lights simultaneously—like lowering overheads while brightening under-cabinet lights for movie night snacks. Smart bulbs can even change color temperature throughout the day—cooler in morning for alertness, warmer in evening for relaxation. The initial setup requires some tech comfort, but the daily convenience is worth it.
Motion sensors add hands-free convenience in key areas. I installed one in my pantry that turns on the lights automatically when I enter with my hands full. Another useful spot is under-cabinet toe-kick lighting that illuminates when walking through the kitchen at night. These small automation touches make living spaces more functional while reducing energy use. I always advise clients to start with one or two smart lighting features rather than overhauling everything at once—you can always add more later as you see what works best for your household’s routines.

Mixing Metal Finishes
Gone are the days when all metal finishes had to match perfectly. I now embrace mixing two or three complementary finishes for a collected-over-time look. In my kitchen, I paired brushed nickel cabinet hardware with brass pendant lights and a black metal chandelier in the adjacent dining area. The key is keeping one dominant finish (about 70% of fixtures) and using others as accents. I often pull inspiration from fixed elements like faucets or appliances when selecting lighting finishes.
Some combinations work better than others. Warm metals (brass, copper, gold) naturally complement each other, as do cool tones (nickel, chrome, black). I sometimes mix warm and cool by keeping them on separate lighting layers—like warm pendants over the island with cool recessed lights in the ceiling. The finishes should feel intentionally mixed, not random. One trick I use: choose fixtures with multiple metal tones that bridge the gap between your dominant and accent finishes. Always view samples together in your actual space, as lighting can dramatically affect how metals look.
Balance matters when mixing finishes. I distribute accent finishes throughout the space rather than clustering them in one area. For example, if using black metal for dining chairs, I might repeat it in small doses in the kitchen lighting. Texture variety helps too—pairing polished brass with brushed nickel creates nice contrast. In open-concept spaces, I often continue one finish from the kitchen into the dining area to create flow. There are no strict rules, but I find most spaces feel cohesive with no more than three metal finishes in total.

How many pendant lights should I hang over my kitchen island?
For most standard islands (5-7 feet long), I recommend three pendant lights spaced evenly about 30 inches apart. Smaller islands can get by with two, while larger ones might need four. The total width of all pendants combined should be about 12 inches less than your island’s length. I always use odd numbers as they create a more natural visual balance. The bottom of the pendants should hang 30-36 inches above the countertop—lower for more intimate spaces, higher in busy family kitchens. Always check sightlines from all angles to ensure the pendants don’t obstruct views across your open space.
What’s the ideal color temperature for kitchen and dining lighting?
I prefer 2700K-3000K (warm white to soft white) for most residential kitchens and dining areas. This range provides flattering light that makes food look appetizing while maintaining enough brightness for tasks. Cooler temperatures (3500K+) can feel too clinical, while warmer (2200K) temperatures may distort food colors. Under-cabinet and task lighting can be slightly cooler (3000K-3500K) for better visibility during food prep. Always choose bulbs with high CRI (90+) for accurate color rendering—this makes ingredients and table settings look their best.

How do I choose the right size chandelier for my dining table?
A simple formula works well: choose a chandelier with a diameter about half to two-thirds your table’s width. For rectangular tables, the fixture can be up to 12 inches narrower than the table. Hang it so the bottom sits 30-34 inches above the tabletop in rooms with 8-foot ceilings—adjust 3 inches higher or lower for each foot of ceiling height difference. For very long tables (over 8 feet), consider two smaller chandeliers or a linear fixture. Always center the chandelier over the table, not necessarily the room, and ensure it doesn’t obstruct views when people are seated.
Can I mix different lighting styles in my open kitchen and dining area?
Absolutely—in fact, I encourage it to define separate zones. The key is maintaining some common elements for cohesion. You might choose contemporary pendants over the island and a traditional chandelier in the dining area, but use matching metal finishes or similar shapes to connect them. I often repeat one material (like glass shades or black metal accents) throughout both spaces. The lighting layers can vary too—perhaps more task lighting in the kitchen, more ambient in the dining area. Just avoid using too many competing statement pieces that create visual chaos.

How much lighting do I need in my kitchen?
A good rule of thumb is about 100 lumens per square foot total, distributed across your lighting layers. For a 200-square-foot kitchen, that’s 20,000 lumens spread between overhead, task, and accent lighting. The kitchen work triangle (sink, stove, fridge) should have at least 50 foot-candles of task lighting. I calculate lighting needs by zones rather than the whole room—you need brighter light over counters than in walkways. Dimmers let you adjust for different activities. One test I use: chop herbs at your main prep area—if you can’t see the details clearly, add more task lighting.
Are smart lights worth the extra cost in kitchens and dining rooms?
In my experience, yes, especially for frequently used spaces. The convenience of voice control when your hands are full of groceries or dishes is priceless. Smart dimming and scheduling ensure perfect lighting for every occasion without fiddling with switches. Energy savings from automated shut-off and dimming can offset the higher initial cost over time. Start with smart bulbs in key fixtures like pendants or under-cabinet lights rather than converting everything at once. Look for systems that work with your existing smart home platform. The ability to adjust color temperature throughout the day is a bonus that enhances both functionality and ambiance.
Dining Room Lighting Fixtures – Stylish Ideas for Dining Room
Ideas For Modern Dining Room Lighting

Dining Room Lighting Ideas

Stylish Light Fixtures for Your Kitchen Kitchen Lighting
Kitchen and Dining Area Lighting Solutions

Related Posts:
- Tuscan Kitchen Light Fixtures
- Cottage Kitchen Lighting Ideas
- Country Kitchen Lighting Ideas
- Retro Kitchen Pendant Lights
- Rustic Industrial Kitchen Lighting
- Vintage Kitchen Light Fixtures
- Farmhouse Style Lighting For Kitchen
- Contemporary Kitchen Lighting Design
- Kitchen Bench Pendant Lights
- Kitchen Vanity Lights