There’s something special about an industrial farmhouse kitchen island that makes it the heart of any home. I’ve always loved how it combines rugged, utilitarian elements with cozy, rustic charm. Whether you’re prepping meals, entertaining guests, or just enjoying your morning coffee, this type of island offers both practicality and personality. Over the years, I’ve helped design several of these islands and seen firsthand how they transform kitchens. If you’re considering one for your space, here’s what you need to know to get it right.
What Defines an Industrial Farmhouse Style
The industrial farmhouse look mixes raw, unfinished materials with warm, inviting textures. I often start with a sturdy metal base—think iron or steel with visible rivets or welds. This gives that factory-like toughness that’s key to the industrial side. Then I balance it with reclaimed wood or distressed finishes for the farmhouse touch. The contrast between these elements creates visual interest that never gets old.
Functionality plays a big role in this style. I always make sure the island can handle real kitchen work while maintaining its character. Open shelving made from pipe fittings, integrated butcher block sections, and metal accents all serve practical purposes. I’ve found that islands with wheels or locking casters add mobility while keeping that industrial workshop vibe.
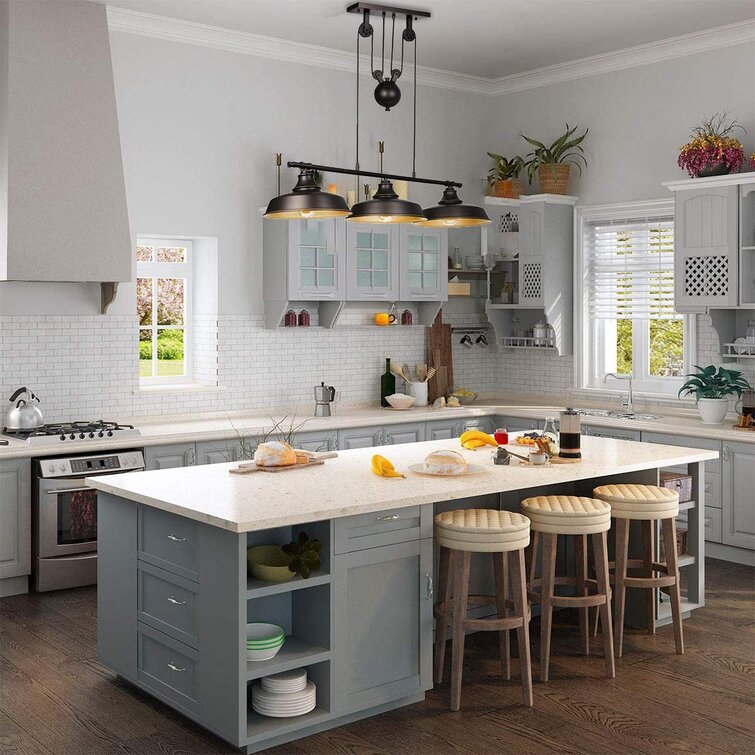
Lighting is another area where this style shines. Hanging pendant lights with Edison bulbs over the island complete the look. I prefer fixtures with metal shades or cage designs that echo the industrial base. The warm glow they cast on the wood countertop brings out all the beautiful grain patterns and imperfections that make farmhouse style so appealing.
Choosing the Right Materials
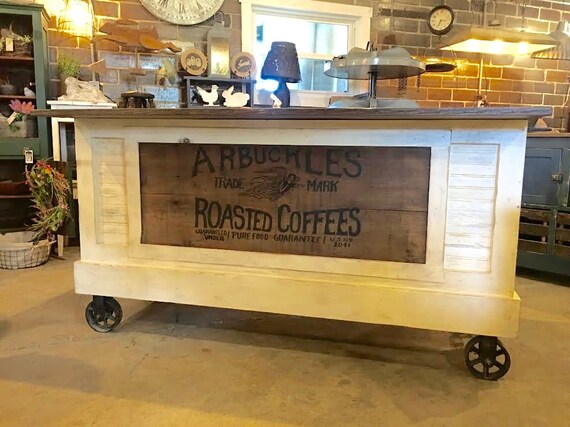
For the base, I typically use steel or iron for authentic industrial appeal. Powder-coated finishes prevent rust while maintaining that raw metal look. In one project, we used salvaged factory cart wheels as the base—it became the island’s standout feature. If metal feels too cold, combining it with wood legs or supports softens the effect while keeping the industrial character.
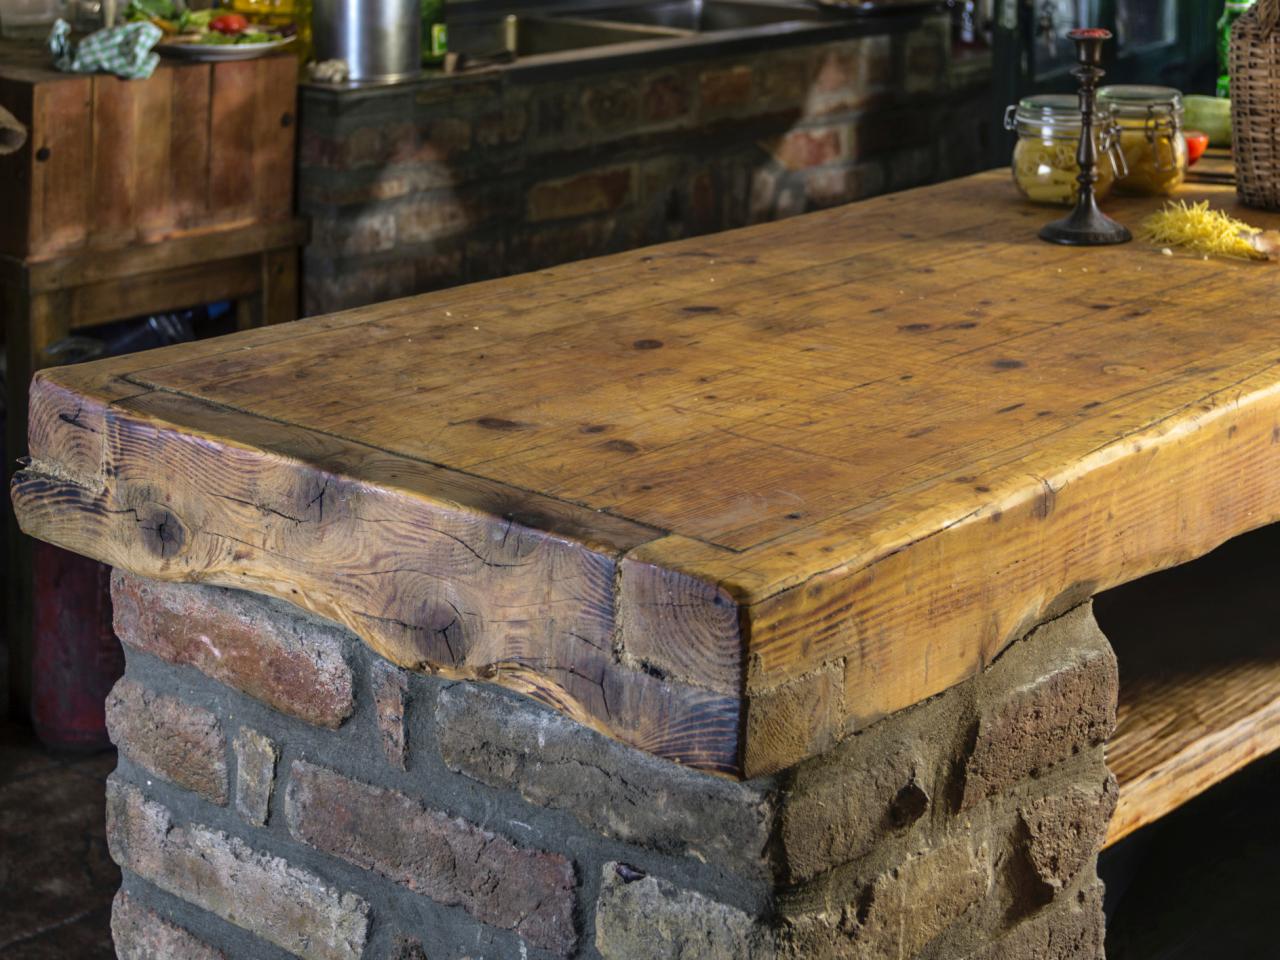
Countertop selection makes a huge difference. Reclaimed wood is my top choice for farmhouse authenticity. The knots, cracks, and variations in old timber tell a story that new wood can’t match. I always seal it properly for food safety and durability. Butcher block is another great option—it’s practical for prep work and develops a beautiful patina over time.
For storage components, I mix metal and wood. Galvanized steel bins or wire baskets add industrial flair while being genuinely useful. Open shelving with iron brackets keeps items accessible and maintains the unfussy farmhouse aesthetic. I avoid upper cabinets on these islands—they tend to block sightlines and make the space feel closed in.

Size and Layout Considerations
Getting the proportions right is crucial. I recommend allowing at least 42 inches of clearance around all sides for comfortable movement. In smaller kitchens, I’ve designed narrower islands (about 36 inches wide) that still offer seating for two. The length depends on your space, but 5 to 7 feet gives enough surface area for multiple uses without overwhelming the room.
Height matters more than people realize. Standard counter height (36 inches) works if you’ll mainly use it for food prep. For seating, I prefer bar height (42 inches) with 12-inch overhang—it’s more comfortable for guests and creates visual separation between work and social areas. In one kitchen, we did a split-level island with prep space on one side and bar seating on the other—it became the home’s most popular spot.
Think about traffic flow when positioning the island. I always place it so the cook can easily access the fridge, sink, and stove without crossing paths with others. If your kitchen opens to dining or living areas, orient the seating side toward those spaces to encourage interaction during gatherings.
Functional Features to Include
A sink in the island is incredibly useful but requires planning. I’ve installed farmhouse-style apron sinks that complement the aesthetic while providing deep, practical basins. Just remember you’ll need to run plumbing, so position it near existing lines to minimize renovation work. A second smaller prep sink is another option I’ve used successfully.
Electrical outlets are a must-have that’s often overlooked. I typically install pop-up outlets in the countertop or side-mounted ones with industrial-style metal covers. USB charging ports are worth adding too—I’ve seen how convenient they are for modern families. Under-cabinet lighting, either LED strips or vintage-style fixtures, adds both function and ambiance.
Storage solutions should match how you’ll really use the island. Deep drawers for pots and pans work better than cabinets in my experience. I often include a dedicated spot for cutting boards and baking sheets. One client loved our idea for a slide-out trash/recycling center—it kept waste out of sight but within easy reach during meal prep.

Customization and Personal Touches
The beauty of this style is how easily you can personalize it. I’ve incorporated everything from vintage factory carts to repurposed sewing machine bases into island designs. One of my favorite projects used an old wood-and-metal workbench as the starting point—its natural wear and tear gave instant character.
Hardware choices make a big impact. I look for oversized iron handles, exposed screws, or pipe-style pulls that enhance the industrial feel. Mixing different metal finishes (like oil-rubbed bronze with brushed nickel) adds depth if done intentionally. For seating, metal stools with wood seats or woven backs bridge both styles perfectly.
Don’t forget the underside details. I often leave some structural elements exposed or add cross braces for visual interest. A chalkboard panel on one side is fun for menus or grocery lists. In homes with kids, I’ve installed hooks at child height for aprons or school bags—small touches that make the island truly part of daily life.

Maintenance and Long-Term Care
Wood countertops need regular upkeep that I think is worth the effort. Monthly oiling keeps them looking rich and prevents drying or cracking. For high-use areas, I recommend a durable matte finish polyurethane—it’s less authentic than oil but more practical for busy families. Always wipe up spills quickly, especially with reclaimed wood that may have existing stains or vulnerabilities.
Metal bases require occasional attention too. I dust them weekly to prevent buildup in crevices. For painted metal, touch up chips promptly to avoid rust. Unfinished steel develops a natural patina that many people love—if that’s your preference, just keep it dry and apply paste wax annually to slow oxidation.
Moving parts like drawers and wheels need periodic checks. I lubricate drawer slides every six months and tighten any loose hardware. Casters should lock securely—if they start sticking, a bit of WD-40 does wonders. Taking these small maintenance steps preserves both the island’s function and its character for years to come.

Can I build an industrial farmhouse island myself?
Absolutely! Many DIYers create stunning islands using salvaged materials. I’ve helped clients build theirs from old doors, pallet wood, and even metal filing cabinets. The key is starting with a solid base—either a pre-made metal frame or sturdy wood construction. Basic carpentry skills and some metalworking tools (like a drill and angle grinder) will get you far. If working with reclaimed wood, invest time in proper cleaning and sanding. Online tutorials can guide you through pipe fitting assembly for shelving. Just take measurements carefully—I’ve seen many islands that ended up too large for their space.
How much does an industrial farmhouse island typically cost?
Prices vary widely based on materials and size. A DIY version with reclaimed wood and simple metal legs might cost 500−1,000. Pre-made islands start around 1,500, while custom-built ones from artisans can reach 5,000+. In my experience, the metal base often drives the price—new steel fabrication isn’t cheap. Salvaging materials helps; I once built one using 200 worth of old bleacher seats and 100 in pipe fittings. Don’t forget to factor in extras like sinks, outlets, or special finishes. While not the cheapest option, these islands add significant value to your home.
What’s the best wood for the countertop?
I prefer hardwoods like maple, walnut, or oak for their durability and grain patterns. Reclaimed heart pine is another favorite—its tight grain and natural aging are perfect for this style. Butcher block works well if you’ll actually use it for cutting. Avoid softwoods like pine for countertops unless you enjoy the distressed look (they dent easily). For a more industrial feel, consider concrete over wood—it pairs beautifully with metal bases. Whatever you choose, ensure proper sealing; I use food-grade mineral oil for pure wood or marine-grade epoxy for heavy protection.
How do I incorporate seating without sacrificing workspace?
The key is proportional overhang. I recommend at least 12 inches of overhang for comfortable knee space, with 15 inches being ideal. For a 36-inch deep island, that leaves 21-24 inches of work surface—enough for most tasks. Stools that tuck completely underneath (with no arms) maximize space when not in use. Another solution I’ve used is flip-up extensions on one side—they provide seating when needed and fold down otherwise. In smaller kitchens, consider an L-shaped design with seating just on one leg of the L. Always allow 24 inches width per stool for elbow room.

Will this style look dated in a few years?
The industrial farmhouse trend has shown remarkable staying power because it’s rooted in authentic, timeless materials rather than fleeting fads. I’ve noticed that the most enduring designs focus on quality craftsmanship over trendy details. To future-proof your island, stick with classic proportions and neutral metal finishes (black, oil-rubbed bronze, or raw steel). Avoid overly distressed finishes or trendy colors that might feel dated. The beauty of this style is its adaptability—you can always update hardware or stools to refresh the look without replacing the entire island.
How do I clean and maintain the mixed materials?
Each material needs slightly different care. For wood surfaces, I use a mild soap solution and avoid harsh chemicals that can strip finishes. Metal bases can usually be wiped with a damp cloth—for stubborn spots, a paste of baking soda and water works well. Don’t use abrasive pads on either surface. For pipe fittings or exposed hardware, occasional polishing with a dry microfiber cloth prevents tarnishing. Grease splatters (common near cooktops) should be wiped immediately from both wood and metal. I recommend keeping coasters handy to prevent water rings on wood. Every few months, check for loose fittings or screws—the natural movement of wood can cause them to loosen over time.
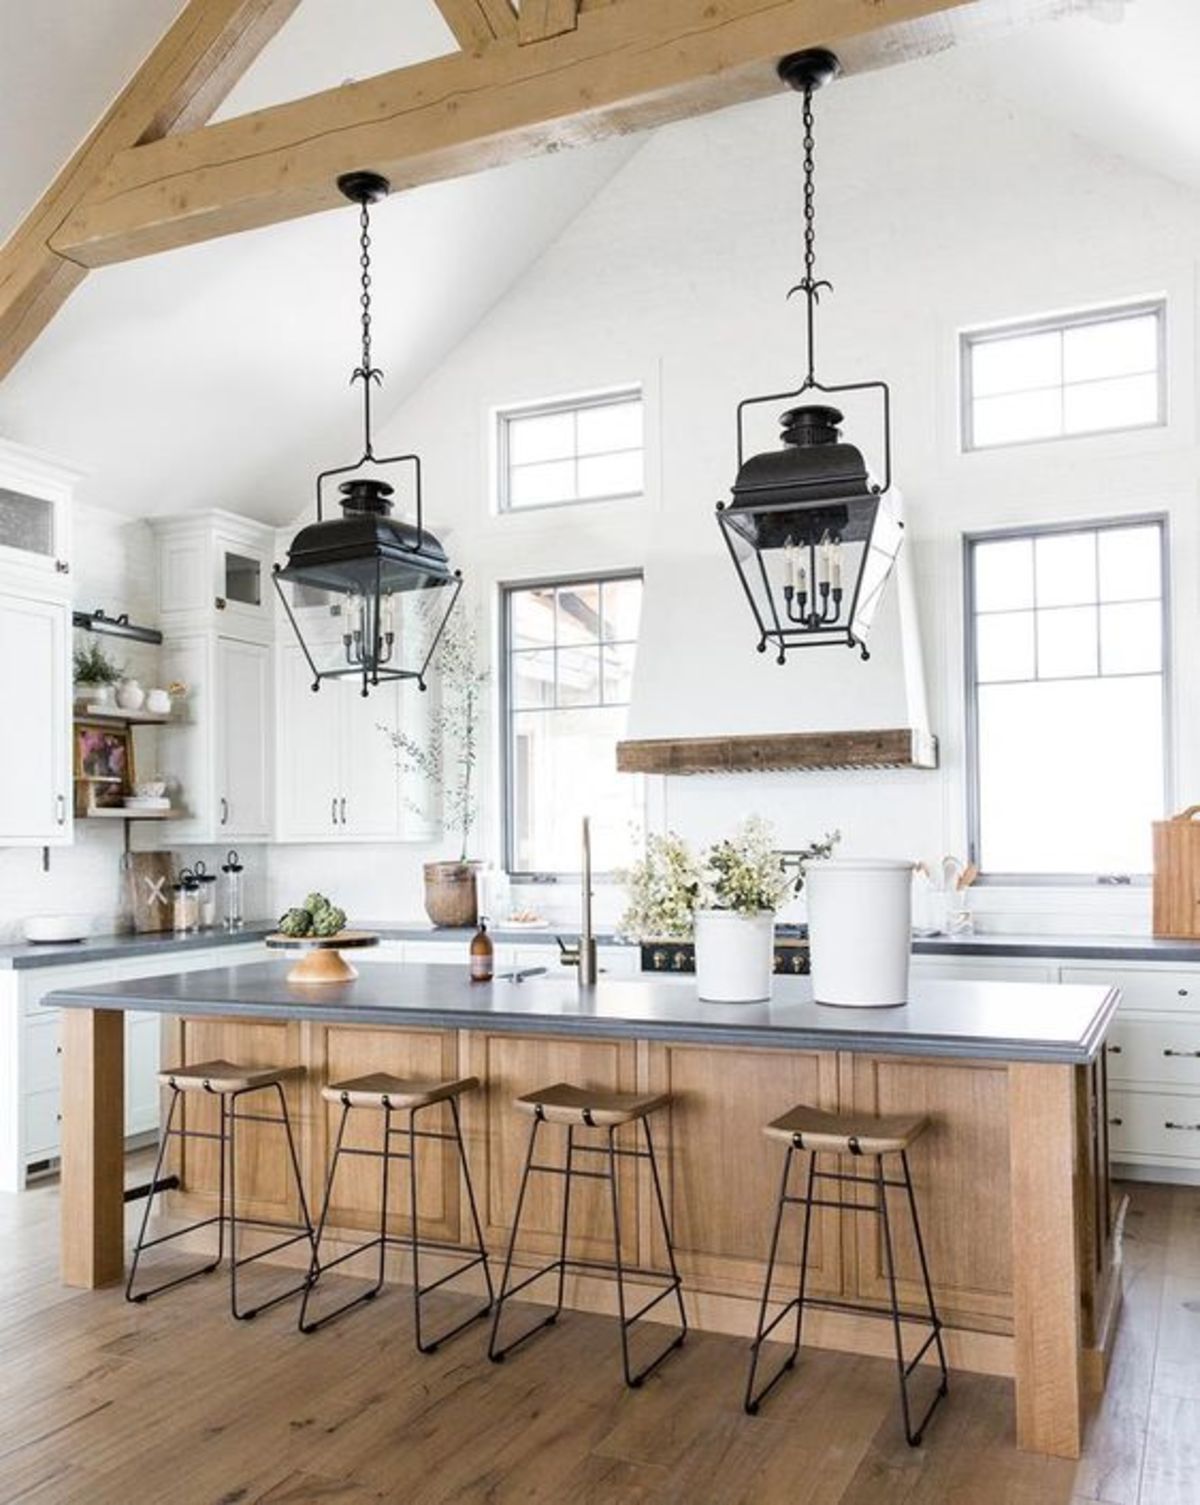
Spacious Industrial Farmhouse Kitchen
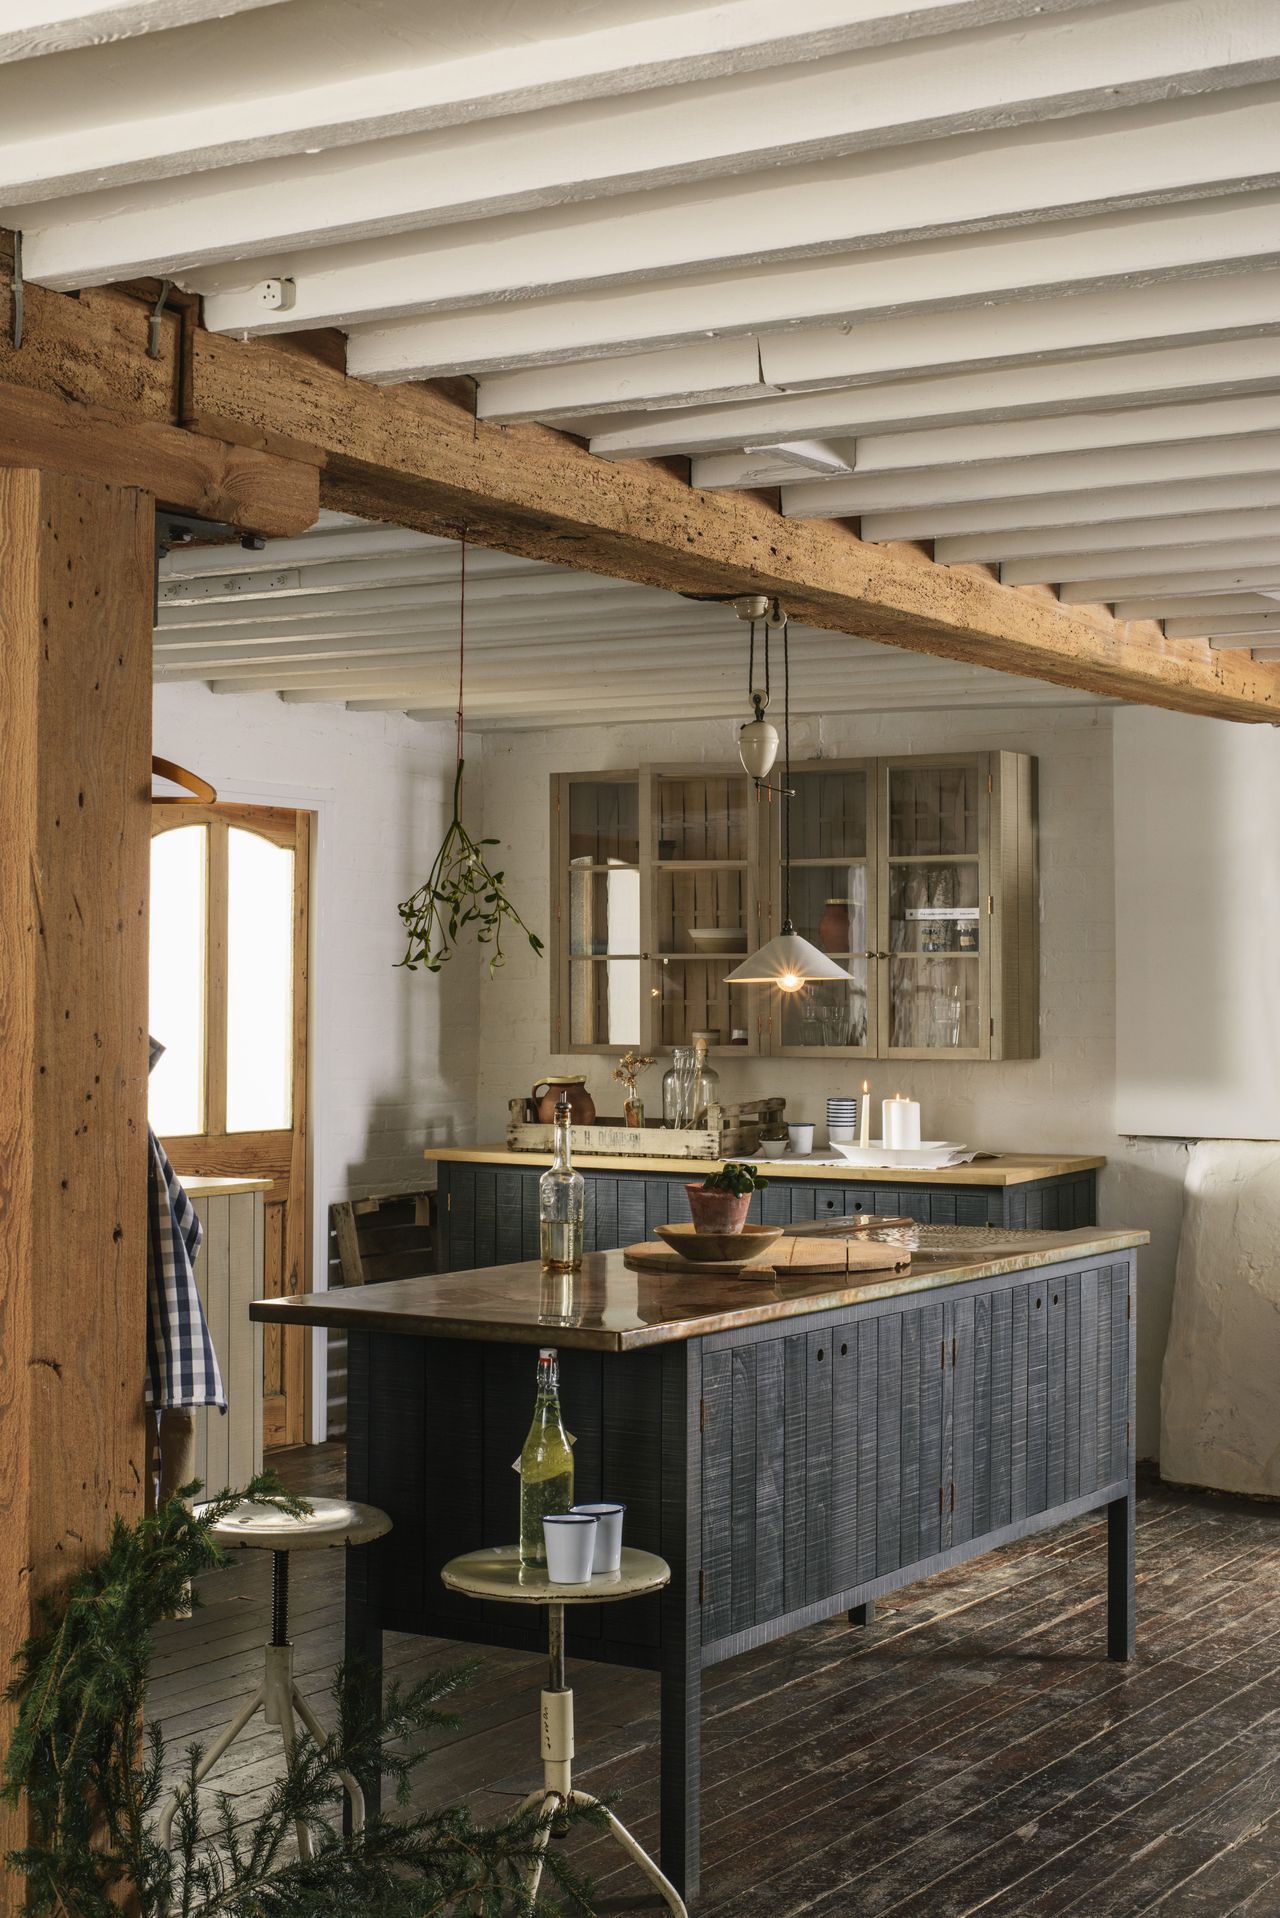
Industrial Kitchen Island – Country – kitchen – Crisp Architects

LOG BARN Dining Room Light Fixture Hanging, Farmhouse Chandelier in Rustic Black Metal with Clear Glass Shades, Adjustable Chains, Pendant for Kitchen

3-light Pulley Pendant Light,rustic Kitchen Island Lights With Metal Shades,adjustable Hanging Height,industrial Vintage Ceiling Lights Fixture For
Farmhouse Industrial 1-light Black Barn Island Pot Pendant Light

Related Posts: