Upgrading Your Kitchen with a Sink Sprayer
A kitchen sink sprayer adds convenience by making cleaning and rinsing easier. Whether replacing an old sprayer or installing one for the first time, the process is straightforward with the right tools. A sprayer connects to the sink’s water supply and provides better reach for washing dishes and filling pots. With a little preparation and attention to detail, homeowners can complete the installation quickly and enjoy the benefits of improved functionality.
Gathering Necessary Tools and Materials
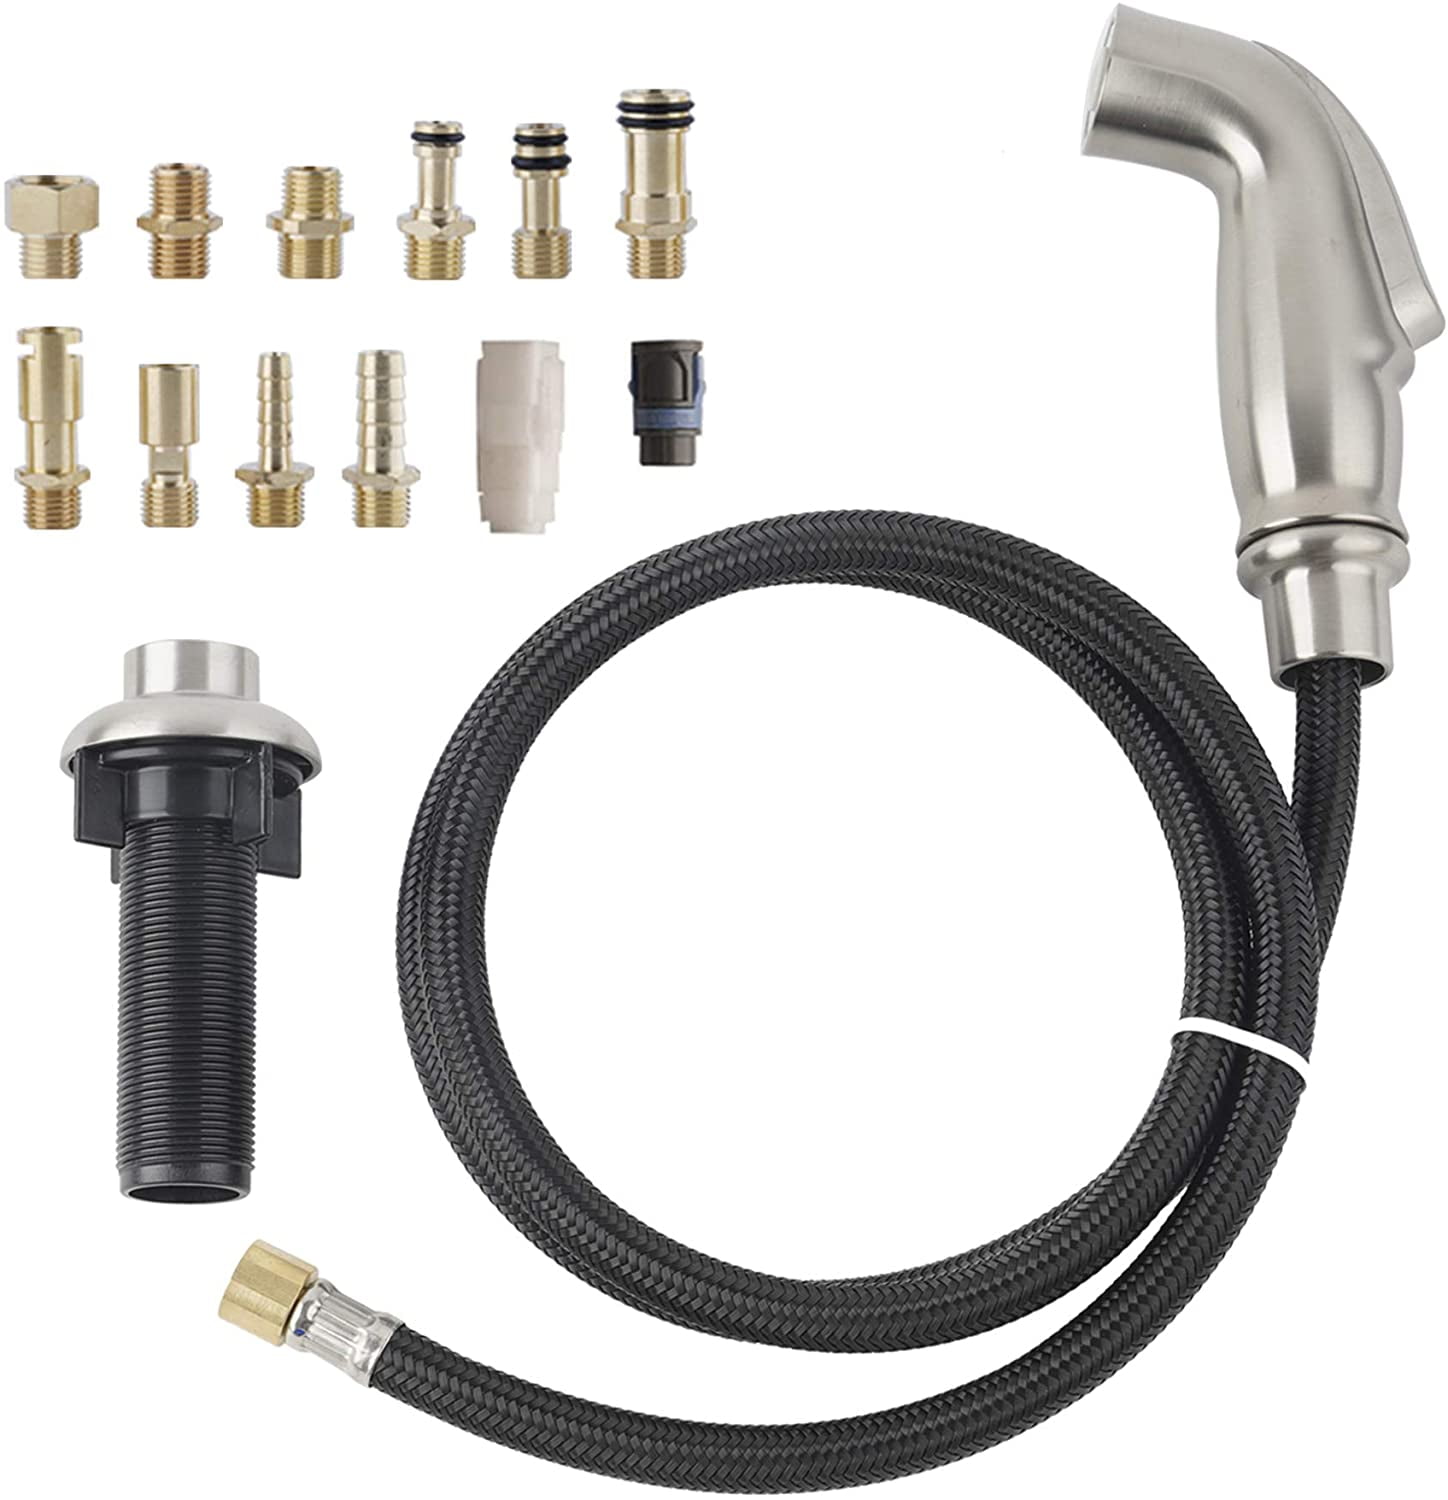
Before starting, gather the required tools to make installation smoother. A wrench, plumber’s tape, and a bucket for catching water are essential. The sink sprayer kit should include a hose, sprayer head, and mounting hardware. Checking the existing sink setup is also important, as some models may require a separate mounting hole. Ensuring all components are available before beginning will help avoid interruptions and speed up the process.
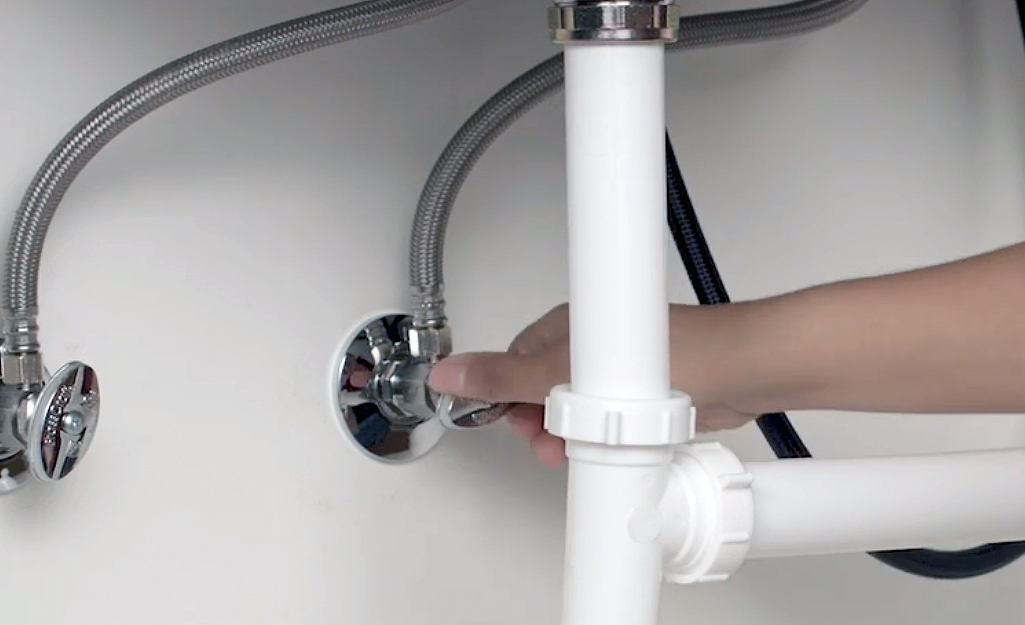
Turning Off the Water Supply
Before disconnecting any plumbing, shut off the water supply to prevent leaks. Most sinks have shut-off valves located under the cabinet. Turning these clockwise will stop water flow. If the sink lacks shut-off valves, turning off the main water supply is necessary. Once the water is off, opening the faucet will release any remaining pressure. This step ensures a dry work area and minimizes the risk of water spilling during installation.
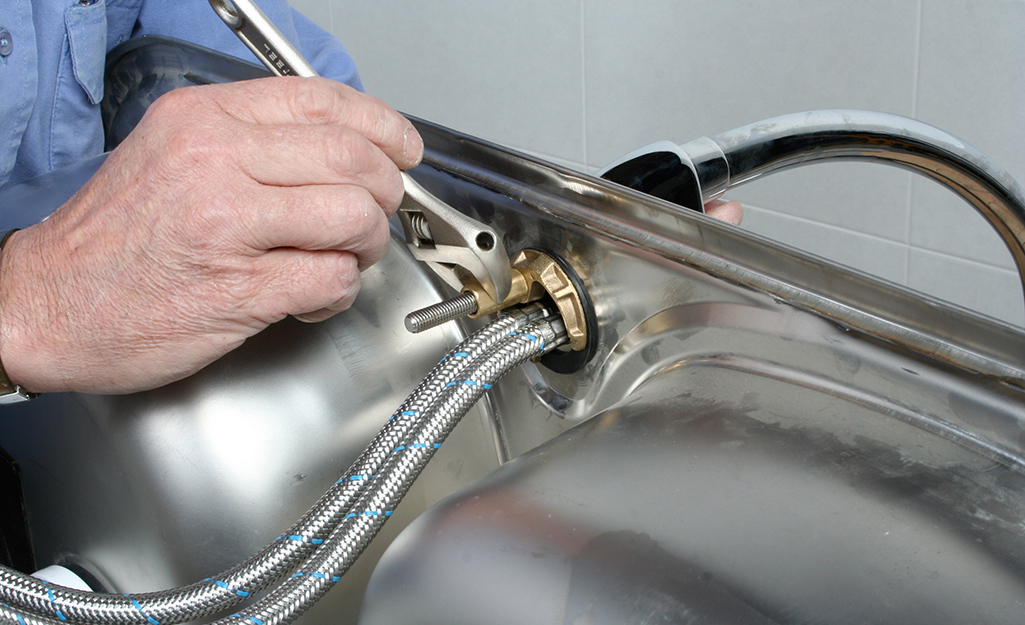
Connecting the Hose and Sprayer
Attaching the sprayer hose to the sink’s diverter valve is a key step in installation. The diverter is typically located beneath the faucet and allows water to switch between the faucet and sprayer. Wrapping plumber’s tape around threaded connections helps prevent leaks. Once the hose is connected, feeding it through the mounting hole and securing the sprayer head completes this step. A firm but careful tightening ensures a secure fit without damaging components.
Testing for Leaks and Proper Function
After installation, restoring the water supply is the next step. Slowly turning the shut-off valves back on will allow water to flow through the system. Testing the sprayer by pressing the trigger ensures proper operation. Checking for leaks at the connections is important, and tightening any loose fittings will help fix minor drips. Running water through both the faucet and sprayer confirms that the diverter is working correctly.
Enjoying a More Functional Sink
A kitchen sink sprayer enhances convenience by improving cleaning efficiency and water control. Installing one is a manageable project with basic tools and attention to detail. Regular maintenance, such as cleaning the sprayer head to prevent clogs, will help extend its lifespan. With a properly installed and functioning sprayer, everyday tasks like washing dishes and rinsing produce become easier. This simple upgrade brings lasting benefits to any kitchen.

Replace a Sink Sprayer

How to Replace a Sink Sprayer

How to install a Sink Sprayer

How to Replace a Sink Sprayer

Kitchen Side Sprayer,Kitchen Sink Sprayer Replacement,Kitchen Sink Faucet Sprayer Hose,Kitchen Sprayer Head Replacement,Kitchen Sink Spray Head,Sink

How to Install a Kitchen Faucet and Side Sprayer
How to Install a Kitchen Faucet and Side Sprayer
Kitchen Sink Side Sprayer Replacement, Kitchen Sink Faucet Spray Head with Hose/Holder Kitchen Sink Sprayer Attachment Sprayer Head Replacement for

How to Replace a Kitchen Sink Sprayer Hose – Dengarden

Kitchen Sink Side Sprayer Replacement, Kitchen Sink Faucet Spray
Related Posts: