When I decided to replace my worn-out kitchen flooring last spring, grey vinyl emerged as the unexpected winner after months of research and showroom visits. Initially, I had my heart set on hardwood, but budget constraints and practical considerations led me to explore modern vinyl options. What I discovered completely changed my perspective on this versatile flooring material. My six-month experience with grey vinyl has taught me valuable lessons about durability, style, and maintenance that I want to share with fellow homeowners.
Choosing the Perfect Grey Shade for Your Kitchen
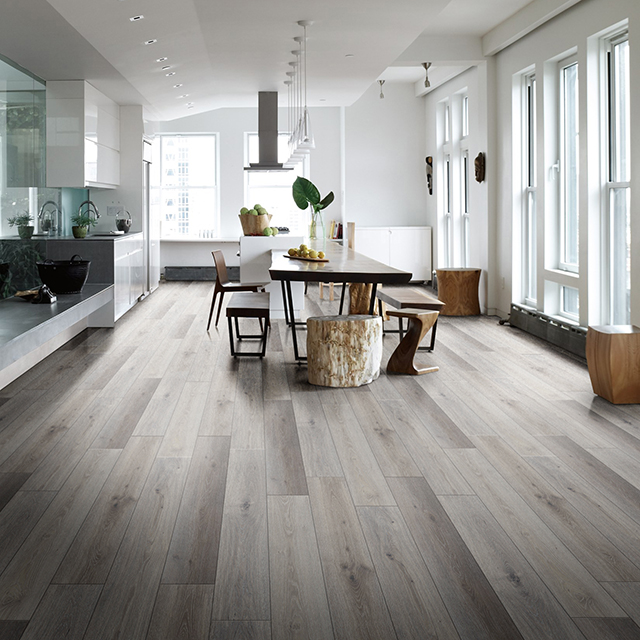
Selecting the right grey tone for my kitchen flooring proved more challenging than I anticipated, given the surprising variety of options available today. Cool greys with blue undertones complement modern stainless steel appliances and white cabinets beautifully, creating a crisp, contemporary aesthetic. I tested multiple samples against my existing cabinetry and discovered that lighting conditions dramatically affect how grey tones appear throughout the day.
Warm greys with brown undertones provided the cozy atmosphere I wanted in my family-friendly kitchen space while maintaining sophistication and style. These earthier tones coordinate perfectly with wood elements and brass hardware, creating a balanced color palette that feels inviting. I learned that warm greys hide dirt and scuff marks better than cooler alternatives, making them practical for high-traffic kitchen areas.
Medium grey tones offered the perfect compromise between light and dark options, providing versatility that works with changing decor preferences over time. Light greys can show every speck of dirt while dark greys reveal water spots and scratches more readily than medium tones. I chose a medium warm grey that creates visual interest without overwhelming my compact kitchen space or clashing with future design changes.
Installation Process and Preparation Requirements
Preparing my kitchen for vinyl flooring installation required more work than I initially expected, but proper preparation ensured professional-looking results that last. I removed all appliances and furniture, then thoroughly cleaned and leveled the existing subfloor using self-leveling compound where necessary. Any imperfections in the subfloor will telegraph through vinyl flooring, creating unsightly bumps and premature wear patterns.
Acclimating the vinyl planks to my kitchen’s temperature and humidity conditions prevented expansion problems after installation was completed successfully. I stored the flooring materials in my kitchen for 48 hours before beginning installation, allowing them to adjust to environmental conditions. This step prevents gaps and buckling that can occur when materials expand or contract after installation.
The actual installation process took me an entire weekend, working methodically to ensure proper alignment and tight seams between planks effectively. I started with the longest, straightest wall and worked across the room systematically. Cutting around cabinets and appliances required patience and precise measurements, but the results justified the extra time and effort invested in careful planning and execution.
Maintenance Routines That Keep Grey Vinyl Looking New
Daily maintenance of my grey vinyl kitchen flooring consists of simple sweeping to remove dirt and debris that could scratch the surface. I use a microfiber dust mop that captures particles effectively without requiring water or cleaning solutions for routine maintenance. This quick daily routine prevents accumulation of abrasive materials that can dull the finish and create permanent damage over time.
Weekly mopping with manufacturer-recommended cleaners maintains the lustrous appearance while removing cooking grease and food residues that accumulate in busy kitchens. I avoid harsh chemicals and abrasive cleaners that can damage the protective wear layer and void warranty coverage. Warm water with mild dish soap works effectively for most cleaning needs while being gentle on the vinyl surface.
Addressing spills immediately prevents staining and maintains the flooring’s appearance, especially important with lighter grey tones that show discoloration more readily. I keep cleaning supplies easily accessible in my kitchen for quick response to accidents and spills. Deep cleaning monthly with specialized vinyl floor cleaners removes built-up residue and restores the original shine that makes this flooring so attractive.
Durability Performance in Real Kitchen Conditions
My grey vinyl flooring has exceeded expectations for durability after six months of typical family kitchen use including cooking, entertaining, and daily foot traffic. The wear layer protects against scratches from dropped utensils and scuff marks from shoes and pet claws effectively. I’ve been impressed by how well it maintains its appearance despite the abuse that kitchen floors typically endure from cooking activities.
Water resistance proved excellent during several minor flooding incidents from dishwasher leaks and overflowing sinks in my busy kitchen environment. Quality vinyl flooring repels water completely when seams are properly sealed during installation. I learned that immediate cleanup prevents water from reaching subfloor areas where damage could occur, but the vinyl itself remained unaffected by moisture exposure.
Temperature changes from cooking activities haven’t caused any expansion or contraction problems with my vinyl flooring installation thus far. The material remains stable despite heat from ovens and freezing temperatures when doors are left open during winter months. This stability eliminates the gaps and buckling issues I experienced with previous laminate flooring in the same kitchen space.

Style Combinations That Work Beautifully
Grey vinyl flooring coordinates beautifully with white cabinetry, creating a classic color combination that feels fresh and timeless in kitchen applications. I paired my medium grey flooring with crisp white cabinets and added warmth through wood countertops and brass hardware accents. This neutral foundation allows me to change wall colors and accessories without clashing with the flooring investment.
Wood-toned cabinets complement grey vinyl flooring by adding natural warmth that prevents the space from feeling cold or sterile like some modern kitchens. I’ve seen beautiful combinations with honey oak, cherry, and walnut cabinet finishes that create rich, sophisticated color palettes. The key is choosing grey tones with appropriate undertones that harmonize rather than compete with existing wood elements.
Bold accent colors pop dramatically against grey vinyl flooring, allowing creative expression through backsplashes, window treatments, and decorative accessories throughout the kitchen. I experimented with navy blue accents that create striking contrast while maintaining sophisticated appeal. Colorful artwork and plants stand out beautifully against the neutral grey backdrop, making the kitchen feel vibrant and personalized.

Cost Analysis and Long-Term Value
Initial investment in quality grey vinyl flooring cost significantly less than hardwood or tile alternatives while providing similar visual appeal in my kitchen renovation. I spent approximately four dollars per square foot for premium luxury vinyl planks including underlayment and installation supplies. Professional installation would have doubled costs, but DIY installation saved money while providing valuable learning experience and personal satisfaction.
Long-term value analysis shows vinyl flooring provides excellent durability and appearance retention compared to its modest cost over the expected lifespan. Manufacturers typically warranty quality vinyl products for 15-20 years under residential use conditions. The low maintenance requirements and stain resistance translate to reduced ongoing costs compared to materials requiring special treatments or frequent refinishing.
Return on investment through increased home value and personal enjoyment justifies the flooring upgrade expense in my kitchen renovation project. Updated flooring immediately modernized my kitchen’s appearance and created a fresh foundation for future decorating changes. The practical benefits of easy maintenance and comfort underfoot provide daily value that monetary calculations cannot fully capture or quantify accurately.

How does grey vinyl flooring hold up to heavy kitchen appliances and furniture?
Quality grey vinyl flooring handles heavy appliances remarkably well when properly installed over a stable subfloor with appropriate underlayment protection. My refrigerator, dishwasher, and island haven’t caused any indentations or damage after six months of use. However, I use furniture pads under moveable items like bar stools and rolling carts to prevent scratches. The key is choosing luxury vinyl with adequate thickness and wear layer protection. Permanent appliances distribute weight evenly and rarely cause problems with modern vinyl products.
Can grey vinyl kitchen flooring be repaired if damaged, or does it require complete replacement?
Individual vinyl planks can often be replaced without disturbing the entire floor installation, making repairs relatively simple and cost-effective compared to other materials. I keep extra planks stored for future repair needs. Small scratches can sometimes be buffed out with manufacturer-approved products. However, deep gouges or burns typically require plank replacement. The floating installation method used with most luxury vinyl makes individual plank removal possible with proper tools and patience. Professional repair may be needed for complex damage situations.

What’s the difference between luxury vinyl planks and standard vinyl flooring for kitchen applications?
Luxury vinyl planks offer superior durability, realistic textures, and better installation methods compared to traditional sheet vinyl or basic vinyl tiles. My LVP flooring has a thick wear layer that resists scratches and stains much better than older vinyl products. The planks install as a floating floor system that’s more stable and easier to repair than glued-down alternatives. Realistic wood and stone textures make LVP virtually indistinguishable from natural materials. The investment in quality luxury vinyl pays dividends through enhanced appearance and longevity.
How do I prevent my grey vinyl flooring from showing every speck of dirt and debris?
Choose medium-toned grey vinyl with subtle texture patterns that naturally camouflage dirt between cleaning sessions more effectively than smooth, light-colored alternatives. I selected a grey with slight wood grain texture that hides everyday debris well. Establish daily sweeping routines to prevent dirt accumulation. Strategic placement of entry mats reduces tracked-in soil from outside areas. Microfiber dust mops capture fine particles that traditional brooms might scatter. Consistent maintenance prevents dirt buildup that makes floors appear constantly dirty.

Is grey vinyl flooring suitable for kitchens with radiant floor heating systems?
Most quality grey vinyl flooring products are compatible with radiant heating systems when installed according to manufacturer specifications and temperature limitations. My kitchen doesn’t have radiant heat, but I researched this extensively during product selection. Ensure the vinyl is rated for radiant applications and maintain temperatures below manufacturer maximums. Gradual temperature changes prevent expansion issues. Professional installation is recommended for radiant applications to ensure proper techniques and warranty coverage. Always verify compatibility with your specific heating system before purchasing.
How does grey vinyl flooring compare to ceramic tile in terms of comfort and practicality?
Grey vinyl flooring provides superior comfort underfoot compared to ceramic tile, with cushioned feel that reduces fatigue during long cooking sessions. The surface stays warmer in winter months, making barefoot kitchen visits more comfortable. Vinyl offers better sound absorption than hard tile surfaces, reducing noise in open floor plans. However, tile provides better heat resistance near ovens and stoves. Vinyl installation is generally easier and faster than tile work. Both materials offer excellent water resistance, but vinyl provides more comfortable daily use experience for most homeowners.

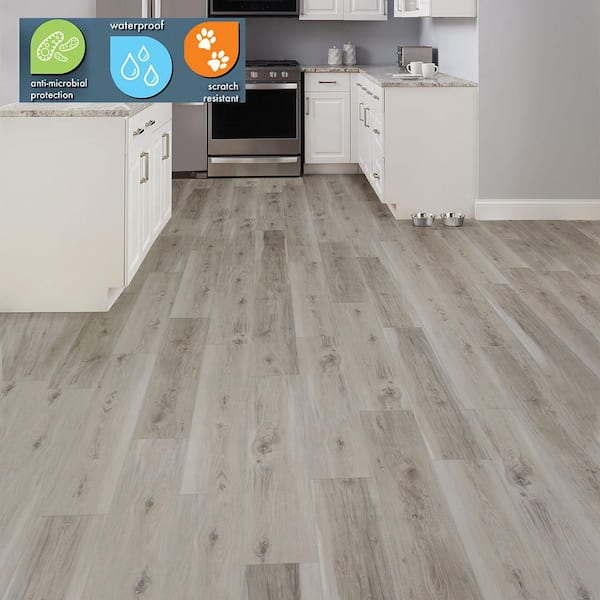
5mm w/pad Silhouette Oak Waterproof Rigid Vinyl Plank Flooring 5.75 in. Wide x 48 in. Long

vinyl plank kitchen flooring Vinyl flooring

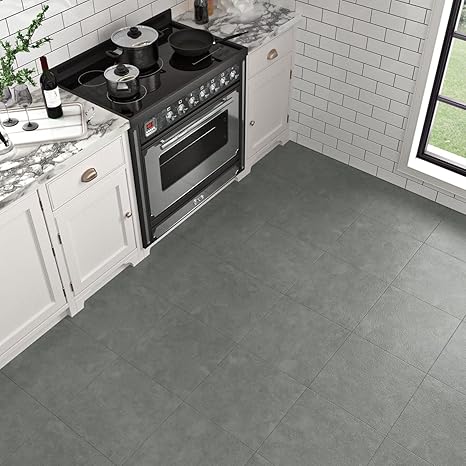
Livelynine Concrete Grey Peel and Stick Floor Tile 12X12 Inch 16 Pack Vinyl Flooring Peel and Stick Waterproof Self Adhesive Floor Tiles for Bathroom
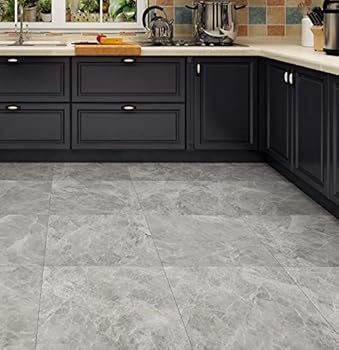
Travertine Grey Stone Residential Vinyl Sheet Flooring 12ft. Wide x Cut to Length

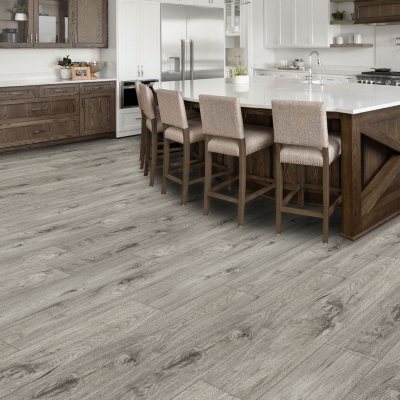
Select Surfaces Anchor Gray Rigid Core Vinyl Plank Flooring
Light Grey Vinyl Plank Flooring |Madera |Sense – Cocorosa
Related Posts: