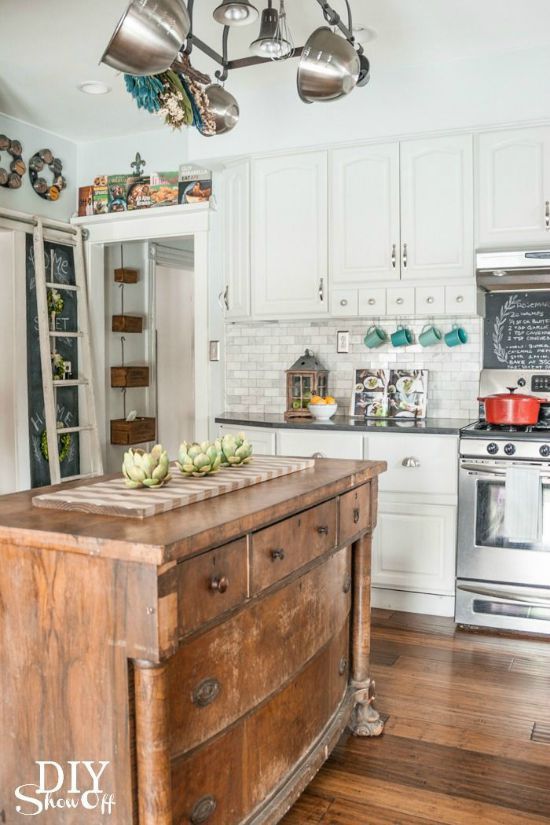
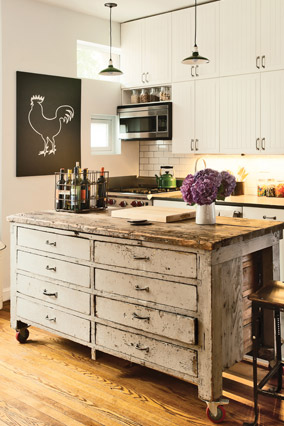
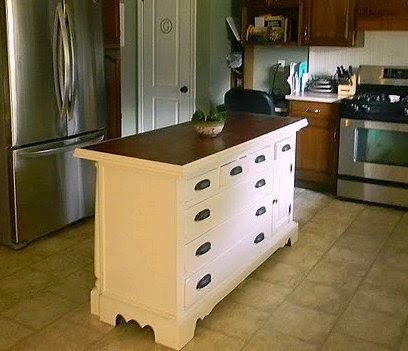
When I acquired my grandmother’s historic dresser, I never anticipated it would be the focal point of my kitchen renovation. After months of living with limited counter space and storage, I realized the enormous possibilities of recycling furniture into usable kitchen islands. This inventive approach not only solved my space issues, but it also brought character and charm that new cabinets simply could not replicate.
Choosing the Best Dresser for Kitchen Conversion
My hunt began at local thrift stores and estate auctions, where I learned how to recognize dressers with kitchen island potential. I chose pieces with robust wood construction and sturdy frames that could withstand regular kitchen use. The height required to be between 34 and 36 inches to fit typical counter height, but I could cut shorter sections later.
I observed that dressers from the 1950s to the 1970s frequently have the best dimensions for kitchen islands. These pieces often have deeper drawers and wider tops to allow enough workspace. I avoided dressers with intricate embellishments that would be difficult to maintain in a kitchen, instead opting for simpler styles that might complement modern appliances.
Storage capacity became my key factor during the choosing process. I measured drawer space and assessed how each compartment may fulfill kitchen functions. Deep bottom drawers were ideal for storing pots and pans, while shallow top drawers could hold utensils and linens. The dresser I ultimately purchased had six big drawers, doubling my kitchen storage capacity.
Important Changes I Made for Kitchen Use
Converting my dresser necessitated numerous significant structural alterations to assure food safety and functioning. I began by fully stripping the original finish, sanding it down to bare wood to remove any chemicals or aromas that could contaminate food preparation areas. This process took all weekend, but it was very necessary for kitchen use.
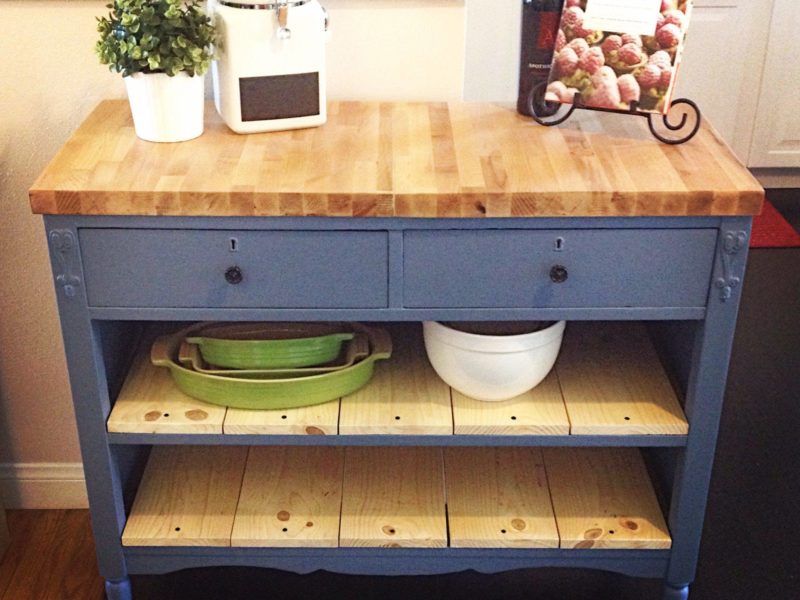
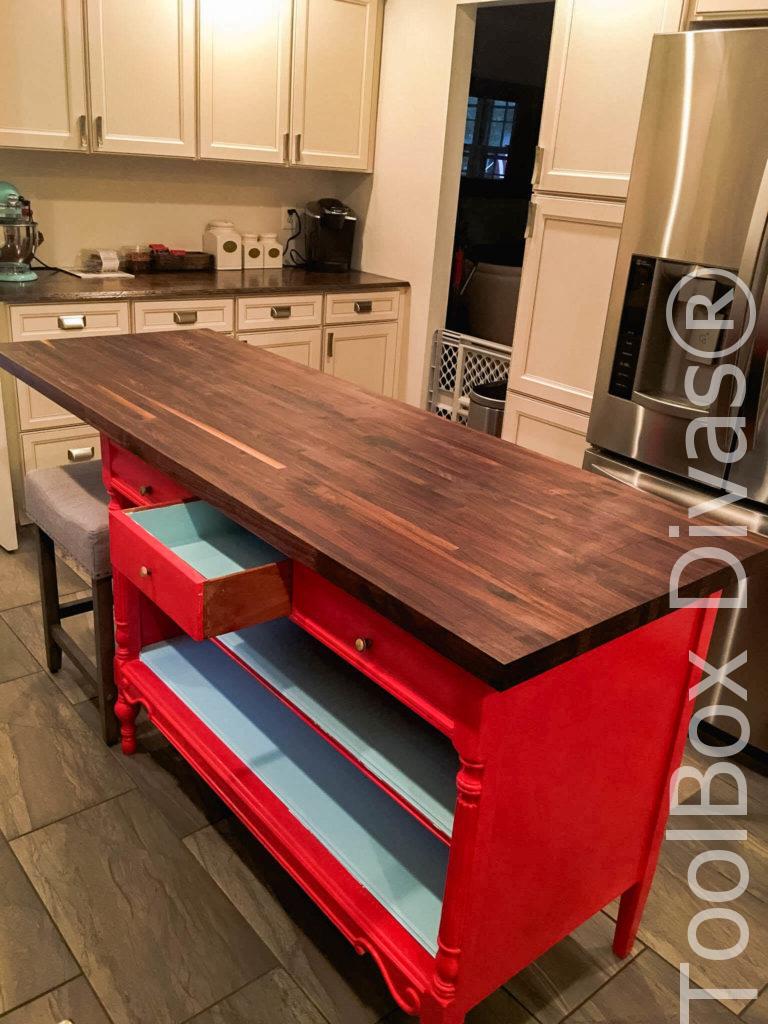
Installing a new countertop became the most difficult aspect of my job. I chose butcher block for its warmth and affordability, but granite or quartz would also work well. I reinforced the dresser top with extra bracing to support the weight, carefully drilling pilot holes to avoid shattering the vintage wood frame underneath.
Adding electrical plugs converted the island from a simple storage area to a productive workspace. I had an electrician install two GFCI outlets on one side that now power my stand mixer, coffee machine, and other small appliances. The outlets are positioned to be hidden behind appliances while yet offering easy access for daily cooking operations.

Creative Storage Solutions I Implemented
I redesigned each drawer to increase kitchen storage efficiency. With custom dividers made from scrap wood, I transformed the top drawers into organized utensil storage. I lined them with non-slip mats to keep the tools from sliding around during use. These shallow spaces are ideal for measuring spoons, whisks, and other tiny kitchen tools.
The deeper center drawers now store my pots, pans, and baking sheets, which I divided vertically. This organization approach enables me to see everything at a glance and retrieve products without having to sift through stacked kitchenware. I installed soft-close drawer slides to minimize slamming and safeguard the dresser and my dishes from harm.
My bottom drawers hold big food items, minor appliances, and cleaning materials in properly labeled bins. I put pull-out shelves in these deep regions to keep goods from getting lost in the back. The renovation resulted in more accessible storage than my original kitchen cabinets ever did, with everything organized and easy to reach.

Style Tips That Made My Island Stand Out
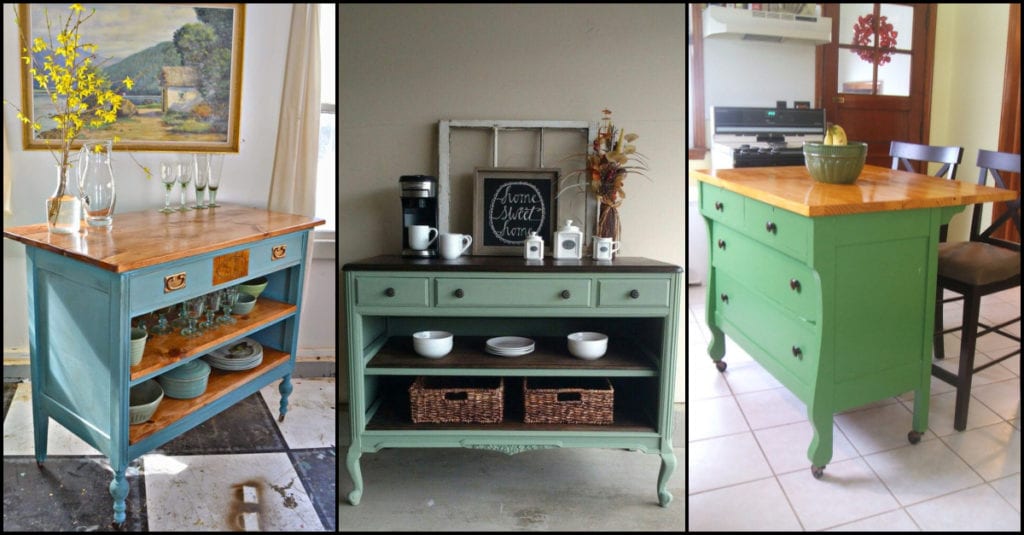
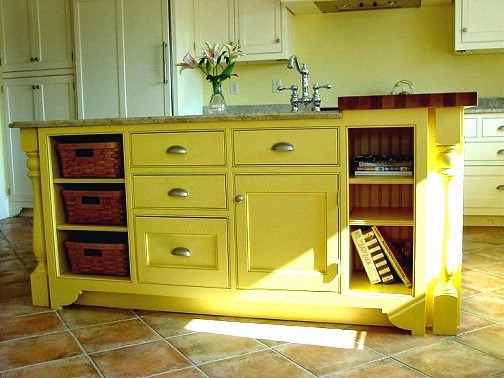
My paint choice completely converted my dresser’s appearance from dated furniture to custom kitchen cabinetry. I chose a subtle sage green to match my white cabinetry and provide visual intrigue. Two coats of high-quality cabinet paint followed by a protective polyurethane finish ensures resistance to kitchen moisture and regular wear.
The hardware replacement transformed the entire look from thrift store discovery to designer piece. I chose brushed brass drawer pulls that match my kitchen faucet and light fixtures. The uniform hardware adds visual continuity to the area, making the island appear purposefully built rather than blatantly reused furniture.
Decorative components add character to the island while remaining functional. I put a tiny shelf underneath to store and showcase cookbooks. Fresh herbs in mason jars on top provide for easy cooking while also giving natural color. A old cutting board pushed against the backsplash provides texture and emphasizes the island’s homemade nature.
Budget Analysis and Cost-Saving Strategies
My overall renovation cost was less than $400, including the dresser, materials, and professional electrical work. The historic dresser cost $75 at an estate sale, with paint, hardware, and wood materials adding an additional $150. My biggest expense was the butcher block countertop, which cost $120, but I saved money by cutting and installing it myself with the help of friends.
Professional electrical installation cost $100, but it was well worth the investment for safety and code compliance. I saved greatly by completing all of the preparation work myself, including furniture removal, demolition, and painting. The electrician simply needed two hours to run new wiring and install the outlets, resulting in low labor expenses while ensuring correct installation.
When I compared my expenditures to those of purchasing a similar-sized kitchen island, I discovered incredible savings. Comparable new islands with solid wood construction cost $800-1200, however my bespoke piece has a distinct personality that mass-produced furniture cannot replicate. The thrill of making something beautiful and functional with my own hands provided worth that money could not buy.
Maintenance and Long-term Performance
Six months after completion, my dresser island continues to exceed my expectations in terms of longevity and practicality. The butcher block countertop requires monthly oiling to keep its appearance and water resistance, but this simple care retains its beauty while preserving the wood from kitchen dampness and stains.
Daily cleaning entails wiping off surfaces with mild soap and water, just like a kitchen countertop. The painted finish resists stains and scratches better than I expected, although I use cutting boards and trivets to protect high-traffic areas. The soft-close drawer slides continue to function smoothly despite regular use during busy cooking periods.
Long-term care will include touch-up painting and, depending on use, resurfacing the countertop every few years. The solid wood construction ensures that this island will survive for decades with regular maintenance, as opposed to particle board alternatives, which may need to be replaced within five years. My investment continues to pay off with better kitchen functionality and happiness.
What is the best type of dresser for kitchen island conversion projects?
Solid wood dressers from the 1940s to 1970s usually provide the ideal combination of size, durability, and style for kitchen island conversions. Look for pieces that are 48-60 inches broad and 18-20 inches deep, with solid construction that can withstand countertop weight. Avoid dressers with significant veneer damage or structural difficulties that could jeopardize kitchen functionality. The height should be 30-34 inches to facilitate typical countertop installation and provide a comfortable working height.
How much does it usually cost to transform a dresser into a kitchen island?
Converting a dresser into a kitchen island costs between $300 and $600, depending on the countertop material and electrical needs. The dresser alone may cost $50-150 at thrift stores or estate sales. Paint, hardware, and supplies cost $100-200, and countertops range from $80 for butcher block to $300 for granite. Professional electrical work for outlets costs between $75 and $150. This is a significant savings over comparable new kitchen islands with equivalent storage capacity priced between $800 and $1500.
Do I require expert assistance with any aspect of the dresser conversion process?
Professional electrical work is strongly advised for adding outlets to ensure safety and code compliance, which normally costs $75-150 for a simple installation. Most other components of dresser conversion are do-it-yourself projects that require basic woodworking skills and tools. Countertop installation for heavy materials, such as granite, may necessitate professional assistance due to weight and precise requirements. Plumbing upgrades for sinks must be professionally installed to avoid water damage and maintain adequate drainage connections.
How do I ensure the dresser island is food-safe for usage in the kitchen?
To avoid any chemical contamination in food preparation areas, previous coatings must be completely removed using sandpaper. usage food-safe sealers and paints designed expressly for kitchen usage, giving adequate drying time before use. Install suitable countertop materials such as butcher block, granite, or quartz rather than leaving the original dresser tops exposed. Ensure that all drawers and surfaces can be cleaned and disinfected using regular kitchen cleaning solutions without damaging the finishes.
What are the finest countertop options for dresser to kitchen island conversions?
Butcher block provides warmth and affordability for $80-120, but it requires frequent cleaning and moisture protection. Granite offers durability and luxurious appeal for $200-400, but it adds significant weight that necessitates structural reinforcement. Quartz countertops cost between $250 and $500, but they are highly stain resistant and require little care. Concrete worktops can be DIY-friendly for $100-200, but they must be sealed and may crumble over time in kitchen situations with temperature changes.
Can any dresser be transformed, regardless of its current state or style?
Because of structural, size, or safety concerns, not all dressers can be converted into kitchen islands. Avoid dressers that have considerable water damage, loose joints, or are made of particle board and cannot securely sustain countertop weight. Ornate Victorian models may be difficult to clean in kitchens, and especially narrow dressers less than 16 inches deep lack appropriate workspace. Dressers less than 30 inches may require leg extensions, whilst those taller than 36 inches produce unpleasant working heights for the majority of people.

Funky kitchen islands that will make you jump

All Dressed Up – Turn An Old Dresser Into A Kitchen Island
Dishfunctional Designs: Upcycled: Awesome Kitchen Islands Made
Related Posts: