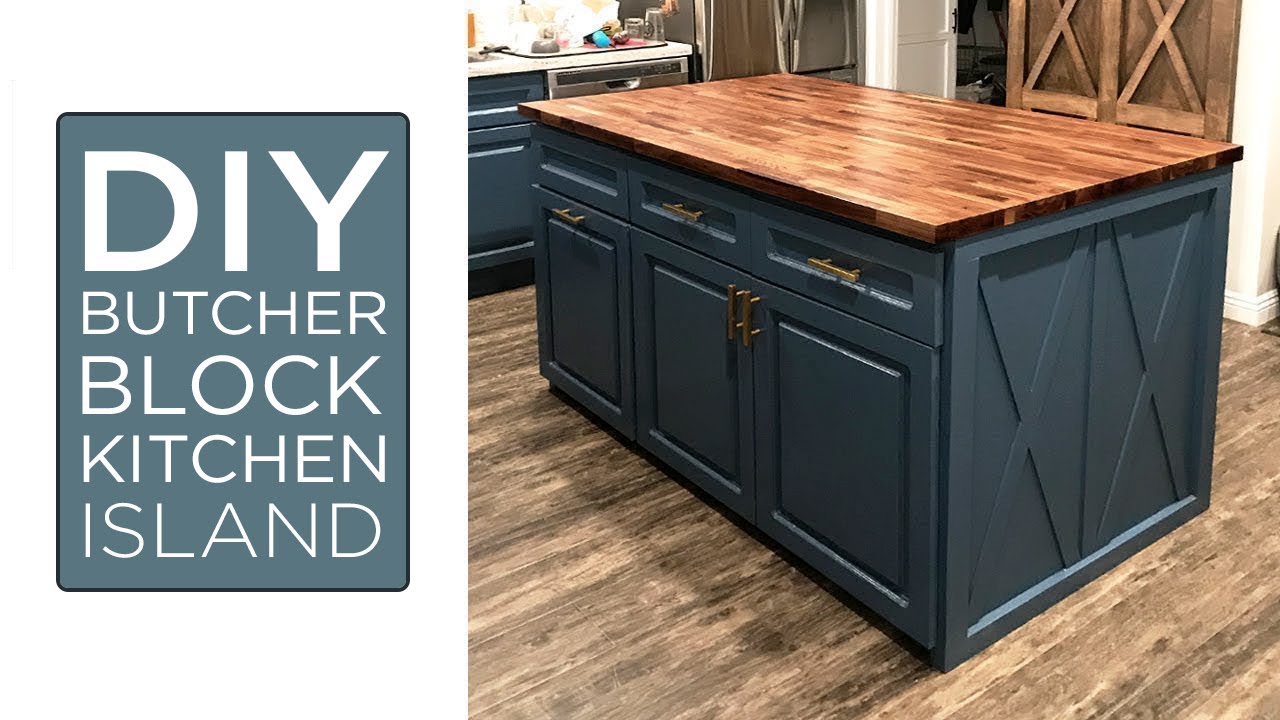
Adding a wood countertop to your kitchen island is a fantastic way to bring warmth and character into your space. Whether you’re going for a rustic farmhouse look or a sleek modern design, a wooden surface can transform your kitchen. I’ve built several countertops over the years, and with the right materials and techniques, it’s a project anyone can tackle. Let me walk you through everything you need to know, from choosing the best wood to finishing touches that protect and enhance your new countertop.
Selecting the Right Wood for Your Countertop
The type of wood you choose will determine both the look and durability of your countertop. Hardwoods like maple, oak, and walnut are excellent choices because they’re sturdy and resist wear. If you want a more budget-friendly option, pine or birch can work, but they’ll require extra sealing to prevent dents and stains. I love the rich grain of walnut for a high-end feel, but maple is my go-to for a lighter, more versatile look.
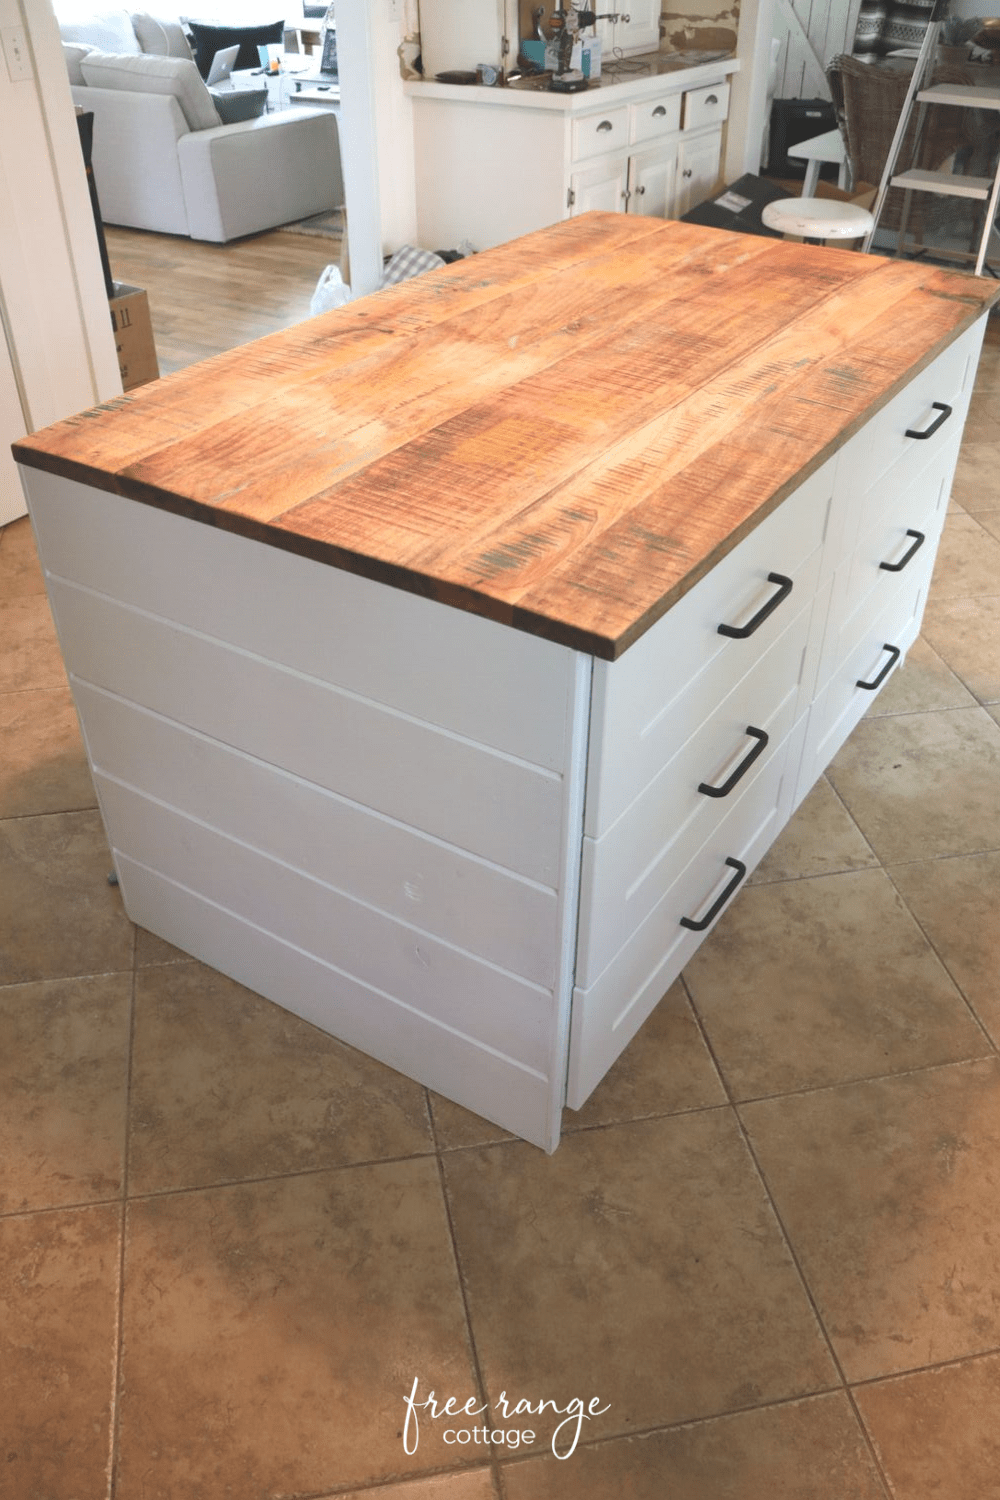
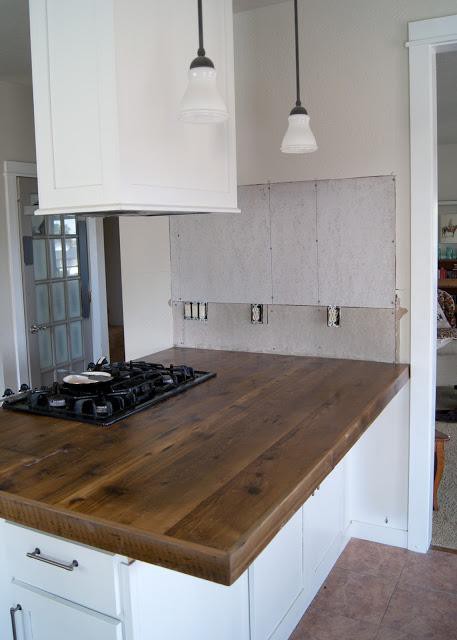
Thickness is another important factor. A standard countertop is 1.5 to 2 inches thick, but if you want a chunkier, more substantial appearance, you can go thicker. Reclaimed wood is another great option if you’re aiming for a rustic or industrial style. Just make sure it’s properly sanded and free of old nails or debris. No matter what wood you pick, ensure it’s properly dried to avoid warping after installation.
If you’re unsure about which wood to use, visit a local lumberyard and see the options in person. The color, grain, and texture can vary a lot, even within the same species. Some woods darken over time, while others lighten, so consider how the material will age. A well-chosen wood countertop can last decades with proper care, making it worth the investment.
Preparing and Cutting the Wood
Before assembling your countertop, you’ll need to cut and prepare the wood. If you’re using multiple boards, make sure they’re all the same thickness for a seamless look. Joining the edges (making them perfectly straight) is crucial if you’re gluing them together. I use a table saw for this, but a circular saw with a guide can work too. Dry-fit the boards first to check for gaps before applying any glue.
When gluing, use a high-quality wood glue and clamps to hold the boards tightly together. Wipe off excess glue immediately with a damp cloth to avoid dried residue. Let the glue cure fully before sanding—usually overnight. Sanding is the key to a smooth finish. Start with 80-grit sandpaper to remove imperfections, then move to 120-grit, and finally 220-grit for a silky surface.
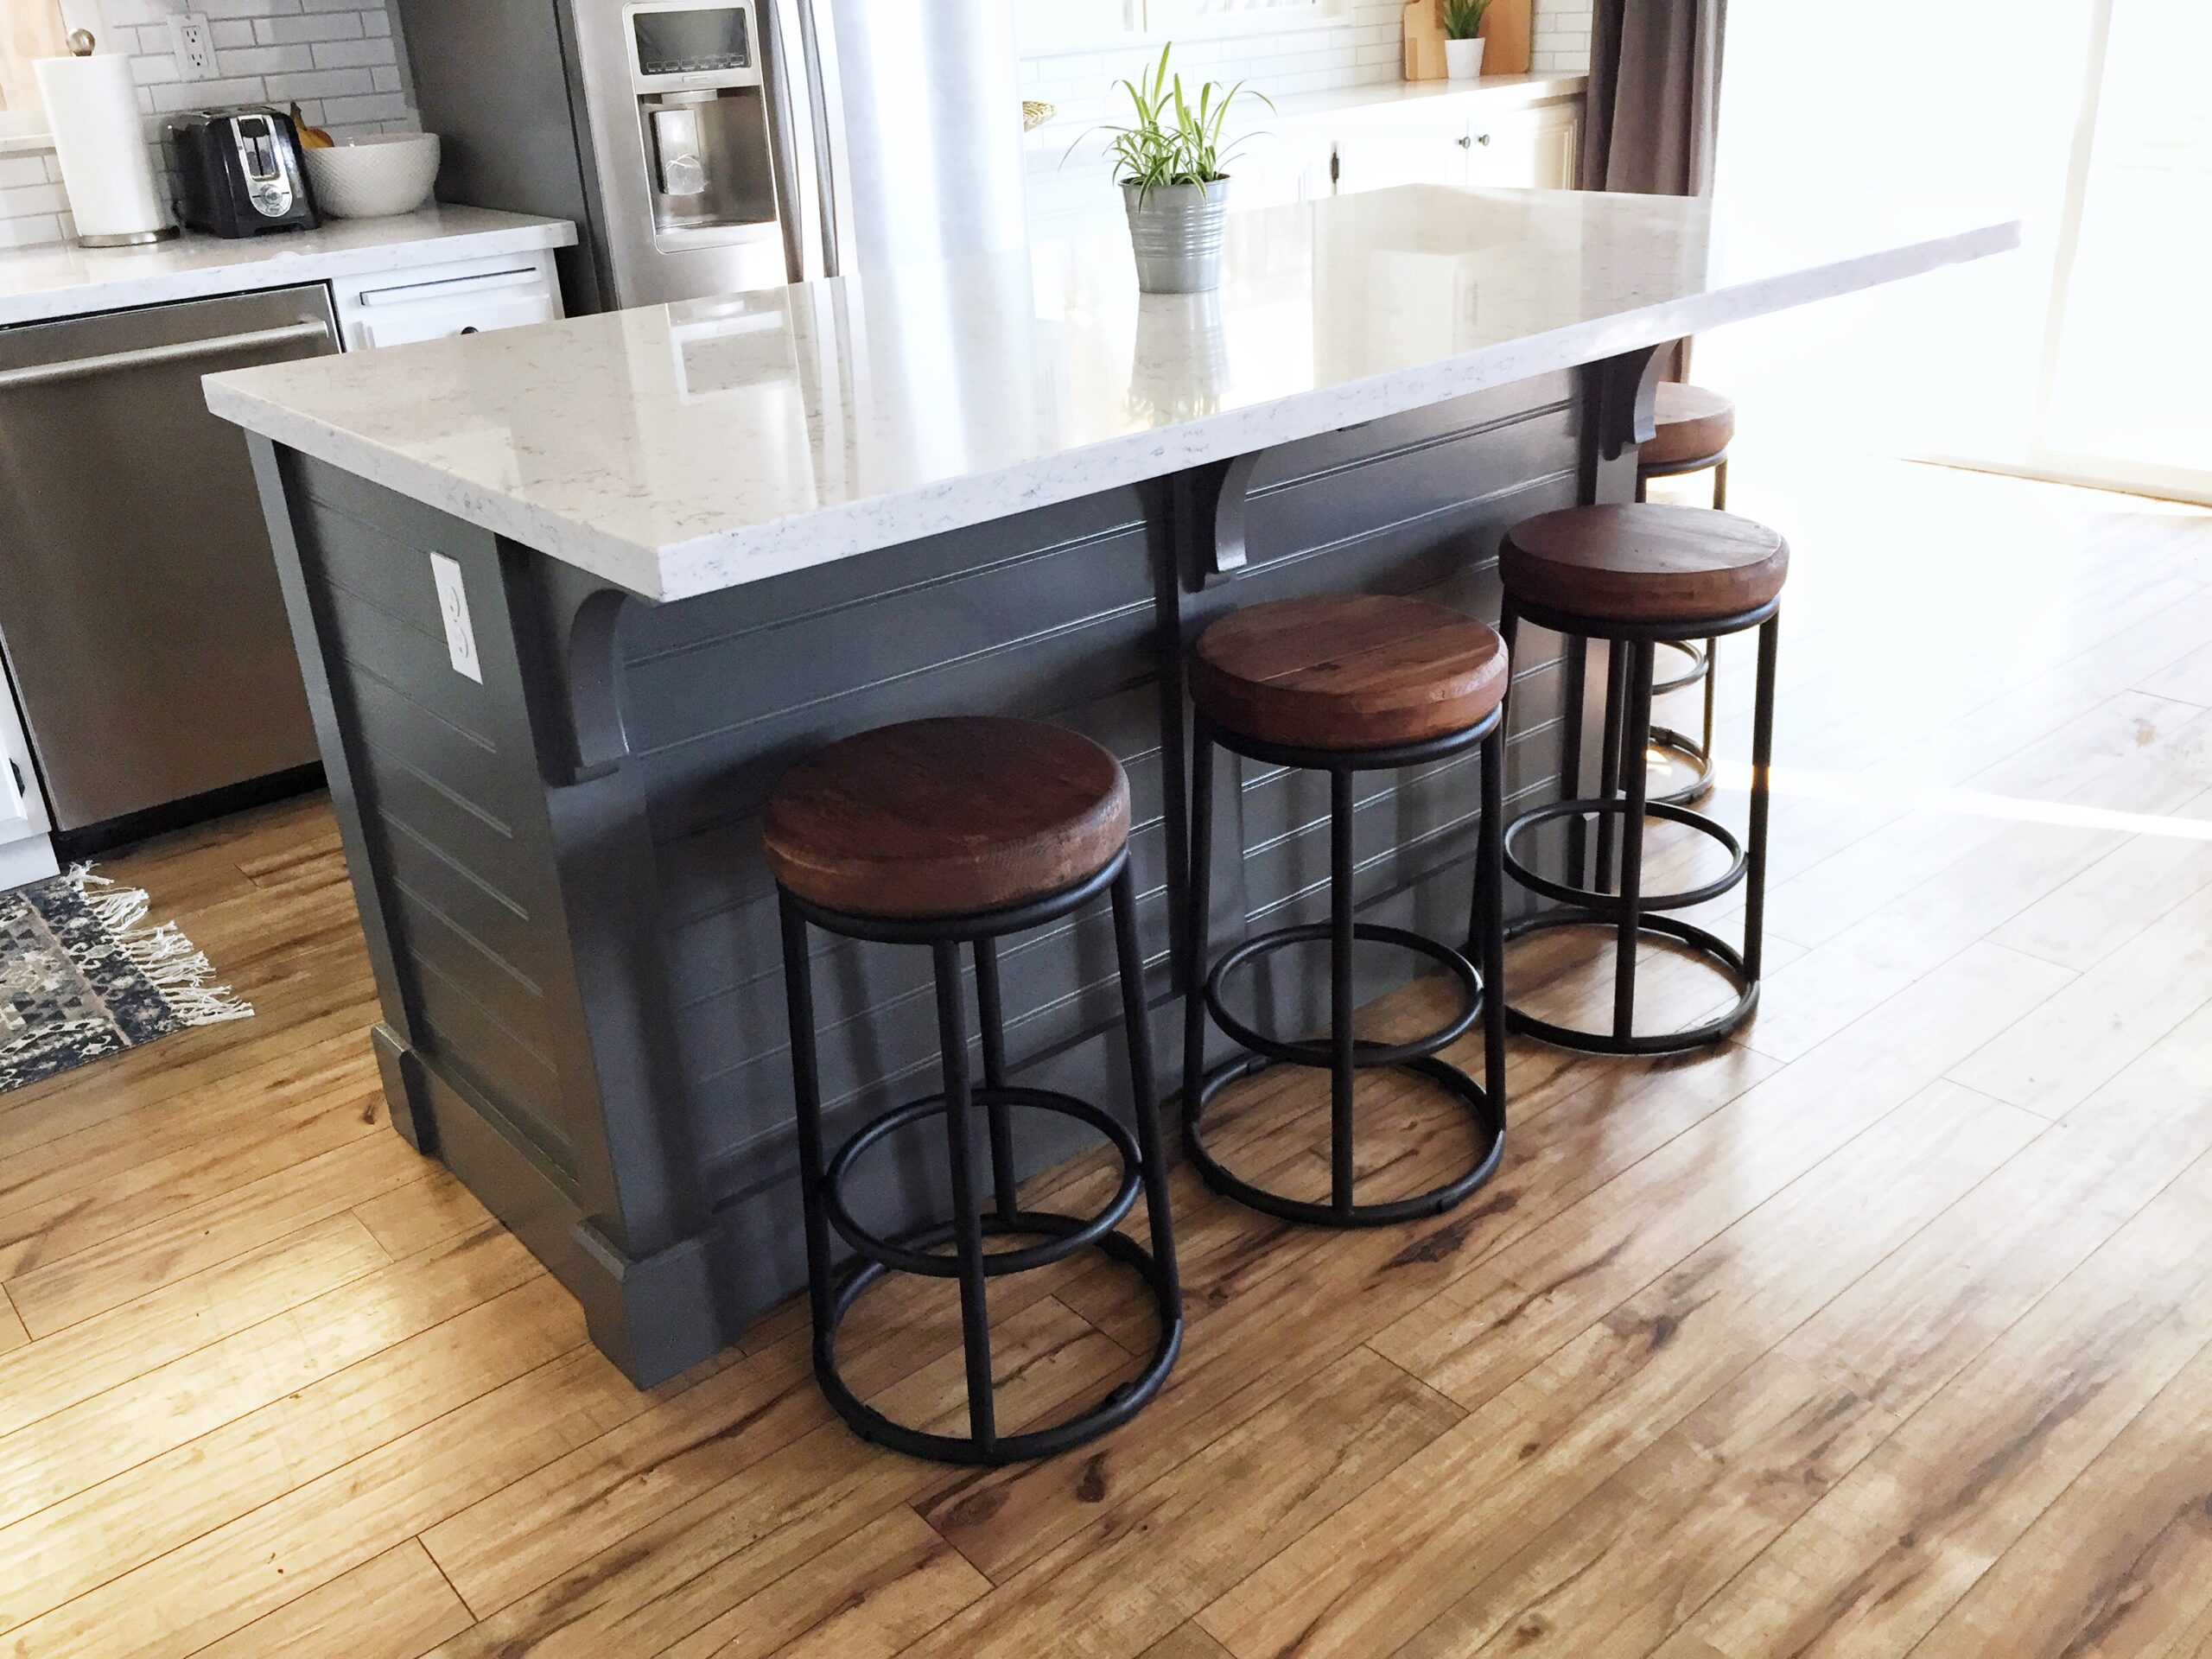
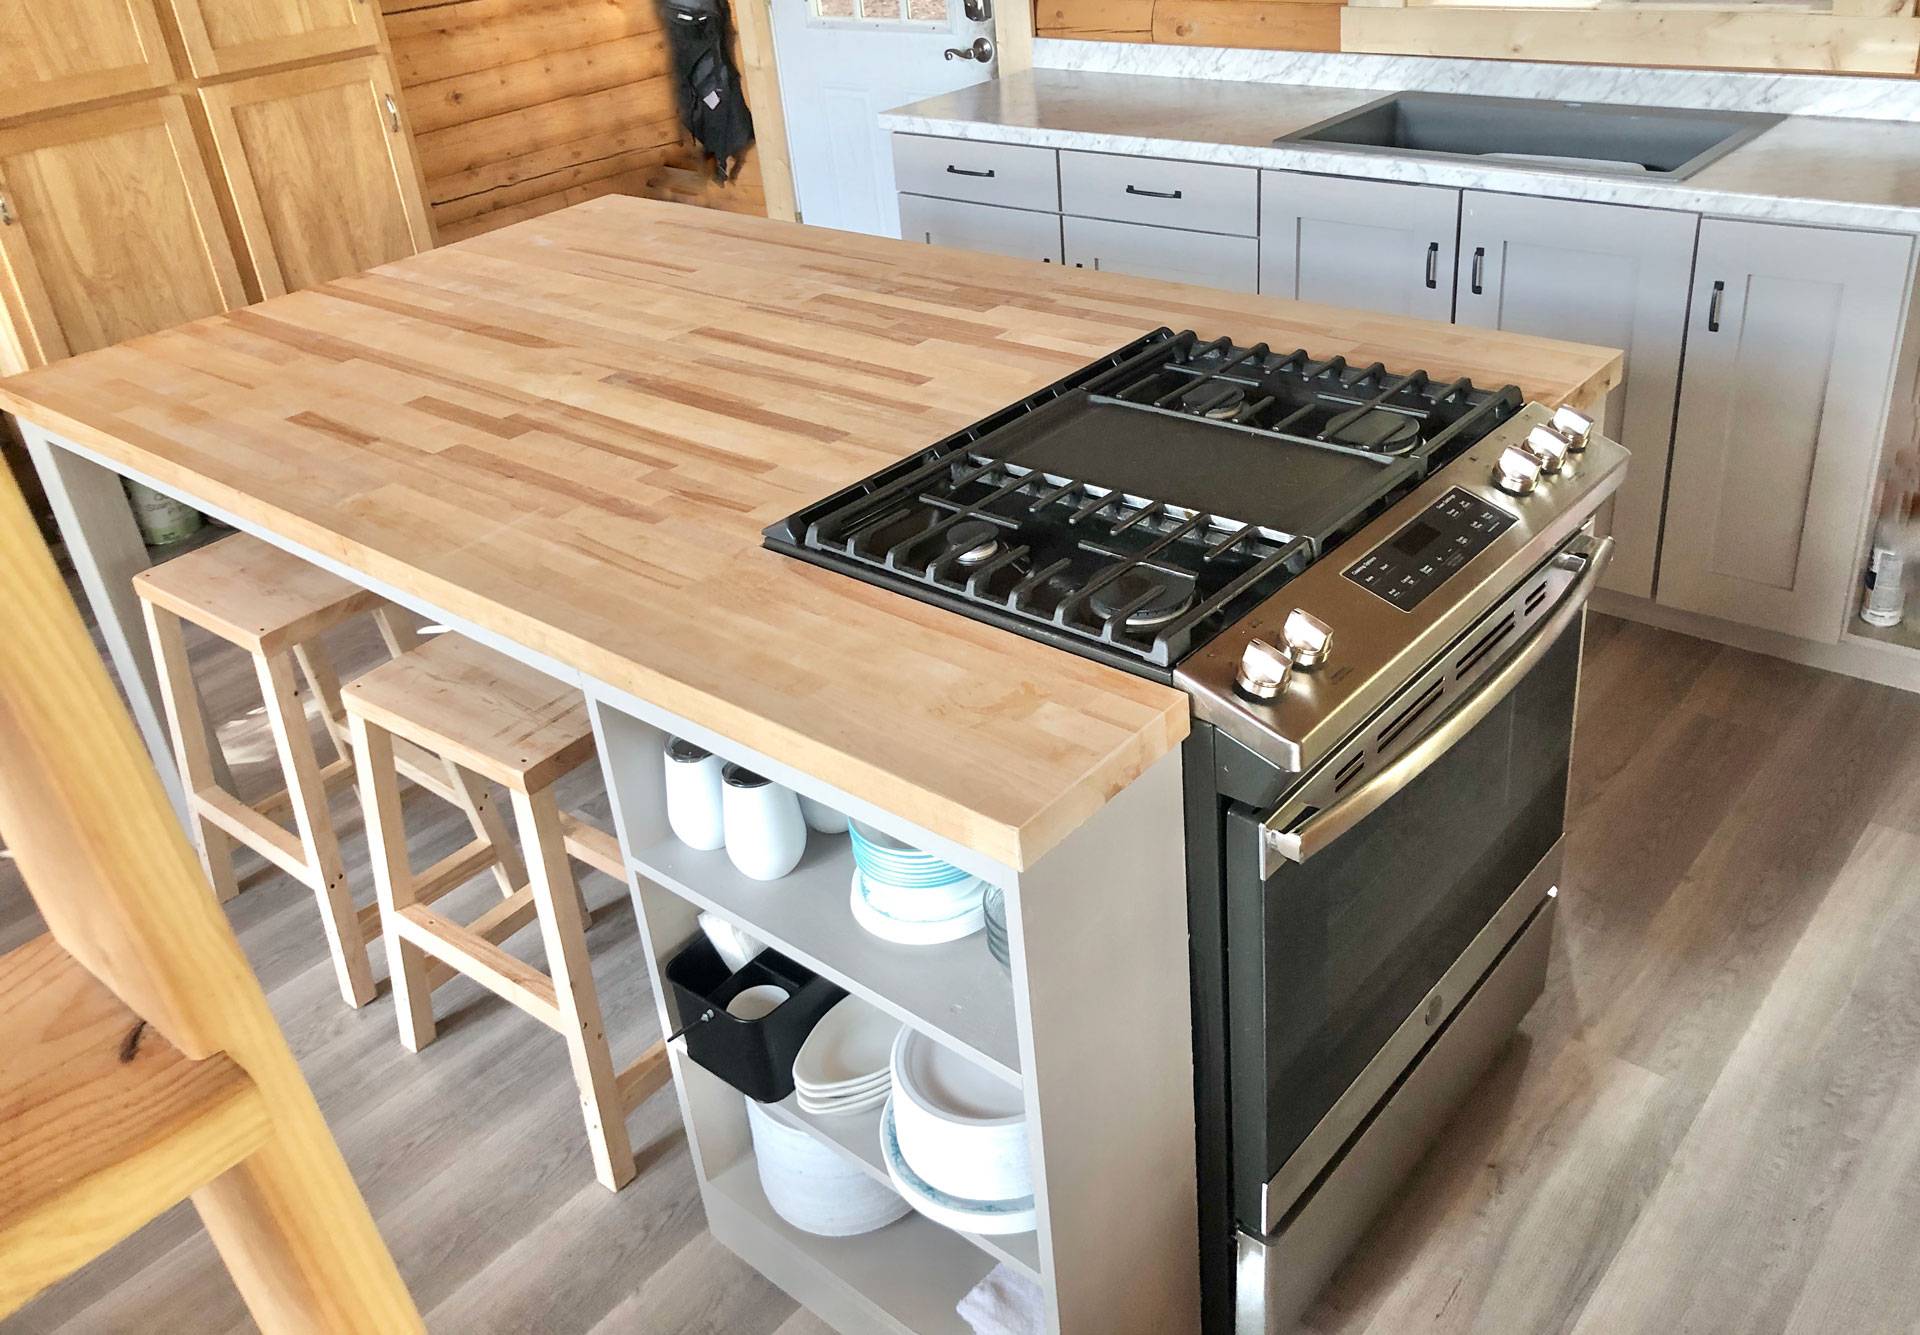
If you’re adding an overhang for bar seating, make sure it’s properly supported to prevent sagging. A standard overhang is about 10 to 12 inches, but anything beyond that may need brackets or corbels. Measure twice and cut once—this old saying is especially true here. A well-prepared countertop will look professional and last much longer.

Finishing and Sealing the Countertop
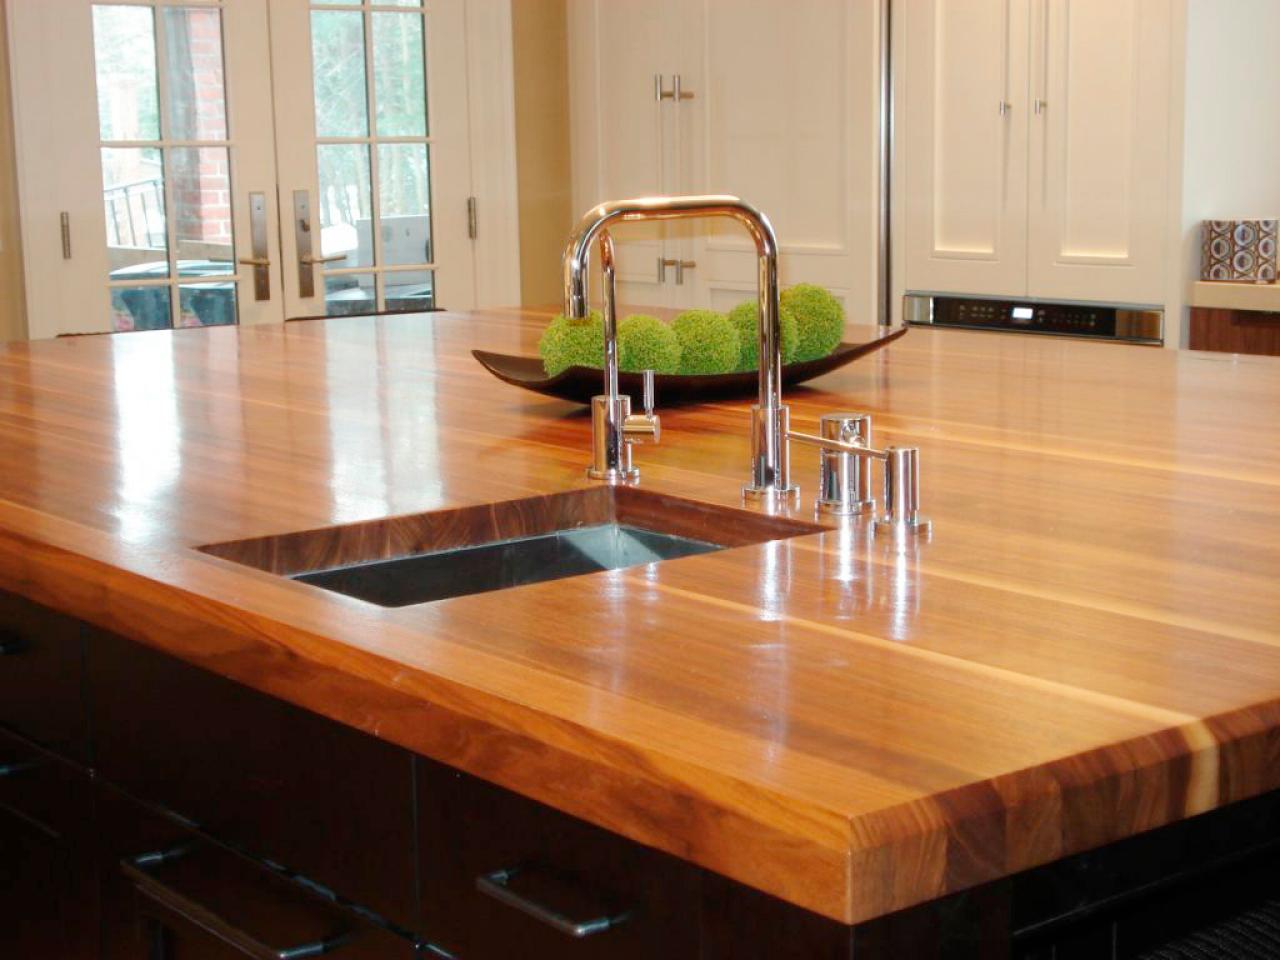
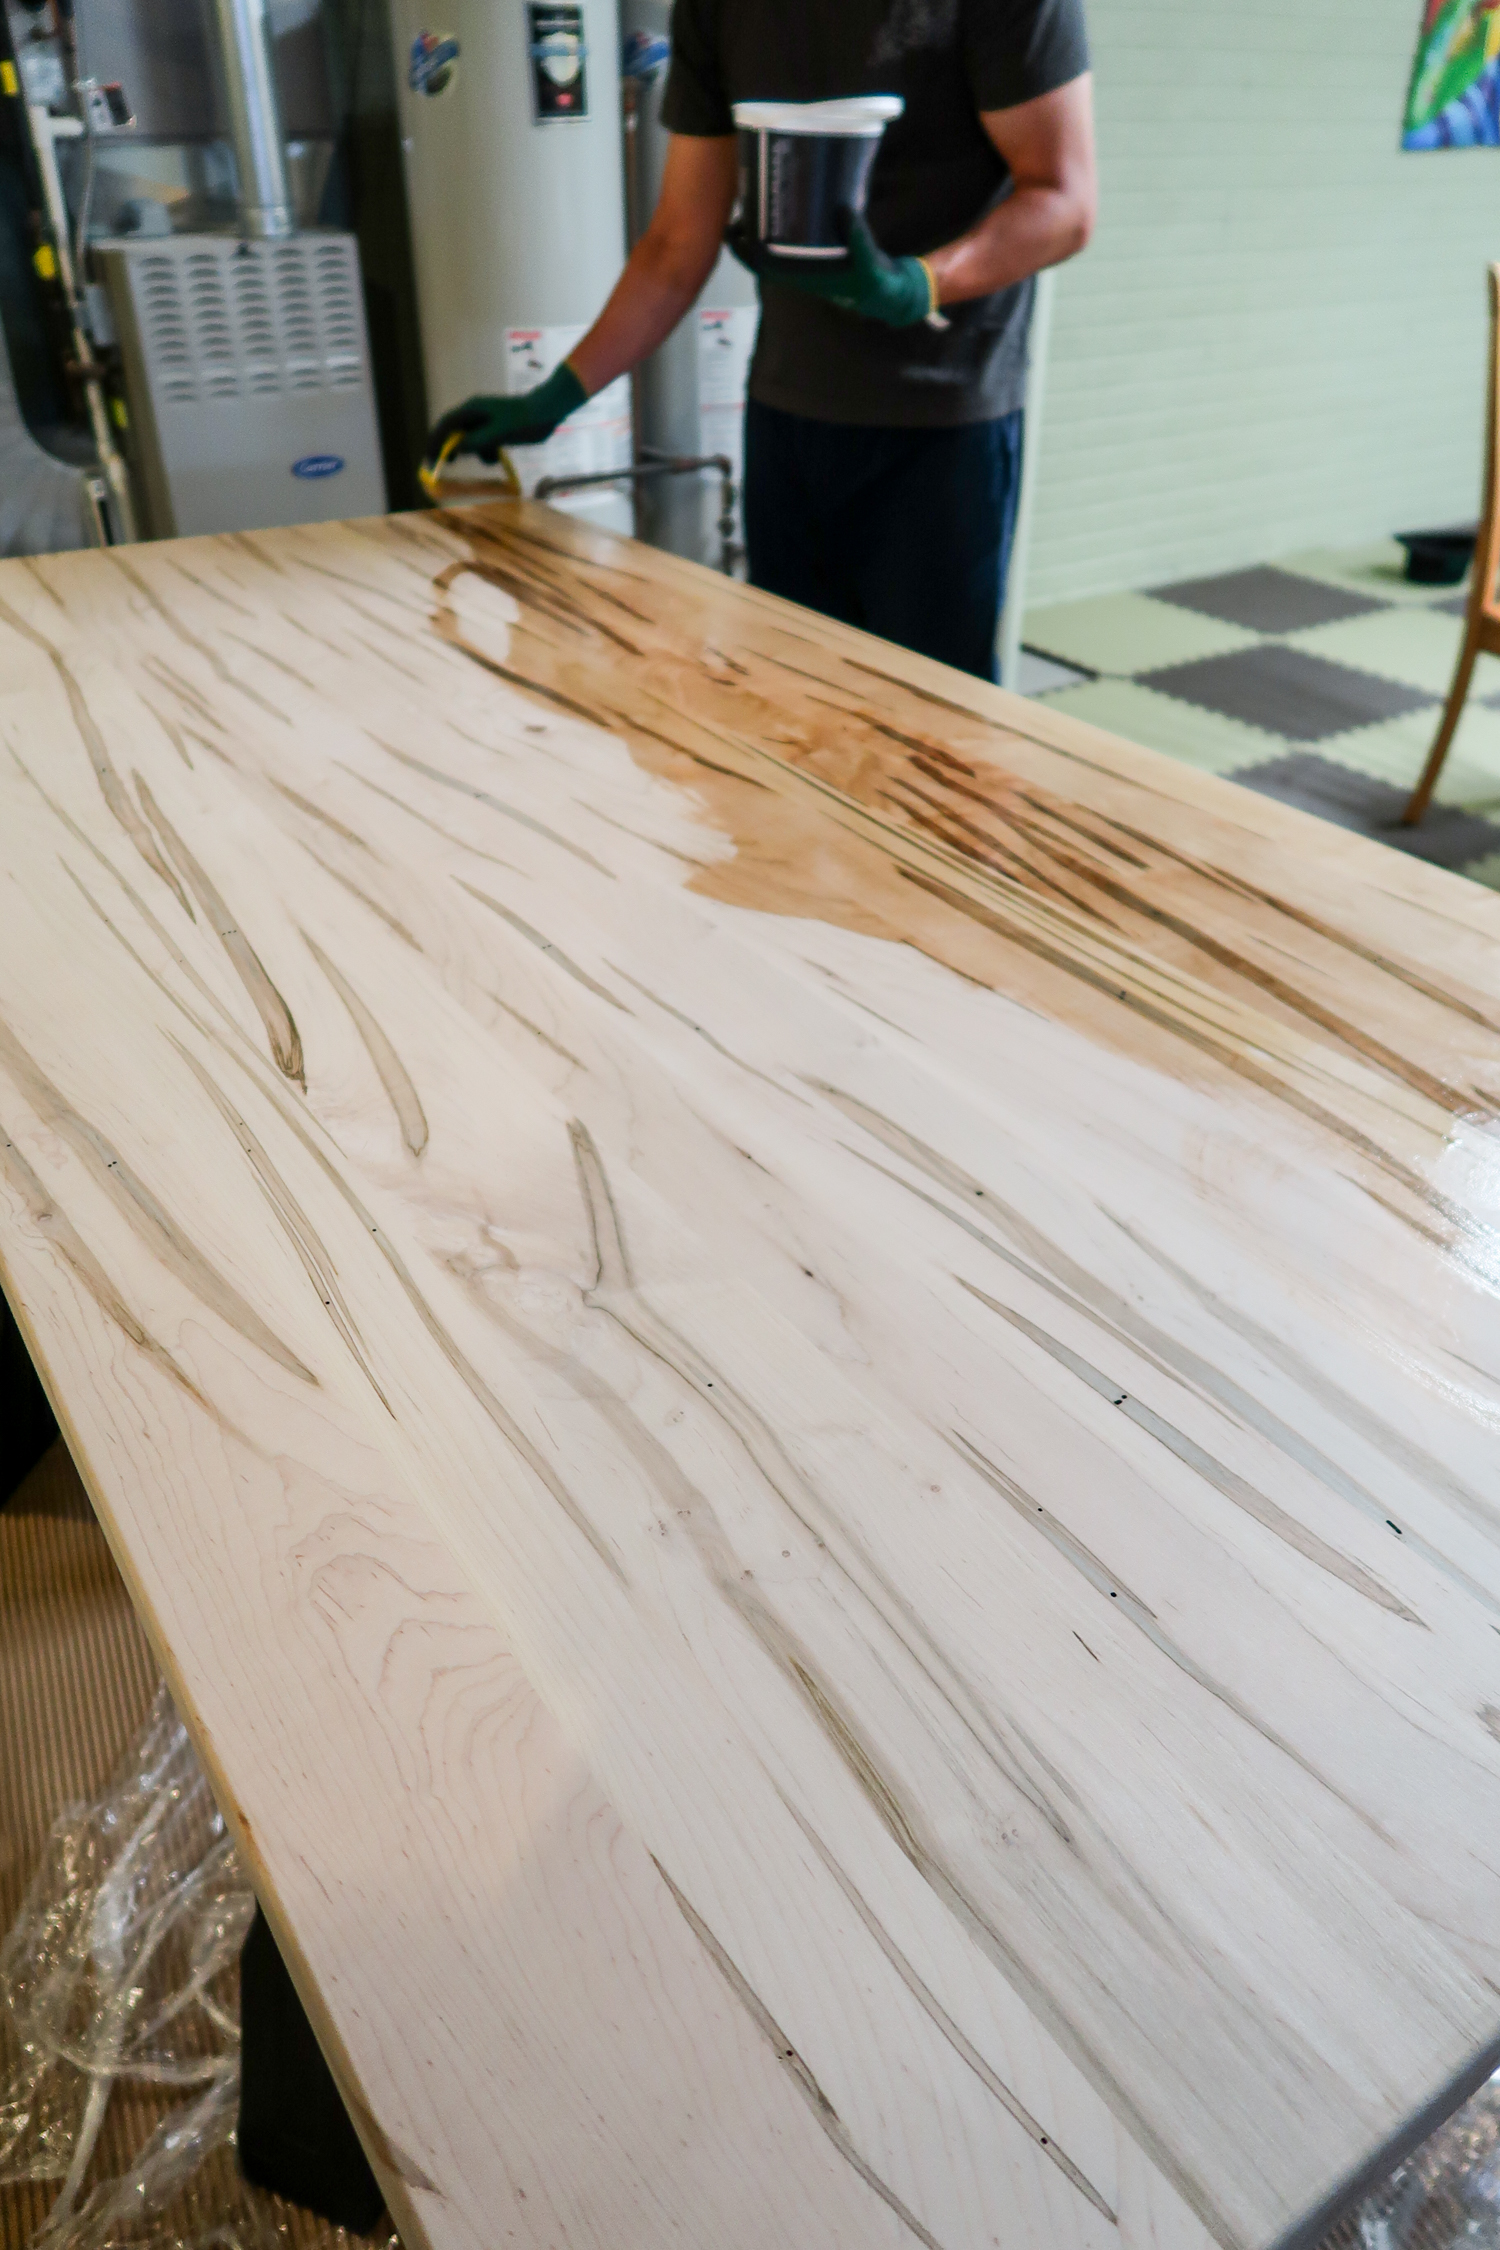
The finish you choose will protect the wood and enhance its natural beauty. For a food-safe option, mineral oil is simple but requires frequent reapplication. If you want something more durable, a polyurethane or tung oil finish provides better protection against water and stains. I prefer water-based polyurethane because it dries clear and doesn’t yellow over time.
Apply the finish in thin, even coats with a brush or foam applicator. Lightly sand between coats with 320-grit sandpaper to remove any bubbles or dust. Three coats are usually enough for good protection, but high-use areas might need an extra layer. Let each coat dry completely before adding the next—rushing this step can lead to a sticky or uneven finish.
If you want a colored finish, consider using a wood stain before sealing. Test the stain on a scrap piece first to ensure you like the shade. Some woods, like cherry or pine, absorb stain unevenly, so a pre-stain conditioner can help. A well-finished countertop not only looks great but also stands up to daily kitchen use.

Installing the Countertop
Once your countertop is sanded and finished, it’s time to install it. If your island has a base, simply place the countertop on top and secure it with brackets or screws from underneath. For a floating look, use hidden fasteners or construction adhesive. Make sure the surface is level before finalizing the installation—a small bubble level is your best friend here.
If you’re attaching the countertop to cabinets, drill pilot holes to prevent splitting the wood. Leave a small expansion gap (about 1/8 inch) near walls to account for wood movement with humidity changes. Silicone caulk can fill any small gaps between the countertop and the wall for a clean finish.
For a more custom look, you can add edge detailing, like a bevel or rounded edge, before installation. This step requires a router, but it gives a polished, furniture-like appearance. Take your time during installation—properly securing the countertop ensures it stays stable and safe for years.
Maintaining Your Wood Countertop
Wood countertops require a little maintenance to keep them looking their best. Wipe up spills immediately to prevent water damage or stains. Use cutting boards for food prep to avoid scratches, and reapply oil or sealant every few months, depending on wear. I like to lightly sand and refresh the finish once a year to keep the surface smooth.
Avoid harsh cleaners—mild soap and water are all you need. If you notice deep scratches or stains, a light sanding and a fresh coat of finish can often restore the surface. Over time, your countertop will develop a patina that adds character, so don’t stress over minor imperfections.
With proper care, a wood countertop ages beautifully and becomes a focal point in your kitchen. It’s a living surface that changes over time, telling the story of meals prepared and memories made.
What’s the best wood for a DIY kitchen island countertop?
Hardwoods like maple, walnut, and oak are the best choices because they’re durable and resist wear. Maple is my top pick for its light color and tight grain, while walnut offers a rich, luxurious look. Softer woods like pine can work, but they need extra sealing. Reclaimed wood adds rustic charm but must be properly cleaned and stabilized. Always choose kiln-dried lumber to prevent warping. The right wood balances aesthetics, durability, and budget for your specific needs.
Do I need to seal a wood countertop?
Yes, sealing is essential to protect the wood from moisture, stains, and bacteria. Food-safe options like mineral oil need frequent reapplication, while polyurethane provides long-lasting protection. I recommend water-based polyurethane for its clarity and durability. Apply at least three thin coats, sanding lightly between each. Unsealed wood will absorb spills and develop stains quickly, so don’t skip this step. A well-sealed countertop stays beautiful and functional for years.
Can I use plywood for a kitchen island countertop?
Plywood can work if you want a budget-friendly option, but it requires extra finishing. Use high-quality birch or maple plywood with a veneer top layer for a smooth surface. Seal it thoroughly with polyurethane to prevent water damage. For a more polished look, add edge banding to hide the plywood layers. While solid wood is more durable, plywood can be a practical choice if properly prepared and sealed.
How do I prevent my wood countertop from warping?
Proper sealing and installation are key to preventing warping. Use kiln-dried wood and seal all sides, including the bottom, to balance moisture absorption. Secure the countertop with brackets that allow slight movement. Avoid placing it near direct heat sources like stoves or dishwashers. If you live in a humid climate, consider a dehumidifier to maintain stable conditions. A well-made countertop should stay flat with minimal maintenance.
What’s the best finish for a wood countertop?
For a natural look, food-grade mineral oil or beeswax works but needs frequent reapplication. For durability, water-based polyurethane is my top choice—it’s clear, non-toxic when cured, and resists water and stains. Tung oil offers a warm, hand-rubbed finish but takes longer to dry. Avoid standard varnishes if you prep food directly on the surface. The best finish depends on your usage and desired maintenance level.
How do I fix scratches or stains on my wood countertop?
Light scratches can often be buffed out with fine sandpaper (320-grit) and a fresh coat of finish. For deeper scratches, fill them with a wood filler that matches the color, then sand and refinish. Stains may require light sanding to remove, followed by resealing. Regular maintenance, like oiling or waxing, helps minimize damage over time. Don’t worry about minor wear—it adds character and tells the story of your kitchen’s use.

How to Create Faux Reclaimed Wood Countertops

Building my Kitchen Island
How to Create Faux Reclaimed Wood Countertops

DIY Wood Countertops Ideas & Plans – Easy To Make Countertops
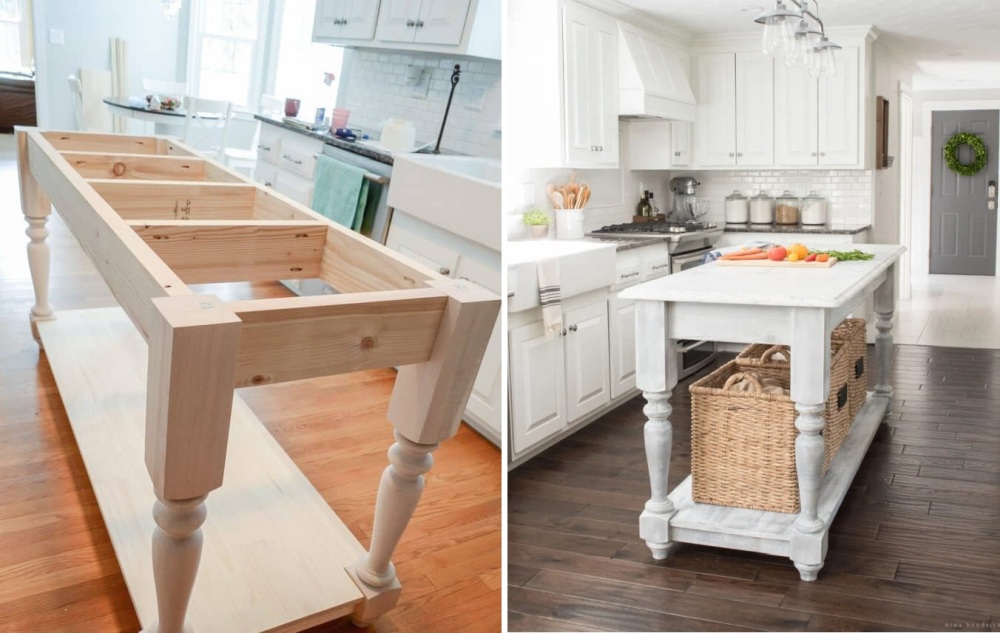
DIY Kitchen Islands to Transform Your Space
DIY Brick Kitchen Island + Behind the Scenes of our Kitchen
Related Posts: