When I bought my 1950s ranch house two years ago, the first thing I wanted to do was restore the kitchen’s original charm with authentic retro floor tile. The existing laminate flooring felt completely wrong for the era, and I dreamed of bringing back that classic mid-century aesthetic with bold patterns and cheerful colors. After months of hunting for the perfect vintage-inspired tile, navigating the installation process, and now living with my finished retro floor daily, I’ve learned so much about what works and what I wish I’d known from the start. The transformation has been absolutely worth every challenge along the way.
Selecting Authentic Retro Tile Patterns
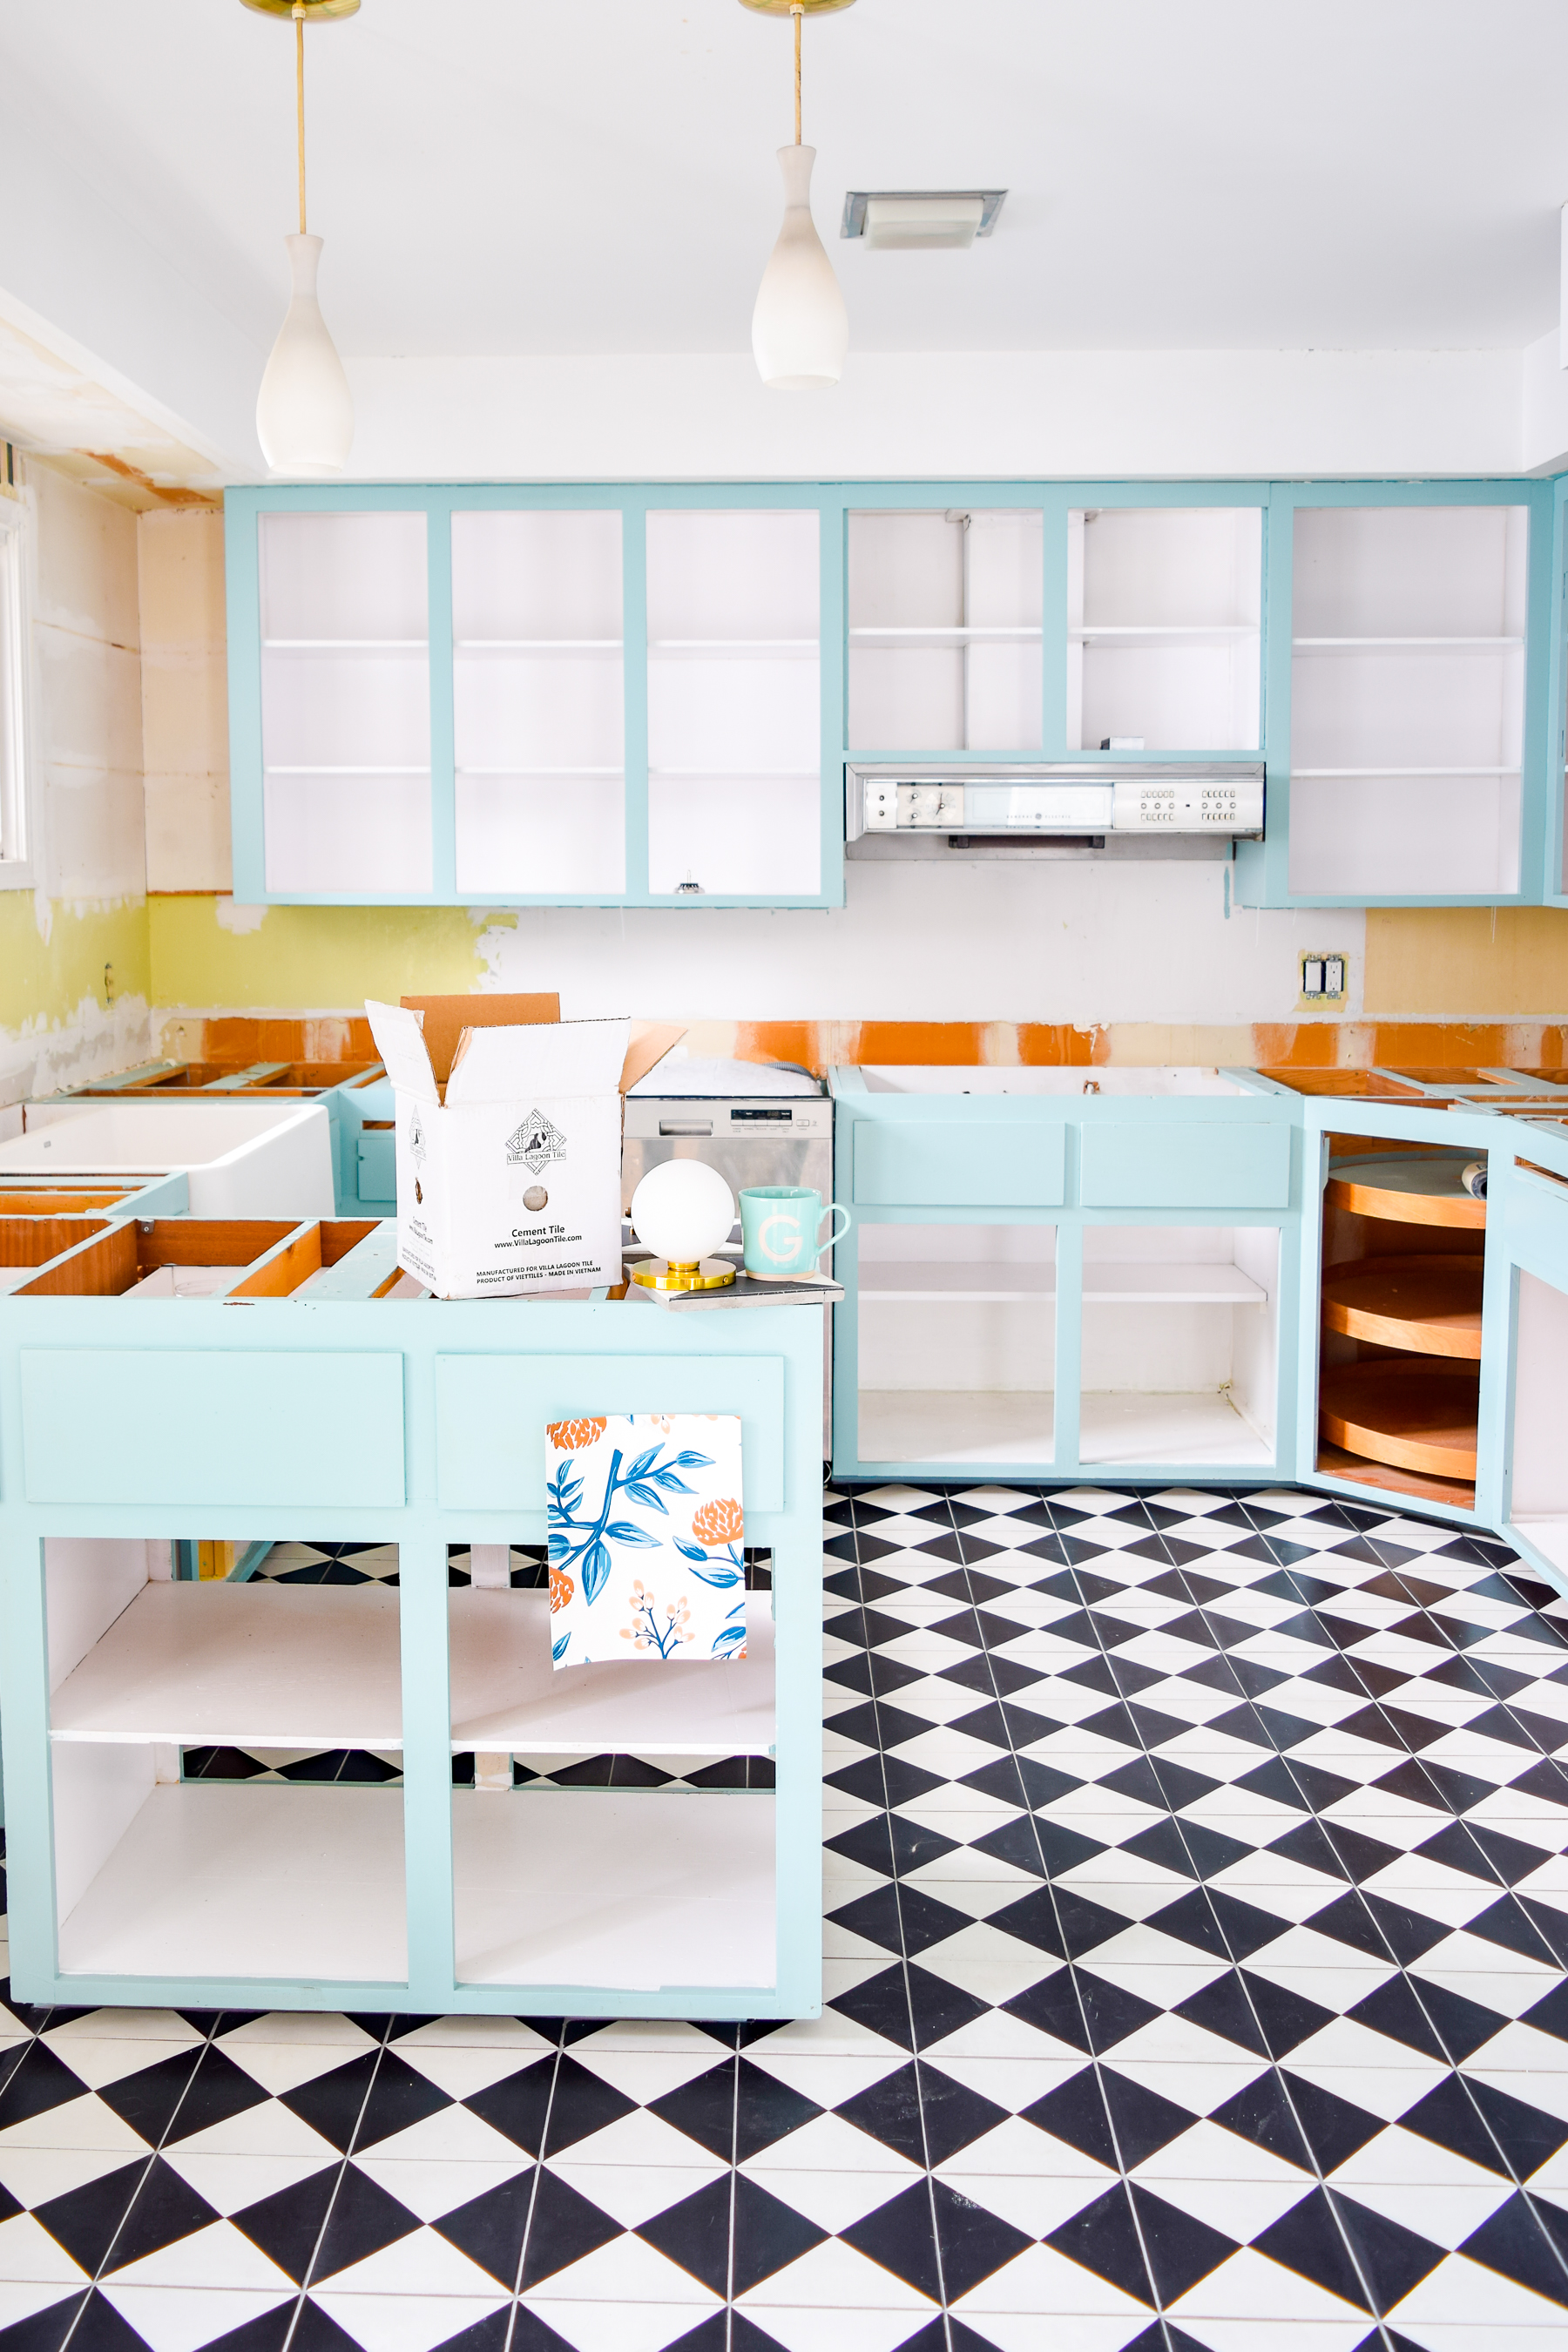
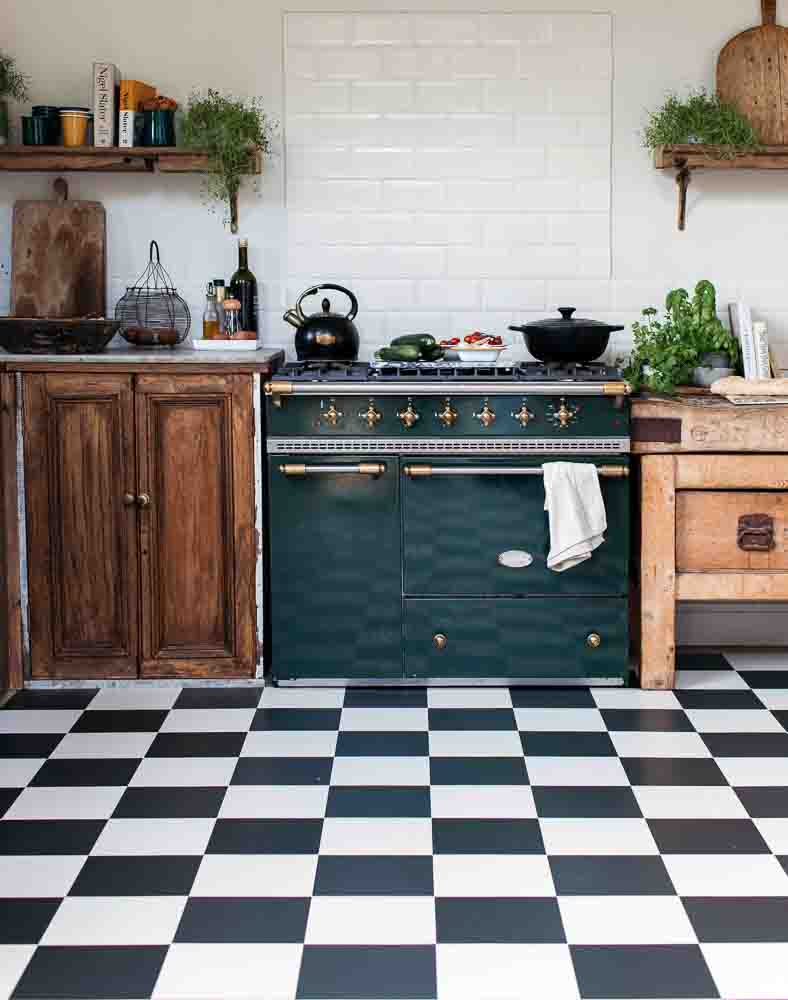
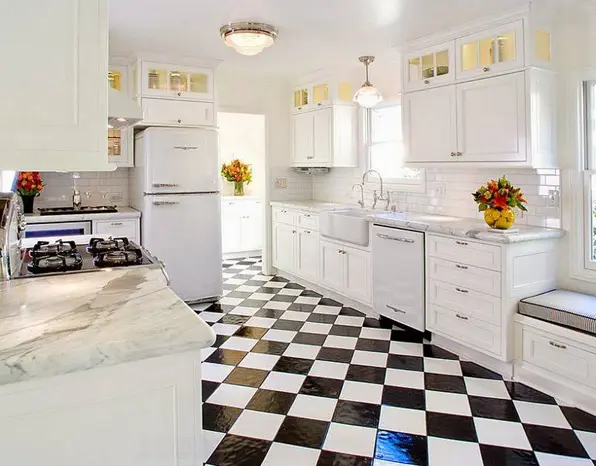
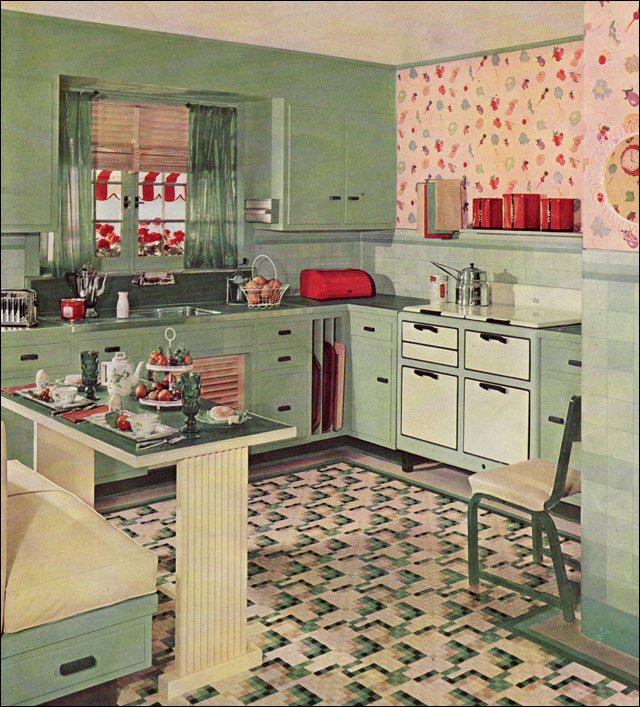
Finding tile that captured the genuine 1950s style rather than a modern interpretation required extensive research into period-appropriate designs. I spent weeks studying photos of original mid-century kitchens, noting the geometric patterns, color combinations, and tile sizes that defined the era. Classic checkerboard patterns, atomic starburst designs, and bold color blocking dominated authentic 1950s kitchens. I ultimately chose a black and white checkerboard pattern with 9-inch tiles that felt true to the period while being practical for daily use.
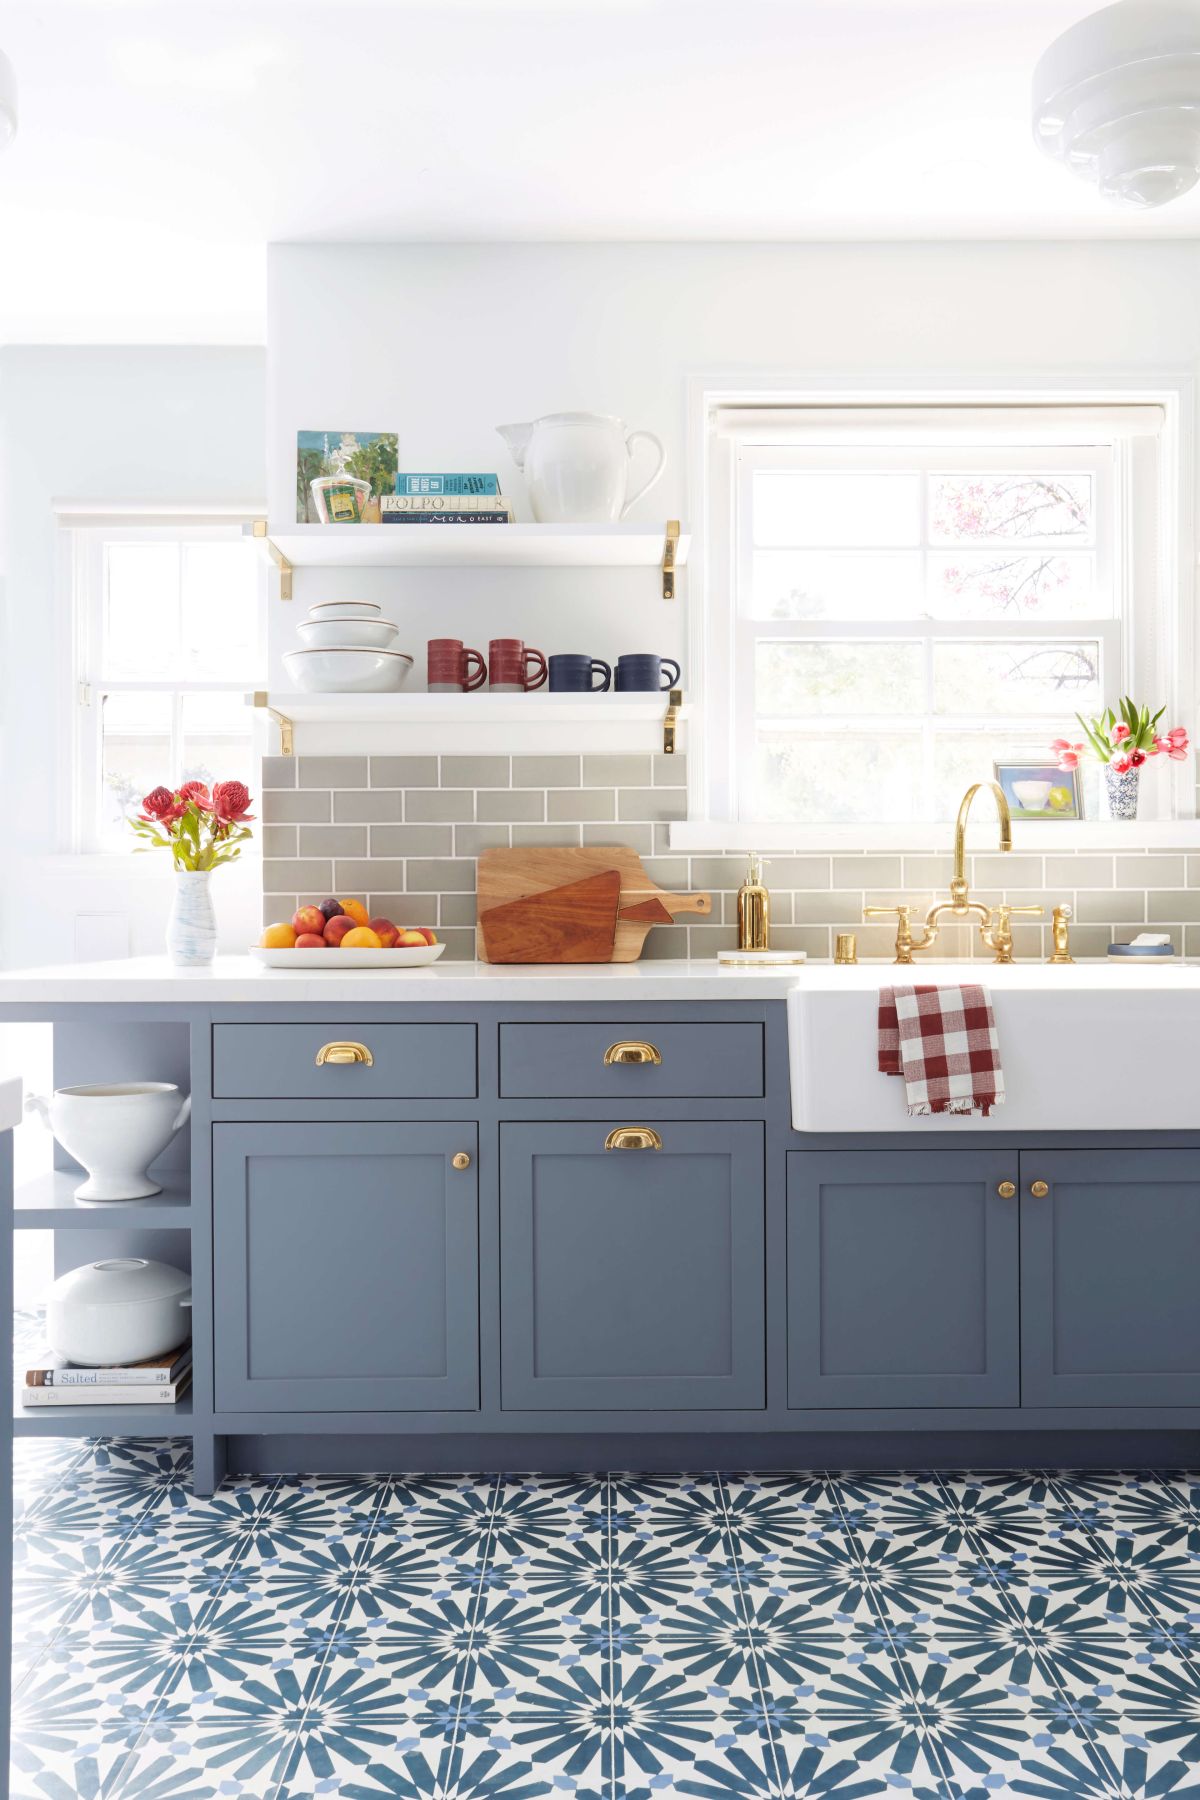
The color palette selection process involved balancing historical accuracy with my personal aesthetic preferences and the existing kitchen elements. Authentic 1950s colors included turquoise, yellow, pink, mint green, and coral, often combined in surprisingly bold ways. I chose to pair classic black and white checkerboard with accents of soft mint green in the grout, creating a nod to the era without overwhelming our relatively small kitchen space. This combination feels authentically retro while remaining livable for modern sensibilities.
Scale considerations became important when translating vintage designs into contemporary installations. Original 1950s tiles were often smaller, typically 4 to 6 inches square, creating intricate patterns with more grout lines. I opted for slightly larger 9-inch tiles that maintain the retro aesthetic while being easier to clean and install. The larger scale also makes our 10×12 kitchen feel more spacious while still delivering that unmistakable mid-century character I was seeking throughout this renovation project.
Choosing Between Reproduction and Vintage Tiles
The debate between using authentic vintage salvaged tiles versus modern reproductions consumed weeks of my planning process. I initially romanticized the idea of finding and using actual 1950s tiles, spending Saturdays visiting architectural salvage yards and online vintage marketplaces. While I found some beautiful pieces, the quantity available never matched what I needed for our 120-square-foot floor. Condition varied wildly, with many tiles showing chips, cracks, or crazing that would create maintenance issues.
Modern reproduction tiles ultimately proved more practical while still delivering authentic retro styling. Contemporary manufacturers have perfected techniques for recreating vintage patterns with modern materials that offer superior durability and consistency. I found reproduction tiles that looked identical to period examples but with enhanced water resistance, stain protection, and uniformity. The price per tile was actually lower than salvaged vintage options, and I had confidence every tile would match perfectly without surprises.
The hybrid approach I ultimately took combined reproduction tiles with a few carefully selected vintage accent pieces. I found a set of original 1950s decorative tiles featuring atomic starburst designs that I incorporated as a border detail near the doorway. This strategy gave me the authentic vintage charm I craved while maintaining the reliability and consistency of modern reproduction tiles for the main floor. The combination satisfies both my practical needs and my desire for genuine period character.

Planning the Layout and Pattern Design
Creating the perfect layout for our retro checkerboard pattern required more careful planning than I initially anticipated. I spent an entire weekend making scale drawings and using graph paper to plan how the pattern would interact with our kitchen’s irregular dimensions. The goal was centering the pattern on the room’s main focal point while avoiding awkward partial tiles in highly visible areas. Starting the layout from the center of the room and working outward ensured symmetry.
The doorway transitions presented unique challenges that required creative problem-solving to maintain the retro aesthetic. I wanted clean transitions to adjoining rooms without abrupt pattern stops that would look unfinished. We created custom threshold pieces that transitioned from the checkerboard to the hardwood in the hallway, using aluminum trim with a brushed finish that felt period-appropriate. These transitions cost an additional $200 but look professional and purposeful rather than like afterthoughts.
Cabinet and appliance locations influenced pattern decisions more than I expected during the planning phase. I had to consider that some tiles would be partially covered by the refrigerator and stove, and I didn’t want half tiles creating visual disruption in visible areas. We adjusted the starting point slightly to ensure full tiles appeared in the most noticeable spots while using cuts along less visible perimeter areas. This planning prevented the pattern from looking off-center or poorly executed once furniture and appliances were in place.
Installing Retro Tile Successfully
The installation process proved more labor-intensive than I expected, even with my contractor’s experience with tile work. We spent a full day preparing the subfloor, ensuring it was completely level and stable before laying any tile. Old vinyl needed removal, and the underlying plywood required patching in several areas. Proper substrate preparation proved critical for preventing future cracking or movement, especially with larger format tiles. This prep work added $400 to the project but provided the necessary foundation for long-term success.
Setting the tiles in the checkerboard pattern required constant attention to alignment and spacing to maintain the graphic impact of the design. My installer used spacers religiously and checked the pattern regularly with a level and straightedge. One misaligned tile early in the process would throw off the entire pattern, creating increasingly noticeable problems. We worked slowly and methodically, completing about 40 square feet per day to ensure precision. The patience required during installation paid dividends in the professional-looking final result.
Grouting became an opportunity to enhance the retro aesthetic through color choice and application technique. I chose mint green grout for the checkerboard to add subtle 1950s color while maintaining the graphic impact of the black and white pattern. The colored grout took longer to install than standard white because it required more careful cleanup to prevent staining the white tiles. We sealed everything thoroughly after the grout cured, protecting both tile and grout from kitchen spills and stains that are inevitable with daily use.
Incorporating Retro Design Elements
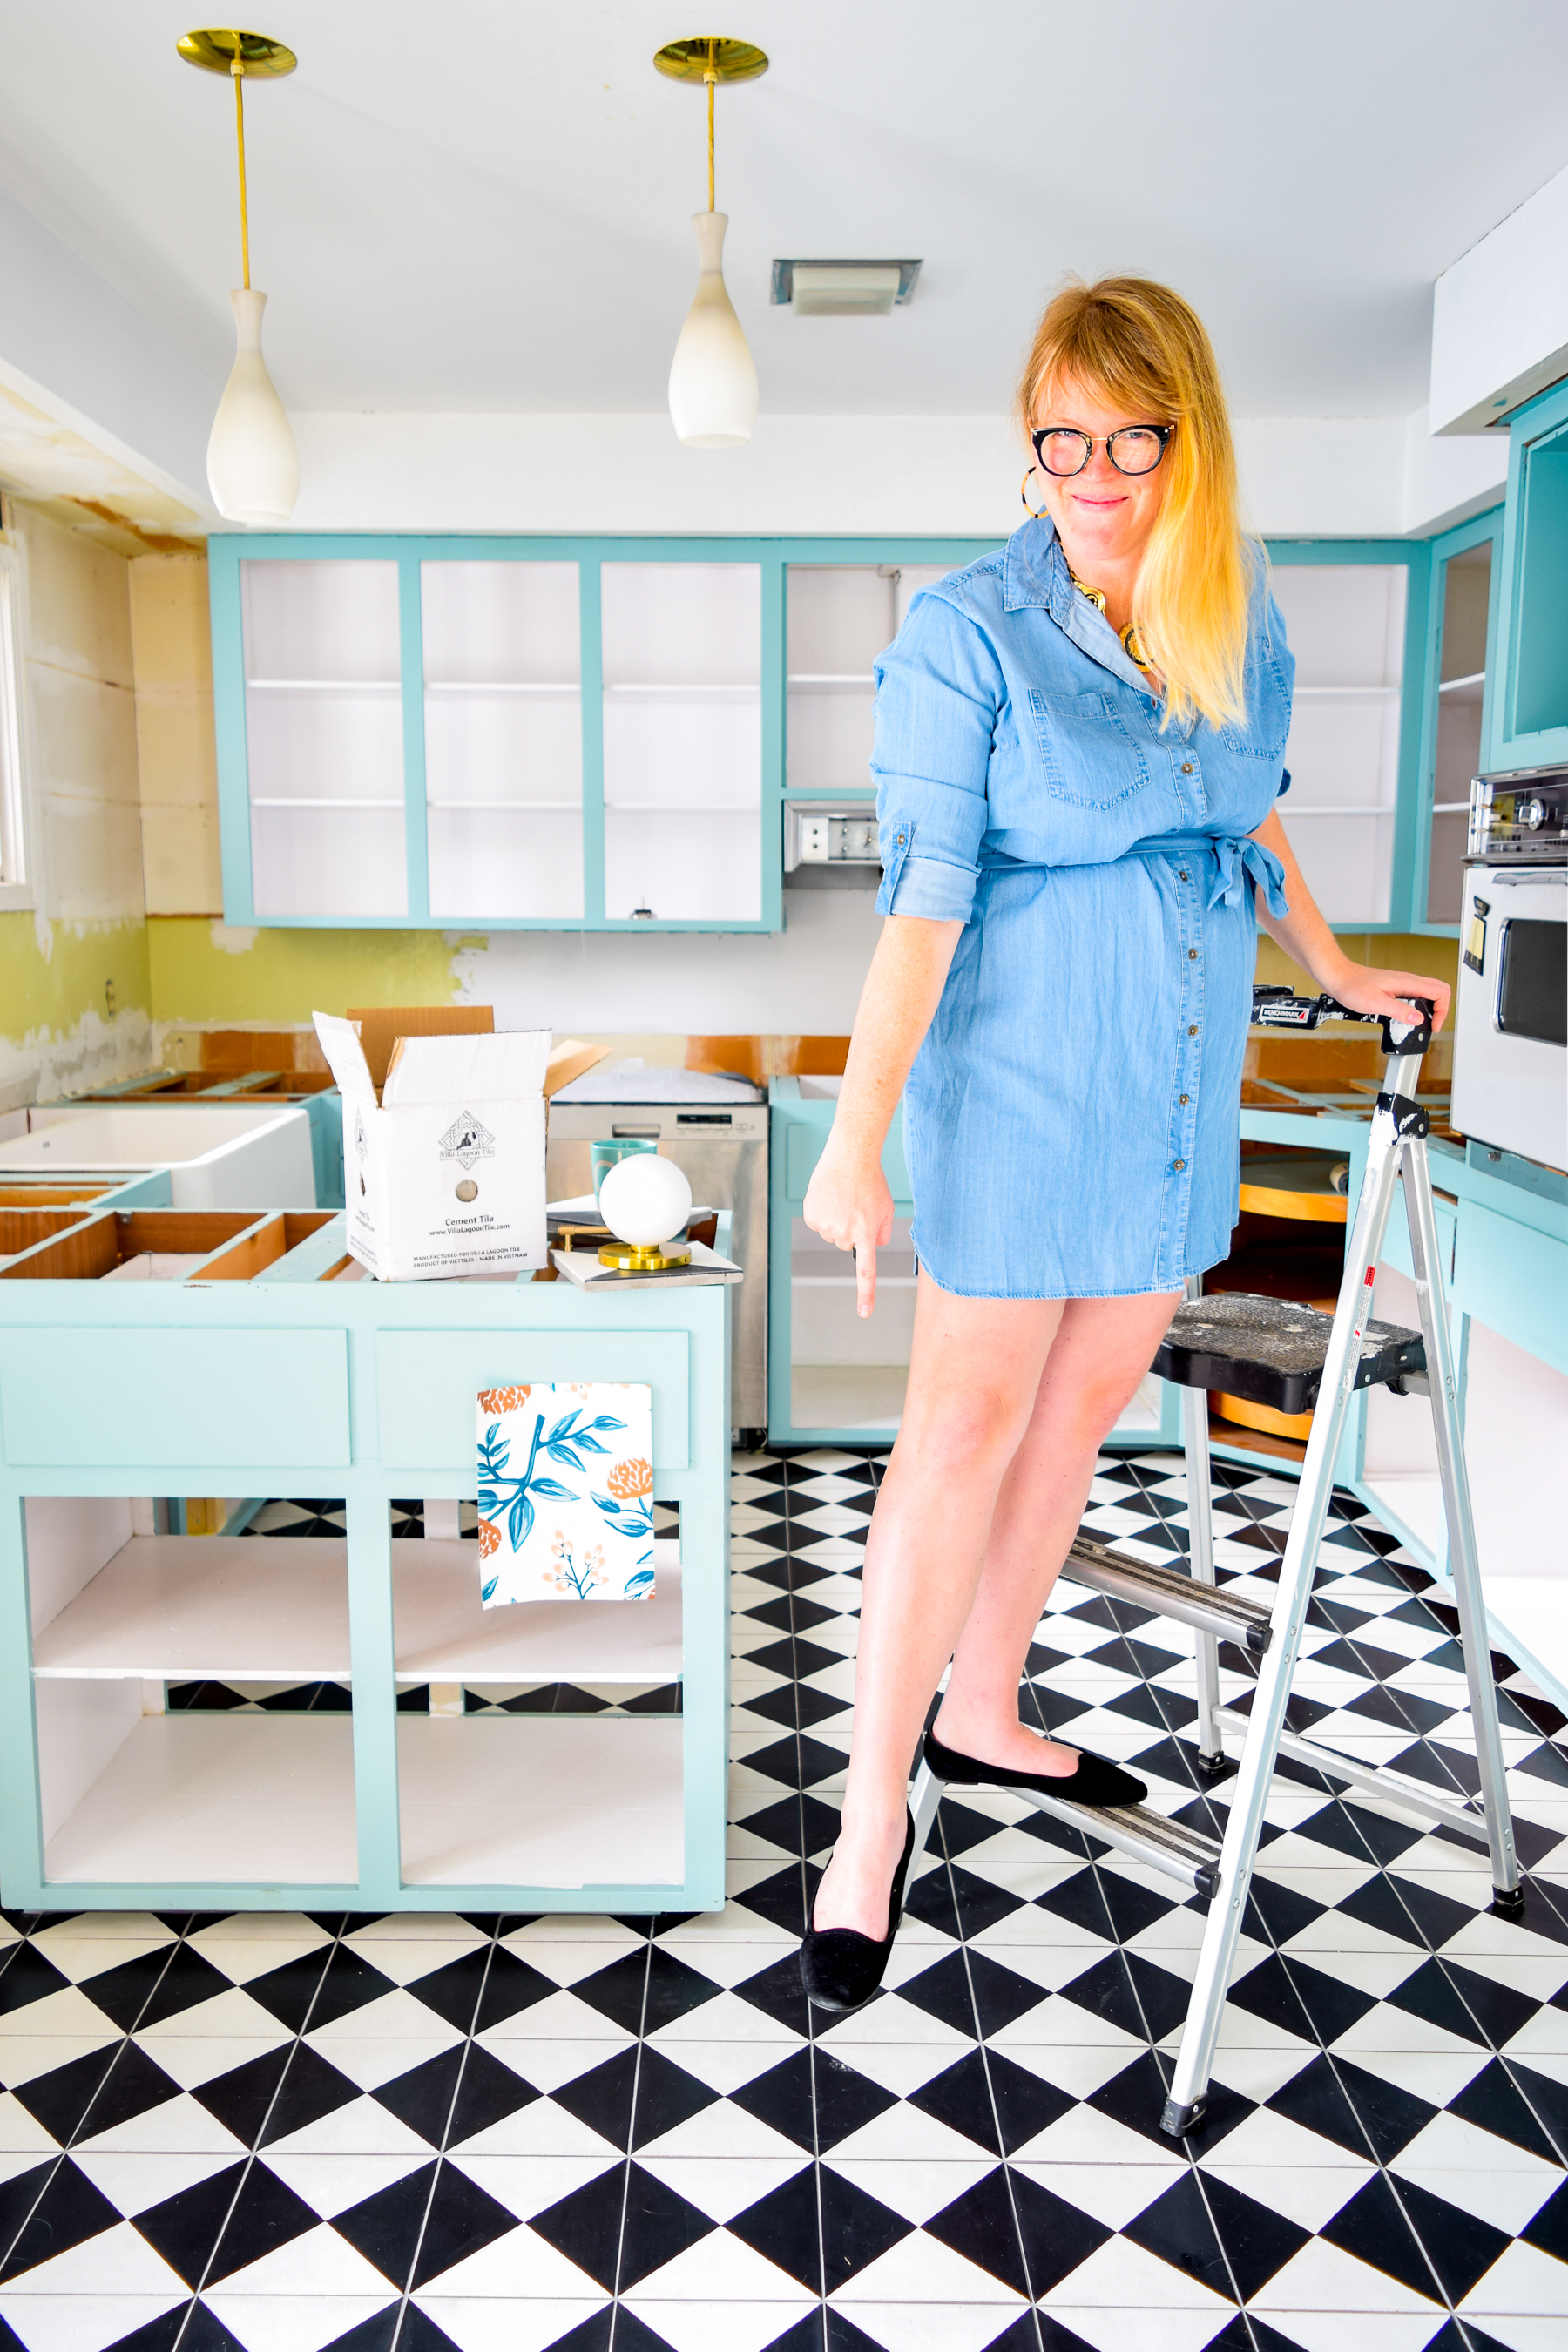
Extending the retro aesthetic beyond just the floor tiles created a cohesive mid-century kitchen that feels authentic rather than costume-like. I paired the checkerboard floor with mint green lower cabinets and white uppers, creating the classic two-tone kitchen look popular in the 1950s. Chrome hardware and appliances with rounded edges reinforce the period styling. The floor became the foundation that influenced every other design decision, creating a unified retro vision throughout the entire space.
Lighting choices dramatically affected how the retro tile pattern appeared and contributed to the overall mid-century atmosphere. I installed reproduction globe pendant lights with brass accents that cast even illumination across the floor, making the checkerboard pattern pop. Under-cabinet lighting helps showcase the tile’s glossy surface while providing task lighting for food preparation. The interplay between light and the reflective tile surface creates visual interest that changes throughout the day as natural light shifts.
Accessories and decor complete the retro kitchen experience in ways that complement the floor’s bold pattern. I display vintage Pyrex bowls, period-appropriate small appliances, and mid-century artwork that reference the same color palette as the floor. The neutral black and white checkerboard provides a perfect backdrop for colorful retro accessories without creating visual chaos. Everything works together to transport visitors back to the 1950s while maintaining functionality for modern cooking and entertaining needs.
Maintaining Retro Tile Long-Term
Daily cleaning of the retro tile floor has become a simple routine that keeps it looking showroom fresh after two years of use. I sweep or vacuum daily to remove grit that could scratch the glossy surface, then damp mop with a pH-neutral tile cleaner twice weekly. The sealed surface resists stains well, but I wipe up spills immediately to prevent any chance of grout discoloration. The glossy finish shows footprints more than matte tiles would, but quick daily maintenance keeps everything looking pristine.
The colored grout requires more attention than standard white or gray would, but I’ve found the maintenance manageable with proper products and techniques. I reseal the grout every six months using a quality penetrating sealer that protects against staining and moisture damage. This preventive care has kept the mint green grout looking as vibrant as on installation day. High-traffic areas near the sink and stove need spot-cleaning more frequently, but the colored grout hides minor discoloration better than white would.
Long-term durability has exceeded my expectations for reproduction retro tiles compared to horror stories I’d heard about vintage materials. The modern glazing technology means my tiles resist chipping, scratching, and crazing that plagued the original 1950s ceramics. After two years of daily use by a family of four, including dropped dishes and dragged furniture, the floor looks nearly perfect. The few minor chips that occurred along edges are barely noticeable and don’t detract from the overall impact of the bold retro pattern.

How much does retro kitchen floor tile cost compared to modern options?
My reproduction retro tiles cost $8 per square foot, comparable to mid-range modern ceramics. Installation added $12 per square foot, including substrate prep, for a total of $20 per square foot. Authentic vintage tiles can cost $15-30 per square foot when available. Budget $2,400-3,000 for a 120-square-foot kitchen, including materials and professional installation. The investment delivers a unique character that modern tiles can’t match.
Can I install retro tile over existing flooring?
Generally no, unless the existing floor is in perfect condition. We removed old vinyl and repaired the subfloor before installation. Tile needs a completely level, stable surface to prevent cracking. Installing over existing flooring risks problems down the road. My contractor recommended removal, which added $400 but ensured long-term success. The proper preparation was worth the additional cost and time investment.

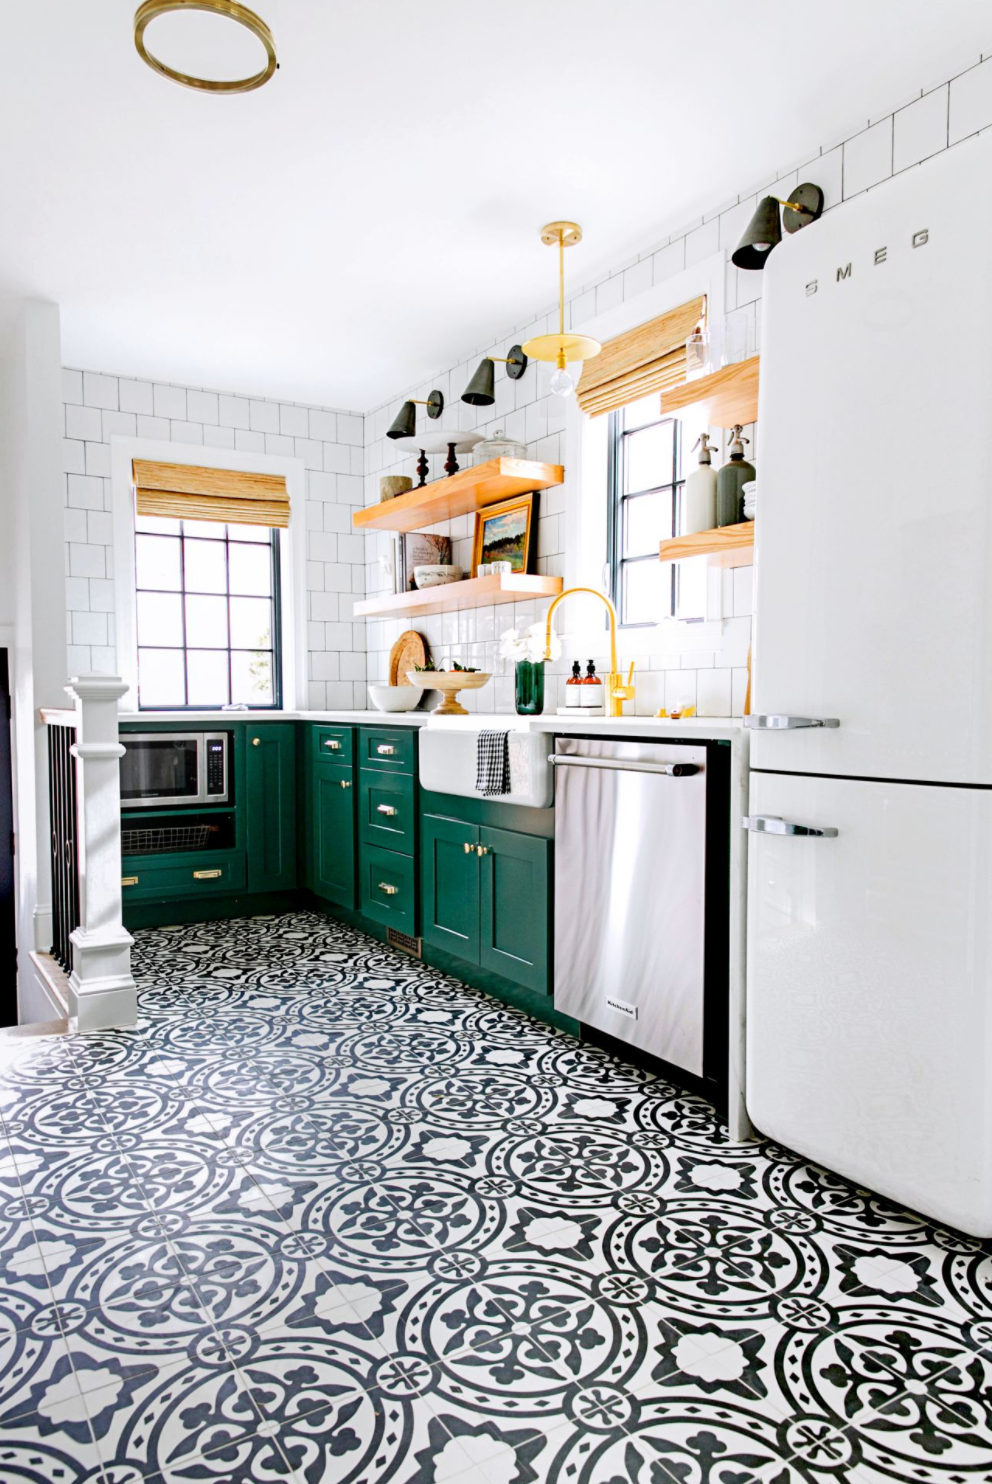
Is checkerboard the only authentic retro pattern available?
Not at all! I chose checkerboard, but authentic 1950s options include atomic starbursts, geometric patterns, terrazzo looks, and solid color blocking. Some manufacturers offer reproduction versions of specific vintage lines. Research period photos to find patterns that speak to you. I considered several options before settling on a classic black and white checkerboard for its timeless appeal and bold graphic impact.
How do I clean retro tile without damaging the glossy finish?
Use pH-neutral tile cleaner and avoid abrasive scrubbers that could scratch the glaze. I use a microfiber mop with warm water and a gentle cleaner for daily maintenance. Never use acidic cleaners like vinegar or harsh chemicals. For stubborn stains, I use a soft brush and specific tile cleaner. Proper sealing protects both tile and grout, making cleaning easier over time.

Will retro tile work in a modern kitchen or look out of place?
Retro tile can absolutely work in mixed-style kitchens! I’ve seen gorgeous kitchens that pair vintage-inspired tile with contemporary cabinets and appliances. The key is balancing elements thoughtfully. Black and white checkerboard especially works across design styles. Consider your overall vision and how much commitment you want to full retro styling versus selective vintage elements mixed with modern design.
How durable is reproduction retro tile for busy family kitchens?
Very durable with proper installation and care. My floor handles daily use by four people, including teenagers, without showing significant wear after two years. Modern manufacturing creates tiles more durable than vintage originals. The glazed surface resists scratches, stains, and moisture when properly sealed. I’ve dropped cast-iron pans and had no damage. Quality reproduction tiles offer vintage looks with contemporary performance.
Vintage home style: 1950s vinyl floor tiles in square patterns

Kitchen Floor Tile Ideas – Remodeling Kitchen Tiles

Kitchen Flooring That Will Endure the Test of Time
Vintage 1960s kitchen tile design ideas

Modern Kitchen Floor Tiles Design
Retro Kitchen Design Sets and Ideas
Retro Self Adhesive 12-Inch Vinyl Floor Tiles

Related Posts: