When I first envisioned adding a kitchen island bar to our rustic home, I had no idea it would become the absolute heart of our family life. What started as a simple desire for extra counter space turned into a year-long journey of planning, building, and perfecting a centerpiece that now hosts everything from homework sessions to holiday gatherings. After eighteen months of daily use, I can honestly say our rustic island bar has transformed not just our kitchen, but how our family connects and spends time together.
Choosing the Right Size and Proportions
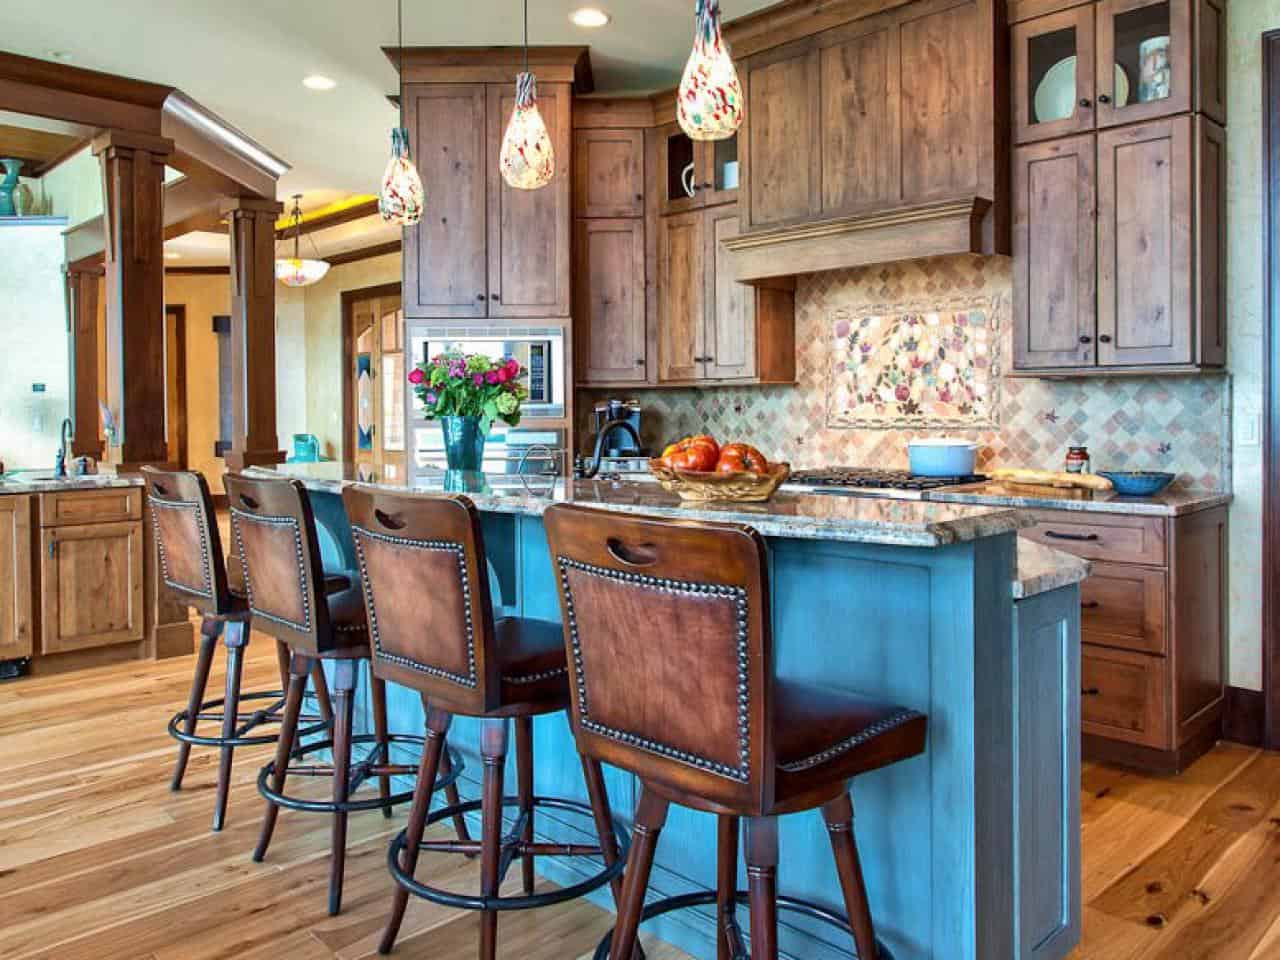
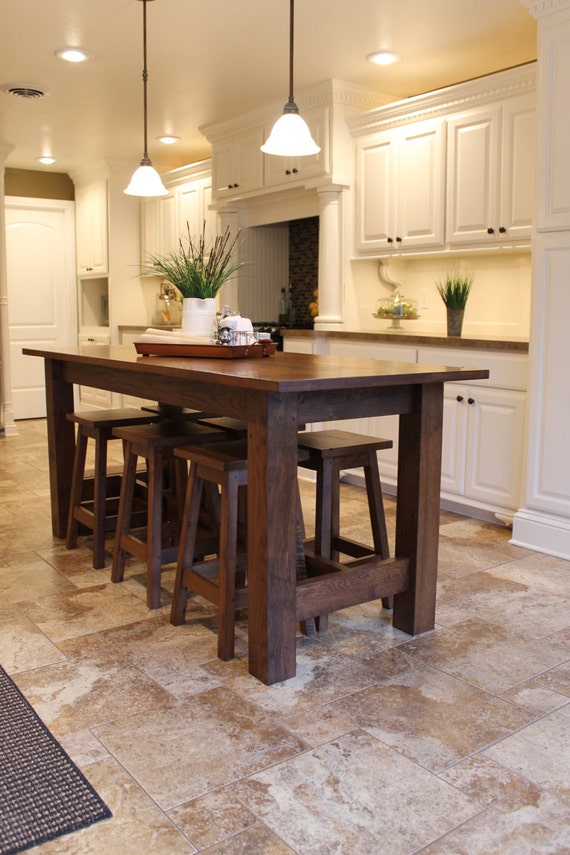
Getting the dimensions right for our rustic kitchen island bar required more trial and error than I initially anticipated. I started by making a cardboard mockup of different sizes, which seemed silly at first but saved me from a costly mistake. Our final island measures 8 feet by 4 feet, which provides ample workspace and seating for four people while maintaining comfortable traffic flow around all sides. I learned that islands need at least 36 inches of clearance space, but 42 inches feels much more comfortable for our busy family kitchen.
The height decision proved crucial for both functionality and aesthetics. Standard counter height felt too low for bar seating, while full bar height seemed too formal for our rustic style. We settled on 38 inches, which works perfectly with adjustable-height stools and feels comfortable for both food prep and casual dining. This compromise height allows my kids to use the space for homework while I cook dinner, something that happens almost daily in our home.
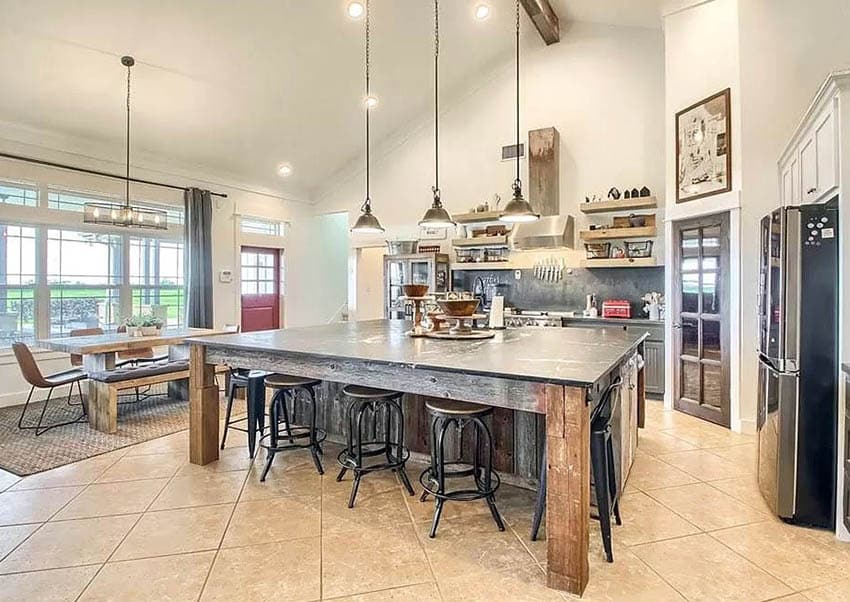
Proportional balance with the rest of the kitchen took careful consideration. Our 12-foot ceilings can handle a substantial island, but I had to ensure it didn’t overwhelm our cozy farmhouse aesthetic. The island’s visual weight comes from the reclaimed wood base rather than sheer size, creating presence without dominating the space. I’m grateful I took time to consider these proportions carefully, because getting them wrong would have ruined the entire kitchen’s harmony.
Selecting Rustic Materials and Finishes
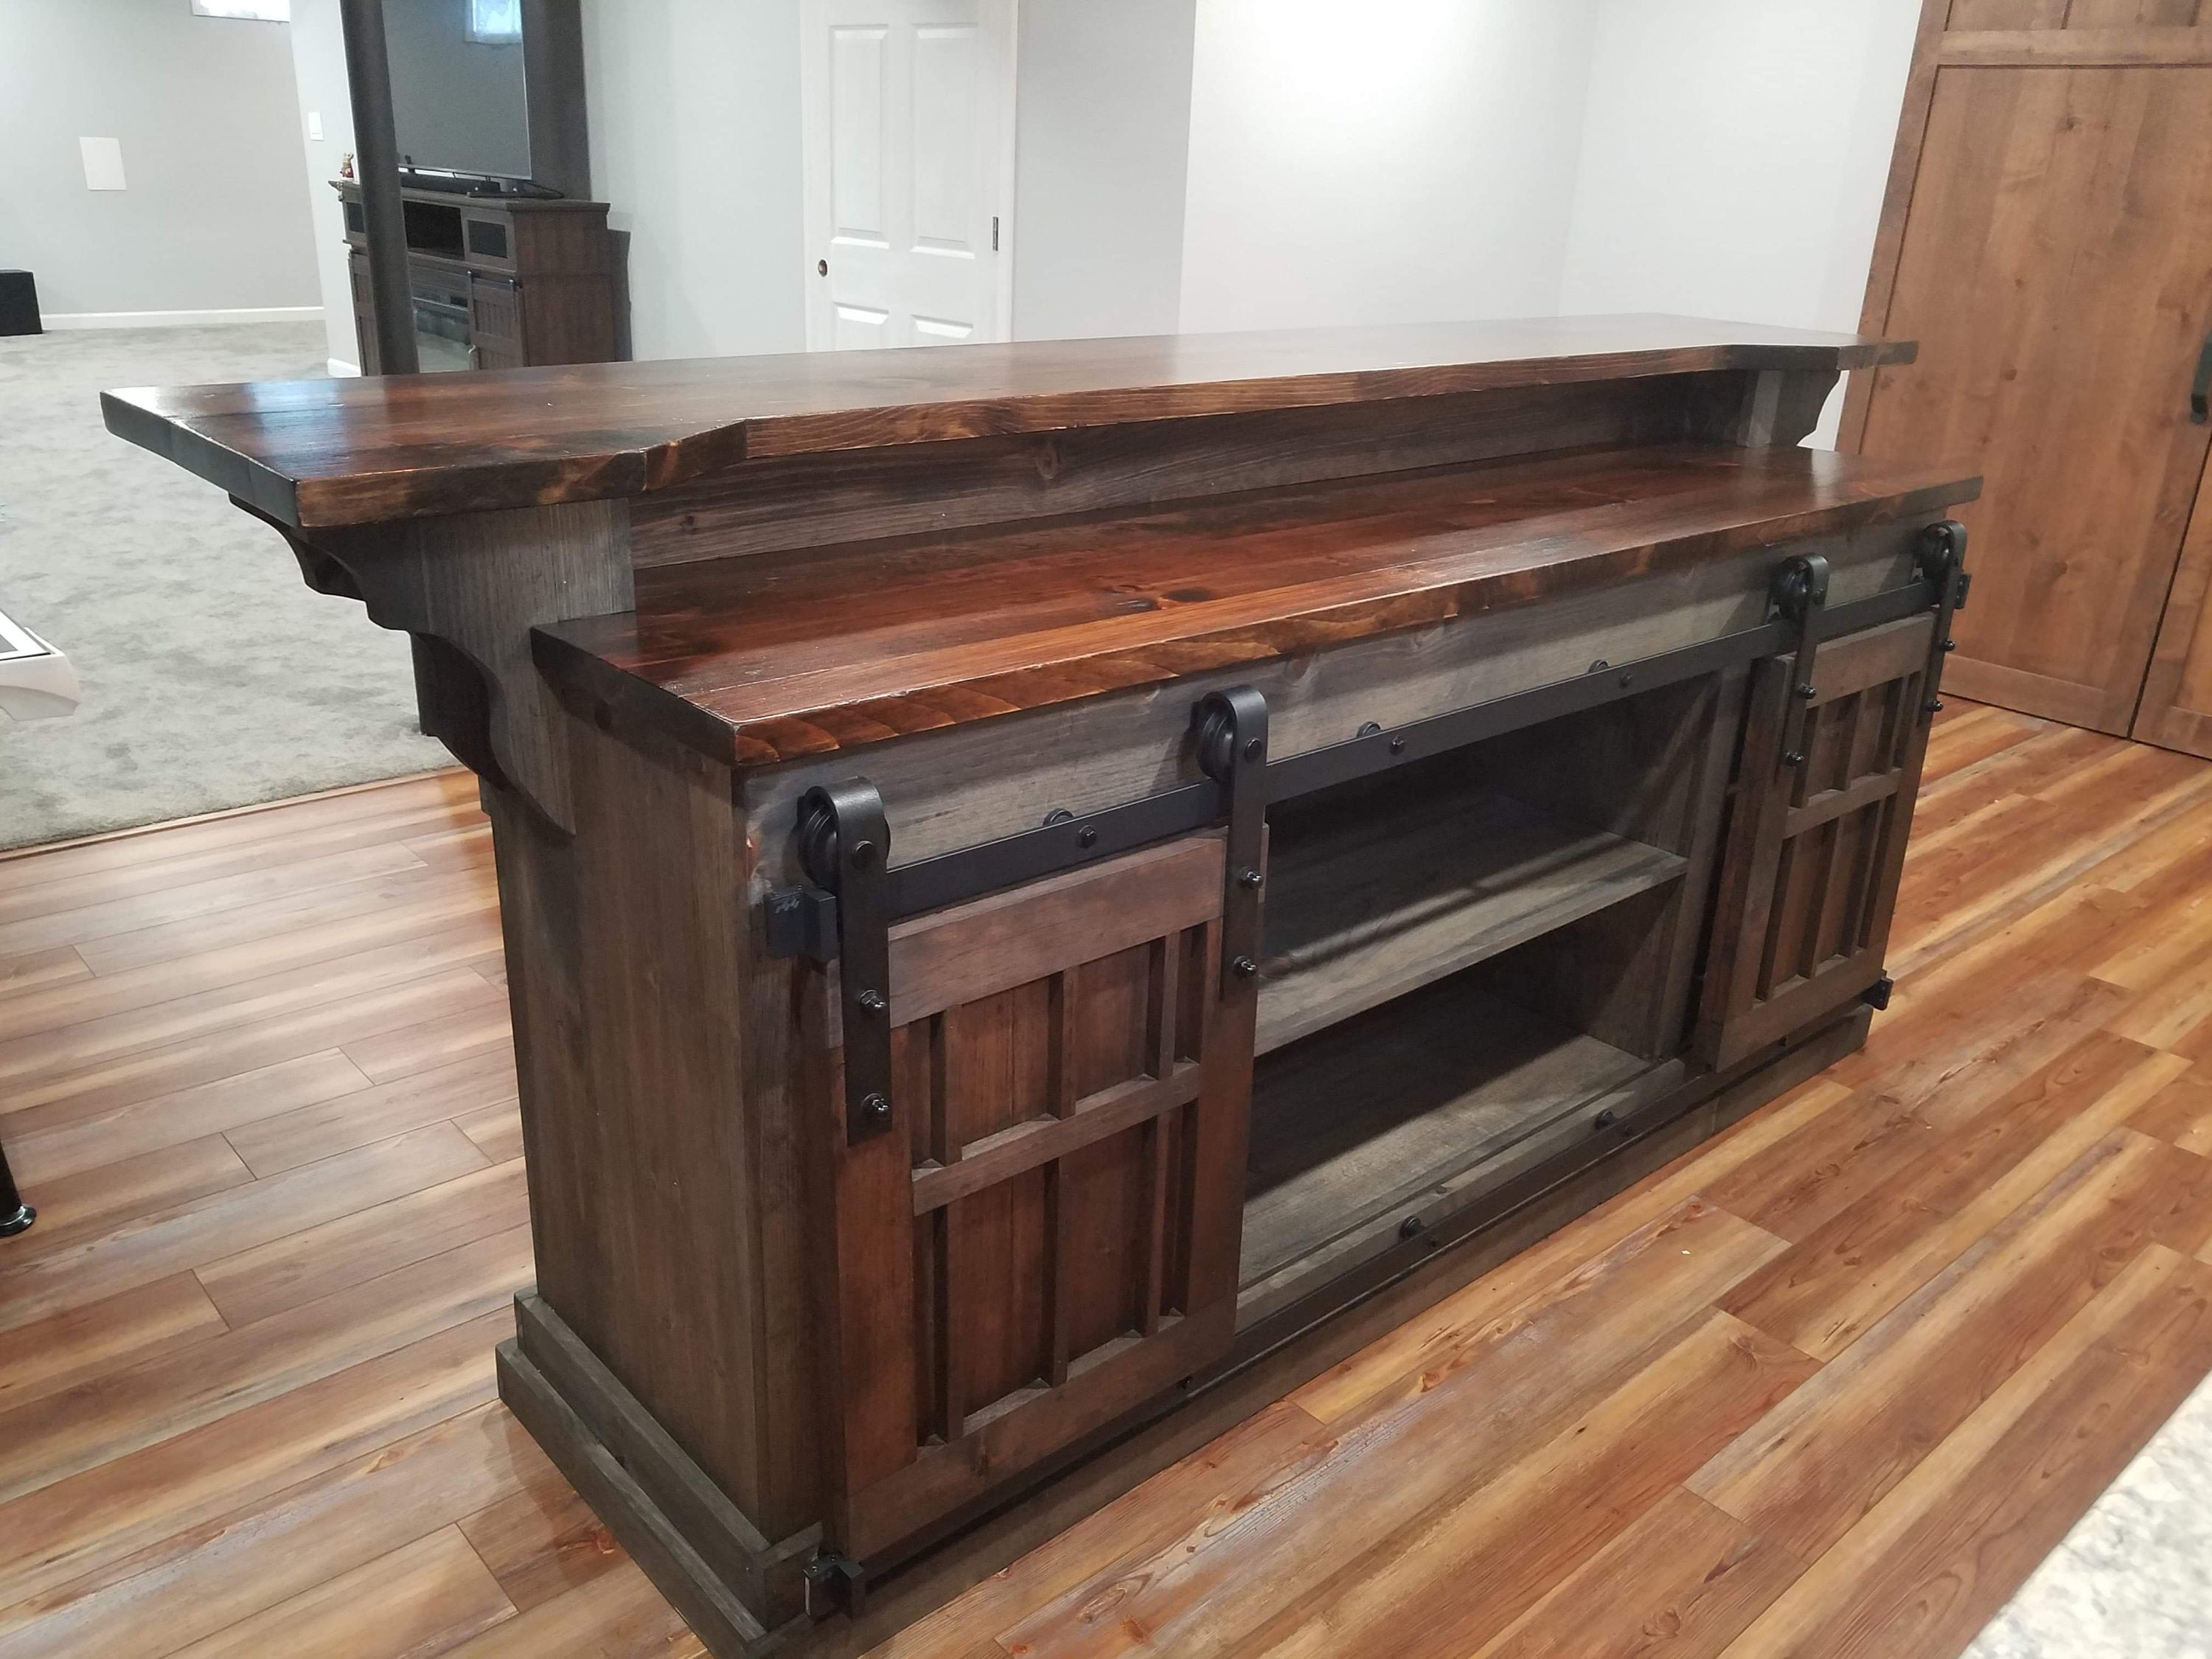
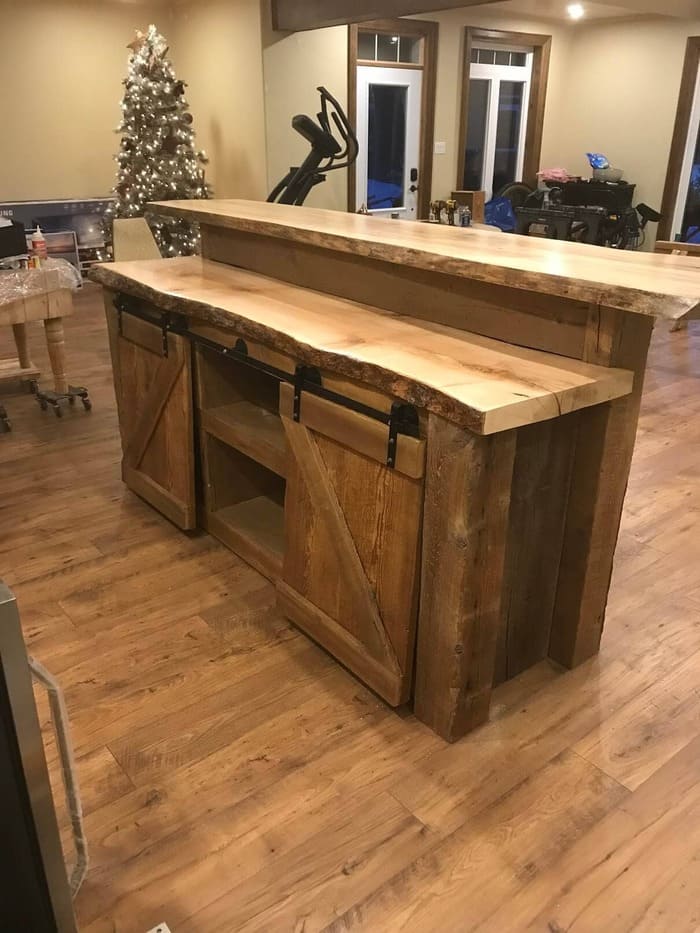
The material selection process became an adventure in itself, taking me to salvage yards, lumber mills, and antique shops throughout our region. I ultimately chose reclaimed barn wood for the island base, sourcing weathered oak beams from a 1890s dairy barn being demolished nearby. This wood tells a story and adds authentic character that new materials simply cannot replicate. The patina and natural wear patterns create visual interest that perfectly captures the rustic aesthetic I was pursuing.
For the countertop, I debated between butcher block and stone for months before choosing a thick maple butcher block that complements the barn wood beautifully. The warm wood tones create a cohesive natural palette while providing a practical work surface that ages gracefully with use. I finish the butcher block monthly with food-safe mineral oil, which takes thirty minutes but keeps it looking gorgeous and protected from daily wear and cooking activities.
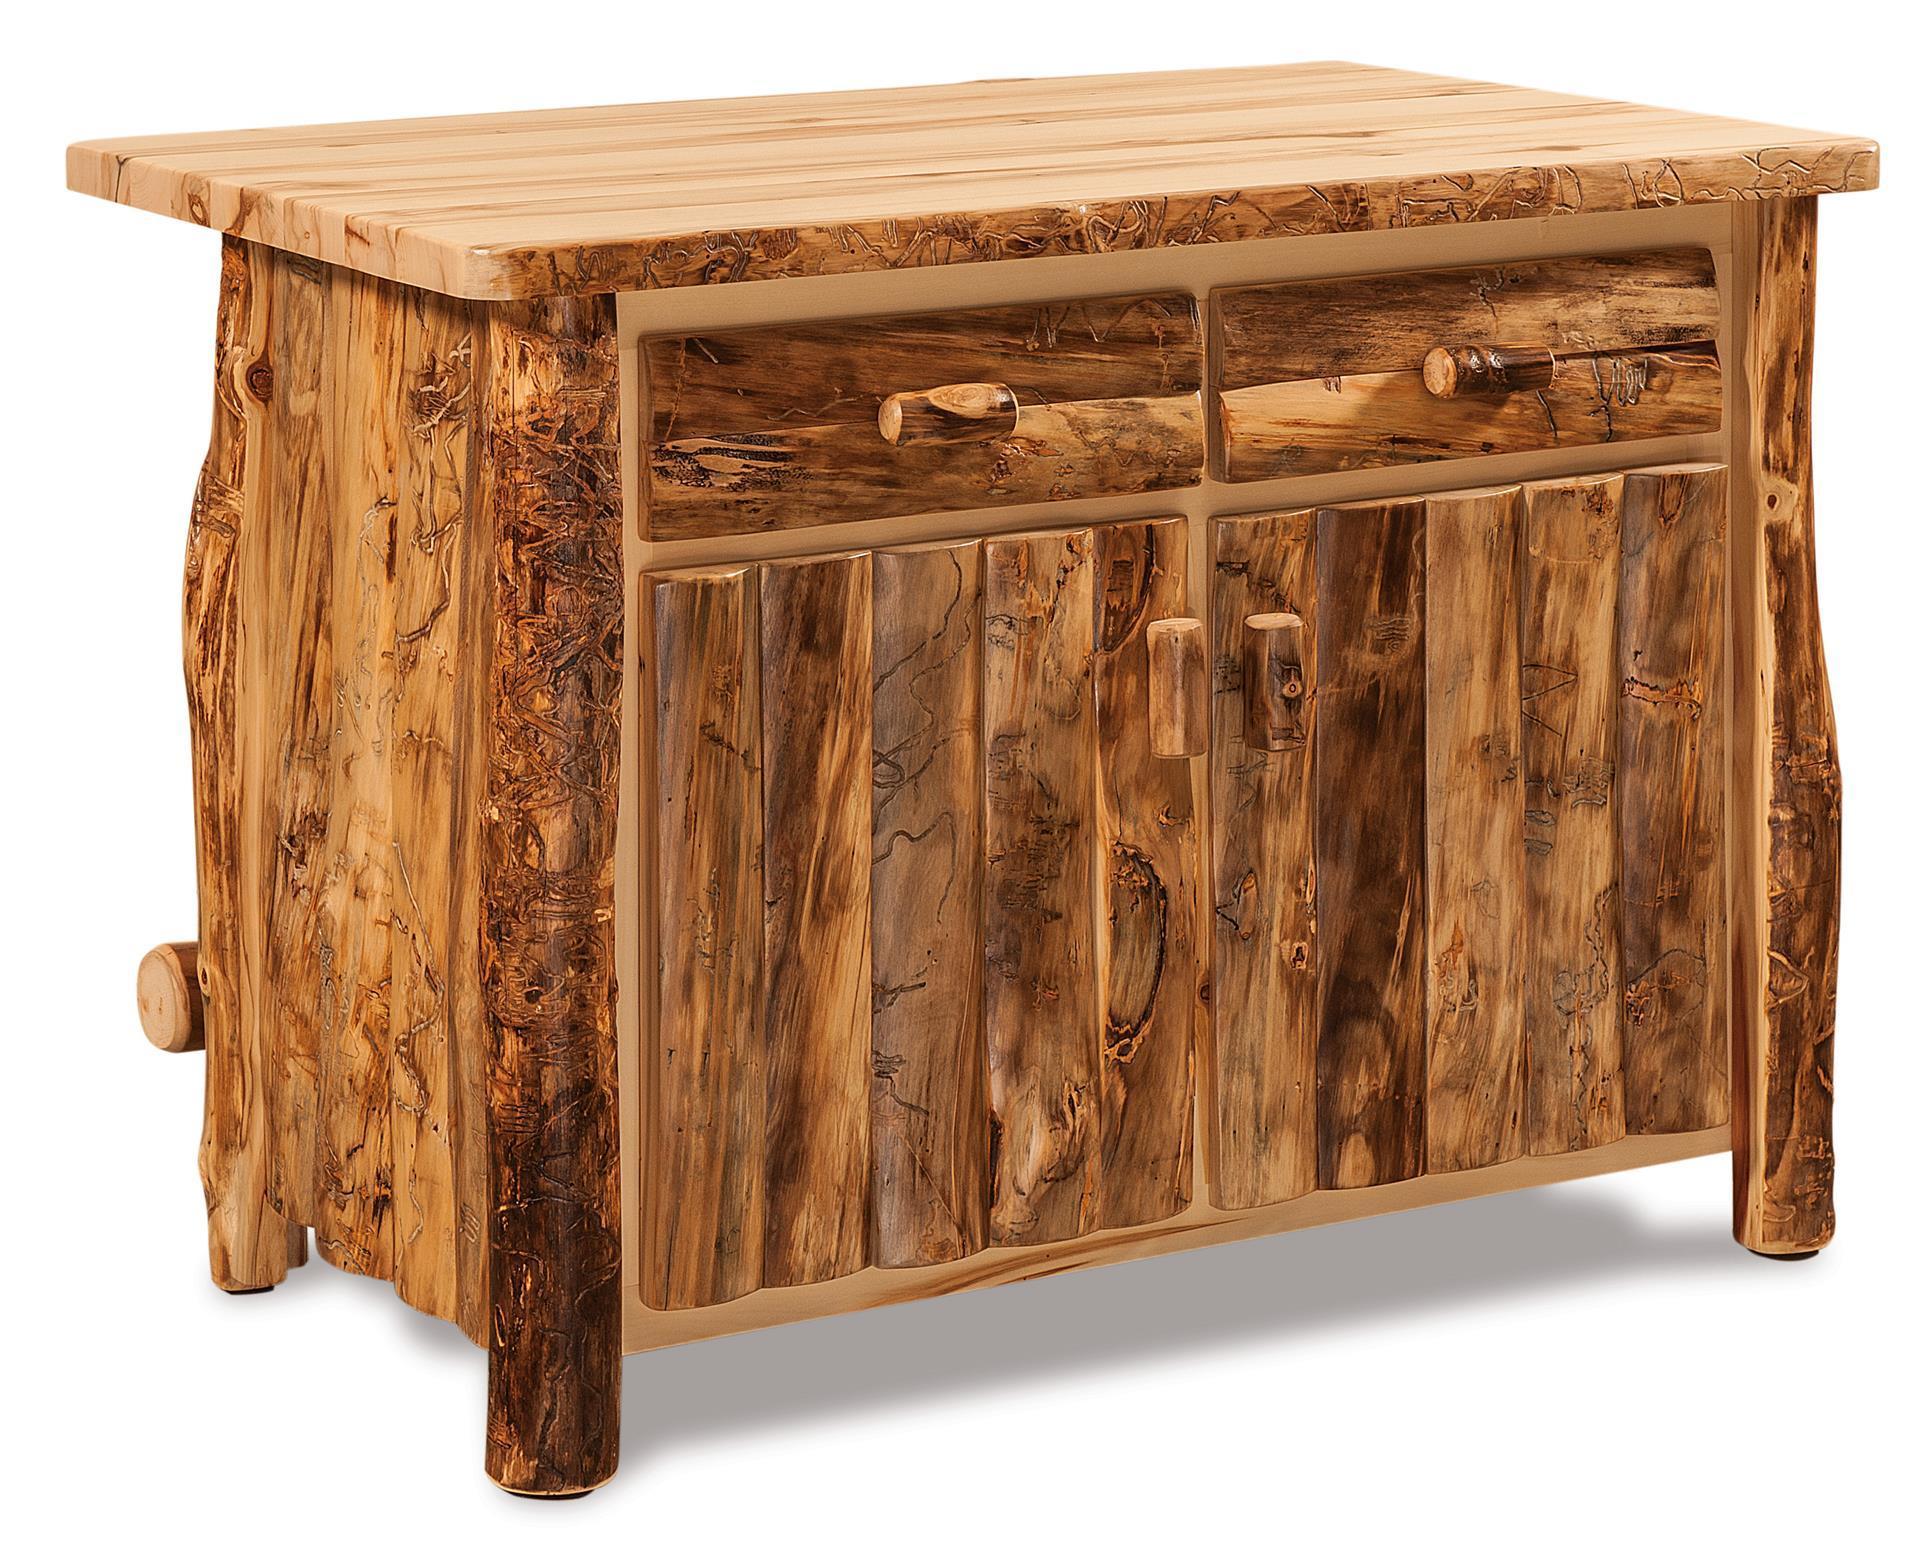
The hardware selection proved more important than I expected for achieving an authentic rustic character. I found wrought iron brackets and handles at a local blacksmith shop, having them custom-forged to match our kitchen’s existing hardware. These handmade details cost more than mass-produced alternatives, but they add a level of authenticity and craftsmanship that makes our island feel like an heirloom piece rather than a modern addition.
Planning for Storage and Functionality
I quickly learned that a beautiful rustic island bar means nothing without proper storage and functional design. Our island includes six deep drawers for pots, pans, and serving dishes, plus open shelving for displaying vintage crockery and everyday dishes. The open shelving adds to the rustic aesthetic while keeping frequently used items easily accessible during cooking and entertaining. I positioned the most beautiful pieces at eye level, creating an attractive display that changes with the seasons.
The electrical planning required careful consideration for both current and future needs. We installed outlets on both ends of the island for small appliances and device charging, plus rough-in wiring for potential future upgrades like a wine refrigerator. The outlets blend seamlessly with the rustic design by using aged bronze covers that match our hardware finish. I also added under-cabinet lighting that creates a beautiful ambiance during evening gatherings.
Storage for bar accessories became a priority once we started using the island for entertaining. I designed a dedicated area for wine glasses, cocktail tools, and bar towels that keeps everything organized but easily accessible. Hidden storage compartments built into the base hold less attractive items like cleaning supplies and trash bags. This thoughtful organization means the island stays beautiful and functional even during busy preparation periods.
Creating Comfortable Seating Arrangements
Finding the right stools for our rustic island bar took months of searching and testing different styles. I wanted seating that complemented the rustic aesthetic while being comfortable enough for long conversations and homework sessions. After trying various options, I settled on adjustable-height stools with weathered wood seats and black metal frames that echo the industrial elements in our kitchen design. The adjustability accommodates family members of different heights perfectly.
The spacing between stools required careful calculation to ensure everyone has adequate elbow room without the island feeling empty. I learned that 24 inches between stool centers provides comfortable seating, while 26 inches feels even better for adult-sized family members. We can seat four people comfortably or six for large gatherings by bringing in extra stools from our dining room. This flexibility has proven invaluable during holiday celebrations and dinner parties.
Footrest considerations became important for long-term comfort during extended use. Our stools have built-in footrests, but I also added a wooden rail along the island base at the perfect height for additional foot support. This detail not only enhances comfort but adds another rustic design element that ties the whole piece together. The rail doubles as protection for the wood base from scuff marks and kicks.

Incorporating Rustic Design Elements
The challenge of making our island bar feel authentically rustic while maintaining modern functionality required careful attention to design details. I incorporated traditional joinery techniques like mortise and tenon construction for the base framework, which adds both structural integrity and visual authenticity. These joints are visible and celebrated rather than hidden, showcasing the craftsmanship that defines quality rustic furniture and architectural elements.
Natural imperfections in the reclaimed wood became features rather than flaws in our design approach. Nail holes, saw marks, and weathering patterns tell the story of the wood’s previous life and add character that cannot be manufactured. I preserved and highlighted these details during construction, using them as inspiration for the overall design rather than trying to hide or repair them. This approach creates genuine rustic appeal.
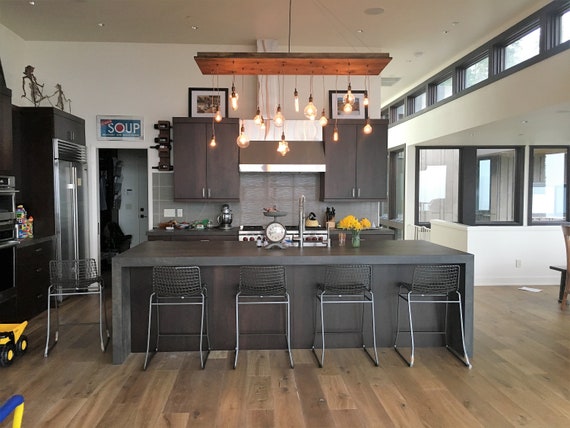
The island’s relationship with other rustic elements in the kitchen required careful coordination to avoid a theme park effect. Our island echoes the wood tones and construction style of our open shelving and range hood while introducing enough variation to maintain visual interest. I used similar hardware throughout the kitchen to create cohesion, while varying the wood grain patterns and finishes to prevent monotony. This balance took time to achieve but resulted in a harmonious design.
Maintenance and Long-Term Care
Living with our rustic kitchen island bar for eighteen months has taught me valuable lessons about maintenance and care. The butcher block countertop requires monthly oiling, which I initially saw as a chore but now enjoy as a meditative ritual that keeps me connected to the natural materials in our home. I use food-safe mineral oil applied with a clean cloth, working with the grain to maintain the wood’s natural beauty and protection.
The reclaimed wood base needs occasional attention to prevent drying and cracking, especially during the winter months when our heating system reduces indoor humidity. I apply a coat of paste wax twice yearly, which nourishes the wood while enhancing its natural patina. This maintenance takes about an hour but helps preserve the authentic character that makes our island special. The wax also protects water rings and scratches from daily use.
Seasonal changes affect the wood’s movement and appearance, something I learned to anticipate and appreciate rather than worry about. Small gaps may appear between boards during dry winter months, then close again in summer humidity. These natural movements are part of living with authentic materials and add to the rustic character rather than detracting from it. Understanding these changes helps me maintain realistic expectations and proper care routines.

How much space do I need around a rustic kitchen island bar?
I recommend at least 42 inches of clearance on all sides for comfortable movement, though 36 inches is the absolute minimum. Our island is 4×8 feet in a 14×16 kitchen, which provides excellent flow. Measure your space carefully and consider making a cardboard mockup like I did. The island should enhance traffic flow rather than creating bottlenecks in your daily cooking routines.
What’s the best height for a rustic kitchen island bar?
We chose 38 inches, which works perfectly with adjustable stools and feels comfortable for both prep work and dining. Standard counter height (36″) is too low for bar seating, while full bar height (42″) can feel too formal for rustic style. The compromise height accommodates various uses and family members of different heights comfortably.

How much should I budget for a custom rustic kitchen island bar?
Our island costs about $3,20, including materials and professional installation. DIY builds can cost $1,000-1,500 for materials, while professionally built custom islands range from $2,500-5,00,0, depending on size and features. Reclaimed materials add cost but provide authentic character. Factor in electrical work, which added $400 to our project for outlets and lighting.
Can I build a rustic island bar myself or should I hire professionals?
I hired professionals for the construction and electrical work, which I recommend unless you have significant woodworking experience. The reclaimed wood required special techniques to preserve character while ensuring structural integrity. However, I did the finishing work myself, including oiling and waxing, which saved money and helped me learn proper maintenance techniques.
What type of wood works best for rustic kitchen island bars?
Reclaimed barn wood provides the most authentic character, but new wood can work if properly aged and finished. Oak, pine, and chestnut are excellent choices for rustic applications. I used reclaimed oak from a 1890s barn, which has incredible patina and character. Whatever wood you choose, ensure it’s properly dried and treated for kitchen use to prevent warping and cracking.
How do I maintain the rustic look while keeping it functional for daily use?
Focus on durable finishes that age gracefully rather than showing wear as damage. I use food-safe mineral oil on the butcher block monthly and paste wax on the base twice yearly. Embrace natural imperfections and aging as part of the rustic character. Choose materials and finishes that look better with age rather than worse, making maintenance enhance rather than fight the aesthetic.

Rustic Farmhouse Bar/island Table With 6 Barstools
Rustic Kitchen Island Ideas – Designing Idea

Trendy Kitchen Makeovers: Wood Islands that Blend Warmth

Rustic Kitchen Islands Perfect for Any Kitchen

Rustic Kitchen Island Ideas – Designing Idea
Rustic Kitchen Island Chandelier Kitchen Lighting Reclaimed
Rustic Kitchen Islands Perfect for Any Kitchen

Related Posts: