When I inherited my grandmother’s 1950s ranch house three years ago, I nearly cried looking at the kitchen cabinets. Layers of white paint had obscured beautiful wood grain, and decades of wear had left them looking tired and dated. But underneath all that neglect, I sensed something special. What started as a simple paint refresh turned into a six-month restoration journey that taught me everything about vintage cabinet care, from proper stripping techniques to period-appropriate hardware. Now these cabinets are the crown jewel of my kitchen, and I wouldn’t trade them for any modern alternative.
Identifying and Evaluating Vintage Cabinet Quality
The first step in my cabinet adventure was learning to recognize quality construction hidden beneath years of paint and wear. I discovered that pre-1960s cabinets often featured solid wood construction, dovetail joints, and mortise-and-tenon joinery that simply doesn’t exist in modern budget cabinets. When I carefully removed a door to examine the construction, I found thick maple frames with hand-cut dovetails that had survived fifty years without a single loose joint.
Hardware mounting gave me crucial clues about original cabinet quality and potential restoration challenges. High-end vintage cabinets used solid brass hinges with hand-filed pins, while budget options relied on plated steel hardware that often failed over time. I learned to check for original screw holes, as multiple generations of hardware changes can weaken door frames significantly. My cabinets showed only one previous hardware swap, indicating they’d been well-maintained throughout most of their life.
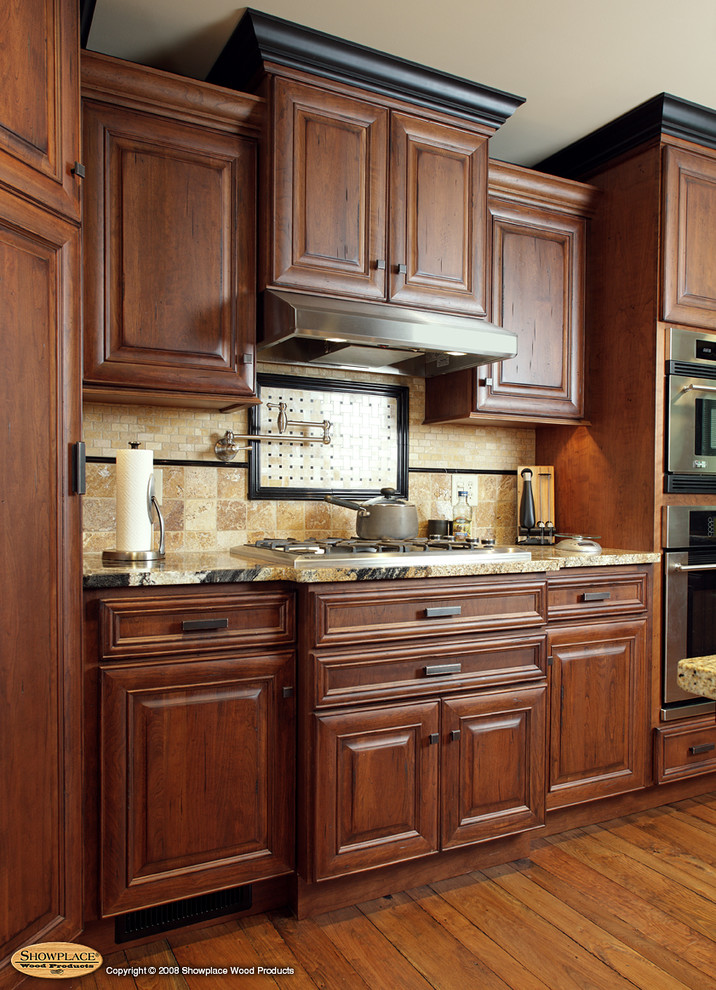
Wood species identification became essential for planning my restoration approach and understanding the cabinets’ true value. I found solid maple face frames under layers of paint, while the door panels revealed beautiful birch with subtle flame patterns. A furniture appraiser friend taught me to look for end grain in inconspicuous areas to confirm solid wood versus veneer construction. This knowledge helped me realize I owned cabinets worth thousands in today’s market, making restoration investment worthwhile.
Stripping Paint and Restoring Original Wood Finishes
My first paint stripping attempt was an unmitigated disaster that nearly ruined a cabinet door. I thought I could speed up the process with aggressive chemical strippers and steel wool, but ended up gouging the soft wood and creating uneven surfaces that took weeks to repair properly. I learned that vintage wood finishes require patience, gentle techniques, and often multiple rounds of careful stripping to reveal the original beauty underneath without causing permanent damage.
Heat guns became my preferred tool after mastering the proper technique through trial and plenty of error. I found that low temperatures and constant movement prevented scorching while softening multiple paint layers for easy removal. The key was working in small sections and having a scraper ready immediately, as the window between perfect softness and overheating was surprisingly narrow. This method preserved delicate wood grain details that chemical strippers often damaged.
Final sanding revealed wood grain patterns that had been hidden for decades under thick paint layers. I used progressively finer grits, starting with 120 and finishing with 220, to achieve smooth surfaces ready for staining. Hand sanding in corners and detailed areas prevented electric sanders from removing too much material from vulnerable spots. The first time I saw the original wood emerge, I understood why craftsmen chose these particular pieces fifty years ago.

Choosing Period-Appropriate Stains and Finishes
Color matching became my obsession after discovering tiny patches of original finish hidden behind hinges and hardware. I spent hours at the paint store with wood samples, trying to recreate the warm honey maple tone that was popular in the 1950s. Modern stains often look too uniform compared to vintage finishes that had subtle color variations and aging characteristics that developed naturally over decades of use and exposure.
Testing stains on hidden areas saved me from costly mistakes that could have ruined my restoration project. I learned that the same stain color appears dramatically different on various wood species and grain patterns. My maple face frames absorbed stain differently from the birch door panels, requiring custom color adjustments to achieve a cohesive appearance. I kept detailed notes and samples of every test combination to ensure consistency across all cabinet components.
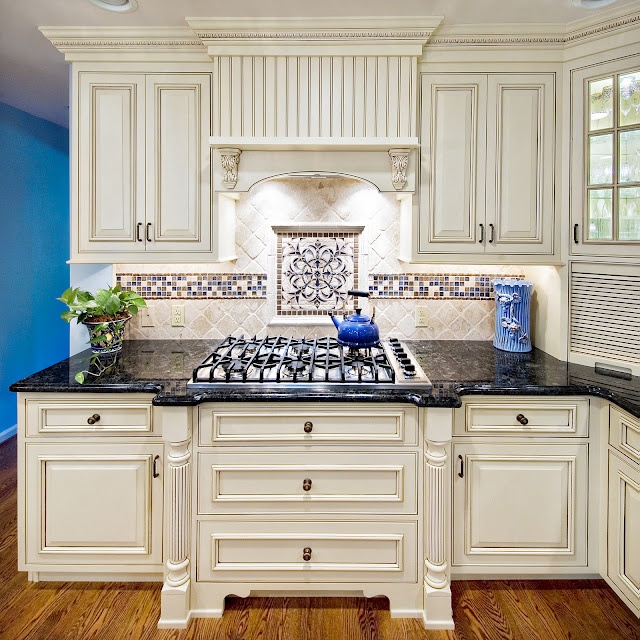
Protective topcoats required careful research to match period-appropriate finishes while providing modern durability for daily kitchen use. I chose amber shellac for authenticity, followed by multiple coats of water-based polyurethane for protection against moisture and heat. This combination maintained the warm vintage appearance while creating a surface that could withstand contemporary kitchen demands. The investment in quality finishing materials proved worthwhile for long-term durability and appearance.

Updating Hardware While Maintaining Vintage Character
Original hardware provided important clues about my cabinets’ age and style, even though most pieces needed replacement due to wear and corrosion. I carefully documented original hinge styles, handle profiles, and mounting patterns before beginning restoration work. This information helped me source appropriate reproduction hardware that maintained period authenticity while providing reliable modern function. I kept one original handle as a reference piece for future repairs or additions.
Mixing original and reproduction hardware created the perfect balance between authenticity and function in my final installation. I restored salvageable original hinges for doors in less-used areas while installing high-quality reproductions on frequently opened cabinet doors. This approach concentrated my restoration budget where it would be most appreciated while ensuring reliable daily operation. The slight variations in patina actually enhanced the collected-over-time appearance that vintage kitchens typically display.
Cabinet pulls required the most research to find appropriate styles that matched my 1950s aesthetic without looking like obvious reproductions. I discovered that chrome and brushed nickel finishes were period-correct for my cabinets’ era, while brass hardware belonged to earlier decades. Online specialty suppliers provided access to authentic reproduction hardware that matched original mounting patterns perfectly. The investment in proper hardware transformed the entire appearance of my restored cabinets.
Addressing Common Structural Issues in Vintage Cabinets
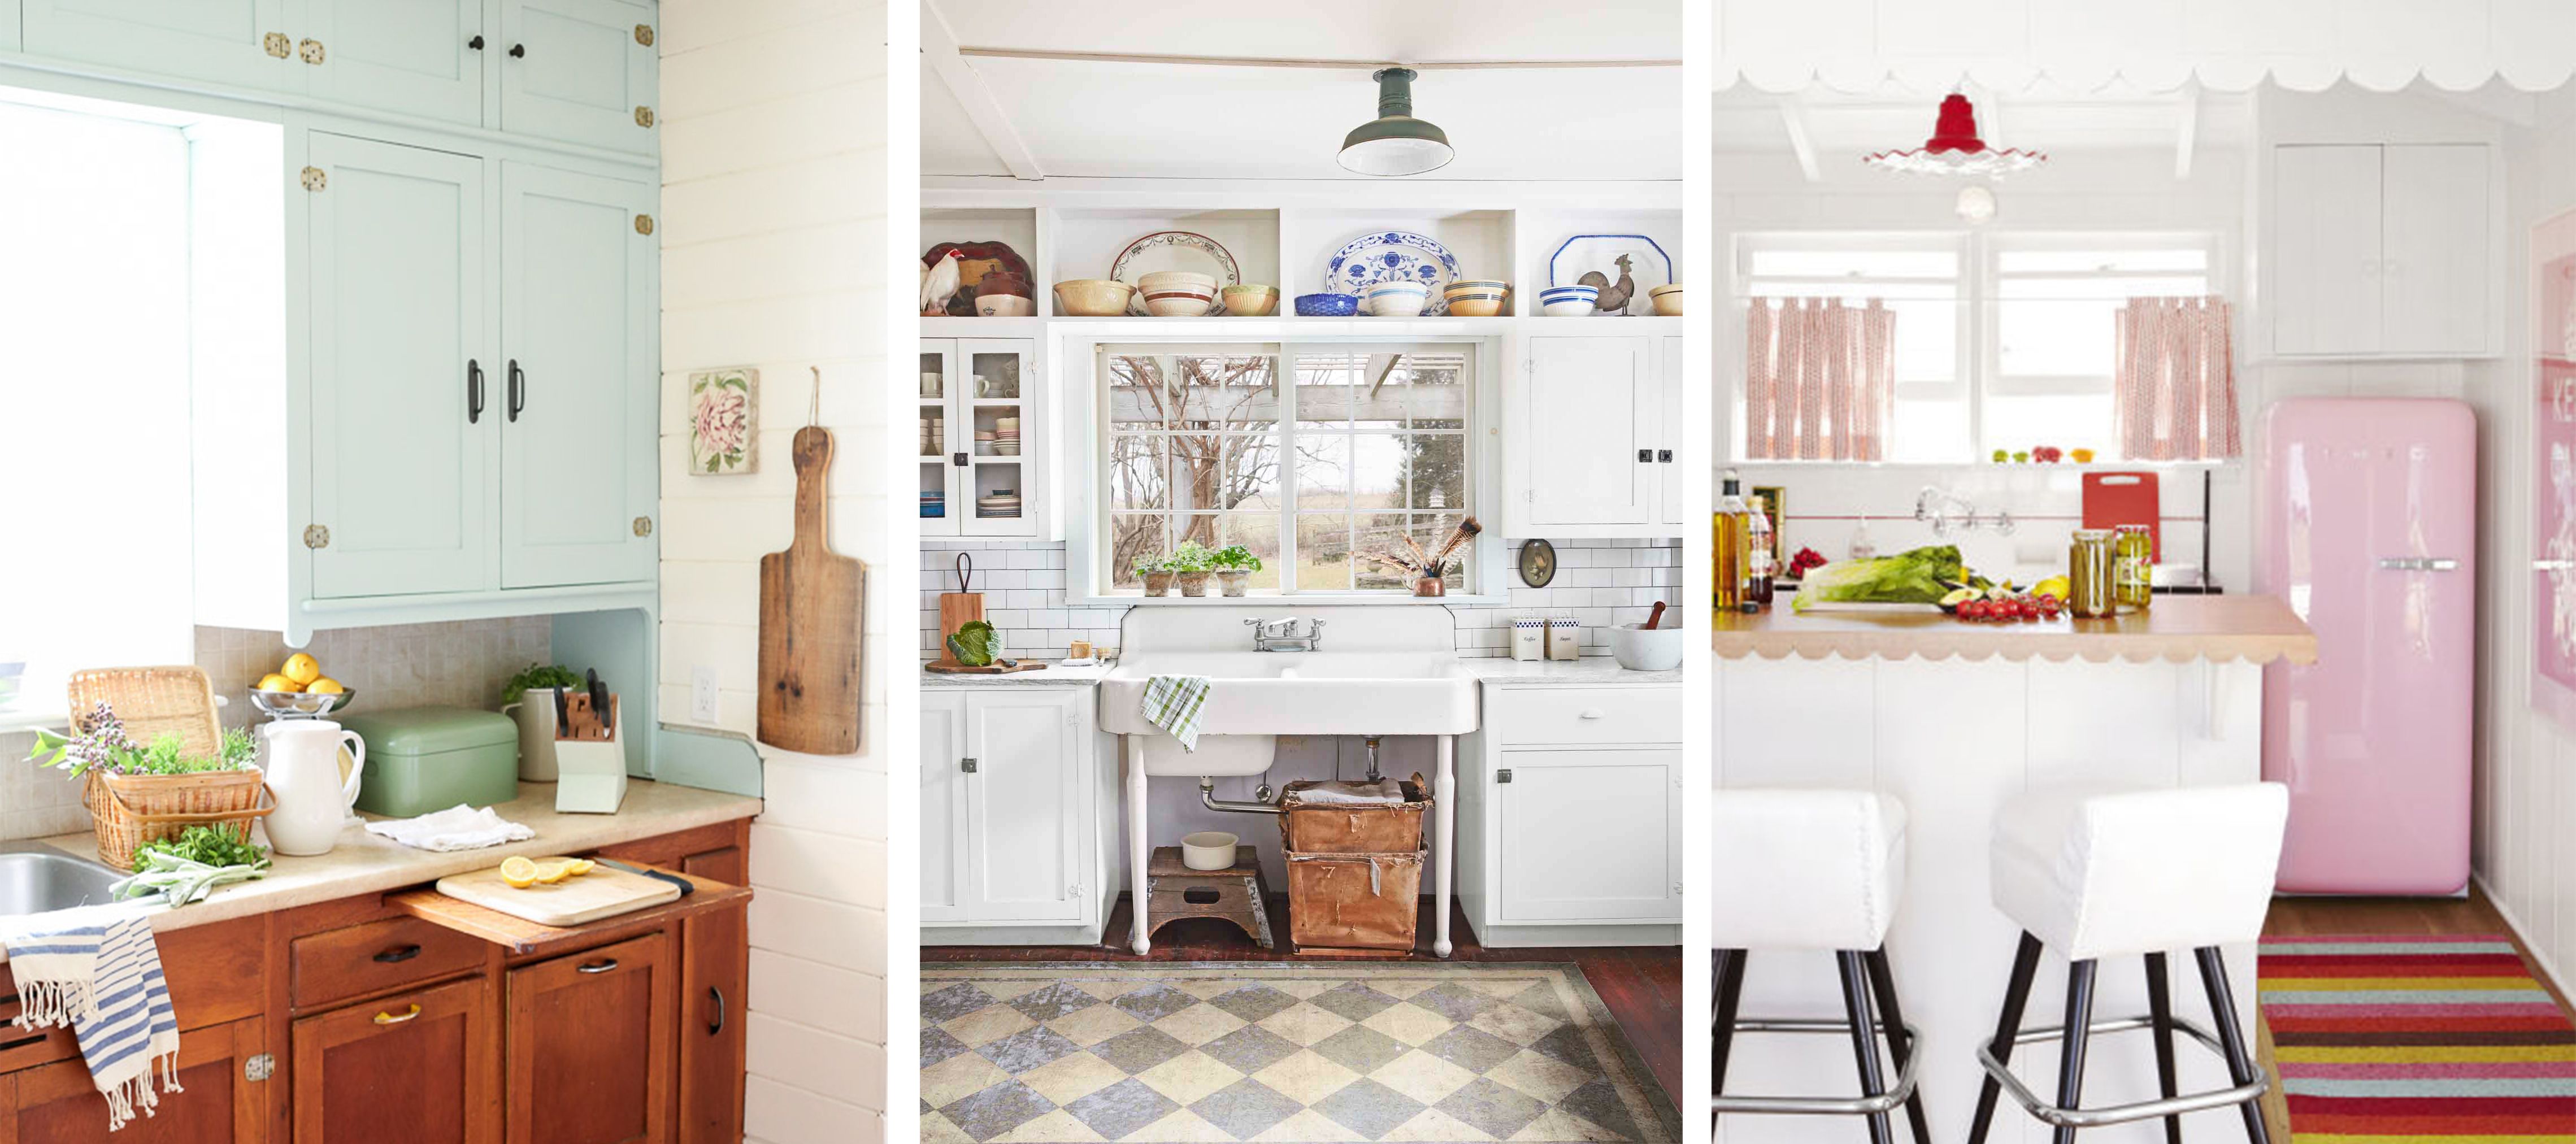
Sagging shelves plagued every cabinet in my kitchen, a common problem with vintage installations that used thinner shelf materials than modern standards require. I reinforced existing shelves with additional support cleats and replaced the worst ones with thicker plywood that could handle modern storage loads. This upgrade improved functionality dramatically while preserving the original cabinet boxes and face frame construction that defined the vintage character.
Door alignment problems frustrated me for weeks until I learned proper vintage hinge adjustment techniques. Unlike modern soft-close hinges with multiple adjustment points, vintage hinges require shimming and careful mortise adjustment to achieve proper door gaps and smooth operation. I invested in traditional woodworking chisels and learned to cut precise hinge mortises, skills that proved invaluable throughout the restoration process and for future maintenance needs.
Drawer slides presented the biggest functional upgrade challenge in my restoration project. Original wood slides had worn smooth and no longer held drawers securely, but I wanted to maintain an authentic operation feel. I compromised by installing hidden modern slides that preserved the original wood slide appearance while providing smooth, reliable operation. This solution maintained vintage authenticity while dramatically improving daily functionality for contemporary kitchen use.

Integrating Vintage Cabinets with Modern Kitchen Needs
Storage optimization required creative solutions to make 1950s cabinet designs work with modern kitchen equipment and food storage needs. I added interior organizers, pull-out shelves, and drawer dividers that improved functionality while remaining completely removable to preserve original construction. These updates transformed awkward deep cabinets into highly functional storage spaces that rival modern cabinet systems while maintaining their vintage charm and character.
Electrical integration posed challenges that my grandfather never faced when these cabinets were new. I needed under-cabinet lighting, outlet strips for small appliances, and task lighting that didn’t exist in the original design. Working with an electrician experienced in historic renovation, we routed wiring through existing spaces and added period-appropriate fixtures that looked intentional rather than retrofitted. The key was planning electrical needs early in the restoration process.
Appliance compatibility required careful measurement and sometimes cabinet modification to accommodate modern equipment sizes. My vintage cabinets were designed for smaller appliances than contemporary standards, so I had to adjust several openings for my new dishwasher and microwave. I approached these modifications conservatively, removing minimal original material and keeping all cutoffs for potential future restoration if appliance sizes change again. This approach preserved maximum original fabric while meeting current needs.
How do I know if my vintage cabinets are worth restoring versus replacing?
Check for solid wood construction, dovetail joints, and quality hardware mounting. If the face frames and door frames are solid and structurally sound, restoration is usually worthwhile. I spent $2,000 restoring cabinets that would cost $15,000 to replace with similar quality. Surface damage is repairable, but structural issues can make replacement more practical.
What’s the biggest mistake people make when restoring vintage cabinets?
Rushing the paint stripping process ruins more vintage cabinets than any other mistake. I nearly destroyed a door using aggressive techniques. Take time with gentle methods, test everything on hidden areas first, and accept that proper restoration takes months, not weekends. Patience saves both money and original wood details.
Should I update the interior hardware and organization systems?
Yes, interior updates improve function dramatically while preserving exterior authenticity. I added modern drawer slides, shelf organizers, and soft-close mechanisms where possible. Focus on removable improvements that don’t alter original construction. These upgrades make vintage cabinets competitive with modern functionality.
How much should I budget for a complete vintage cabinet restoration?
I spent about $150 per cabinet door between stripping supplies, stain, finish, and hardware. Add $500-1000 for professional help with difficult sections. Factor in your time value, restoration is labor-intensive. Total costs run 60-80% less than quality replacement cabinets while delivering superior construction and unique character.
Can I mix vintage cabinets with some new pieces for a kitchen renovation?
Absolutely, I added a vintage-style island to complement my restored original cabinets. The key is matching wood species, stain colors, and hardware styles carefully. Have stain samples professionally matched and source similar construction quality for new pieces. This approach lets you expand storage while preserving vintage character.
What’s the best way to maintain vintage cabinets after restoration?
Use mild soap and water for daily cleaning, and avoid harsh chemicals that can damage vintage finishes. I reapply paste wax annually to maintain luster and protection. Address small scratches immediately with touch-up stain and finish. Proper humidity control prevents wood movement that can affect door alignment over time.
Farmhouse Kitchen

How To Bring Vintage Style to Your Kitchen

Incorporating Vintage Furniture Into a Kitchen Remodel

How to Give Your Stock Kitchen Cabinets a Vintage Look
Vintage Kitchen Decorating Ideas – Design Inspiration for Retro
Best Cabinets for a Vintage Kitchen

Quick and Fun Vintage Kitchen Tour Town & Country Living
![]()
Related Posts: