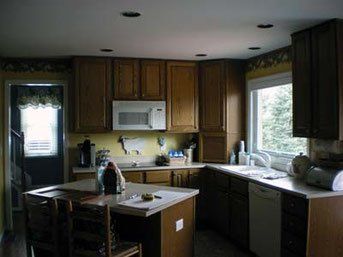
Refacing kitchen cabinets is an excellent way to give your kitchen a fresh, updated look without the high cost and hassle of a full replacement. This DIY project involves replacing cabinet doors, drawer fronts, and applying new veneers or paint to the existing cabinet frames. It’s a cost-effective solution that can dramatically change the appearance of your kitchen in just a few days. Whether you prefer a modern, sleek finish or a classic woodgrain look, refacing allows for customization while keeping the original cabinet structure intact. We will talk a bit deeper about DIY cabinet refacing, from materials and tools to step-by-step techniques and design inspiration.
Understanding the Basics of Cabinet Refacing
Cabinet refacing involves updating the visible parts of your cabinets while keeping the existing boxes in place. The process typically includes replacing doors and drawer fronts, applying veneer or laminate to the cabinet frames, and adding new hardware. This method is ideal for homeowners who are satisfied with their current cabinet layout but want a refreshed appearance. Unlike a full cabinet replacement, refacing is less invasive, requires fewer materials, and can often be completed in a weekend with proper planning.
The first step in any refacing project is assessing the condition of your existing cabinets. If the frames are structurally sound and free from water damage or warping, they are good candidates for refacing. However, if the boxes are deteriorating, a full replacement may be necessary. Measuring your cabinets accurately is crucial, as new doors and drawer fronts must fit precisely. Take detailed measurements of each cabinet opening, including height, width, and depth, to ensure a seamless fit when ordering new components.
Choosing the right materials is another essential consideration. Common options for refacing include wood veneers, rigid thermofoils (RTF), and laminate sheets. Each material has its advantages, with wood veneers offering a natural look, RTF providing durability, and laminate being budget-friendly. Additionally, new hinges, handles, and knobs can further enhance the updated appearance. By understanding these basics, you can confidently plan your DIY cabinet refacing project for a professional-quality result.
Essential Tools and Materials for DIY Refacing
Before starting your cabinet refacing project, gather all necessary tools and materials to ensure a smooth process. Basic tools include a screwdriver, drill, measuring tape, level, utility knife, and sandpaper. For applying veneers or laminate, you’ll need a roller or brush for adhesive, a trim router for edging, and a roller or squeegee to smooth out bubbles. A table saw or circular saw may also help trim doors or veneers to size. Having the right tools on hand will save time and prevent frustration during installation.
Materials for refacing vary depending on the desired finish. If you’re using wood veneer, purchase high-quality adhesive and clamps to secure the veneer while it dries. For laminate refacing, contact cement is the best adhesive, as it creates a strong, lasting bond. New cabinet doors and drawer fronts can be ordered from manufacturers or custom-made to fit your specifications. Don’t forget to select matching edge banding to cover exposed edges of the cabinet frames for a polished look.
Hardware upgrades, such as soft-close hinges and modern handles, can significantly improve functionality and aesthetics. Consider the finish of your hardware, whether it’s brushed nickel, matte black, or brass, to complement your new cabinet style. Primer and paint are necessary if you plan to paint the frames instead of applying veneer. Investing in high-quality materials ensures durability and a professional finish, making your DIY refacing project look like a pro did it.

Step-by-Step Guide to Refacing Cabinet Doors
The first step in refacing cabinet doors is removing the old doors and drawer fronts. Use a screwdriver or drill to carefully detach them from the hinges, keeping track of screws and hardware for reinstallation. Label each door and its corresponding cabinet to avoid confusion later. Once removed, clean the frames thoroughly to remove grease, dirt, and old adhesive, ensuring a smooth surface for the new veneer or paint. Sanding the frames lightly can help the new finish adhere better.
Next, measure and cut your chosen veneer or laminate to fit the cabinet frames precisely. Apply adhesive evenly to the frame and press the veneer firmly into place, using a roller to remove air bubbles. Trim any excess material with a utility knife or router for clean edges. If painting, apply a primer first, followed by two coats of high-quality cabinet paint, allowing proper drying time between coats. For a flawless finish, use a foam roller or spray gun to minimize brush marks.
Finally, attach the new doors and drawer fronts using the original hinges or upgraded soft-close versions. Adjust the hinges as needed to ensure proper alignment and smooth operation. Install new handles or knobs, drilling pilot holes to prevent splitting. Take your time with this step, as properly aligned doors and hardware make a significant difference in the final appearance. Once everything is installed, step back and admire your transformed kitchen.
Choosing the Right Finish for Your Refaced Cabinets
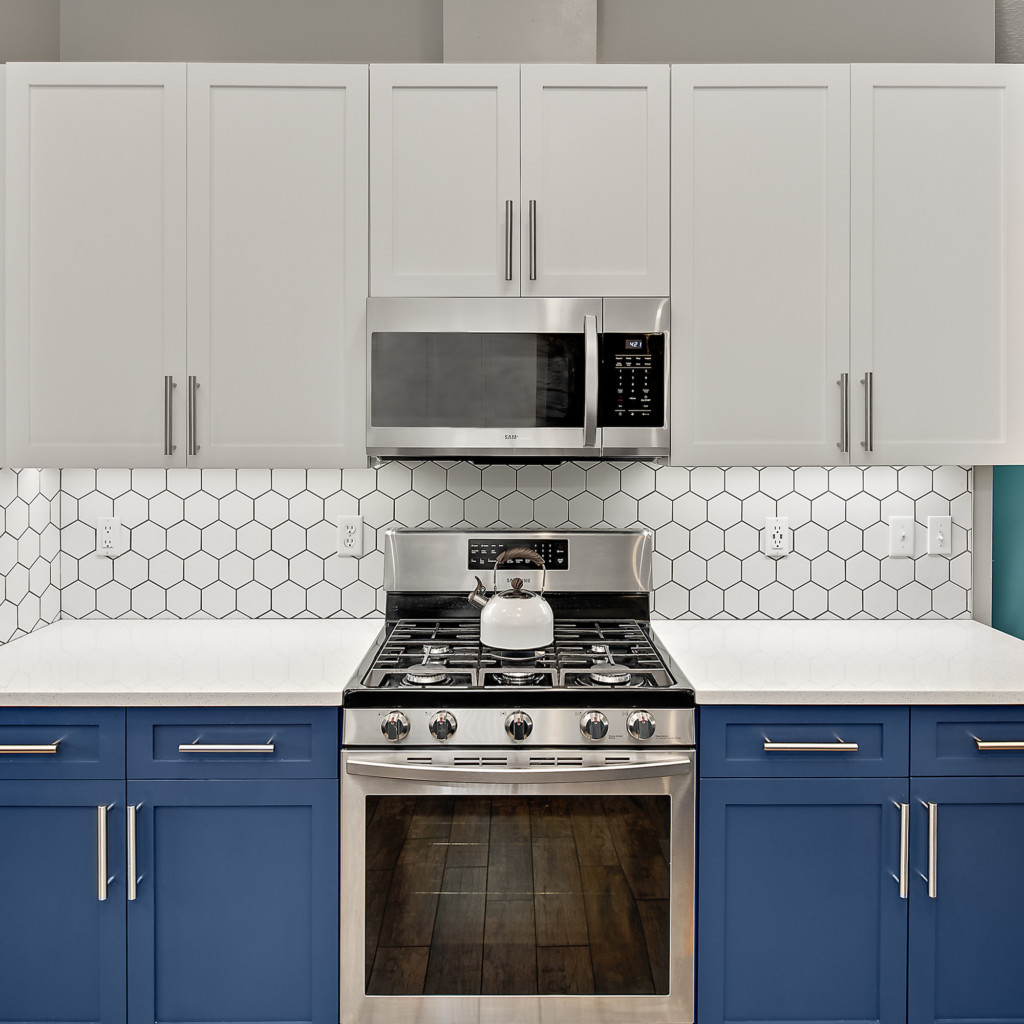
The finish you choose for your refaced cabinets plays a major role in the overall look of your kitchen. Painted finishes offer a clean, modern appearance and are available in endless color options. White and gray remain popular for their timeless appeal, while bold colors like navy or forest green can make a striking statement. For a durable finish, use high-quality acrylic or enamel paint designed for cabinets, as it resists chipping and yellowing over time.
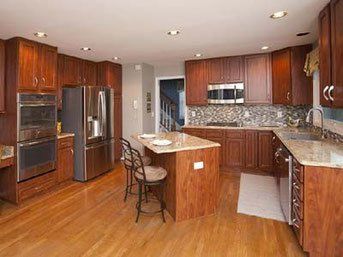
Stained wood finishes provide warmth and a classic, natural look. If your existing frames are wood, sanding and restaining them can refresh their appearance without veneer. For a more contemporary style, consider two-tone cabinets, where upper and lower cabinets are different colors. Another trend is mixing materials, such as wood lowers with painted uppers, for visual interest. The key is selecting a finish that complements your countertops, backsplash, and overall kitchen design.
Laminate and thermofoil finishes are excellent for homeowners seeking a low-maintenance option. These materials come in various patterns, including woodgrain and solid colors, and are resistant to scratches and moisture. Glossy finishes reflect light and create a sleek, modern vibe, while matte finishes offer a softer, more understated look. Whichever finish you choose, ensure it aligns with your lifestyle and design preferences for a result you’ll love for years.
Budget-Friendly Tips for DIY Cabinet Refacing
Refacing cabinets yourself can save thousands compared to hiring a professional, but costs can still add up. To stay within budget, consider keeping your existing doors and simply painting or refinishing them instead of buying new ones. Sanding and repainting can give old doors a fresh look at a fraction of the cost. Another cost-saving option is using peel-and-stick veneer or laminate, which is easier to apply and more affordable than traditional veneers.
Shop around for discounted or surplus cabinet doors and drawer fronts at home improvement stores or online marketplaces. Many retailers offer sales on discontinued styles, which can be a great way to save. Reusing existing hinges and hardware is another way to cut costs, though updating them can significantly improve the final look. If new hardware is a must, look for bulk pricing or budget-friendly options that still offer quality.
DIY labor is the biggest money-saver, but don’t skimp on essential materials. Investing in high-quality paint, adhesive, and tools ensures a durable finish that won’t require frequent touch-ups. Plan your project carefully to avoid mistakes that could lead to wasted materials. By being strategic with your choices, you can achieve a high-end look without breaking the bank.

Maintaining Your Refaced Cabinets for Longevity
Proper maintenance ensures your refaced cabinets stay looking new for years. For painted cabinets, clean regularly with a mild soap and water solution, avoiding abrasive cleaners that can damage the finish. Touch up chips or scratches promptly with matching paint to prevent further wear. Wood veneer cabinets should be dusted frequently and treated with a wood polish to maintain their luster. Laminate surfaces are easy to clean with a damp cloth and mild detergent.
Avoid excessive moisture near cabinets, as it can cause warping or adhesive failure over time. Use coasters under glasses and wipe up spills immediately to protect the finish. Soft-close hinges and handles should be checked periodically for loose screws and tightened as needed. If your cabinets experience heavy use, consider applying a clear protective topcoat for added durability.
Regular inspections help catch minor issues before they become major problems. Check for peeling veneer, chipped paint, or loose hardware, addressing them promptly. With proper care, your DIY refaced cabinets can remain beautiful and functional for a decade or more, making the effort well worth it.

Is cabinet refacing a good option for outdated kitchens?
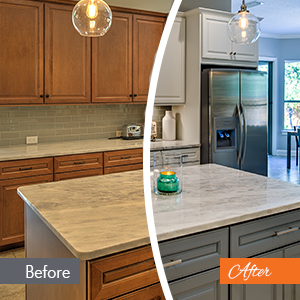
Yes, cabinet refacing is an excellent solution for outdated kitchens, as it provides a significant visual upgrade without the expense and mess of a full replacement. By replacing doors, drawer fronts, and applying new veneers or paint, you can achieve a modern look while retaining the existing cabinet structure. This approach is ideal if your cabinets are in good condition but have dated finishes or styles. Refacing also allows for customization, so you can choose contemporary colors, materials, and hardware to match current trends.
Compared to a full remodel, refacing is faster, more affordable, and less disruptive. It’s a practical choice for homeowners who want a fresh kitchen appearance but don’t need layout changes. However, if your cabinets are damaged or poorly constructed, replacement may be necessary. Overall, refacing is a cost-effective way to transform an outdated kitchen into a stylish, functional space.

Can I reface laminate cabinets myself?
Absolutely, laminate cabinets can be refaced as a DIY project with the right materials and techniques. Start by cleaning the surfaces thoroughly to remove grease and grime. Lightly sanding the laminate helps the new adhesive bond better. You can apply new laminate sheets or veneer using contact cement, ensuring a smooth, bubble-free application. Alternatively, painting laminate is possible with a high-quality primer designed for slick surfaces, followed by cabinet-grade paint.
Peel-and-stick laminate is another user-friendly option for DIYers, as it requires no adhesive and can be trimmed easily. If your existing laminate is peeling or damaged, remove loose sections before applying the new finish. While refacing laminate cabinets requires patience and precision, the results can be impressive. With proper preparation and the right products, even beginners can achieve a professional-looking upgrade.
How long does DIY cabinet refacing take?
The timeline for DIY cabinet refacing depends on the size of your kitchen and the complexity of the project. A typical kitchen with 20 to 30 cabinets can take three to five days to complete, including prep, installation, and drying time. Removing old doors and cleaning frames usually takes a day, while applying veneer or paint may require another one to two days, accounting for drying between coats. Installing new doors and hardware can be done in a day.
Factors like material choices and drying times can affect the schedule. For example, painted finishes need several hours between coats, while adhesive for veneers may require overnight curing. Working methodically and allowing adequate drying time ensures the best results. If you’re new to DIY projects, allot extra time for adjustments and troubleshooting. Proper planning helps the process go smoothly without unnecessary delays.
What’s the average cost of DIY cabinet refacing?
The cost of DIY cabinet refacing varies based on materials and kitchen size. On average, homeowners spend between $1,000 and $3,500, significantly less than full replacement, which can range from $5,000 to $15,000. New cabinet doors and drawer fronts typically cost $50 to $200 per piece, depending on material and style. Veneers or laminate sheets range from $1 to $10 per square foot, while paint and supplies may add $100 to $300.
Hardware upgrades, such as hinges and handles, can cost $2 to $20 per piece. Budget-friendly options like refinishing existing doors or using peel-and-stick materials can reduce expenses further. While DIY refacing requires an initial investment, it’s far more affordable than professional refacing or replacement. By comparing prices and choosing mid-range materials, you can achieve a high-end look without overspending.

Can I reface cabinets without replacing the doors?
Yes, you can reface cabinets without replacing doors by refinishing or repainting them instead. Sanding and staining existing wood doors can restore their natural beauty, while painting can completely change their look. For laminate or thermofoil doors, use a bonding primer before painting to ensure adhesion. This approach saves money and reduces waste, making it an eco-friendly option.
If your doors are structurally sound but outdated, consider adding trim or molding for a custom look. Another idea is replacing just the center panels or applying adhesive veneer to update the style. However, if doors are damaged or poorly constructed, replacement may yield better results. Refacing without new doors is a great budget-friendly solution for those who want a fresh appearance without a full overhaul.

Does cabinet refacing increase home value?
Yes, cabinet refacing can increase home value by improving the kitchen’s appearance and functionality. A modern, updated kitchen is a major selling point for potential buyers, and refacing offers a high return on investment compared to a full remodel. By making cabinets look new without changing the layout, you enhance the space’s appeal while keeping costs reasonable.
Buyers appreciate move-in-ready homes, and refaced cabinets contribute to that perception. Neutral, timeless finishes appeal to a broader audience, while quality materials signal durability. While refacing may not add as much value as a full kitchen renovation, it’s a smart, cost-effective upgrade that can make your home more attractive to buyers. Even if you’re not selling, the refreshed look adds daily enjoyment and longevity to your kitchen.

Kitchen Remodel Cost Cincinnati OH Kitchen Saver

Wood Refinishing Cincinnati OH N-Hance of Cincinnati
Browse our Project Galleries Cincinnati Cabinet Refinishing

Related Posts: