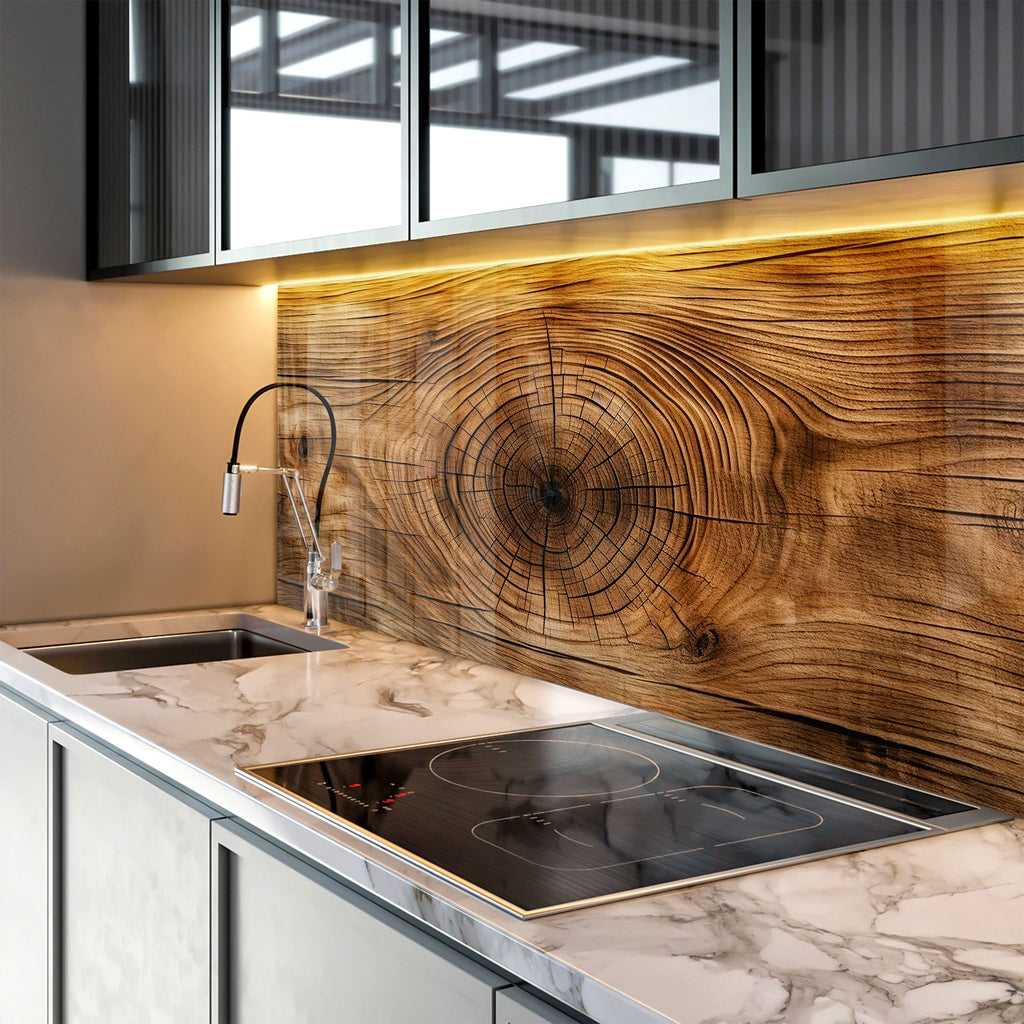
When I decided to replace the generic subway tile backsplash in my kitchen, I never imagined that choosing rustic wood would completely transform the heart of my home. After researching countless options and wrestling with concerns about moisture, maintenance, and practicality, I took the plunge and installed reclaimed barn wood behind my stove and sink. The warmth and character it brought to my kitchen exceeded every expectation, creating a focal point that guests consistently comment on. The installation taught me valuable lessons about working with natural materials in wet environments, and I’m excited to share everything I learned about making rustic wood backsplashes both beautiful and functional.
Selecting the Right Wood for Kitchen Conditions
Choosing moisture-resistant wood species became my top priority after learning about potential problems with humidity and splashing. I discovered that cedar, teak, and white oak naturally resist moisture due to their tight grain structure and natural oils. My final choice was a reclaimed chestnut from an old barn, which had already weathered decades of moisture and developed incredible character. The key is avoiding softwoods like pine that can warp and absorb moisture easily, leading to maintenance headaches down the road.
Reclaimed wood offers unmatched character but requires careful inspection for structural integrity. I spent hours examining each board for signs of rot, insect damage, and structural weakness. The patina and weathering that make reclaimed wood so appealing can sometimes hide problems underneath. I learned to look for solid, stable pieces with interesting grain patterns and color variations. Some nail holes and minor imperfections actually add to the authentic rustic appearance.
Kiln-dried lumber provides consistency and stability that reclaimed wood sometimes lacks. When I couldn’t find enough matching reclaimed pieces, I supplemented with new wood that I artificially aged using various techniques. Wire brushing, staining, and distressing can create authentic-looking character on new lumber. The key is ensuring all pieces are properly dried and stable before installation, as movement after installation can create gaps and alignment issues.
Proper Sealing and Moisture Protection
Understanding the importance of proper sealing saved my backsplash from potential water damage. I applied three coats of marine-grade polyurethane, paying special attention to end grain where moisture absorption is highest. The first coat soaked in completely, the second coat provided the primary barrier, and the third coat gave me confidence in long-term protection. I learned that skipping proper sealing is the fastest way to ruin a wood backsplash project.
Installing a vapor barrier behind the wood became essential in areas prone to steam and splashing. I used plastic sheeting behind my stove area and sealed all edges carefully to prevent moisture from reaching the wall structure. This extra step requires planning during the framing stage but provides crucial protection against long-term moisture problems. Some installers skip this step, but I consider it essential insurance against future issues.
Maintaining proper ventilation proved just as important as sealing the wood itself. I upgraded my range hood to a more powerful model that effectively removes steam and cooking odors. Running the exhaust fan during and after cooking prevents moisture buildup that can overwhelm even the best sealants. Good kitchen ventilation benefits the entire room, not just the wood backsplash.
Installation Techniques and Mounting Methods
Planning the layout carefully prevented costly mistakes and material waste during installation. I created a detailed sketch showing each board’s position, accounting for outlets, switches, and the range hood. Starting with a level reference line ensured the entire installation stayed straight, even when working around obstacles. I learned that taking time for proper planning saves hours of frustration during actual installation.
Mounting methods vary depending on wall type and wood thickness. I used construction adhesive combined with finish nails for my drywall installation, ensuring each board was firmly attached while allowing for slight seasonal movement. For thicker reclaimed boards, I drilled pilot holes to prevent splitting and used screws in less visible areas. The key is achieving solid attachment without creating stress points that could cause cracking.
Cutting around outlets and fixtures requires patience and precise measuring. I created cardboard templates for complex cuts and used a jigsaw for most openings. The rustic style is somewhat forgiving of minor imperfections, but electrical boxes need proper clearance for safety. I learned to cut openings slightly smaller than needed and enlarge them gradually for perfect fits.
Design Patterns and Layout Options
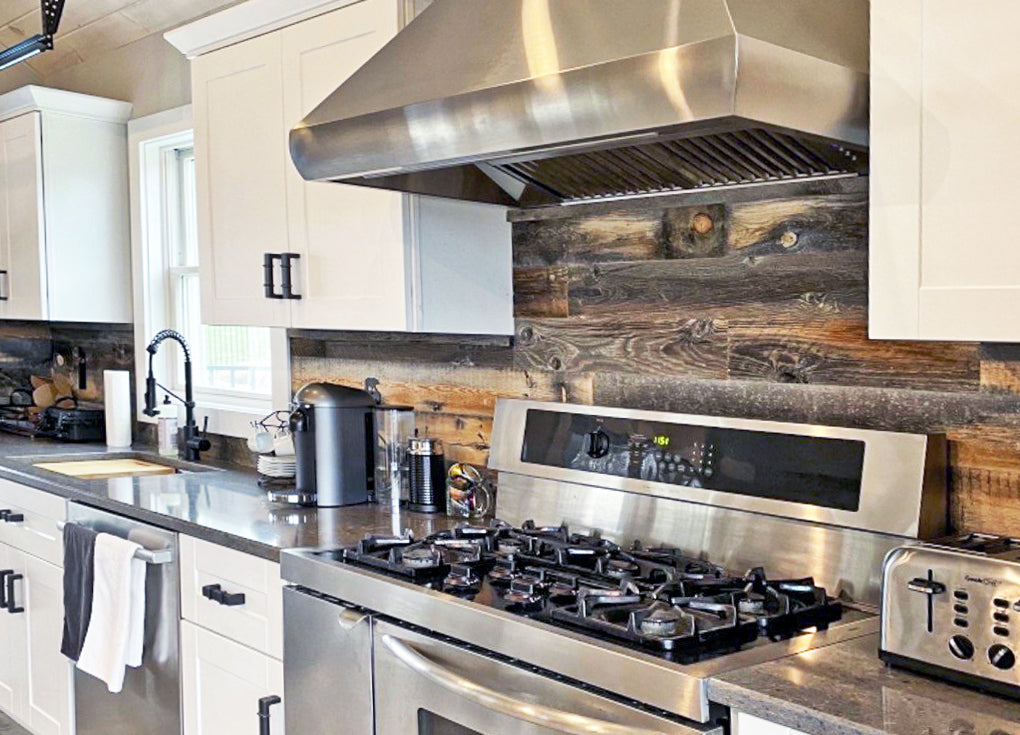
Horizontal plank installation became my preferred method after experimenting with different orientations. Running boards horizontally creates clean lines that complement most kitchen designs while showcasing the wood grain beautifully. I varied the board widths randomly to create visual interest and avoid the monotony of uniform planking. The horizontal orientation also makes rooms appear wider, which worked perfectly in my galley kitchen.
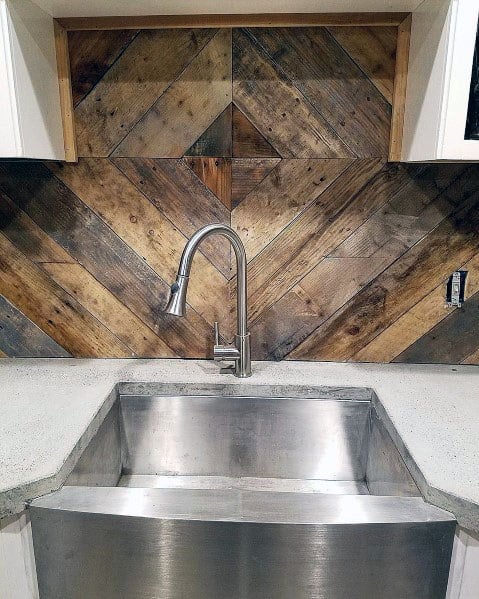
Herringbone patterns offer dramatic visual impact but require significantly more planning and cutting. I installed a herringbone section behind my range as a focal point, using narrower strips to keep the pattern manageable. This technique requires precise angle cuts and careful fitting, but the results are stunning. The pattern adds sophistication while maintaining the rustic character that makes wood backsplashes special.
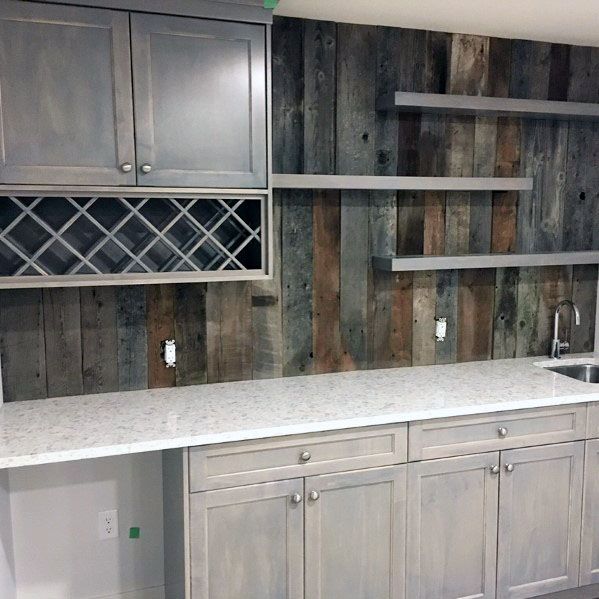
Mixed-width installations create the most authentic rustic appearance in my experience. I combined 3-inch, 5-inch, and 7-inch boards randomly, avoiding repetitive patterns that look manufactured. This approach mimics the way old barns and cabins were built with whatever materials were available. The varied widths add visual texture and prevent the installation from looking too uniform or modern.
Maintenance and Long-Term Care
Daily maintenance of my wood backsplash is surprisingly simple with proper sealing. I wipe down surfaces with a damp microfiber cloth after cooking, paying attention to areas that receive splatter. Harsh chemicals aren’t necessary; mild dish soap and water handle most cleaning needs. I learned that gentle, frequent cleaning prevents buildup that requires aggressive scrubbing later.
Annual resealing maintains protection and keeps the wood looking fresh. I lightly sand any rough spots and apply a fresh coat of polyurethane, focusing on high-use areas behind the stove and sink. This maintenance takes a weekend but extends the life of the backsplash significantly. I keep detailed records of when I seal to stay on schedule and prevent protection from failing.
Addressing damage quickly prevents small problems from becoming major repairs. I’ve successfully repaired minor scratches with matching stain and touch-up polyurethane. More significant damage might require replacing individual boards, which is why I kept extra material from the original installation. The rustic character actually helps hide minor wear and imperfections.

Cost Considerations and Budget Planning
Material costs vary dramatically depending on wood choice and source. Reclaimed barn wood cost me about $8 per square foot, while new lumber that I aged myself ran closer to $4 per square foot. Factor in sealing products, mounting hardware, and tools when budgeting. My 40-square-foot backsplash cost approximately $400 in materials, which was competitive with high-end tile options.
Labor costs for professional installation can double or triple the project budget. I chose to install my backsplash myself, which saved money but required significant time investment. The project took three weekends, including preparation, installation, and finishing. Professional installation might be worth considering for complex layouts or if you lack the necessary tools and experience.
Hidden costs caught me by surprise during my project. I needed to upgrade electrical boxes to meet code when working around them, and I purchased several specialized tools for cutting and installation. Proper ventilation improvements added to the overall cost but benefited the entire kitchen. Budget at least 20% extra for unexpected expenses and tool purchases.
Addressing Common Concerns and Challenges
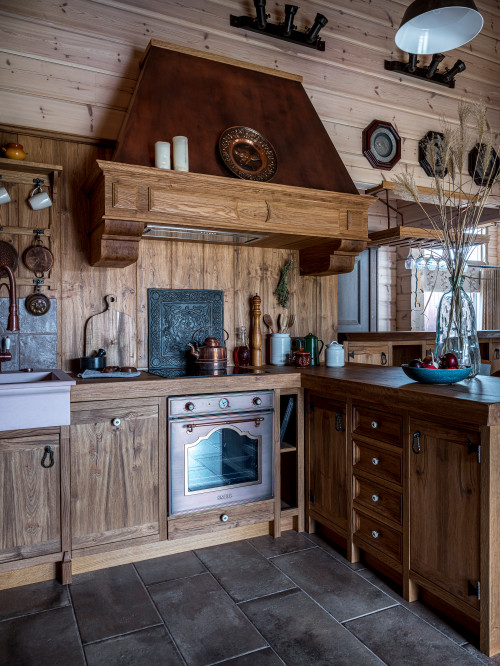
Fire safety concerns were my biggest worry when planning a wood backsplash behind my gas range. I consulted local building codes and learned that proper clearances and heat-resistant finishes address most safety issues. I used a fire-resistant barrier behind the wood in the immediate stove area and maintained required clearances from heat sources. Many jurisdictions allow wood backsplashes with proper installation.
Grease and stain resistance improve dramatically with proper sealing, but some discoloration is inevitable over time. I’ve found that embracing the natural aging process enhances the rustic character rather than detracting from it. Areas that receive heavy use develop a patina that looks authentically aged. Touch-up maintenance handles any staining that looks out of place.
Matching existing kitchen elements required careful color and finish selection. I brought cabinet door samples when selecting wood to ensure compatibility. The natural variation in wood grain and color creates interest while complementing other kitchen finishes. I learned that perfect matches aren’t necessary; coordinating tones and textures work better than identical finishes.

How do I know if a wood backsplash will work with my cooking style?
I cook frequently and have found that proper sealing makes wood very practical. If you do a lot of messy cooking or deep frying, consider limiting wood to decorative areas away from the main cooking zone. Heavy-duty range hoods remove most grease and moisture. My wood backsplash handles normal cooking beautifully with minimal maintenance.
What’s the best way to clean grease buildup on wood backsplashes?
I use warm soapy water for routine cleaning and degreasing agents sparingly for stubborn buildup. The key is cleaning frequently to prevent heavy accumulation. Properly sealed wood resists most stains and grease. I avoid abrasive cleaners that could damage the protective finish and stick to gentle, pH-neutral products designed for sealed wood.

Can I install wood backsplash over existing tile?
Yes, if the existing tile is firmly attached and level. I installed furring strips over old tile to create a flat mounting surface for my wood boards. This approach saves removal time and mess but adds thickness that affects outlet boxes and trim work. Ensure the existing surface can support the additional weight of wood planking.
How long does a properly sealed wood backsplash typically last?
With proper installation and maintenance, wood backsplashes can last decades. My installation is five years old and looks great with annual resealing. The key is using appropriate wood species, proper sealing, and regular maintenance. Even when replacement becomes necessary, individual boards can often be replaced rather than the entire installation.

What wood species should I avoid for kitchen backsplashes?
Avoid softwoods like pine and fir that absorb moisture easily and can warp. Oak can work, but may show water stains more readily than harder species. I also avoid woods with open grain patterns that trap grease and debris. Stick with naturally moisture-resistant species or properly treat whatever wood you choose.
Is professional installation worth the extra cost for wood backsplashes?
For complex layouts or if you lack woodworking experience, professional installation provides value through expertise and warranty coverage. Simple horizontal plank installations are manageable for most DIYers with proper tools and patience. Consider your skill level, available time, and project complexity when deciding. My DIY installation saved money and provided great satisfaction.
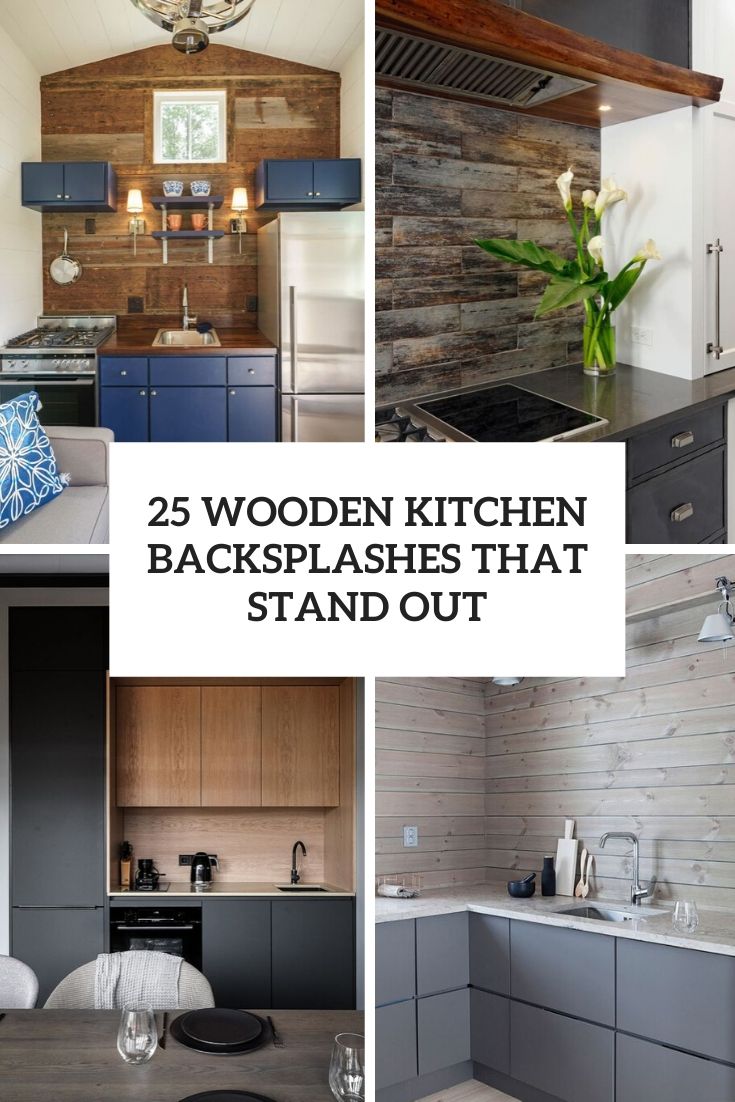
Wood Backsplash Ideas – Wooden Kitchen Wall

Wood Backsplash Ideas – Wooden Kitchen Wall Designs
Wood Backsplash ( NATURAL BEAUTY ) – Beautiful Backsplashes
DIY Kitchen Backsplash Ideas

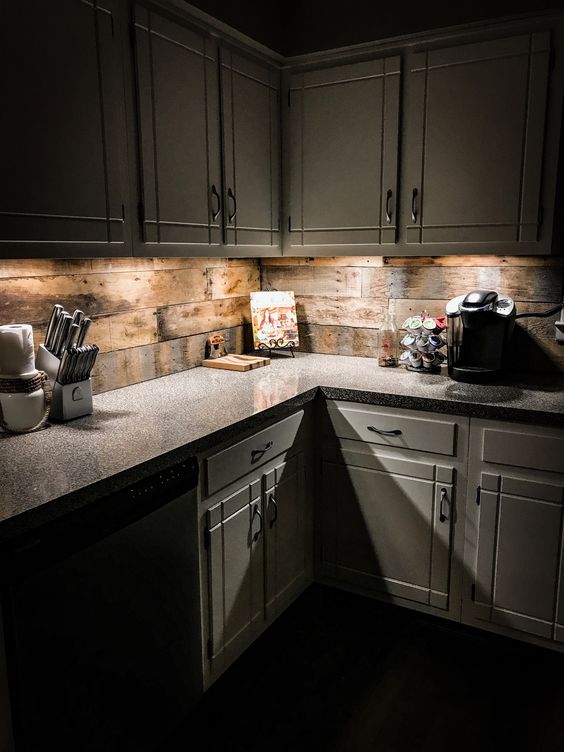
Cheap DIY Rustic Kitchen Backsplash – Shelterness

Related Posts:
- French Kitchen Backsplash Ideas
- Cottage Kitchen Backsplash
- Country Kitchen Backsplash
- Retro Kitchen Backsplash
- Rustic Wood Kitchen Backsplash
- Vintage Kitchen Backsplash Ideas
- Modern Farmhouse Kitchen Backsplash
- Mid Century Modern Kitchen Backsplash Tile
- Turquoise Kitchen Backsplash Tile
- Mediterranean Tile Kitchen Backsplash