When I decided to add a kitchen island to my home two years ago, I knew I wanted something with real character and warmth. After falling in love with Tuscan design during a memorable trip to Italy, I became obsessed with recreating that rustic Mediterranean charm right in my own kitchen. The island became the centerpiece of this transformation, and I learned so much about what makes Tuscan style truly authentic versus just decorative. Let me walk you through my entire process, from initial design concepts to the finishing touches that brought my Tuscan dream island to life.
Choosing the Right Size and Layout
Determining the correct size for my Tuscan island was more complex than I initially thought. I measured my kitchen obsessively, ensuring at least 42 inches of clearance on all sides for comfortable movement. My kitchen is about 14 by 16 feet, and I settled on an island measuring 4 feet by 6 feet, which feels substantial without overwhelming the space.
The layout required careful consideration of workflow and function. I positioned my island to create a natural work triangle between my sink, stove, and refrigerator. This placement makes cooking feel effortless, and I can prep vegetables at the island while monitoring pots on the stove just steps away.
I also thought about seating arrangements from the beginning. I extended one side of the island by 12 inches to create an overhang for barstools. This breakfast bar has become where my family naturally gathers each morning, and the extended countertop provides the knee room needed for comfortable seating without kicking the cabinets.
Selecting Authentic Tuscan Materials and Finishes
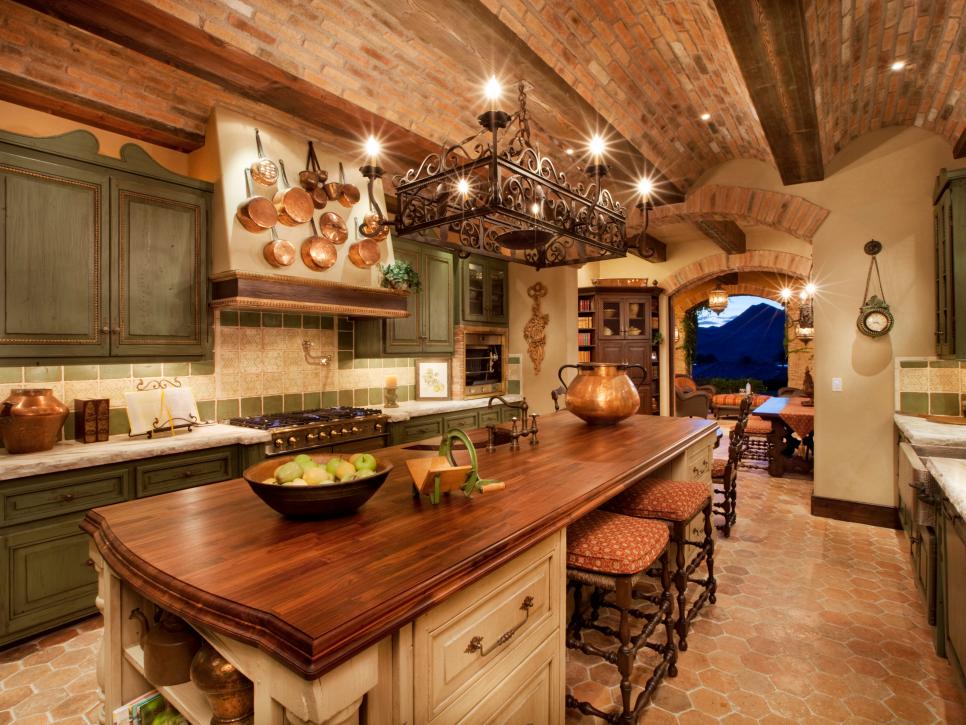
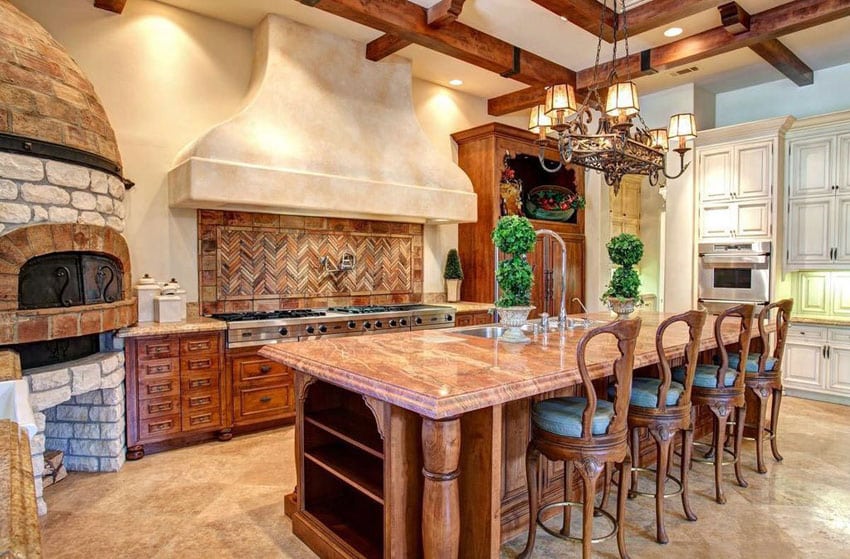
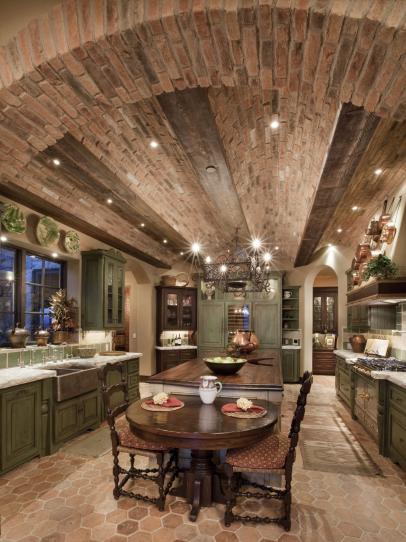
The materials I chose were critical to achieving an authentic Tuscan look. I selected reclaimed wood for the island’s base, finding beautiful aged oak with natural patina and character marks from a local salvage yard. The wood had been part of an old barn, and its weathered appearance perfectly captured that aged Italian farmhouse aesthetic I wanted.
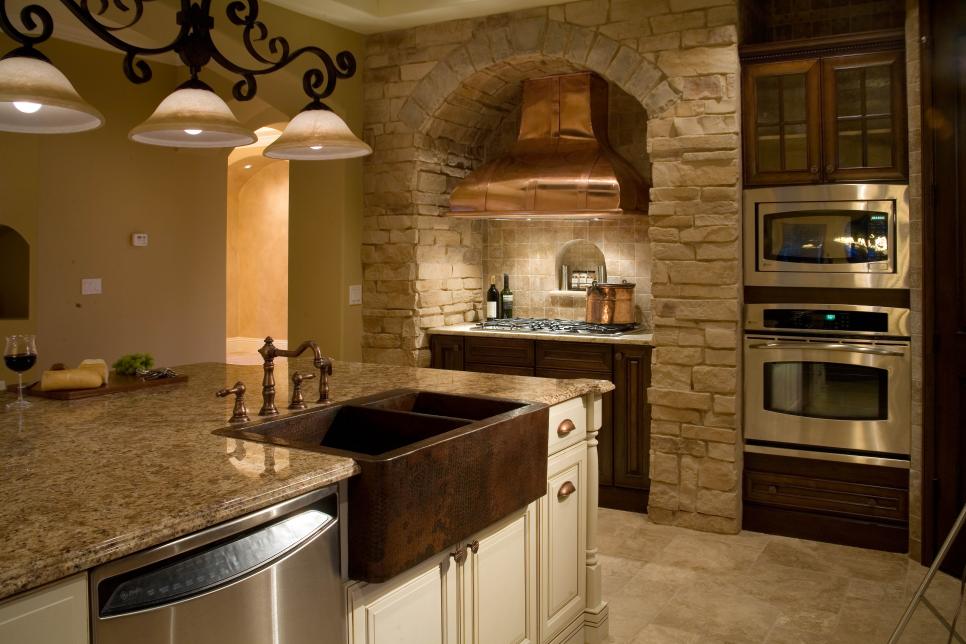
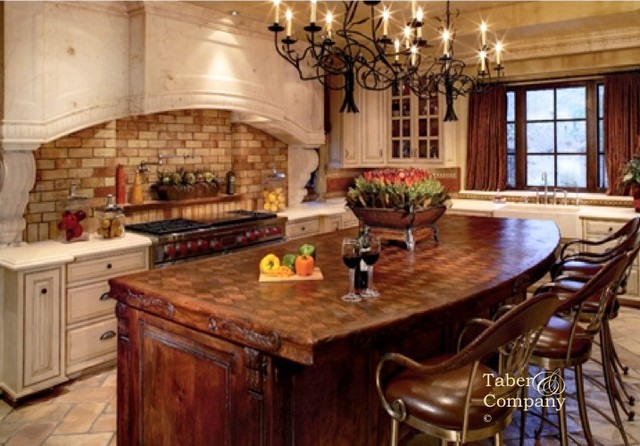
For the countertop, I chose honed travertine with warm honey and cream tones. Travertine is commonly found throughout Tuscany, and the natural pitting and variation in the stone add organic texture. I specifically requested a honed finish rather than polished because the matte surface feels more authentic and rustic.
The cabinet finish required multiple discussions with my painter. We created a custom antiquing process using a warm cream base coat, then applied a dark brown glaze that settled into crevices and corners. After that dried, we lightly distressed edges and high-touch areas with sandpaper. The layered finish looks like generations of use, exactly the lived-in quality that defines Tuscan style.
Incorporating Storage and Functional Elements
I designed my island’s storage to be both beautiful and practical. The front features two large cabinet doors with hand-forged iron hardware that opens to reveal deep shelving perfect for my Dutch oven, large mixing bowls, and sheet pans. These frequently used items are now exactly where I need them during food preparation.
On one side, I added open shelving with thick wooden planks supported by decorative iron brackets. I display my collection of Italian pottery, cookbooks, and attractive serving pieces here. The open shelving breaks up the solid cabinet fronts and creates visual interest while keeping items I use regularly within easy reach.
The opposite side features three drawers with custom dividers for utensils, linens, and cooking tools. I worked with my cabinet maker to create deep drawers that can accommodate even my largest spatulas and serving spoons. The bottom drawer is extra deep for storing small appliances I use occasionally but don’t want cluttering my countertops.
Adding Authentic Tuscan Architectural Details
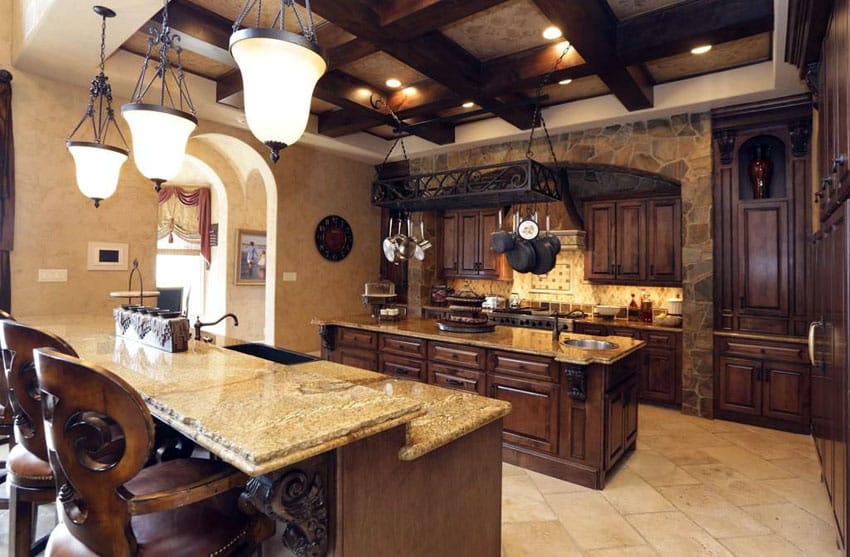
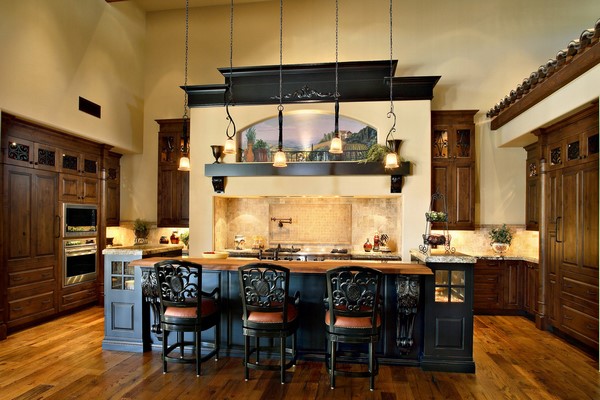
Architectural details transformed my island from nice to extraordinary. I added corbels under the breakfast bar overhang, choosing hand-carved wood pieces with acanthus leaf designs reminiscent of Tuscan architecture. These corbels provide actual structural support while adding ornamental beauty.
The island’s base includes a decorative toe-kick with carved wood trim that I found at an architectural salvage store. This small detail at floor level adds visual weight and makes the island feel more like a piece of furniture than built-in cabinetry, which is very characteristic of Italian country homes.
I also incorporated a small wine rack into one end of the island, holding about eight bottles horizontally. The diagonal slats were custom-built by my carpenter using the same reclaimed oak as the island base. This functional element celebrates the Italian appreciation for wine and provides convenient storage for bottles I’m planning to open soon.

Selecting Colors and Coordinating with Kitchen Design
My color choices were inspired by actual Tuscan villas I’d photographed during my trip. I used a warm cream for the cabinet base with that brown antiquing glaze, creating depth and age. The color reminds me of sun-bleached plaster walls in Italian farmhouses, warm and inviting without being stark white.
The travertine countertop’s natural honey tones beautifully complement the cream cabinets. I made sure to select stone with warm undertones rather than cool grays, which would have felt too modern. The variation in the stone, from pale cream to deeper gold, adds visual richness that changes throughout the day as light shifts.
Coordinating the island with my existing kitchen required balance. My perimeter cabinets are darker, a weathered sage green, so the cream island creates pleasing contrast while maintaining cohesion through the antiqued finish technique. The mix of colors feels collected over time rather than matchy-matchy, which is essential to authentic Tuscan style.
Lighting and Finishing Touches
Lighting my island properly took more thought than I anticipated. I installed three wrought iron pendant lights with amber glass shades that cast warm, flattering light over the workspace. The fixtures hang at different heights, creating visual rhythm and referencing the rustic chandeliers common in Italian homes.
I added a pot rack above one section of the island, suspending it from the ceiling with heavy chains. This iron rack holds my most-used pots and pans, keeping them accessible while contributing to the Tuscan aesthetic. The hanging cookware also fills vertical space in my kitchen with high ceilings.
Final touches included accessories that enhanced the Tuscan feeling. I keep a ceramic olive oil dispenser, a wooden bowl filled with fresh fruit, and a small potted herb plant on the island. These functional decorative elements make the space feel lived-in and loved, capturing that essential Italian warmth that makes Tuscan kitchens so inviting and special.

How much did your Tuscan style kitchen island cost to build?
My island cost approximately $4,500 total, including materials, custom carpentry, and installation. The reclaimed wood was surprisingly affordable at $600, while the travertine countertop was my biggest expense at $1,800. Custom cabinet work and finishing ran about $1,500, and hardware, corbels, and accessories made up the rest. This was less than the prefab designer islands I’d considered.
Can I create a Tuscan island in a small kitchen?
Absolutely! Consider a smaller island or even a movable cart with Tuscan details. I’ve helped friends create beautiful 3-foot by 4-foot islands in compact kitchens. The key is maintaining proper clearances and choosing one or two signature Tuscan elements like distressed finish or iron hardware rather than trying to include everything. Scale is more important than omitting the style entirely.
What type of countertop works best for Tuscan style besides travertine?
Granite in warm earth tones, butcher block, or concrete all work beautifully. I’ve seen stunning Tuscan islands with thick wood countertops that develop gorgeous patina over time. Tumbled marble or soapstone also captures the rustic aesthetic. Avoid ultra-modern materials like white quartz or glossy surfaces that feel too contemporary for authentic Tuscan style.
How do I maintain a distressed finish on my island?
The beauty of distressed finishes is that they’re forgiving and low-maintenance. I wipe mine with a damp cloth and mild soap. New dings and scratches actually enhance the aged appearance. Every few years, I might touch up the antiquing glaze in high-wear areas. The finish is meant to show use, so don’t stress about keeping it perfect.

Should my island match my existing kitchen cabinets exactly?
Not necessarily! Tuscan style embraces collected, mismatched elements. My island’s cream finish contrasts beautifully with my sage perimeter cabinets. The key is coordinating undertones and using similar distressing techniques. Matching wood stains or antiquing methods creates cohesion without identical colors. This collected look is more authentically Tuscan than perfectly matched cabinetry.
Can I add electrical outlets to my Tuscan island?
Yes, and I highly recommend it! I installed two outlets on the end of my island, positioned where they’re accessible but not prominently visible. My electrician placed them about 18 inches from the floor, tucked discreetly into the cabinet base. These outlets are invaluable for small appliances and phone charging, adding modern convenience without compromising the traditional aesthetic.

Tuscan kitchen design ideas – fabulous interiors in Mediterranean
Italian Style Kitchen

Tuscan Kitchens Tuscan Kitchen Design Ideas
Tuscan Kitchen Design – Style & Decor Ideas

Custom Tuscan Style Kitchen Island is hand crafted from solid wood
How to Achieve the Elegant Tuscan Style for Your Kitchen

Related Posts: