When I renovated my kitchen last year, I thought lighting would be the easy part. Pick some cute farmhouse fixtures, install them, and call it done, right? Wrong. I quickly learned that kitchen lighting requires serious planning to get both the ambiance and functionality just right. After making several mistakes, returning fixtures that didn’t work, and finally getting it right, I now have a country kitchen that’s both beautifully lit and incredibly practical. Let me share what I discovered about creating the perfect lighting scheme that balances charm with real-world usability.
Layering Light for Function and Atmosphere
I learned the hard way that one ceiling fixture isn’t enough, no matter how beautiful it is. My first attempt involved a gorgeous chandelier over my dining table, and that was it. The result? Beautiful ambiance, but terrible task lighting. I couldn’t see what I was chopping, and the stove area was practically in shadow. I needed to understand layered lighting, combining ambient, task, and accent light sources to create a truly functional kitchen.
Ambient lighting became my foundation, the overall illumination that fills the entire space. I installed a flush-mount farmhouse fixture with frosted glass in the center of my kitchen ceiling, providing general light that’s bright enough for basic navigation but not harsh. This fixture has a dimmer switch, which I now consider essential. Being able to adjust brightness throughout the day and evening has completely changed how I use and enjoy my kitchen space.
Task lighting transformed my cooking experience completely. I added under-cabinet LED strips that illuminate my countertops perfectly for food prep, and I installed a dedicated pendant light over my sink area. I also placed recessed lights above my stove and work zones. These focused light sources make actual cooking tasks so much easier and safer. I used to struggle with shadows while chopping vegetables, but now I have clear, bright light exactly where I need it without glare or dark spots.
Choosing Fixtures That Define Country Style
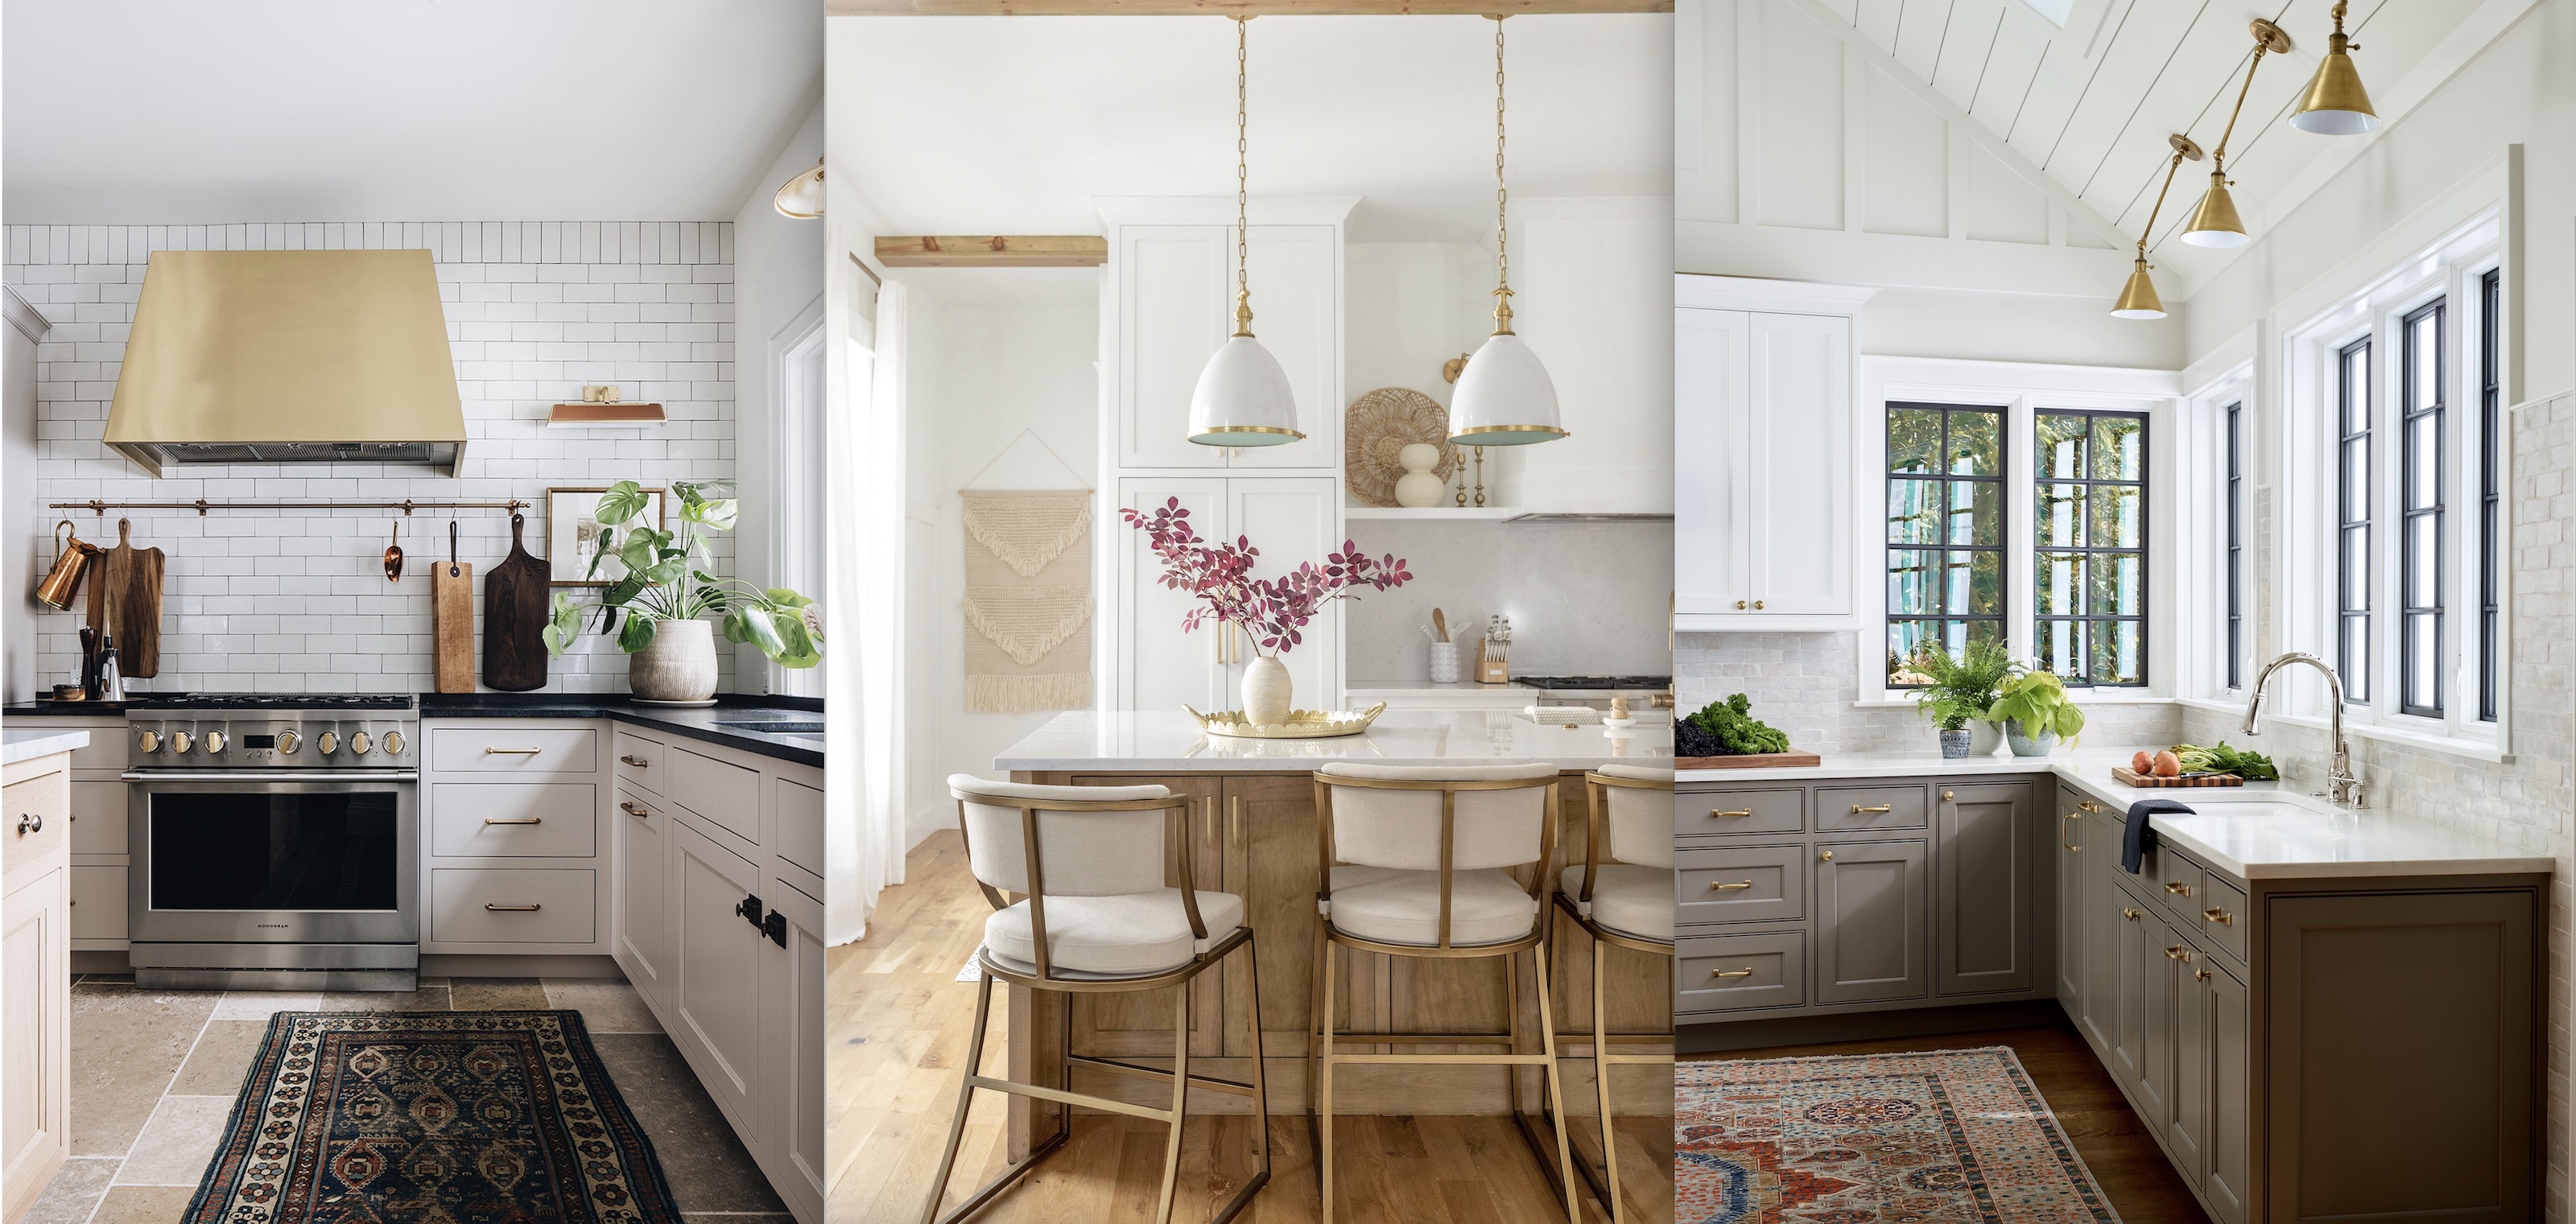
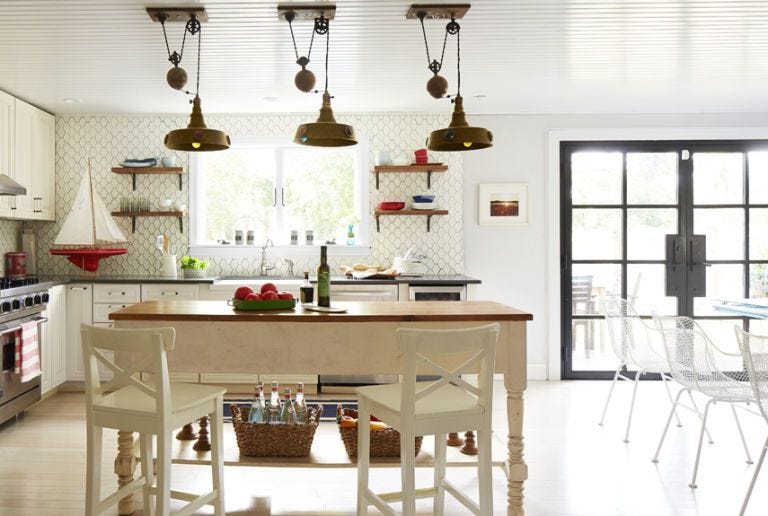
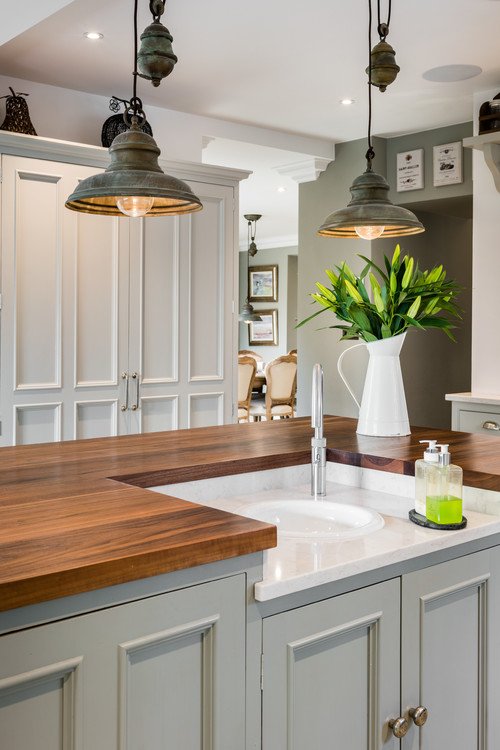
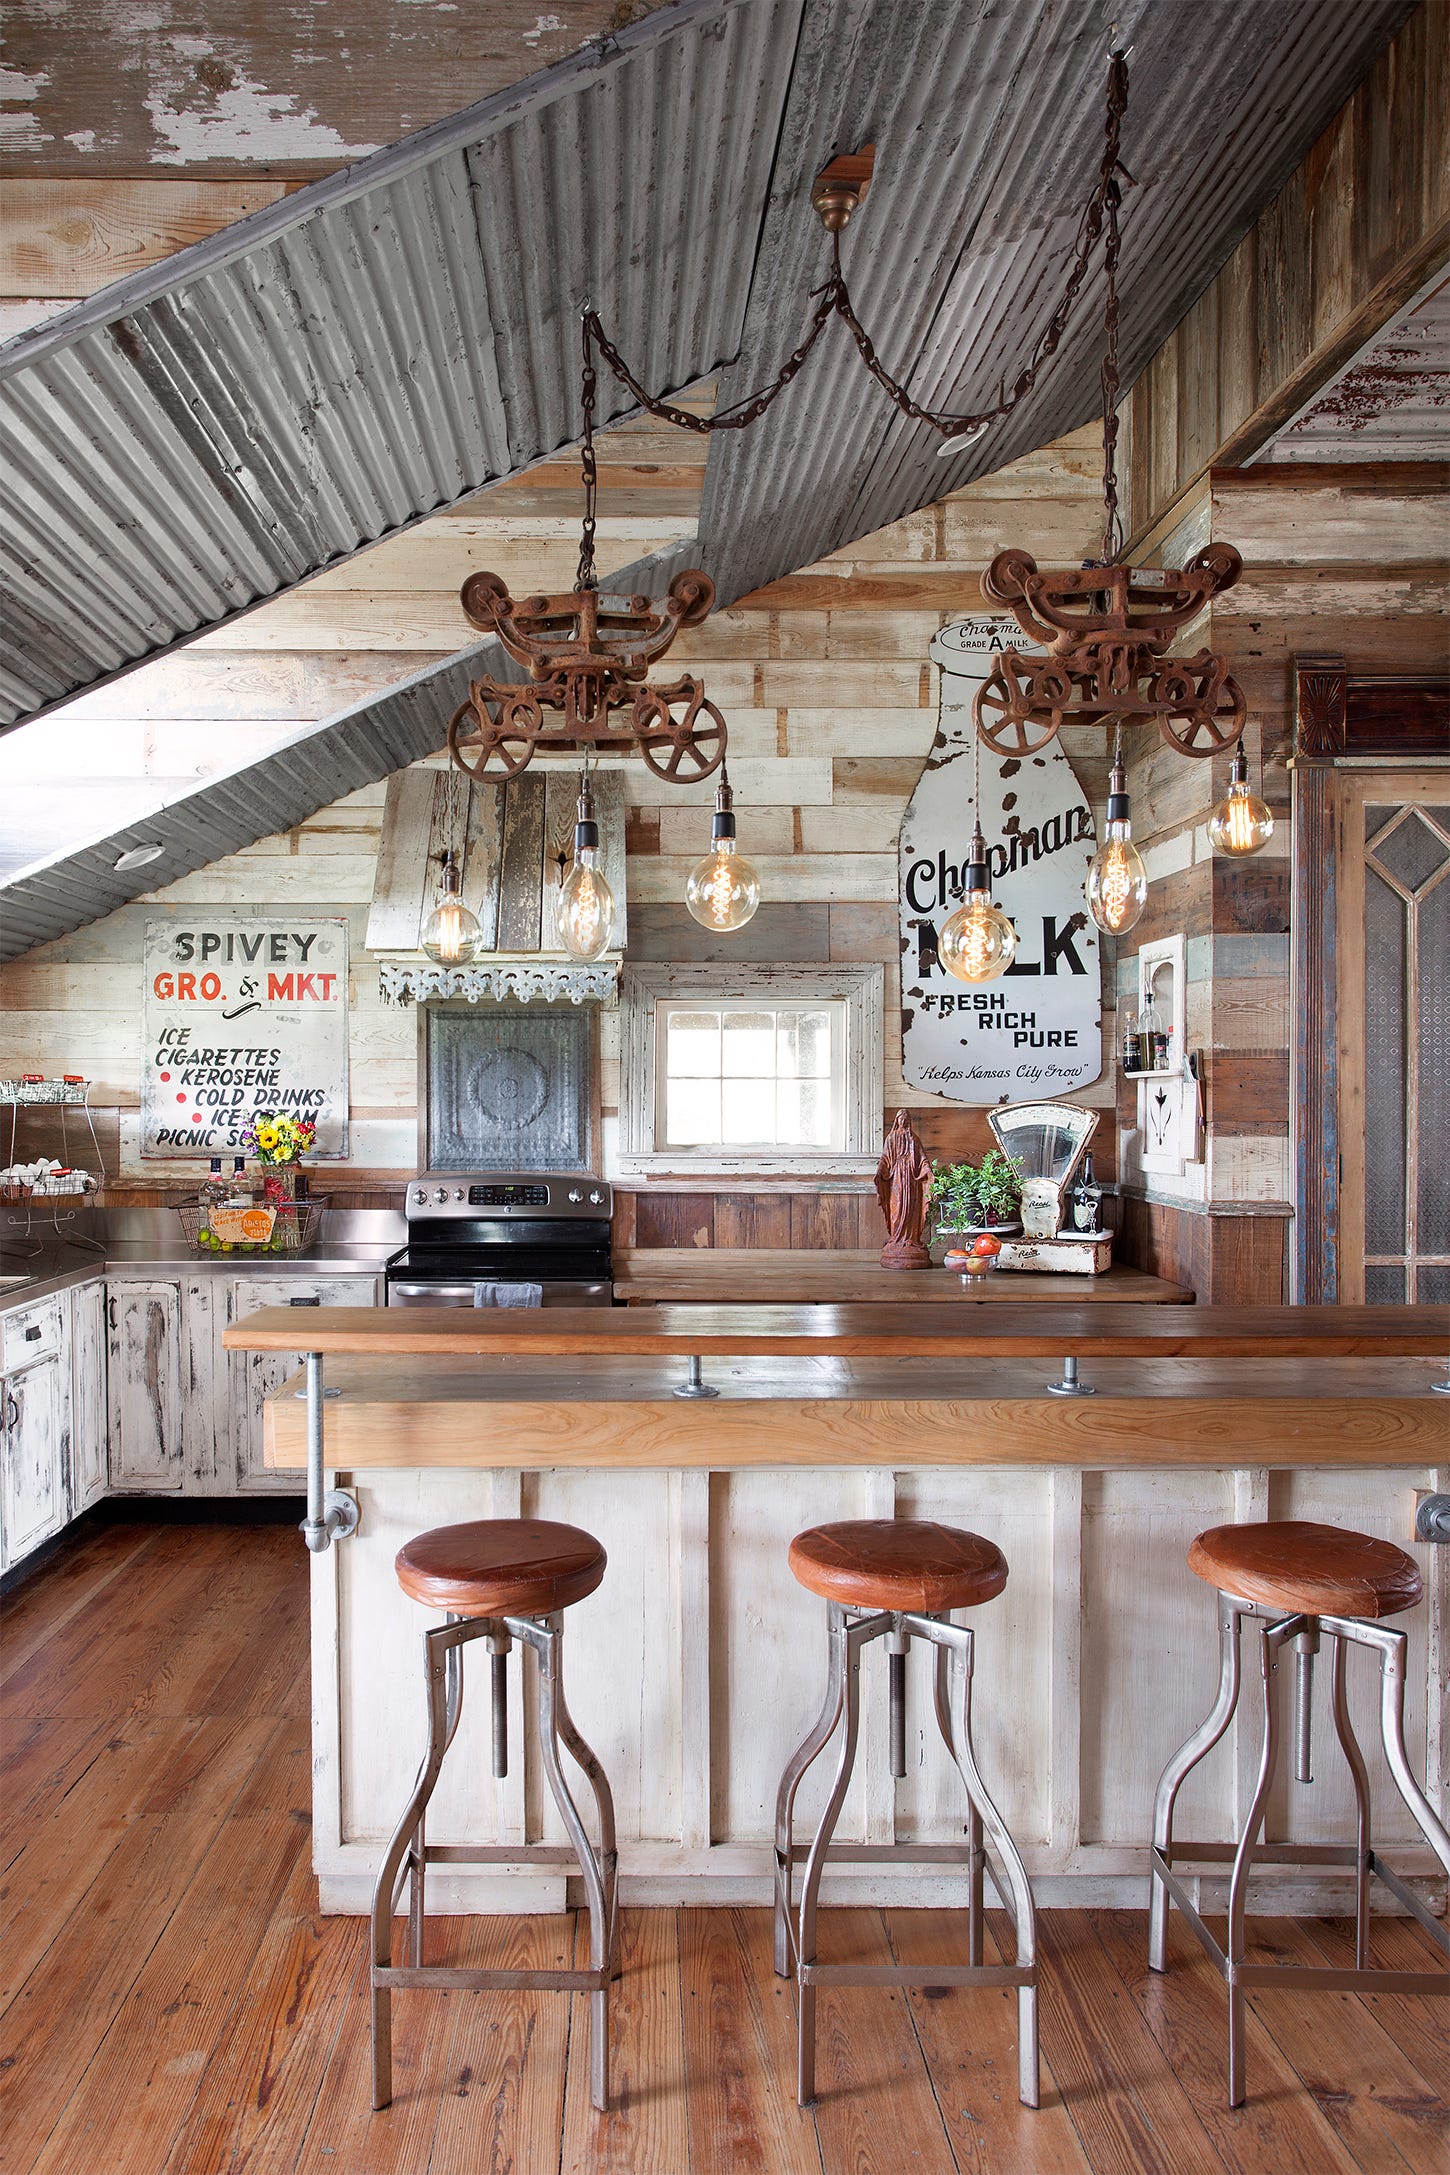
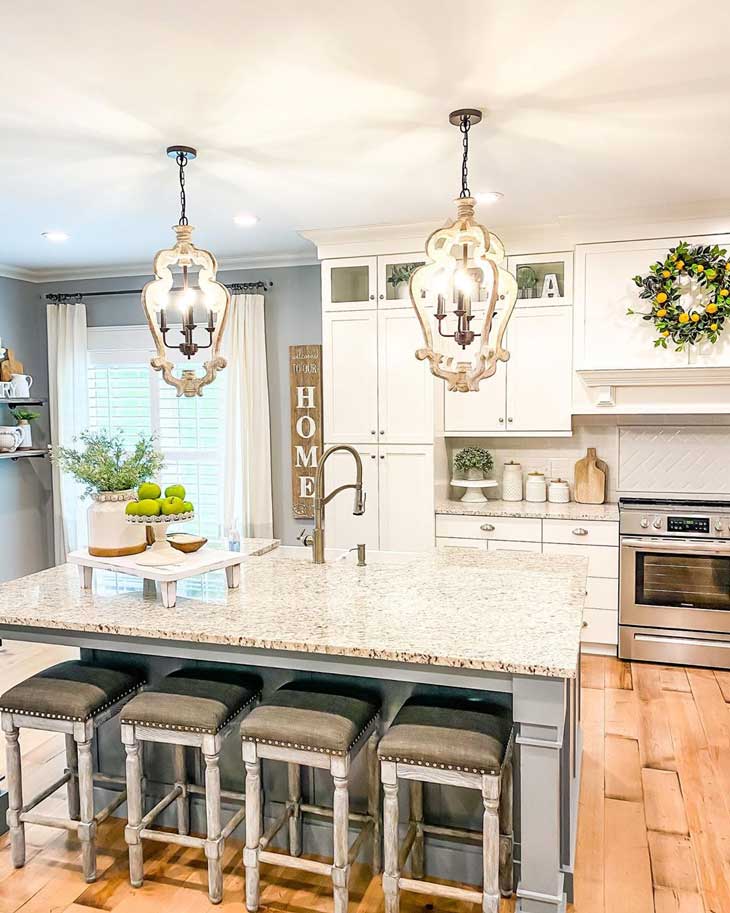
Pendant lights became my favorite discovery for adding country character while providing excellent task lighting. I hung three vintage-inspired metal pendants with Edison bulbs above my kitchen island, and they instantly became the focal point of the room. The warm glow from Edison bulbs creates such a cozy atmosphere in the evenings. I positioned them about 30 inches above the counter surface, which provides perfect illumination without blocking sightlines across the kitchen.
I fell in love with schoolhouse-style glass pendants for above my sink area. The simple, classic design feels authentically farmhouse without being too trendy or themed. I chose clear glass with oil-rubbed bronze hardware that complements my cabinet pulls and faucet finish. The transparent glass allows maximum light output, which is crucial above a sink where you’re washing dishes and doing detailed tasks. Plus, it doesn’t obstruct my view out the kitchen window.
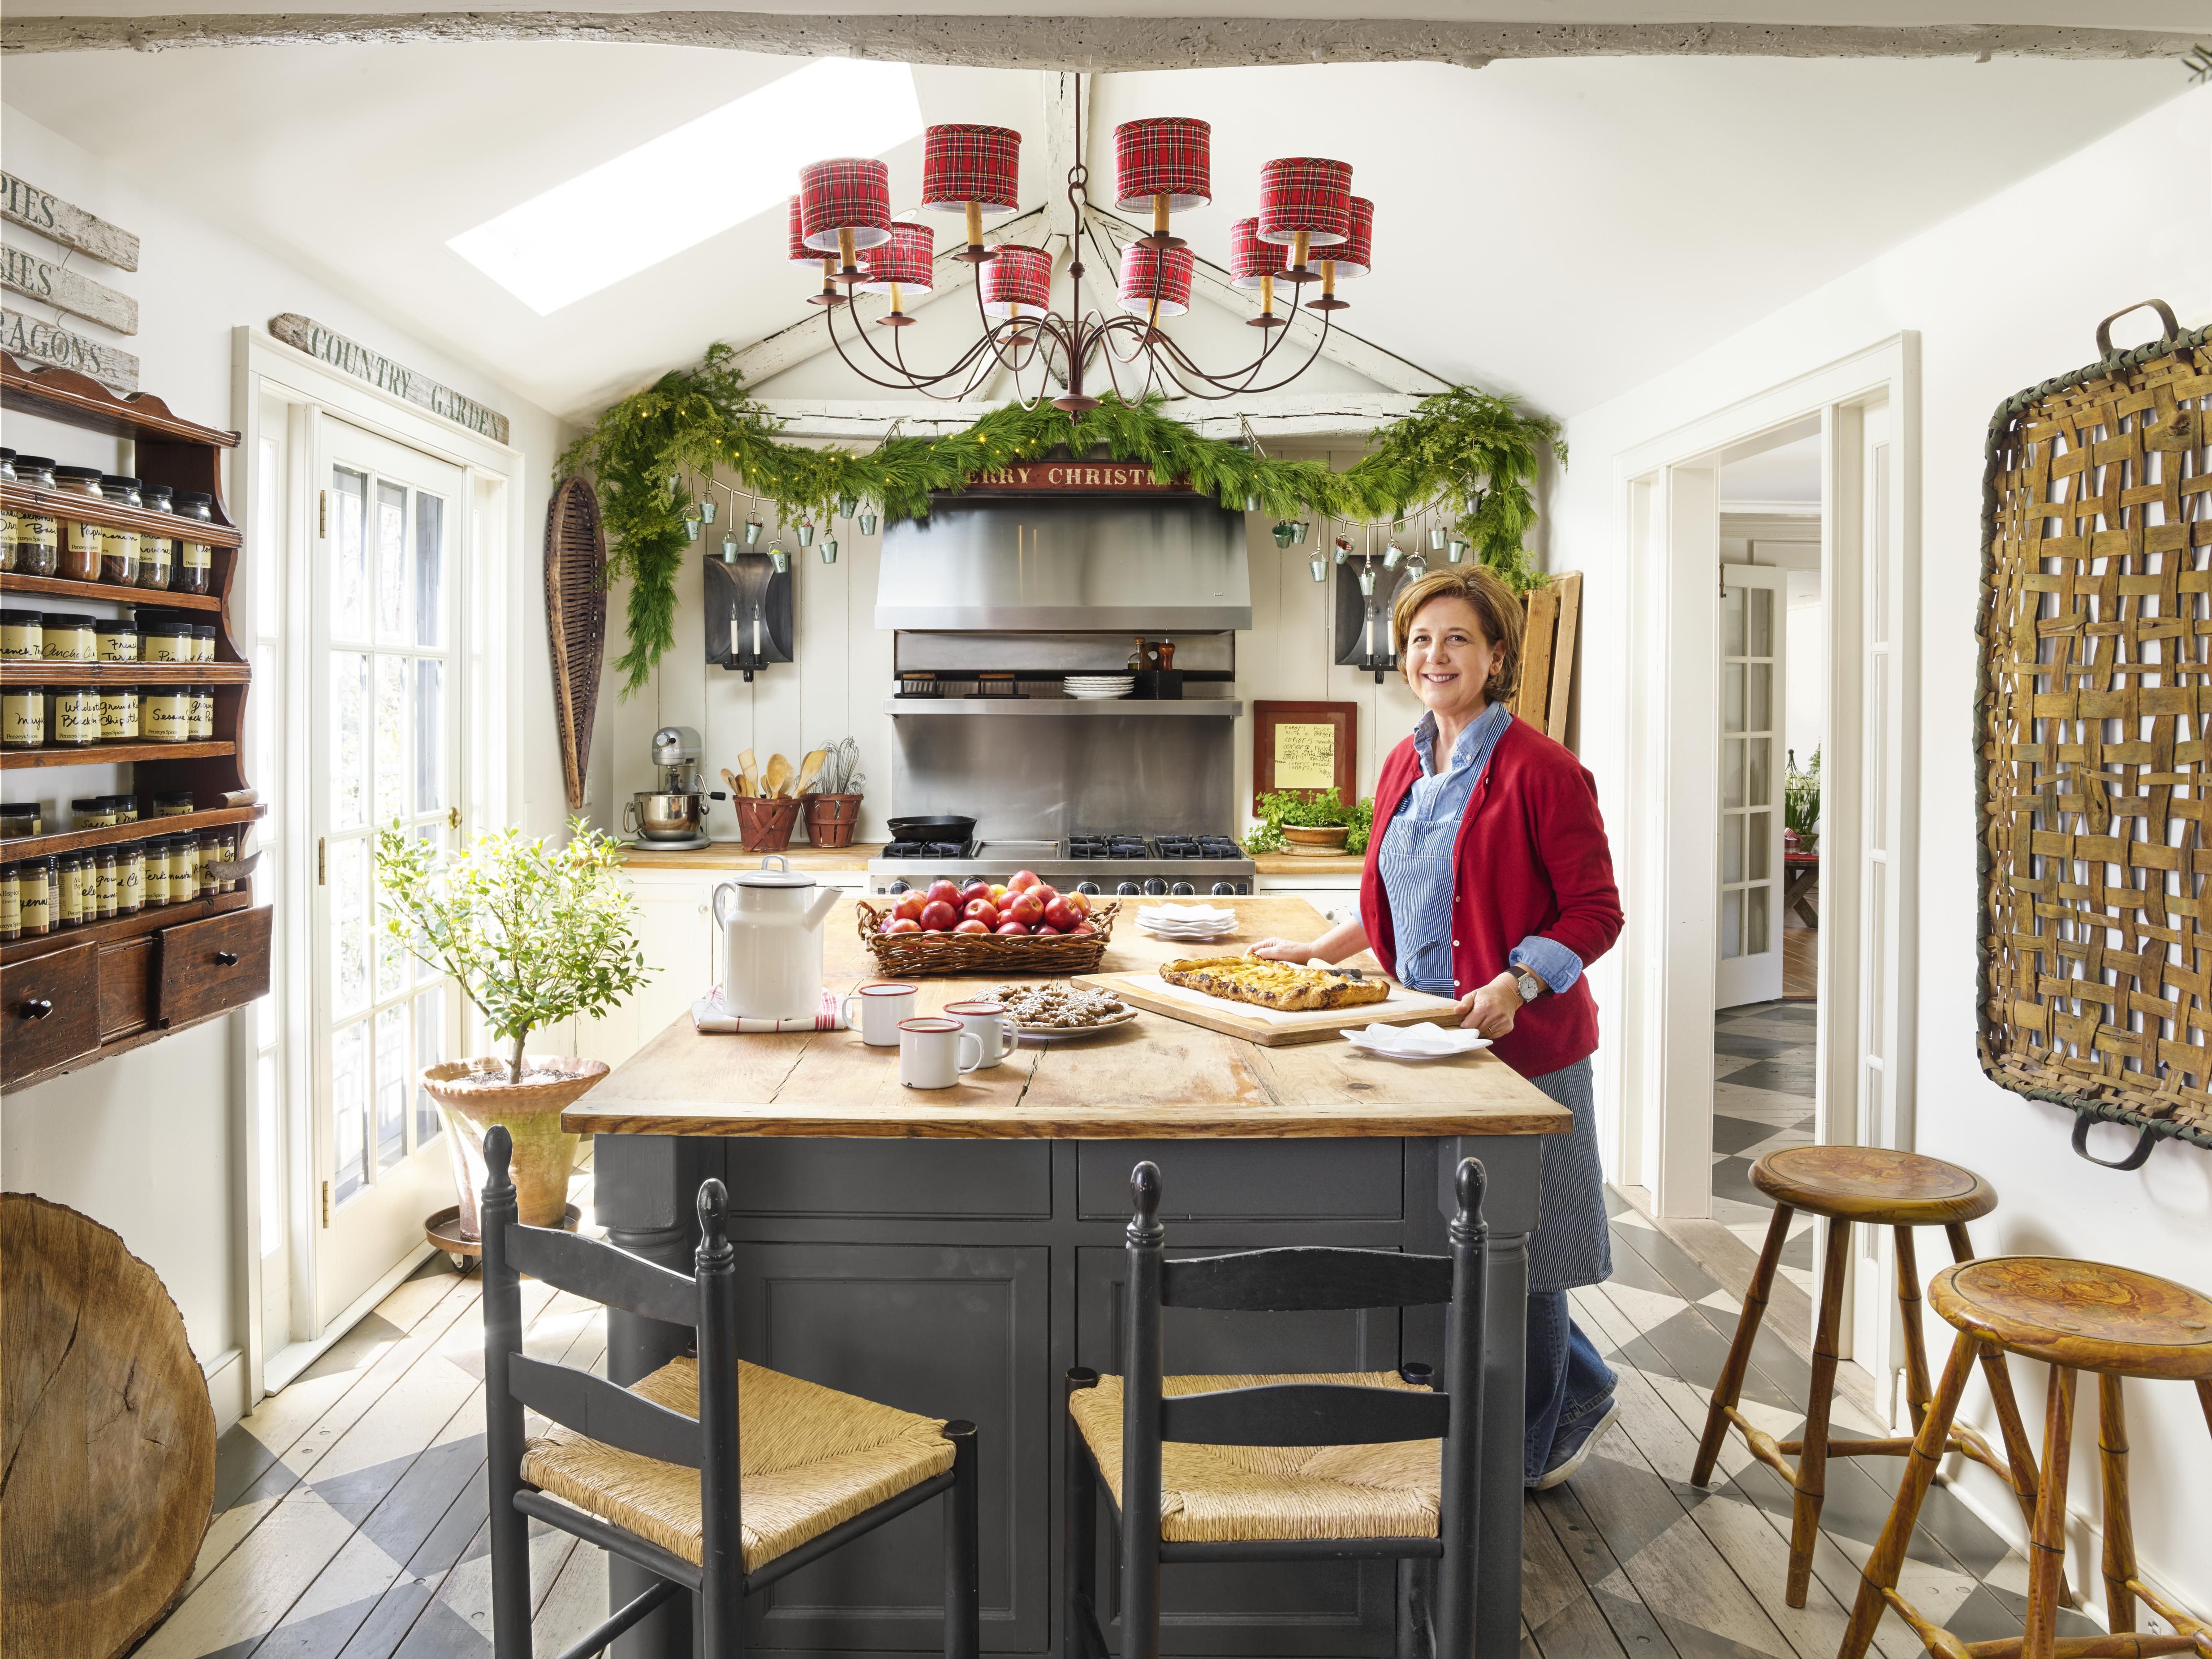
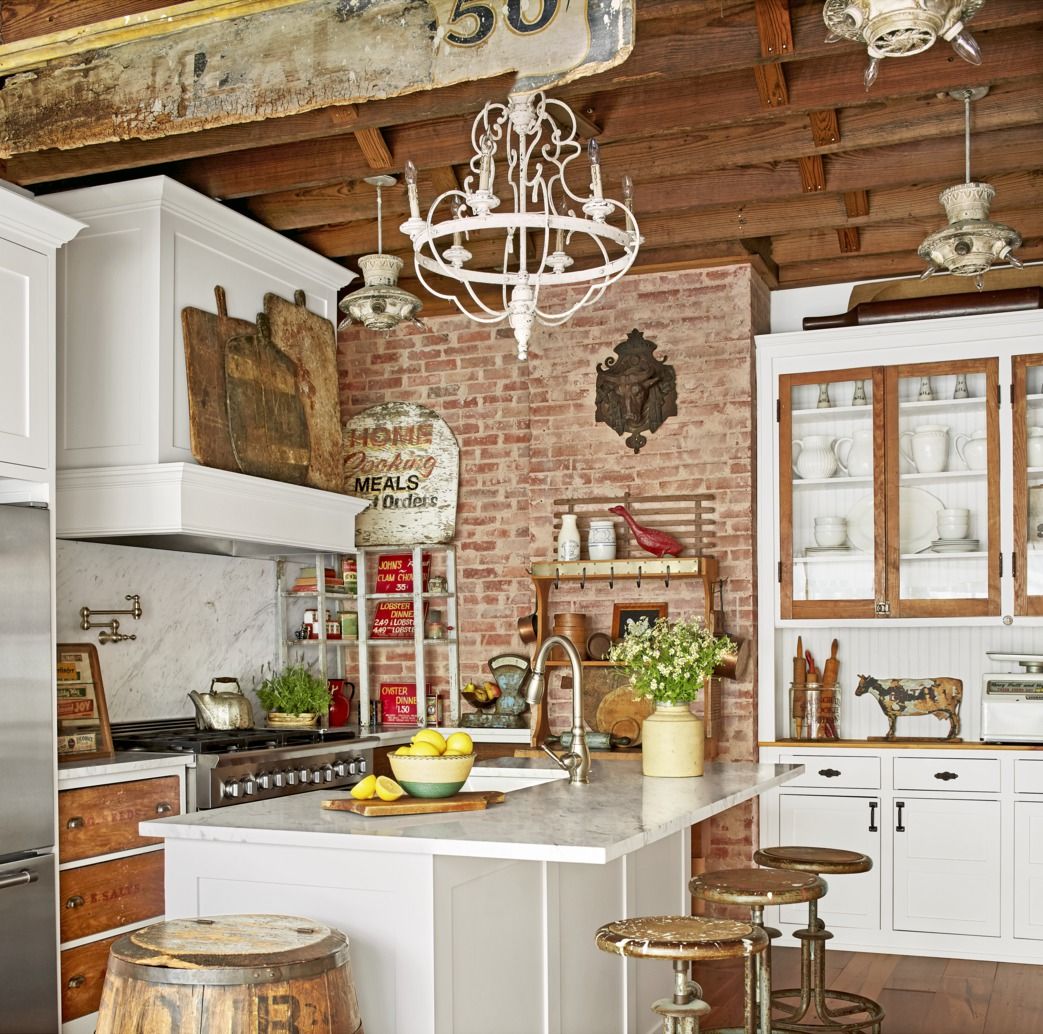
Chandeliers work beautifully in country kitchens, especially over dining areas or larger islands. I installed a wrought iron chandelier with candle-style lights above my breakfast nook, and it creates such a warm, inviting gathering spot. I initially worried it would feel too formal for a kitchen, but the distressed black finish and simple lines keep it feeling casual and farmhouse-appropriate. The chandelier is on a dimmer, so I can brighten it for family meals or dim it for intimate dinners.

Installing Under-Cabinet and Task Lighting
Under-cabinet lighting was the single most impactful addition to my kitchen functionality. I chose LED strip lights because they’re energy-efficient, produce minimal heat, and provide even illumination across my entire counter workspace. I installed them myself in about two hours using plug-in strips that don’t require hardwiring. The difference in food prep visibility is remarkable; I can actually see what I’m doing without casting shadows from overhead lights.
I debated between warm white and cool white LED bulbs for weeks. Cool white feels more like daylight and shows colors more accurately, which seems ideal for cooking. However, I found it felt too clinical and harsh in my country kitchen. I went with warm white (2700K-3000K), which creates that cozy, inviting glow that complements my farmhouse aesthetic while still providing plenty of bright, functional light for detailed kitchen tasks.
Installing dimmer switches for under-cabinet lights was an afterthought that became essential. Sometimes I want full brightness for meal prep, but in the evenings after dinner, I dim them to create gentle ambient lighting that’s perfect for cleaning up or grabbing a late-night snack. This flexibility makes my kitchen feel like different rooms depending on the time of day and what I’m doing. The dimmers only cost about $25 each, but they dramatically improved my lighting functionality.

Incorporating Natural Light and Window Treatments
My kitchen has two windows, and maximizing natural light became a priority during my renovation. I replaced heavy curtains with simple linen cafe curtains that cover only the bottom half of the windows, maintaining privacy while allowing abundant daylight to flood the space. Natural light during the day reduces my reliance on artificial lighting and makes the kitchen feel more open, airy, and connected to the outdoors.
I painted my window trim in a crisp white that reflects light beautifully and emphasizes the farmhouse aesthetic. The contrast between white trim and my pale blue walls creates visual interest while bouncing light around the room more effectively. I also removed a decorative valance that was blocking the top portion of my windows, and the difference in brightness was immediately noticeable. Sometimes less is more when it comes to window treatments.
I positioned my sink directly under one window, a classic country kitchen design that I absolutely love. Working at the sink with a view and natural light makes dishwashing and food prep so much more pleasant. I added a small pendant light above the sink for evening tasks, but during daylight hours, I rarely need artificial light in that zone. This thoughtful placement of my work areas relative to windows has reduced my energy usage and improved my overall kitchen experience.

Creating Ambiance with Decorative Lighting Touches
I discovered that small decorative lights add personality and warmth beyond what overhead fixtures provide. I strung vintage Edison bulb string lights along open shelving in my kitchen, weaving them between displayed dishes and cookbooks. They create a soft, twinkling glow in the evenings that makes the space feel magical and lived-in. These lights cost less than $40 but deliver tremendous visual impact and cozy atmosphere.
Candles became another unexpected lighting layer that I now use daily. I keep a collection of white pillar candles in various heights on my kitchen island in a large wooden tray. Lighting them during dinner creates an intimate, romantic atmosphere that electric lights alone can’t achieve. I also have a vintage candle lantern on my windowsill that I light while cooking dinner, adding to that authentic country kitchen feeling I wanted.
I incorporated a small table lamp on my kitchen desk area, which might seem unusual, but has become one of my favorite touches. The lamp has a burlap shade anda distressed white ceramic base that fits perfectly with my country style. It provides soft, localized light for recipe reading, list making, and computer work. This unexpected lighting element makes my kitchen feel more like a complete living space rather than just a cooking zone, which is exactly the multifunctional room I wanted.
Solving Common Country Kitchen Lighting Challenges
My biggest challenge was lighting a kitchen with low ceilings without making the space feel cramped. Large, hanging fixtures that I loved in showrooms would have created head-bumping hazards in my 8-foot ceiling kitchen. I solved this by using flush-mount and semi-flush fixtures that sit close to the ceiling while still providing farmhouse charm. I found beautiful options with metal finishes and vintage-inspired details that don’t sacrifice style for practicality.
Dark wood beams in my kitchen absorbed light in ways I didn’t anticipate. My initial lighting plan left the entire space feeling dim and cave-like despite having adequate fixtures. I added recessed can lights between the beams to bounce light off the ceiling and brighten the whole room. I also painted the ceiling a lighter shade, moving from cream to pure white, which reflected significantly more light and made the kitchen feel taller and more spacious.
Balancing old and new fixtures while maintaining a cohesive style took trial and error. I wanted authentic vintage pieces, but needed modern functionality like dimmers and LED compatibility. I found reproduction fixtures that capture vintage aesthetics but accommodate modern bulbs and wiring. For truly vintage pieces, I had them rewired by an electrician for safety and functionality. Mixing a few genuine antiques with quality reproductions gives my kitchen authentic character without compromising on practical lighting needs or safety concerns.

How many light sources should I include in a country kitchen?
I learned that layering is key. My 12 by 15 foot kitchen has one central ceiling fixture, three island pendants, under-cabinet lighting, one sink pendant, and two recessed lights over the stove. That’s eight different light sources that can be controlled independently. This might sound like a lot, but each serves a specific purpose. I rarely have all of them on simultaneously. Instead, I use different combinations throughout the day depending on whether I’m cooking, eating, or just passing through the kitchen.
What’s the best bulb temperature for country kitchen lighting?
I tested various temperatures extensively. Cool white (4000K+) felt too sterile and clinical for a country aesthetic. I settled on warm white bulbs between 2700K and 3000K, which create that cozy, inviting glow that complements farmhouse style beautifully. These temperatures closely mimic traditional incandescent bulbs while being much more energy efficient. For task lighting under cabinets, I use 3000K for slightly brighter, more neutral light that still feels warm but helps with food prep accuracy.
Should I hire an electrician or install lighting fixtures myself?
I did both, depending on complexity. Simple fixture swaps, like replacing an existing chandelier, I handled myself after watching tutorial videos and carefully following instructions. However, I hired an electrician for anything involving new wiring, ceiling cuts for recessed lights, or hardwiring under-cabinet systems. That cost me about $800 but gave me peace of mind about safety and code compliance. Plug-in under-cabinet LED strips are DIY-friendly and saved me money while delivering professional-looking results.
How can I add country lighting character on a tight budget?
I found amazing options without spending a fortune. Thrift stores and antique shops yielded vintage fixtures I had rewired for under $100 each. I also used spray paint to update dated brass fixtures into trendy matte black or oil-rubbed bronze finishes. Edison bulbs instantly add farmhouse charm to basic fixtures for just $8-15 per bulb. I spent about $1,200 total on my kitchen lighting, including professional installation, which was far less than I expected for completely transforming the space.
What lighting mistakes should I avoid in a country kitchen?
My biggest mistake was prioritizing style over function initially. That beautiful chandelier alone left my workspace inadequately lit. Don’t neglect task lighting, especially over sinks, stoves, and prep areas. I also regret not installing dimmers from the start; I added them later at extra expense. Avoid fixtures that hang too low over islands. I learned that 30-32 inches above counters works best. Also, don’t mix too many different metal finishes; I stick to two complementary finishes throughout for a cohesive look.
How do I make sure pendant lights are hung at the correct height?
I measured carefully but still made adjustments. For island pendants, hang them 30-36 inches above the counter surface. I went with 30 inches for my 6-foot island, which provides great task lighting without blocking conversation across the island. For dining table chandeliers, 30-34 inches above the table surface works well. I temporarily hung mine with an adjustable cord before making final height decisions, which let me test different heights during actual use. This extra step prevented permanent installation at the wrong height.
Best Kitchen Lighting Ideas – Kitchen Light Fixtures
Breathtaking Kitchen Island Lighting Ideas
Farmhouse Lighting Ideas For Warm And Homely Decor

Best Kitchen Lighting Ideas – Kitchen Light Fixtures
Related Posts:
- Tuscan Kitchen Light Fixtures
- Cottage Kitchen Lighting Ideas
- Country Kitchen Lighting Ideas
- Retro Kitchen Pendant Lights
- Rustic Industrial Kitchen Lighting
- Vintage Kitchen Light Fixtures
- Farmhouse Style Lighting For Kitchen
- Contemporary Kitchen Lighting Design
- Kitchen Bench Pendant Lights
- Kitchen Vanity Lights