When I first started planning my cottage kitchen renovation, I knew the backsplash would be the feature that tied everything together. I spent weeks looking at inspiration photos, visiting tile shops, and imagining how different materials would look against my cream-colored cabinets. The backsplash became more than just a protective surface; it became the heart of my kitchen’s personality. I learned that choosing the right backsplash for a cottage-style kitchen means balancing practicality with that cozy, timeless aesthetic we all love. Through trial, error, and lots of research, I discovered what works and what doesn’t in creating that perfect cottage feel.
Classic Subway Tile: My Go-To Choice
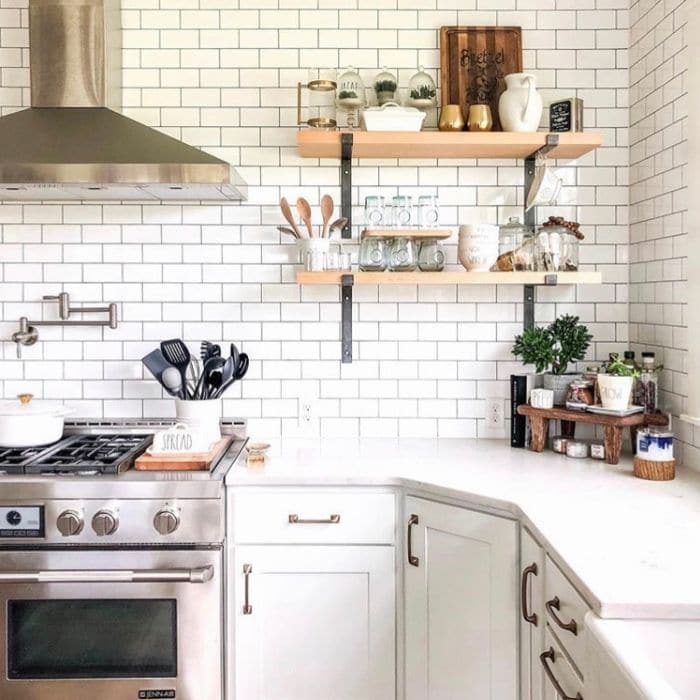
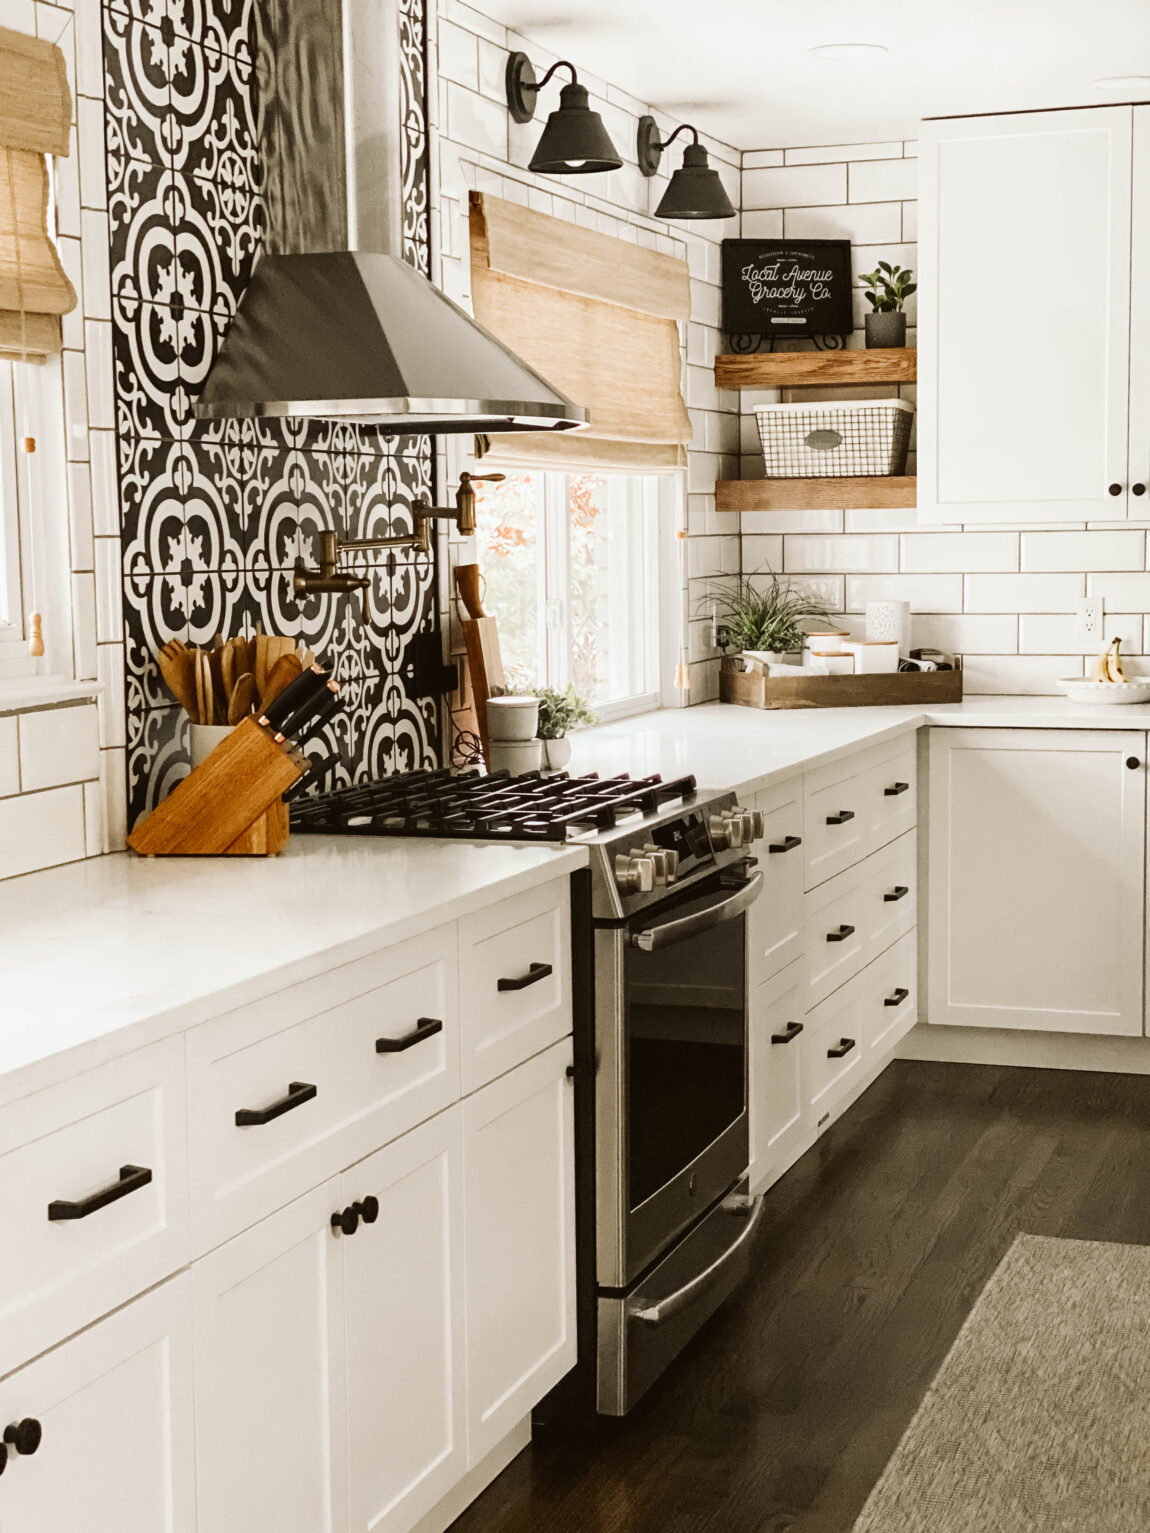
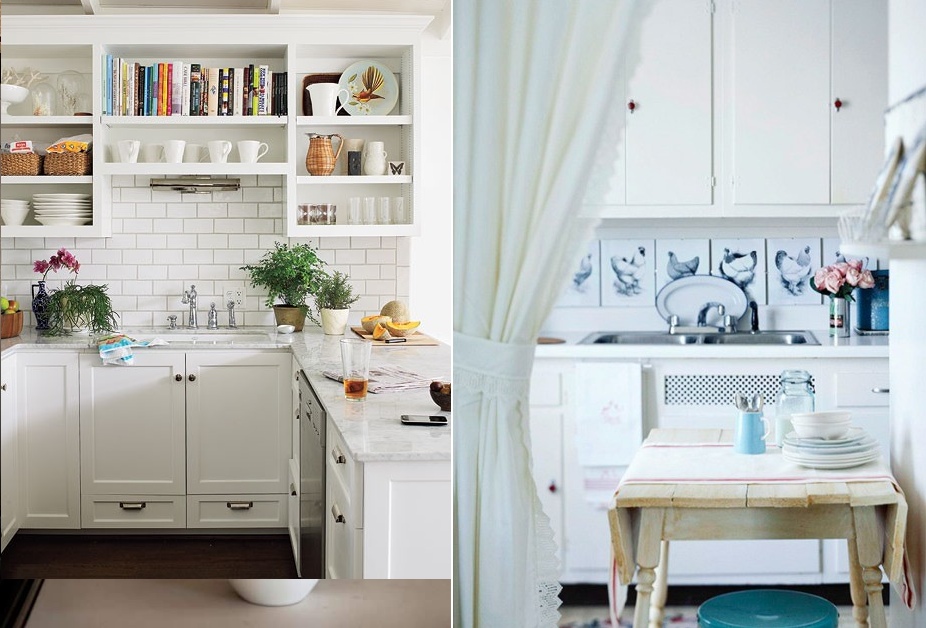
I chose white subway tile for my cottage kitchen backsplash, and it was one of the best decisions I made during my renovation. The clean lines and simple rectangular shape brought an instant sense of history and authenticity to the space. I went with a traditional 3×6 inch size and installed it in a classic brick pattern, which gave me that timeless look I was after. The beauty of subway tile is that it never goes out of style, and it complements virtually any cottage kitchen design.
What surprised me most about subway tile was how many installation options there were. I experimented with different grout colors before settling on a soft gray that added subtle contrast without being too stark. Some of my friends went with darker grout for a more dramatic look, but I wanted something that felt soft and inviting. The slightly beveled edges on my tiles catch the light beautifully, especially in the morning when sunlight streams through my kitchen window.
Maintenance has been incredibly easy, which matters when you’re cooking daily like I do. I simply wipe down the tiles with warm, soapy water, and they look as fresh as the day they were installed. The glazed surface resists stains wonderfully, even when I’m making tomato sauce or working with turmeric. I’ve had my subway tile backsplash for three years now, and it still makes me smile every time I walk into my kitchen. The cost was reasonable too, running me about $8 per square foot with installation.
Handmade Ceramic Tiles for Authentic Character
After visiting a local artisan market, I became obsessed with the idea of incorporating handmade ceramic tiles into my backsplash. These tiles have slight variations in color, texture, and shape that give them so much more personality than mass-produced options. I used them as an accent behind my stove, creating a focal point that guests always comment on. The imperfections are what make them perfect; each tile tells its own little story and adds to that genuine cottage feel I wanted.
I chose tiles in soft, muted colors, creamy whites, pale blues, and gentle sage greens that reminded me of sea glass. The glazing on handmade tiles often has beautiful depth and movement that changes throughout the day as natural light shifts. I mixed different colors randomly rather than creating a pattern, which gave me a more organic, collected-over-time appearance. This approach made my kitchen feel like it had evolved naturally rather than being designed all at once.
Working with handmade tiles required more patience during installation than I expected. Because they’re not perfectly uniform, my installer needed extra time to make everything look balanced and intentional. The investment was worth it, though; these tiles cost me about $15-25 per square foot, but they transformed my kitchen into something truly special. I love running my fingers over the slight texture variations; it makes cooking feel more connected to the handcrafted, slower pace of cottage living.
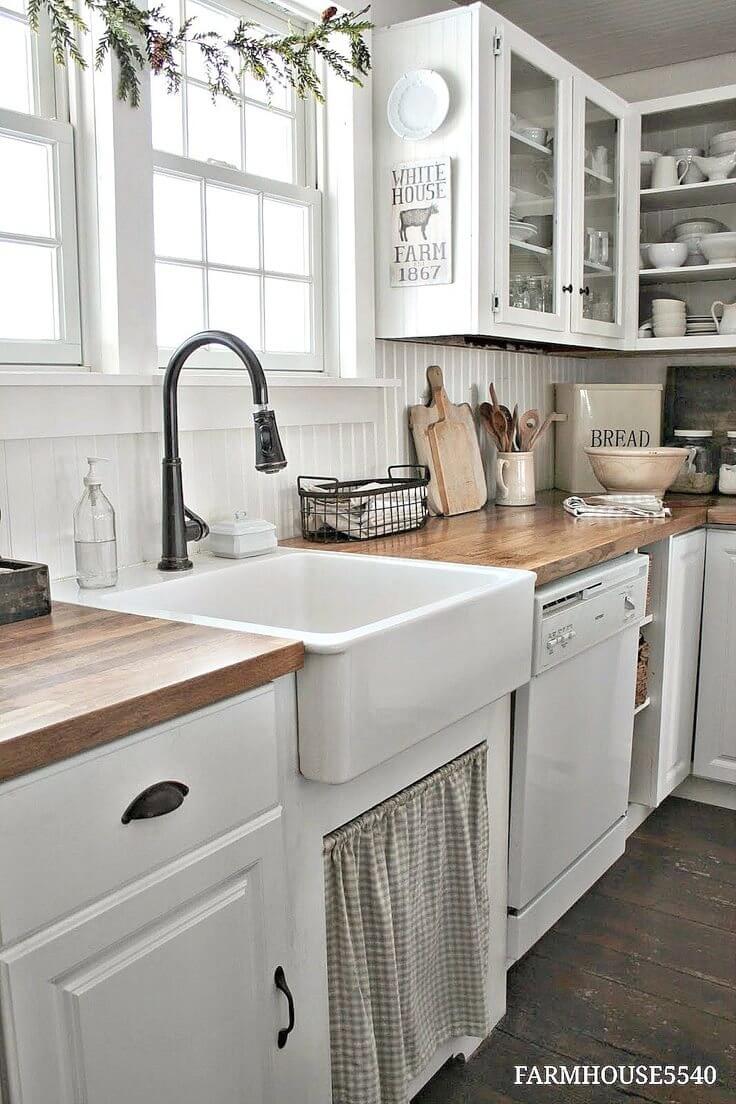
Beadboard Backsplash for Traditional Cottage Appeal
I installed painted beadboard as my backsplash in a previous cottage kitchen, and it brought such warmth and texture to the space. Beadboard has those classic vertical grooves that instantly evoke farmhouse and cottage style, and it’s surprisingly practical as a backsplash material. I painted mine in a soft white with a semi-gloss finish that made it easy to wipe clean while adding a subtle sheen that reflected light beautifully around my kitchen.
The installation process was straightforward enough that I tackled it as a DIY project one weekend. I used beadboard panels rather than individual planks, which saved me considerable time and effort. After cutting the panels to fit my space, I secured them with construction adhesive and finishing nails, then added trim pieces along the edges for a polished look. Painting required a few coats to get good coverage in all those grooves, but the result was absolutely worth the extra effort.
One thing I learned is that beadboard works best in areas that don’t get heavily splattered. I used it along most of my kitchen walls but switched to tile directly behind my cooktop, where grease and moisture are more intense. The combination looked intentional and gave me the best of both approaches. Beadboard is also budget-friendly. I spent only about $3-5 per square foot for materials, making it perfect for cottage renovations on a tight budget. The texture adds dimension that flat painted walls simply can’t match.
Natural Stone for Rustic Elegance
When I wanted to add more rustic character to my cottage kitchen, I turned to natural stone for my backsplash. I selected tumbled marble in creamy ivory tones with subtle gray veining that brought an earthy, organic quality to the space. Each piece of stone is unique, which means my backsplash is truly one of a kind. The matte, slightly rough texture of tumbled stone feels authentic and unpretentious, exactly what I wanted for my cottage aesthetic.
I also considered slate and travertine during my research, both excellent choices for cottage kitchens. Slate offers gorgeous color variations in grays, greens, and even purples, while travertine has those beautiful natural pits and texture that add incredible depth. I ultimately chose marble because I loved how it complemented my butcher block countertops and created a sophisticated yet relaxed feel. The natural variation in the stone means no two installations ever look exactly alike.
Stone does require more maintenance than ceramic or porcelain tiles, something I wish I’d fully understood before installation. I seal my marble backsplash twice a year to protect it from stains and moisture, a simple process that takes about an hour. Despite needing this extra care, I love my stone backsplash and would choose it again. The cost ran higher than other options at $20-35 per square foot installed, but the natural beauty and timeless quality made it a worthwhile investment for my forever cottage kitchen.

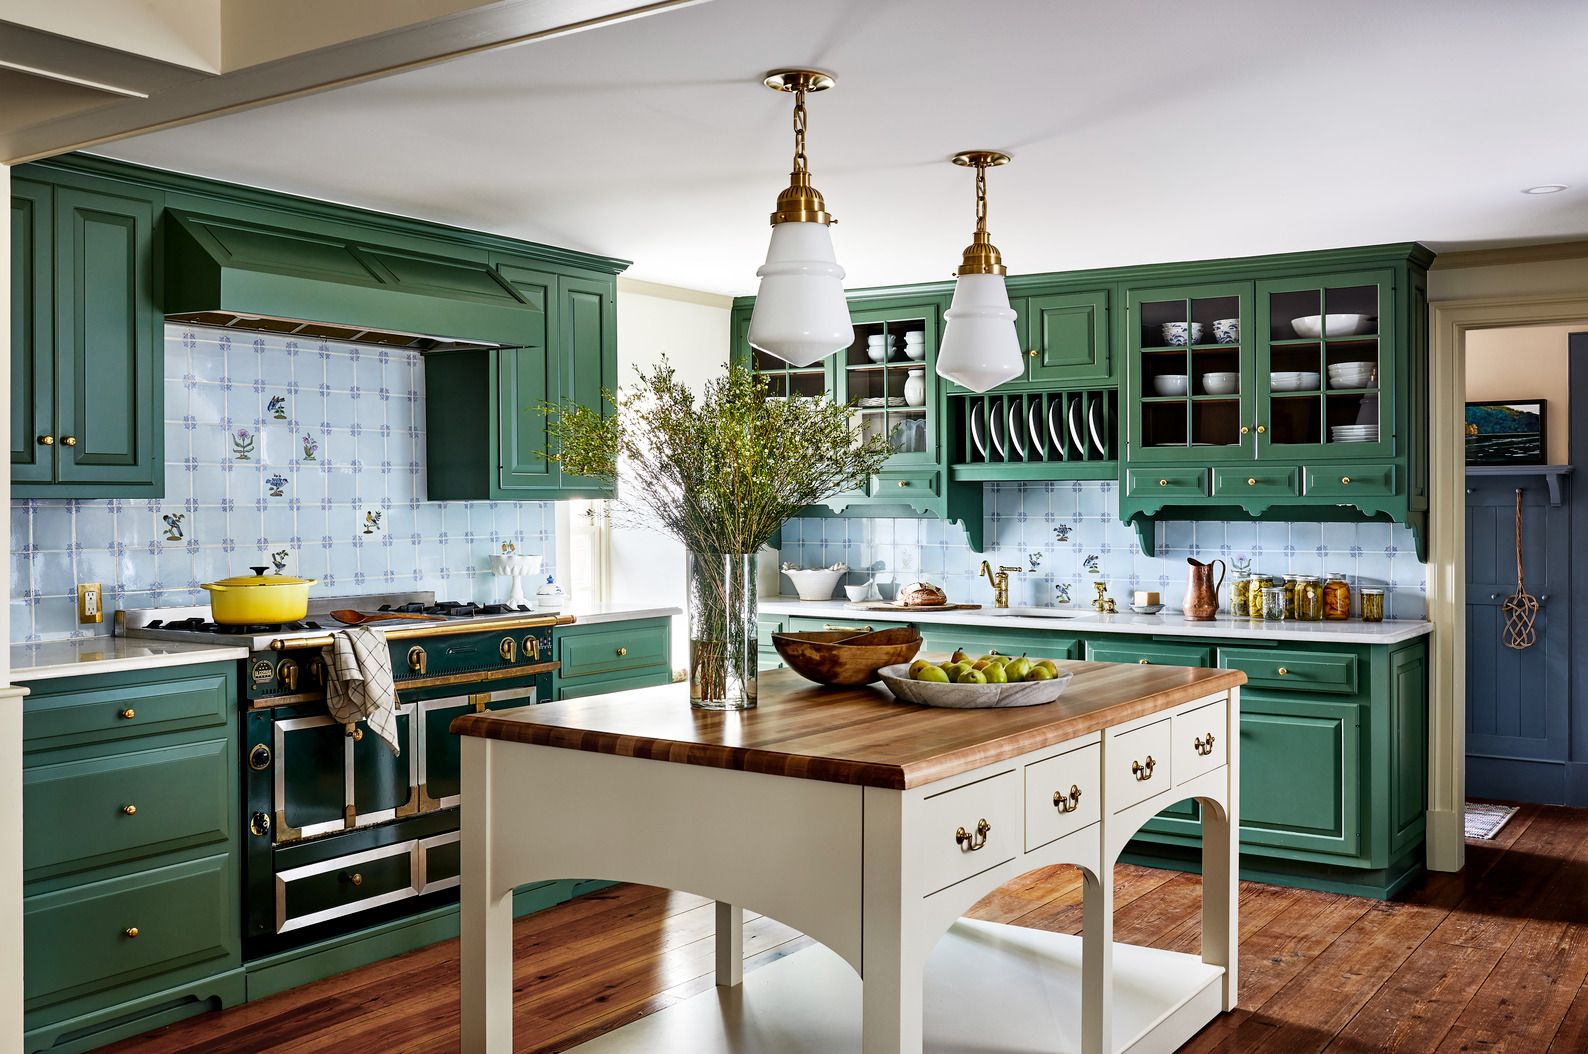
Patterned Cement Tiles for a Creative Touch
I added patterned cement tiles behind my sink area, and they became the unexpected star of my cottage kitchen. These tiles feature geometric or floral patterns in soft, muted colors that add visual interest without overwhelming the space. I chose a delicate blue and white pattern that reminded me of vintage linens and perfectly captured that cottage romanticism I was after. Cement tiles bring an old-world craftsmanship that feels both historic and fresh.
The key to using patterned tiles in a cottage kitchen is restraint. I used them in just one section rather than covering every wall. This created a beautiful focal point that draws the eye without making the space feel busy or cluttered. I kept the rest of my backsplash simple with white subway tile, which let my patterned section really shine. This mix-and-match approach gave me a collected, lived-in look that developed over time rather than all at once.
Cement tiles need proper sealing because they’re porous and can stain if not protected. I learned to seal them before grouting and then again after installation, a crucial step my installer emphasized repeatedly. They’re also softer than ceramic tiles, so I’m more careful about not banging pots against them. The cost was higher than I initially expected, about $12-20 per square foot, but these tiles added so much personality to my kitchen that I consider them worth every penny I spent.

Open Shelving with Exposed Wall as Backsplash
In my current cottage kitchen, I chose open shelving instead of upper cabinets in one section, which meant rethinking my backsplash approach entirely. I painted the wall behind my shelves in a soft, muted sage green that creates a beautiful backdrop for my white dishes and vintage creamware collection. The painted wall acts as both backdrop and backsplash, simplifying the design while adding a lovely pop of color that feels fresh and cottage-appropriate.
This approach saved me money while giving me flexibility to change things seasonally. I can easily repaint if I want a different color, something that would be much more complicated with permanent tile. The open shelving lets me display items that add to my cottage aesthetic, vintage mixing bowls, pretty jars of pasta and grains, and my collection of ironstone pitchers. The colored wall behind these items makes them stand out and creates visual interest without needing decorative tiles.
I did protect the wall area directly behind my countertop with a clear glass panel that extends about 18 inches up from the counter. This gives me easy-to-clean protection from splashes while keeping my painted wall beautiful. I found the glass panel at a local glass shop, and they cut it to my exact specifications for about $150. This hybrid approach, painted wall with strategic protection, gave me the cottage look I wanted with the practicality I needed for daily cooking and living.

What’s the most budget-friendly cottage backsplash option?
In my experience, painted beadboard offers the best value for cottage kitchens. I installed it myself for around $3-5 per square foot, including paint and materials. White subway tile is another affordable choice at about $8 per square foot installed. Both options deliver authentic cottage style without breaking your renovation budget, and they’re durable enough to last for years with proper care.
How do I choose between white and colored backsplash tiles?
I’ve done both, and my advice is to consider your overall kitchen palette. White creates a clean, timeless backdrop that lets other elements shine, perfect if you have colorful cabinets or want flexibility in decor. Colored tiles add personality but require more commitment. In my sage-green kitchen, I used white tiles to keep things light and airy, which I’m still happy with years later.
Can I mix different backsplash materials in one kitchen?
Absolutely! I combined subway tile with patterned cement tiles in my current kitchen, and the mix creates wonderful visual interest. The trick is using your special tiles as an accent, maybe behind the stove or sink, while keeping larger areas simple. This approach gives you that collected-over-time cottage feel while staying cohesive. Just make sure your materials share a common color thread that ties them together beautifully.
How high should my cottage kitchen backsplash go?
I typically take my backsplash from the countertop to the bottom of my upper cabinets, usually about 18-20 inches. In areas without cabinets, I’ve extended backsplashes higher for more drama and protection. Behind my stove, I went all the way to the ceiling with tile, creating a statement wall that’s both practical and gorgeous. Consider where splashes actually occur in your cooking routine when deciding height.
What’s the easiest backsplash material to keep clean?
Glazed ceramic and porcelain tiles have been the easiest for me to maintain. I simply wipe them down with soapy water, and they look perfect. Natural stone requires more care with special cleaners and regular sealing. Beadboard needs attention in the grooves where grime can collect. For a busy cottage kitchen where you cook often, like I do, I’d recommend glazed tile for its combination of beauty and easy maintenance.
Should I install my backsplash myself or hire a professional?
I’ve done both, and it depends on your skill level and the material you choose. I successfully installed beadboard and peel-and-stick tiles myself, saving significant money on labor. However, I hired professionals for subway tile and natural stone because proper installation requires experience, especially with cutting and spacing. If you’re handy and patient, simpler materials make great DIY projects. Complex patterns or expensive materials deserve professional expertise, in my opinion.
Farmhouse Kitchen Backsplash Ideas and Designs
Most Beautiful Kitchen Backsplash Ideas
Farmhouse Kitchen Backsplash Ideas to Try
White cottage kitchen backsplash ideas
Best Farmhouse Kitchen Backsplash Ideas

Related Posts:
- French Kitchen Backsplash Ideas
- Cottage Kitchen Backsplash
- Country Kitchen Backsplash
- Retro Kitchen Backsplash
- Rustic Wood Kitchen Backsplash
- Vintage Kitchen Backsplash Ideas
- Modern Farmhouse Kitchen Backsplash
- Mid Century Modern Kitchen Backsplash Tile
- Turquoise Kitchen Backsplash Tile
- Mediterranean Tile Kitchen Backsplash