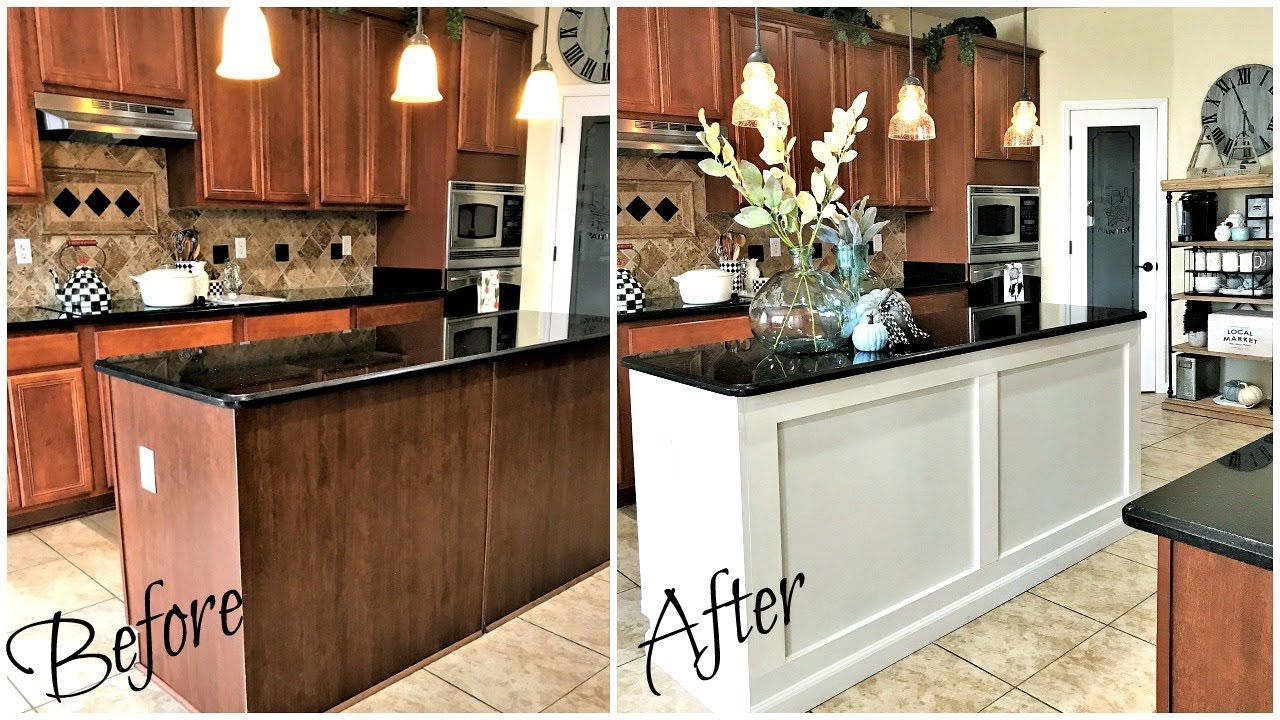
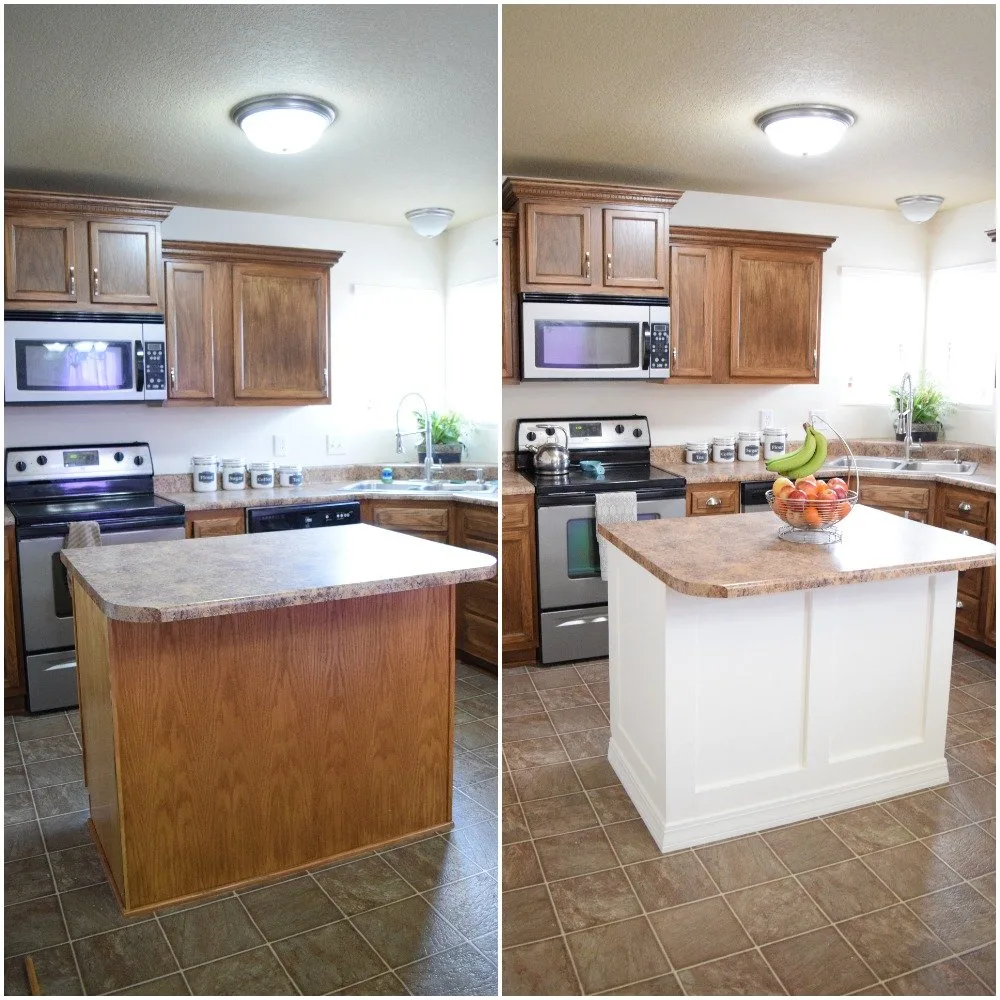
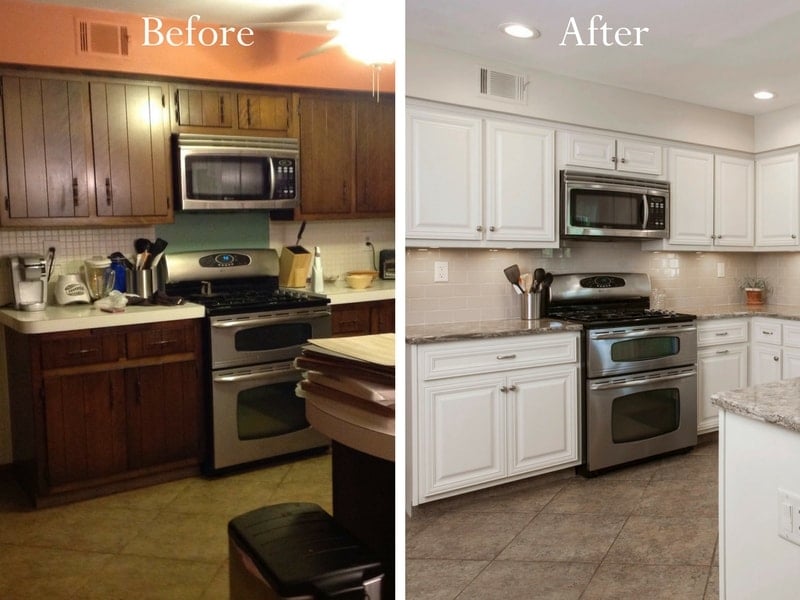
When I walked into my kitchen every morning two years ago, that bulky oak island from the 1990s made the entire space feel dark and outdated. The honey-colored finish clashed with my updated cabinets, and the basic raised panel doors looked tired despite being structurally sound. Rather than spending thousands on a complete island replacement, I decided to reface it myself, transforming this central focal point into a gorgeous piece that now anchors my entire kitchen design. The process taught me that with patience, the right materials, and careful planning, refacing can deliver custom results at a fraction of replacement costs.
Planning and Design: Choosing the Perfect New Look
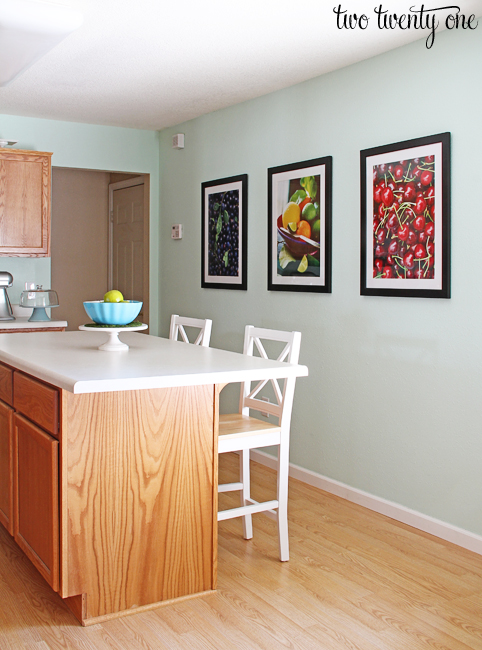
My design journey started with honestly assessing what worked and what didn’t about my existing island. The size and layout were perfect for my kitchen’s flow, with excellent storage and a functional breakfast bar that my family used daily. However, the outdated raised panel doors and warm oak finish made everything feel stuck in the past. I decided to go with a clean shaker style in crisp white to match my recently updated perimeter cabinets and create visual continuity.
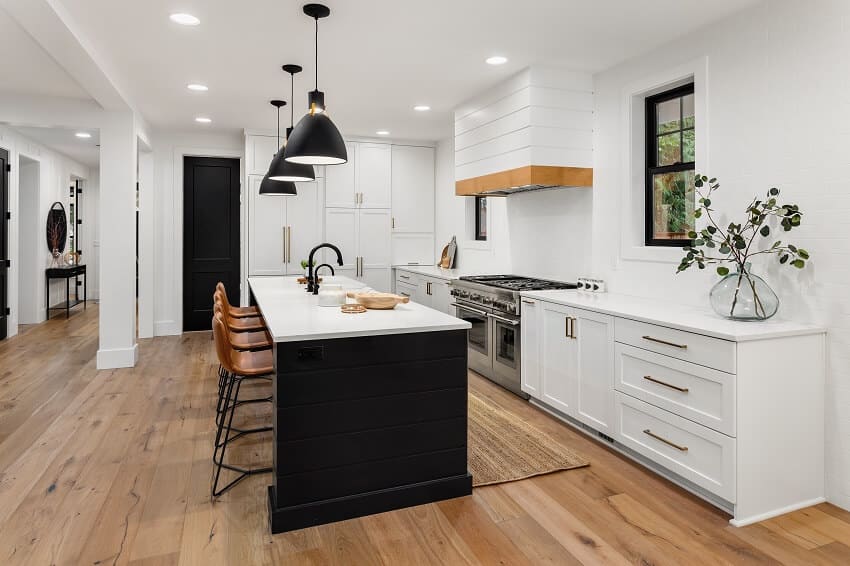
Color selection required careful consideration of my kitchen’s overall palette and lighting conditions. While I loved the idea of a bold navy or sage green island, my kitchen has limited natural light, so I chose classic white to brighten the space and create a timeless look that wouldn’t feel dated in five years. I planned to add personality through new hardware, a stunning countertop, and decorative elements rather than relying on cabinet color for visual interest.
The most important planning decision was determining which elements to reface versus replace entirely. My existing cabinet boxes were solid and well-built, making them perfect candidates for refacing. However, the old laminate countertop had to go, and I knew updated hardware would be essential for achieving the fresh look I wanted. I created a detailed plan and budget that allocated funds strategically, spending more on high-impact elements like countertops while economizing on basic refacing materials.
Material Selection: Finding Quality Options Within Budget
Researching refacing materials opened my eyes to options I never knew existed, from wood veneer and rigid thermofoil to painted MDF and solid wood doors. I ultimately chose painted MDF shaker doors because they provided the clean, contemporary look I wanted at a reasonable price point. The factory-painted finish was far superior to anything I could achieve painting on-site, and the medium-density fiberboard core provided excellent stability and durability.
Hardware selection proved just as important as the door style in creating my desired aesthetic. I replaced the old brass handles with sleek brushed nickel bar pulls that feel substantial and modern. The key was choosing hardware with enough visual weight to balance the new door style while coordinating with my kitchen’s other finishes. I bought extra pieces to update my perimeter cabinets’ hardware simultaneously, creating perfect continuity throughout the space.
Countertop selection required balancing my design dreams with practical budget realities. While I coveted marble or quartz, I found a stunning granite remnant that was perfect for my island size and cost 60% less than a full slab. The neutral gray granite coordinates beautifully with my white cabinets while adding natural texture and visual interest. Sometimes the best solutions come from thinking creatively about materials rather than choosing the most obvious options.
DIY Installation Process: Step-by-Step Reality
The actual refacing process was more involved than I initially expected, requiring careful measurement, precise cutting, and patience with multiple installation steps. I started by removing all the old doors and drawer fronts, then thoroughly cleaning and lightly sanding the cabinet boxes to ensure good adhesion for the new wood veneer I applied to visible surfaces. This preparation work took an entire weekend but was crucial for professional-looking results.
Installing the new shaker doors required adjusting hinges and ensuring perfect alignment, which tested my patience and precision skills. I invested in a quality drill and self-centering hinge bits that made installation much easier and more accurate. Each door needed individual fitting and adjustment to achieve consistent gaps and smooth operation. The process was time-consuming but incredibly satisfying as I watched my vision come together piece by piece.
The most challenging aspect was working around my kitchen’s daily use since I couldn’t shut down the entire space during installation. I worked in sections, completing one side of the island at a time so we could still access storage and maintain some functionality. This phased approach extended the timeline but allowed my family to continue normal routines while I transformed our kitchen centerpiece over several weekends.

Hardware and Finishing Touches: Details That Make the Difference
Upgrading the hardware was where my island refacing project truly came alive with personality and style. I chose oversized bar pulls in brushed nickel that feel substantial and modern, replacing the dated brass knobs that made everything look old-fashioned. The new hardware required different hole spacing, so I filled the old holes with wood filler, sanded them smooth, and touched up with matching paint before installing the new pieces.
Interior organization upgrades were an unexpected bonus of the refacing project that significantly improved functionality. While I had the island partially disassembled, I added pull-out shelves, drawer dividers, and door-mounted organizers that maximized storage efficiency. These hidden improvements make daily kitchen tasks much easier and help keep the beautiful new exterior looking clean and uncluttered.
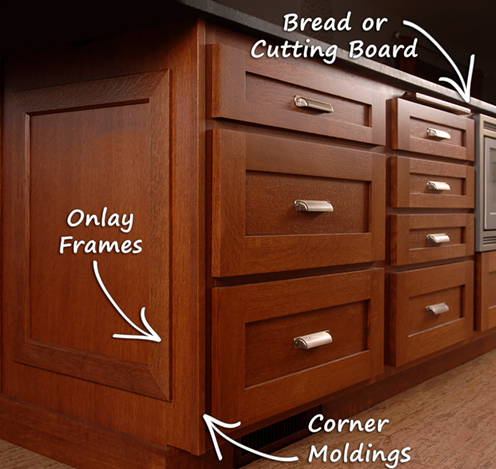
The final finishing touches included adding decorative trim pieces that enhanced the custom appearance and upgrading the island’s electrical components. I installed under-cabinet lighting that showcases the new countertop beautifully and added USB outlets that make the island more functional for modern family life. These small upgrades cost relatively little but contributed significantly to the overall transformation and daily usability of the space.
![]()
Cost Breakdown: Achieving Custom Results on a Budget
My total island refacing project cost approximately $1,800, compared to $8,000+ estimates I received for complete island replacement. The biggest expenses were the new granite countertop at $600 and the custom MDF doors at $500. Hardware, wood veneer, paint, and miscellaneous supplies added another $700, while the interior organization upgrades cost about $300. Professional countertop installation was my only contractor expense at $200.
Material quality made a significant difference in both appearance and long-term durability. I learned that cheap cabinet doors look cheap no matter how carefully they’re installed, so I invested in factory-painted MDF doors with smooth, durable finishes. Similarly, quality hardware feels substantial and operates smoothly years later, while bargain pulls often become loose or tarnished quickly. Spending wisely on key components delivered much better results than trying to economize everywhere.
Labor savings from DIY installation represented the largest cost reduction compared to hiring professionals. While the project required significant time investment over several weekends, I gained valuable skills and the satisfaction of transforming my kitchen with my own hands. The learning experience was rewarding, and I now feel confident tackling similar projects in other areas of my home.

Design Integration: Creating Cohesive Kitchen Flow
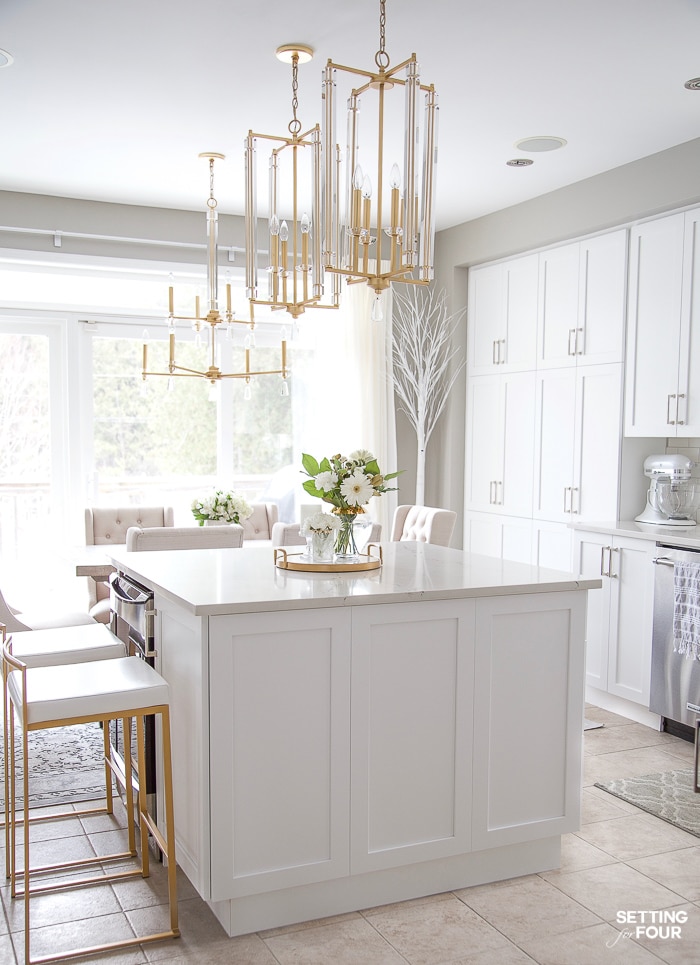
Ensuring my refaced island coordinated seamlessly with the rest of my kitchen required careful attention to proportions, colors, and styling details. The new white shaker doors matched my perimeter cabinets perfectly, while the gray granite countertop provided a subtle contrast that defined the island as a distinct but harmonious element. I updated all cabinet hardware throughout the kitchen simultaneously to maintain perfect coordination and visual flow.
Lighting integration played a crucial role in showcasing the island’s transformation and improving the overall kitchen ambiance. I added pendant lights above the breakfast bar that complement the new aesthetic while providing excellent task lighting for food preparation and homework sessions. The under-cabinet lighting I installed creates a beautiful ambient glow that highlights the granite’s natural patterns and makes evening cooking more pleasant.
Styling the newly refaced island required restraint to maintain the clean, sophisticated look I’d worked hard to achieve. I keep the countertops mostly clear, displaying only a few carefully chosen items like a beautiful fruit bowl and small potted herbs. This minimalist approach allows the quality materials and craftsmanship to shine while maintaining the uncluttered aesthetic that makes the space feel larger and more serene.
Long-Term Results: Two Years Later Assessment
Living with my refaced island for two years has confirmed that this renovation approach delivered excellent value and lasting satisfaction. The white painted finish still looks fresh and clean with regular maintenance, and the quality hardware operates as smoothly as installation day. The granite countertop has developed a beautiful patina that adds character while remaining highly functional for daily food preparation and casual dining.
Functionality improvements from the refacing process continue to enhance daily kitchen activities. The interior organization upgrades make accessing stored items much easier, while the improved lighting makes food preparation more enjoyable. The island has become an even more central gathering place for my family, proving that thoughtful improvements can enhance both beauty and practicality simultaneously.
The most rewarding aspect of the refacing project has been the boost in confidence it gave me for tackling other home improvement challenges. Successfully transforming such a prominent kitchen feature taught me valuable skills and proved that careful planning and patient execution can achieve professional-quality results. I’ve since refaced bathroom vanities and built-in bookcases using similar techniques, continually improving my home while building practical skills and saving money.
How long does a kitchen island refacing project typically take?
My island refacing took about six weekends, working at a relaxed pace while keeping the kitchen functional. Preparation and door installation consumed most of the time. If you can work continuously, it’s possible to complete refacing in 3-4 days. The key is having all materials ready and working systematically. Professional refacing takes 2-3 days but costs significantly more than DIY approaches.
What’s the cost difference between refacing and replacing a kitchen island?
I spent $1,800 refacing my island compared to $8,000+ for replacement quotes. Refacing typically costs 60-70% less than replacement while achieving similar aesthetic results. The biggest savings come from reusing existing cabinet boxes and doing the installation yourself. Even with professional refacing, costs are usually half of complete replacement while providing an excellent updated appearance.

Can any kitchen island be refaced, or are some better candidates?
Islands with solid wood or quality plywood boxes are excellent refacing candidates, like mine was. Avoid refacing particle board or damaged structures that won’t support new materials properly. The island layout and size should meet your current needs since refacing doesn’t change functionality. If you need different storage or configuration, replacement might be better than refacing.
What maintenance does a refaced kitchen island require?
My painted MDF doors need only regular cleaning with mild soap and water. I touch up minor chips or scratches annually with matching paint. Quality hardware maintains smooth operation with occasional tightening. The granite countertop requires periodic sealing, but overall maintenance is minimal. Proper installation and quality materials ensure refaced surfaces last as long as new construction.

How do I ensure my refaced island matches my existing kitchen design?
Careful material selection is crucial for integration. I matched my perimeter cabinet door style exactly and coordinated all hardware finishes throughout the kitchen. Consider the island as part of the whole design rather than a standalone piece. Update other elements simultaneously if needed to create a cohesive flow. Professional design consultation can help if you’re unsure about coordination.
What are the biggest challenges with DIY kitchen island refacing?
A: Precise measurement and door alignment proved most challenging for me. Working around daily kitchen use added complexity, but it was manageable with phased installation. Quality tool investment is essential for professional results. Take time for proper preparation, which determines final quality more than any other factor. Don’t rush the process; patience produces much better results than speed.

Kitchen Island Makeover Ideas – Love Remodeled
How To Spice Up Your Kitchen Island
![]()
Kitchen Cabinet Refacing Kitchen Magic
Cabinet Refacing: Can I Change a Couple of Cabinets?

Kitchen Cabinet Refacing Makeover – A Homeowneru0027s Experience
Our Dark to White Kitchen Remodel Before and After – Setting for Four
Kitchen Makeovers That Benefited From Refaced Cabinets

Kitchen Cabinet Refacing (Design Options) – Designing Idea
Related Posts: